Advertisement
Table of Contents
- 1 Installation Manual
- 2 Selecting the Installation Location
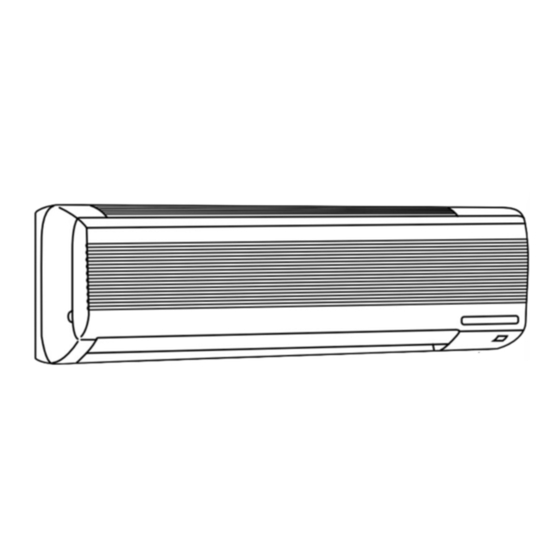
- 3 Indoor Unit
- 4 Outdoor Unit
- 5 Indoor Unit Installation
- 6 Outdoor Unit Installation
- 7 Indoor/Outdoor Unit Connection Finishing and Test Run
- 8 Flaring Work
- 9 Auto Restart Function
- 10 Pipe Connection
- 11 Purging Procedures·leak Test
- 12 Test Run
- 13 Drain Piping
- 14 For Movement and Maintenance
- Download this manual
VG79A008H02
1. THE FOLLOWING SHOULD ALWAYS BE
OBSERVED FOR SAFETY
•
Please report to your supply authority or obtain their consent before connecting
this equipment to the power supply system.
•
Be sure to read "THE FOLLOWING SHOULD ALWAYS BE OBSERVED FOR
SAFETY" before installing the air conditioner.
•
Be sure to observe the cautions specified here as they include important items
related to safety.
•
The indications and meanings are as follows.
Could lead to death, serious injury, etc.
Could lead to serious injury in particular environments when operated incorrectly.
•
After reading this manual, be sure to keep it together with the OPERATING
INSTRUCTIONS in a handy place on the customer's site.
■ Do not install the unit by yourself (customer).
Incomplete installation could cause injury due to fire, electric shock, the unit
falling or leakage of water. Consult the dealer from whom you purchased the
unit or special installer.
■ Install the unit securely in a place which can bear the weight of the unit.
When installed in an insufficient strong place, the unit could fall causing injury.
■ Use the indoor/outdoor unit connecting wire that meets the Standards to
connect the indoor and outdoor units and fix the wire to the terminal
block securely so that no external force is conveyed to the connecting
section of the terminal block.
Incomplete connection or fixing of the wire could result in a fire.
■ Do not use intermediate connection of the power cord or the extension
cord and do not connect many devices to one AC outlet.
It could cause a fire or an electric shock due to defective contact, defective
insulation, exceeding the permissible current, etc.
■ Check that the refrigerant gas do not leak after installation has com-
pleted.
■ Perform the installation securely referring to the installation manual.
Incomplete installation could cause a personal injury due to fire, electric
shock, the unit falling or leakage of water.
■ Perform electrical work according to the installation manual and be sure
to use an exclusive circuit.
If the capacity of the power circuit is insufficient or there is incomplete
electrical work, it could result in a fire or an electric shock.
■ Attach the electrical cover to the indoor unit and the service panel to the
outdoor unit securely.
If the electrical cover in the indoor unit and/or the service panel in the outdoor
unit are not attached securely, it could result in a fire or an electric shock due
to dust, water, etc.
■ Be sure to use the part provided or specified parts for the installation
work.
The use of defective parts could cause an injury due to a fire, an electric
shock, the unit falling, leakage of water, etc.
■ Be sure to cut off the main power in case of setting up the indoor
electronic control P.C. board or wiring works.
It could cause an electric shock.
SPLIT-TYPE AIR CONDITIONERS
Models
MS12/15/17TN
MSH12/15TN
[FLARE CONNECTION TYPE]
WARNING
CAUTION
WARNING
ADVANCED AND EVER ADVANCING
Series
■ Ground the unit.
Do not connect the ground to a gas pipe, water pipe, lightning rod or
telephone ground. Defective grounding could cause an electric shock.
■ Do not install the unit in a place where an inflammable gas leaks.
If gas leak and accumulate in the area surrounding the unit, it could cause an
explosion.
■ Install a ground leakage breaker depending on the installation place
(Where it is humid).
If a ground leakage breaker is not installed, it could cause an electric shock.
■ Perform the drainage/piping work securely according to the installation
manual.
If there is a defect in the drainage/piping work, water could drop from the unit
and household goods could be wet and damaged.
2. SELECTING THE INSTALLATION LOCATION
2-1 INDOOR UNIT
•
Where airflow is not blocked.
•
Where cool air spreads over the entire room.
•
Maximum refrigerant piping length between indoor unit and outdoor unit is 49 ft.
and the difference of height of both units is 25 ft. maximum.
•
Rigid wall without vibration.
•
Where it is not exposed to direct sunshine.
•
Where easily drained.
•
At a distance 3 ft. or more away from your TV and radio (to prevent picture from
being distorted or noise from being generated).
•
In a place as far away as possible from fluorescent and incandescent lights (so
the infrared remote control can operate the air conditioner normally).
•
Where the air filter can be removed and replaced easily.
2-2 OUTDOOR UNIT
•
Where it is not exposed to strong wind.
•
Where airflow is good and dustless.
•
Where it is not exposed to rain and direct sunshine.
•
Where neighbours are not annoyed by operation sound or hot air.
•
Where rigid wall or support is available to prevent the increase of operation sound
or vibration.
•
Where there is no risk of combustible gas leakage.
•
When installing the unit at a high level, be sure to fix the unit legs.
•
Where it is at least 10 ft. away from the antenna of TV set or radio. (Otherwise,
images would be disturbed or noise would be generated.)
•
Install the unit horizontally.
Avoid the following places for installation where air conditioner trouble is liable to
occur.
•
Where there is too much machine oil.
•
Salty environment as seaside areas.
•
Hot-spring areas.
•
Where sulfide gas exists.
•
Other special atmospheric areas.
2-3 WIRELESS REMOTE CONTROLLER MOUNTING
•
Place of mounting
• Where it is easy to operate and easily visible.
• Where children can not touch.
•
Mounting
Select a position about 4 ft. above the floor, check that signals from the remote
controller are surely received by the indoor unit from that position ('beep' or 'beep-
beep' receiving tone sounds). After that, attach remote controller mounting
hardware 3 to a pillar or wall and set the wireless remote controller 6.
In rooms where inverter type fluorescent lamps are used, the signal from the
wireless remote controller may not be received.
INSTALLATION MANUAL
CAUTION
CAUTION
Advertisement
Table of Contents

Related Manuals for Mitsubishi Electric MS12


Summary of Contents for Mitsubishi Electric MS12
-
Page 1: Installation Manual
ADVANCED AND EVER ADVANCING VG79A008H02 SPLIT-TYPE AIR CONDITIONERS Models MS12/15/17TN Series MSH12/15TN [FLARE CONNECTION TYPE] INSTALLATION MANUAL CAUTION 1. THE FOLLOWING SHOULD ALWAYS BE ■ Ground the unit. OBSERVED FOR SAFETY Do not connect the ground to a gas pipe, water pipe, lightning rod or telephone ground. - Page 2 PIPING PREPARATION 3. INSTALLATION DIAGRAM & ACCESSORIES 1 Table below shows the specifications of pipes commercially available. FLARED CONNECTIONS 2 Ensure that the 2 refrigerant pipes are insulated to prevent condensation. 3 Refrigerant pipe bending radius must be 4 in. or more. •...
-
Page 3: Indoor Unit Installation
4-3 POWER SUPPLY AND INDOOR/OUTDOOR CON- 4. INDOOR UNIT INSTALLATION NECTING WIRE CONNECTION • 4-1 FIXING OF INSTALLATION PLATE Power should be taken from an exclusive branched circuit. • Wiring work should be based on applicable technical standards. • Find a structural material (such as a stud) in the wall and fix installation plate •... -
Page 4: Outdoor Unit Installation
5-2 GROUNDING 5. OUTDOOR UNIT INSTALLATION • Remove the service panel. • Fix the conduit connector to conduit cover with lock nut then secure it against unit 5-1 POWER SUPPLY AND INDOOR AND OUTDOOR with screw. WIRE CONNECTION • Leave some slack in wires to allow easier servicing. •... -
Page 5: Auto Restart Function
• To prevent breaker off due to the rush of starting current, systematize other home appliances not to turn on at the same time. Grounding 4-5 PIPE FORMING terminal INDOOR UNIT MS12/15/17TN • Terminal block Place the drain hose below the refrigerant piping. N L1 •... -
Page 6: Pipe Connection
3 Putting nut on Connect the gauge manifold valve and the vacuum pump to the service port of the stop valve on the gas pipe side of the outdoor unit. • Remove flare nuts attached to indoor and outdoor Flare nut units, then put them on pipe having completed burr removal. -
Page 7: Drain Piping
INDOOR UNIT INSTALLATION FOR LEFT OR LEFT-REAR PIPING • Insert the drain hose into the wall hole sleeve C, and hook the upper part of • indoor unit on the installation plate 1. Then, move the unit to the very edge of the Pipe arrangement Put the refrigerant piping and the drain hose together, then apply felt tape 7 to left side for putting the piping easily in the back space of the indoor unit. -
Page 8: For Movement And Maintenance
FRONT PANEL REINSTALLATION MSH type 1 Before installing the panel, set the horizontal vane to the position as shown in the • Before performing the test run, recheck any wrong wiring. figure below. Wrong wiring prevents normal operation or results in blown fuse disabling 2 Attach the bottom of the panel under the horizontal vane.
Need help?
Do you have a question about the MS12 and is the answer not in the manual?
Questions and answers