Table of Contents
Advertisement
Quick Links
QQ
3 7 63 1515 0
SERVICE MANUAL
5
2004
MA046
KD-AR7000, KD-SHX700
TE
L 13942296513
1
PRECAUTIONS . . . . . . . . . . . . . . . . . . . . . . . . . . . . . . . . . . . . . . . . . . . . . . . . . . . . . . . . . . . . . . . . . . . . . . . 1-3
2
SPECIFIC SERVICE INSTRUCTIONS . . . . . . . . . . . . . . . . . . . . . . . . . . . . . . . . . . . . . . . . . . . . . . . . . . . . . . 1-5
3
DISASSEMBLY . . . . . . . . . . . . . . . . . . . . . . . . . . . . . . . . . . . . . . . . . . . . . . . . . . . . . . . . . . . . . . . . . . . . . . . 1-6
4
ADJUSTMENT . . . . . . . . . . . . . . . . . . . . . . . . . . . . . . . . . . . . . . . . . . . . . . . . . . . . . . . . . . . . . . . . . . . . . . . 1-21
www
5
TROUBLESHOOTING . . . . . . . . . . . . . . . . . . . . . . . . . . . . . . . . . . . . . . . . . . . . . . . . . . . . . . . . . . . . . . . . . 1-31
.
http://www.xiaoyu163.com
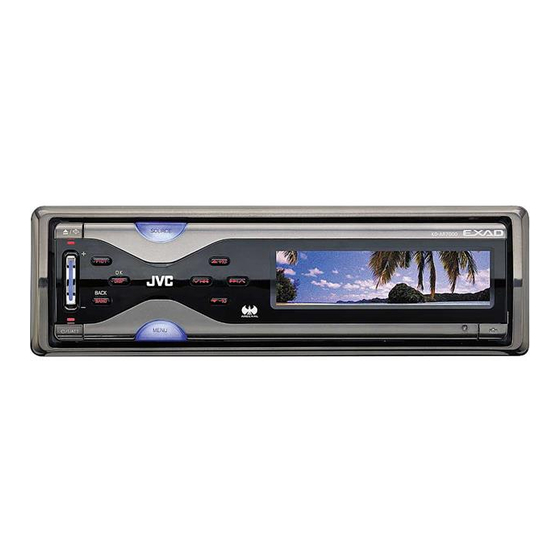
CD RECEIVER
KD-AR7000
PICT
OK
BAND
BACK
DISP
KD-SHX700
PICT
OK
BAND
BACK
DISP
ARSENAL rogo
LINE IN
TABLE OF CONTENTS
x
ao
i
COPYRIGHT © 2004 VICTOR COMPANY OF JAPAN, LIMITED
2 9
8
SOURCE
KD-AR7000
MENU
SOURCE
Q Q
KD-SHX700
3
6 7
1 3
1 5
MENU
KD-AR7000
KD-SHX700
.
9 4
2 8
Area suffix
J -------------- Northern America
0 5
8
2 9
9 4
2 8
No.MA046
9 9
9 9
2004/5
Advertisement
Table of Contents

Related Manuals for JVC KD-AR7000


Summary of Contents for JVC KD-AR7000
-
Page 1: Table Of Contents
3 7 63 1515 0 SERVICE MANUAL CD RECEIVER MA046 2004 KD-AR7000, KD-SHX700 Area suffix KD-AR7000 J -------------- Northern America SOURCE KD-AR7000 PICT BAND BACK DISP MENU KD-SHX700 SOURCE KD-SHX700 L 13942296513 PICT BAND BACK DISP MENU KD-AR7000 KD-SHX700... - Page 2 Frequency Response 40 Hz to 20 000 Hz Signal-to-Noise Ratio 70 dB Line-In Level/Impedance LINE IN 1.5 V/20 kΩ load (KD-AR7000 only) Line-Out Level/Impedance KD-AR7000 5.0 V/20 kΩ load (full scale) KD-SHX700 4.0 V/20 kΩ load (full scale) Output Impedance 1 kΩ...
-
Page 3: Precautions
http://www.xiaoyu163.com SECTION 1 3 7 63 1515 0 PRECAUTIONS Safety Precautions Burrs formed during molding may be left over on some parts of the chassis. Therefore, pay attention to such burrs in the case of preforming repair of this system. Please use enough caution not to see the beam directly or touch it in case of an adjustment or operation check. - Page 4 http://www.xiaoyu163.com Preventing static electricity 3 7 63 1515 0 Electrostatic discharge (ESD), which occurs when static electricity stored in the body, fabric, etc. is discharged, can destroy the laser diode in the traverse unit (optical pickup). Take care to prevent this when performing repairs. 1.2.1 Grounding to prevent damage by static electricity Static electricity in the work area can destroy the optical pickup (laser diode) in devices such as CD players.
-
Page 5: Specific Service Instructions
http://www.xiaoyu163.com SECTION 2 3 7 63 1515 0 SPECIFIC SERVICE INSTRUCTIONS This service manual does not describe SPECIFIC SERVICE INSTRUCTIONS. L 13942296513 u163 (No.MA046)1-5 http://www.xiaoyu163.com... -
Page 6: Disassembly
http://www.xiaoyu163.com SECTION 3 3 7 63 1515 0 DISASSEMBLY Main body section 3.1.1 Removing the front panel assembly (See Fig.1) (1) Push the detach button in the lower right part of the front Front panel assembly panel assembly. (2) Remove the front panel assembly. Detach button Fig.1 3.1.2 Removing the heat sink... -
Page 7: See Figs.5 And
http://www.xiaoyu163.com 3.1.3 Removing the top chassis assembly 3 7 63 1515 0 (See Figs.3 to 6) • Prior to performing the following procedures, remove the heat sink. Reference: Bottom chassis assembly Remove the front panel assembly as required. (1) From the bottom side of the main body, remove the two screws C attaching the top chassis assembly to the bottom chassis assembly. - Page 8 http://www.xiaoyu163.com 3.1.4 Removing the front chassis 3 7 63 1515 0 (See Figs.7 and 8) • Prior to performing the following procedure, remove the front Top chassis assembly panel assembly, heat sink and top chassis assembly. (1) From the both sides of the top chassis assembly, remove the two screws E attaching the front chassis.
- Page 9 http://www.xiaoyu163.com 3.1.6 Removing the main board 3 7 63 1515 0 (See Figs.10 and 11) • Prior to performing the following procedures, remove the front Rear bracket panel assembly, heat sink and top chassis assembly. (1) From the rear side of the bottom chassis assembly, remove the two screws G attaching the rear bracket to the bottom chassis assembly.
-
Page 10: No.ma046)1
http://www.xiaoyu163.com 3.1.8 Removing the front door mechanism assembly 3 7 63 1515 0 (See Fig.13) • Prior to performing the following procedures, remove the front Front door mechanism assembly panel assembly, heat sink, top chassis assembly and main Bottom chassis board. - Page 11 http://www.xiaoyu163.com CD mechanism assembly 3 7 63 1515 0 • Prior to performing the following procedure "Removing the CD mechanism assembly". 3.2.1 Removing the front-end board (See Fig.1) (1) From the top side of the CD mechanism assembly, solder Short-circuit point Feed motor the short-circuit point on the flexible wire extending from the CD pickup.
- Page 12 http://www.xiaoyu163.com 3.2.2 Removing the top cover 3 7 63 1515 0 (See Fig.2) (1) From the back side of the CD mechanism assembly, re- move the two screws B attaching the top cover. Top cover (2) Take out the top cover upward. Parts d Reference: When reassembling the top cover, set parts c of the top cover...
- Page 13 http://www.xiaoyu163.com 3.2.4 Removing the clamper unit 3 7 63 1515 0 (See Figs.5 and 6) • Prior to performing the following procedures, remove the top Clamper unit cover and mechanism section. (1) From the bottom of the mechanism section, remove the clamper spring2.
- Page 14 http://www.xiaoyu163.com 3.2.5 Reattaching the clamper unit 3 7 63 1515 0 (See Figs.5 to 9) (1) From the bottom of the mechanism section, attach the Clamper2 spring clamper spring2 to the clamper unit. (See Figs.5 and 7) (2) Move the clamper unit to set the side joints f and g to each boss of the chassis base.
- Page 15 http://www.xiaoyu163.com 3.2.6 Removing the front unit 3 7 63 1515 0 (See 10 to 12) • Prior to performing the following procedures, remove the top Front-end cover and mechanism section. board (1) From the bottom side of the mechanism section, discon- nect the flexible wire from connector CN503 on the front-...
- Page 16 http://www.xiaoyu163.com 3.2.7 Removing the loading arm S.A. 3 7 63 1515 0 (See Figs.13 and 14) • Prior to performing the following procedures, remove the top cover, mechanism section and front unit. (1) From top side of the front unit, move the loading arm S.A. from the front upwards.
- Page 17 http://www.xiaoyu163.com 3.2.8 Removing the rod (L)(R) and roller assembly 3 7 63 1515 0 (See Figs.15 and 16) • Prior to performing the following procedures, remove the top Collar Collar cover, mechanism section, front unit and loading arm S.A. (1) From the bottom side of the loading arm S.A., release the rod (L) and (R) from the joints r.
- Page 18 http://www.xiaoyu163.com 3.2.9 Removing the CD pickup assembly 3 7 63 1515 0 (See Figs.17 to 19) • Prior to performing the following procedure, remove the front- Feed gear end board. CD Pickup assembly (1) From the bottom of the CD mechanism assembly, turn the feed gear in the direction of the arrow to move the CD pick- up assembly outwards.
- Page 19 http://www.xiaoyu163.com 3.2.10 Removing the spindle motor 3 7 63 1515 0 (See Fig.20) • Prior to performing the following procedure, remove the front- T. table assembly end board. (1) From the bottom side of the CD mechanism assembly, re- Washer move the T.table assembly and washer from the spindle motor.
- Page 20 http://www.xiaoyu163.com 3.2.12 Removing the SW board and reset SW board 3 7 63 1515 0 (See Fig.23) • Prior to performing the following procedure, remove the front- end board. (1) From the top side of the CD mechanism assembly, remove the screw L attaching the SW board.
-
Page 21: Adjustment
(2) Electric voltmeter Load impedance 20KΩ(2 Speakers connection) (3) Digital tester Output Level (4) Tracking offset meter (5) Test Disc JVC :CTS-1000 KD-AR7000 Line out 5.0V (Vol. MAX) (6) Extension cable for check KD-SHX700 Line out 4.0V (Vol. MAX) EXTSH002-22P × 1... - Page 22 http://www.xiaoyu163.com Service mode 3 7 63 1515 0 4.2.1 Service mode setting (1) Push POWER BOTTON (Power ON) (2) Set to service mode By pushing and holding "DISP" button + "VOLUME +" button + "MENU" button sequentially. "SOURCE" button "OK" button "CURSOR"...
- Page 23 http://www.xiaoyu163.com 3 7 63 1515 0 CD DATA READ ADJ NOW ADJ INT OTHERS ADJ NOW ADJ NOW FEB ** FEO ** TEB ** RFG** The auto adjustment value of FGA ** TEO ** TGA ** survo at now ADJ INT ADJ INT FEB ** FEO ** TEB ** RFG** The auto adjustment value of...
- Page 24 http://www.xiaoyu163.com 3 7 63 1515 0 PICTURE CLEAR NOW... PICTURE CLEAR A.DSP ERROR CLEAR NOW... A.DSP ERROR CLEAR T.DSP ERROR CLEAR NOW... T.DSP ERROR CLEAR ROM COLLECTION DATA READ DATA CLEAR DATA READ (Without disk) If "DISP" and "SOURCE" buttons are pushed and PLEASE INSERT DATA CD held during the usual display, it will shift to ROM...
- Page 25 http://www.xiaoyu163.com 3 7 63 1515 0 SMTH1=****** SMTH1=****** SMTH1=****** DEFAULT * BACK / DISP Change the value with ENTER : OK / BAND "CURSOR" button. SMTH2=****** SMTH2=****** SMTH2=****** DEFAULT * BACK / DISP Change the value with ENTER : OK / BAND "CURSOR"...
- Page 26 http://www.xiaoyu163.com 3 7 63 1515 0 7.FM IF COUNTER 7.FM COUNTER 97.9MHz 70dBuV 0% 97.9MHz 70dBuV 0% Adjustment NG or No Signal 8.AM S.METER 8.AM S.METER 999kHz 26dBuV 0% 999kHz 26dBuV 0% High or Low or No Signal 9.AM S.METER 9.AM S.METER 999kHz 56dBuV 0% 999kHz 56dBuV 0%...
- Page 27 http://www.xiaoyu163.com 4.2.2 Detailed CD error code 3 7 63 1515 0 Error Details of error Error code Detailed error code Focus serch error When foucus is not adjusted by 3-round(1set) focus serch after 0053 Focus is not adjusted by disc change or focus shock, 3-round focus serch the result is NG Tracking balance adjustment error...
- Page 28 http://www.xiaoyu163.com 4.2.3 Detailed error code of mechanism error 3 7 63 1515 0 Error Details of error Error code Detailed error code Disc loading error 1.B1 Time out 0011 2.C1 Time out 0012 3.D1 Time out 0013 4.C2 Time out 0014 5.B2 Time out 0015...
- Page 29 http://www.xiaoyu163.com 4.2.5 Detailed CD changer mechanisum error code 3 7 63 1515 0 Error Details of error Error code Detailed error code Tray extension error 1.Tray-in switch time out Tray stops part way 0011 (Tray-in switch Low,Tray-out switch High) 2.Tray-out switch time out Tray stops part way 0012 (Tray-in switch High,Tray-out switch High)
- Page 30 http://www.xiaoyu163.com 4.2.6 Detailed CD changer error code 3 7 63 1515 0 Details of error Error code Error Detailed error code Pickup movement error Time over at PUBWD and PUFWD by monitoring RESET SW 1.Time over of pickup movement Pickup cannot move to an inner around inner circumference (10s) circumference.
-
Page 31: Troubleshooting
http://www.xiaoyu163.com SECTION 5 3 7 63 1515 0 TROUBLESHOOTING Feed section Is the wiring for IC601 Is 8V present at IC681 Is 2V at IC601 pin 63? Check CD8V. pin 63 correct? pins 3 and 12? Check the vicinity of IC601. - Page 32 http://www.xiaoyu163.com Signal processing section 3 7 63 1515 0 Compare the L-ch and Is the sound output from No sound from either R-ch to locate the both channels (L, R)? channel. defective point. Normal Is 9V present at IC165 Is 9V present at IC901 Check IC901 and its /IC265 pin 16? pin 10?
- Page 33 http://www.xiaoyu163.com Maintenance of laser pickup 3 7 63 1515 0 Replacement of laser pickup (1) Cleaning the pick up lens Before you replace the pick up, please try to clean the lens Turn of the power switch and, disconnect the with a alcohol soaked cotton swab.
- Page 34 http://www.xiaoyu163.com 16P CORD DIAGRAM 3 7 63 1515 0 Black Green GN/BK WH/BK VI/BK GY/BK Violet Gray Blue WH White Yellow BL/WH OR/WH Orange MEMORY Choking Coil OR/WH ILLUMINATION CONTROL WH/BK GY/BK L 13942296513 GN/BK VI/BK BL/WH REMOTE Rear Right Auto Antenna Front...
- Page 35 http://www.xiaoyu163.com 3 7 63 1515 0 L 13942296513 u163 (No.MA046)1-35 http://www.xiaoyu163.com...
- Page 36 http://www.xiaoyu163.com 3 7 63 1515 0 L 13942296513 u163 VICTOR COMPANY OF JAPAN, LIMITED AV & MULTIMEDIA COMPANY CAR ELECTRONICS CATEGORY 10-1,1chome,Ohwatari-machi,Maebashi-city,371-8543,Japan (No.MA046) Printed in Japan http://www.xiaoyu163.com...
-
Page 37: Y U163 Co M
3 7 63 1515 0 SCHEMATIC DIAGRAMS CD RECEIVER KD-AR7000,KD-SHX700 CD-ROM No.SML200405 Area suffix J -------------- Northern America KD-AR7000 SOURCE KD-AR7000 L 13942296513 PICT BAND BACK DISP MENU KD-SHX700 SOURCE KD-SHX700 PICT BAND BACK DISP MENU KD-AR7000 KD-SHX700 ARSENAL rogo... -
Page 38: Safety Precaution
http://www.xiaoyu163.com 3 7 63 1515 0 Safety precaution Burrs formed during molding may be left over on some parts of the chassis. Therefore, pay attention to such burrs in the case of preforming repair of this system. Please use enough caution not to see the beam directly or touch it in case of an adjustment or operation check. - Page 39 http://www.xiaoyu163.com 3 7 63 1515 0 < M E M O > L 13942296513 u163 http://www.xiaoyu163.com...
-
Page 40: Block Diagram
http://www.xiaoyu163.com 3 7 63 1515 0 Block diagram CD servo control section FOCUS+ FOCUS- TRACKING+ TRACKING- BUS0 to BUS3 VF1, VF2 BUCK IC573 VT1, VT2 VF1,VF2, VT1,VT2 MD, LD MDI,LDO, VREF X571 PICK UP IC601 DSPRST CLOCK GEN. CD RF &... - Page 41 CDREQ E2PROM DI E2PROM DO IC703 E2PROM CLK IC381 IC701 EPROM SUBWFER WOOFER L 13942296513 CONTROL WOOFER MICOM IC702 RESET RESET KD-AR7000 only VOLDA /BUS_I/O LINE.IN-L VOLCK BUSSI LINE.IN-R LINE IN VOLMUTE BUSSO BUS_I/O REMOCON BUSSCK DISPCK BUSINT DISPDA IC710...
- Page 42 http://www.xiaoyu163.com Standard schematic diagrams 3 7 63 1515 0 DSP section blend iboc_i 0.022 10/6.3 iboc_q iboc_ws iboc_bck RDS-D2 RDS-C2 SCL-DI 10/6.3 SDA-DI IC10 220P QAX0781-001Z 220P QAM0556-002 SAF7730HV/N114F 10/6.3 0.01 1SS355-X 1SS355-X NQR0129-003X KAGC1 QAU0325-001 47/16 4.7/6.3 390P 100/ 4.7/6.3 0.001 47/16...
- Page 43 http://www.xiaoyu163.com 3 7 63 1515 0 Parts are safety assurance parts. When replacing those parts make sure to use the specified one. 0.022 10/6.3 IDM_DATA IDM_WS IDM_BCK LINE.IN-L LINE.IN-GND LINE.IN-R RDS-D2 SUBWFER RDS-C2 RDS_DATA RDS_CLK DIRNCLK DIRNLRCLK R4057 220P DIRNBCK CDDATA DIRNSDINA CDLRCK...
- Page 44 http://www.xiaoyu163.com Main amplifier section 3 7 63 1515 0 LINE.IN-L LINE.IN-GND LINE.IN-R SUBWFER IC165 BD3805F-X R1604 3.9K R1601 AK_IRST 4.7k F-LCH- C1603 AK_SRST C1651 R1651 390p R1605 C1720 AK_REQ 1.2k 10/16 R1652 4.7/25 AK_SCLK F-LCH+ C1652 AK_SI R1653 1/50 R1602 R1606 AK_SO FRONT_LCH...
- Page 45 http://www.xiaoyu163.com 3 7 63 1515 0 R3810 IC381 C3804 R3805 NJM4565V-X 4.7/25 C3803 R3801 R3802 4.7/25 R3811 R1801 C1720 4.7/25 R2801 R1724 Q3801 C1726 2SD1781K/QR/-X C1700 C1724 4.7/25 C1722 C1723 0.0015 C1721 100/10 22/16 C1725 R1722 4.7/25 R1725 REARL_OUT C2700 R3807 D3801 1SS355-X...
- Page 46 http://www.xiaoyu163.com 3 7 63 1515 0 Sound mix section IC401 AK7740VT BK-LCH BK-RCH C4034 0.001 C4012 0.001 R4018 C4035 10/6.3 AK_IRST R4017 AK_SRS C4036 0.001 R4016 AK_REQ R4015 AK_SCL C4038 R4014 AK_SI 0.001 DSP3.3V AK_IRST AK_SRST AK_REQ L 13942296513 AK_SCLK AK_SI AK_SO DAC_PDN...
- Page 47 http://www.xiaoyu163.com 3 7 63 1515 0 C4134 100/10 IC411 JCV8009-W L4130 R4130 C4130 R4100 IC412 R4101 AK4385VT-X R4102 R4115 R4131 C4131 47/6.3 C4100 R4114 10/6.3 R4113 0.001 C4132 100P AK_IRST CCC_RST R4103 R4112 DAC_PDN R4132 F-LCH+ C4101 AK_SRST R4104 R4111 DAC_CSN R4133 F-LCH-...
- Page 48 http://www.xiaoyu163.com 3 7 63 1515 0 LCD & Key control section CN802 QGF0522F1-07W K471 C871 C873 10/6.3 1/25 C872 C874 PICTCLK R854 0.001 0.001 TP801 PICTDI R855 R870 R481 R871 R872 R873 R874 IC801 R875 SYSCLK R876 MN103S57GDD C807 0.047 R877 R860 L 13942296513...
- Page 49 http://www.xiaoyu163.com 3 7 63 1515 0 R442 R443 R444 R445 R446 R447 1.5k R454 KEY0 Q441 2SB709A/QR/-X IC461 D441 MA152Wk-X RPM7338-V4 R449 R450 R451 R452 R453 KEY1 R455 R464 Q442 2SB709A/QR/-X R434 R435 R436 PICTCLK PICTDI R840 DISPCK 0.001 DISPCE DISPDA R839 C804...
- Page 50 http://www.xiaoyu163.com CD servo control section 3 7 63 1515 0 C603 100/6.3 Q601 C604 R616 2SB1132/QR/-W 0.01 R662 C637 0.047 C636 0.047 Q653 R643 3.3k C632 470p C631 470p C649 5600p L622 0.033 C612 C678 470p 0.01 470p C677 0.01 R604 C613 L623...
- Page 51 http://www.xiaoyu163.com 3 7 63 1515 0 R574 Q573 2SB624/4/-X L573 R668 R577 R581 CDON Q574 UN2211-X FGND2 PFGND2 R693 C579 C527 2.2M CD.L-CH R582 L571 CD.R-CH L572 X571 Q571 NAX0375-001X 2SA1037AK/R/-X ON5V Q572 UN2211-X 470p 470p C672 C606 47/6.3 C671 10/10 C608 R610...
- Page 52 http://www.xiaoyu163.com Printed circuit boards 3 7 63 1515 0 Main board Forward side CN345 CN702 CN381 R1502 R2501 R2502 R1501 CN351 C3804 R3805 C3803 C2401 Q3801 R2404 R9001 CN901 R3807 C3811 R1455 C1401 R1456 C3808 R1404 D1451 C1502 IC381 C2705 R1772 R3808 C2502...
- Page 53 http://www.xiaoyu163.com 3 7 63 1515 0 Reverse side C2451 C1451 C2452 C1452 CN345 C2802 C1802 D705 C3807 C1323 C3403 C1321 C1322 CN351 C1324 C721 C3501 CN702 C2403 C1403 C2401 CN901 C3804 D968 R911 D967 C3810 C911 C1401 D966 C3803 D965 R912 R3405 C1304...
- Page 54 http://www.xiaoyu163.com 3 7 63 1515 0 Mecha control board Forward side (Switch board) (Reset SW board) (Mecha control board) Q653 C673 R663 R664 C649 L 13942296513 R658 C630 C638 R630 R643 R631 C617 C610 R635 R636 IC652 C672 R654 C661 C662 R653 C655...
- Page 55 http://www.xiaoyu163.com 3 7 63 1515 0 Reverse side (Switch board) (Reset SW board) R692 R691 R686 R685 (Mecha control board) R687 R680 C694 D682 C689 C682 C684 R609 C607 C604 C629 C678 R625 C620 C619 C677 Q601 R626 L 13942296513 C618 R617 R564...
- Page 56 http://www.xiaoyu163.com 3 7 63 1515 0 Front board Forward side R867 S454 R453 R454 R866 R447 R455 S811 R865 R864 D425 D408 R863 R819 R802 R823 R830 D419 D420 R818 C472 S442 R442 S449 R816 R443 D871 R491 D418 D872 C872 C874 R862...
- Page 57 http://www.xiaoyu163.com 3 7 63 1515 0 < M E M O > L 13942296513 u163 http://www.xiaoyu163.com...
- Page 58 http://www.xiaoyu163.com 3 7 63 1515 0 L 13942296513 u163 VICTOR COMPANY OF JAPAN, LIMITED AV & MULTIMEDIA COMPANY CAR ELECTRONICS CATEGORY 10-1,1chome,Ohwatari-machi,Maebashi-city,371-8543,Japan Printed in Japan (No.MA046SCH) http://www.xiaoyu163.com...
-
Page 59: Parts List
3 7 63 1515 0 PARTS LIST [ KD-AR7000 ] [ KD-SHX700 ] * All printed circuit boards and its assemblies are not available as service parts. Area suffix J -------------- Northern America L 13942296513 - Contents - 3- 2 Exploded view of general assembly and parts list (Block No.M1) - Page 60 http://www.xiaoyu163.com 3 7 63 1515 0 Exploded view of general assembly and parts list Block No. L 13942296513 Front board u163 45 82 http://www.xiaoyu163.com...
- Page 61 3 7 63 1515 0 KD-AR7000 KD-SHX700 Main board L 13942296513 u163 http://www.xiaoyu163.com...
- Page 62 http://www.xiaoyu163.com 3 7 63 1515 0 General Assembly Block No. [M][1][M][M] Symbol No. Part No. Part Name Description Local GE20156-002A GEAR BKT UNIT FSYH4036-100 SHEET GE30968-001A LEVER BKT UNIT GE30964-002A LOWER LEVER ASS GE30975-003A FRONT BKT ASSY QNZ0664-002 CAR CONNECTOR QAL0587-001 FSYH4036-100 SHEET...
- Page 63 http://www.xiaoyu163.com 3 7 63 1515 0 Symbol No. Part No. Part Name Description Local LV43349-001A POWE IC BKT LV43373-001A REG IC BKT QAM0561-001 CAR CABLE AR7000 QAM0573-001 CAR CABLE SHX700 QAM0560-001 CAR CABLE LV34596-004A REAR BRACKET LV43864-001A WIRE BRACKET QYSDST2604Z SCREW 2.6mm x 4mm...
- Page 64 http://www.xiaoyu163.com 3 7 63 1515 0 CD mechanism assembly and parts list Block No. Grease FLM-JC1-1D = JVS-1003 = MOBIL-1 = JVG-31N = JC-803B 61 38 L 13942296513 11.10mm 0.10mm 82 82 1.2 0.1mm u163 http://www.xiaoyu163.com...
- Page 65 http://www.xiaoyu163.com 3 7 63 1515 0 CD mechanism Block No. [M][B][M][M] Symbol No. Part No. Part Name Description Local VKZ4539-026 MINI SCREW (x5) LV10857-001A CHASSIS FRAME 2 LV30225-0J6A SPACER (x2) LV35272-001A DAMPER(F) (x2) LV35273-001A DAMPER(R) QYSPSTU2045M TAP SCREW M2 x 4.5mm(x3) LV43039-001A DAMPER SP.(R) LV43849-001A...
- Page 66 http://www.xiaoyu163.com 3 7 63 1515 0 Symbol No. Part No. Part Name Description Local LV43011-001A THRUST SPRING QYSPSFT2040Z TAP SCREW M2 x 4mm LV21604-003A L.S.HOLDER 1 VKZ4539-026 MINI SCREW (x2) LV34582-002A L.S.HOLDER 2 VKZ4539-026 MINI SCREW (x2) LV34581-001A SUB GUIDE VKZ4539-026 MINI SCREW (x3)
-
Page 67: Electrical Parts List
http://www.xiaoyu163.com 3 7 63 1515 0 Electrical parts list Main board Symbol No. Part No. Part Name Description Local Block No. [0][1][0][0] D716 UDZS5.6B-X Z DIODE 1.5kΩ 1/10W J Symbol No. Part No. Part Name Description Local D717 UDZS5.6B-X Z DIODE 1.5kΩ... - Page 68 http://www.xiaoyu163.com 3 7 63 1515 0 Symbol No. Symbol No. Part No. Part Name Description Local Part No. Part Name Description Local NCB31HK-103X C CAPACITOR 0.01uF 50V K C991 QERF1AM-107Z E CAPACITOR 100uF 10V M NCB31HK-103X C CAPACITOR 0.01uF 50V K C992 NCB31CK-473X...
- Page 69 http://www.xiaoyu163.com 3 7 63 1515 0 Symbol No. Symbol No. Part No. Part Name Description Local Part No. Part Name Description Local C2705 QERF1EM-475Z E CAPACITOR 22uF 16V M NRSA63J-103X MG RESISTOR 10kΩ 1/16W J C2720 QTE1E52-475Z E CAPACITOR 4.7uF 25V NRSA63J-102X MG RESISTOR...
- Page 70 http://www.xiaoyu163.com 3 7 63 1515 0 Symbol No. Symbol No. Part No. Part Name Description Local Part No. Part Name Description Local R752 NRSA63J-102X MG RESISTOR 1kΩ 1/16W J R972 NRSA02J-102X MG RESISTOR 1kΩ 1/10W J R753 NRSA63J-0R0X MG RESISTOR 0Ω...
- Page 71 http://www.xiaoyu163.com 3 7 63 1515 0 Symbol No. Symbol No. Part No. Part Name Description Local Part No. Part Name Description Local R2602 NRSA63J-472X MG RESISTOR 4.7kΩ 1/16W J R4106 NRSA63J-102X MG RESISTOR 1kΩ 1/16W J R2603 NRSA63J-392X MG RESISTOR 3.9kΩ...
-
Page 72: Front Board
http://www.xiaoyu163.com 3 7 63 1515 0 Symbol No. Symbol No. Part No. Part Name Description Local Part No. Part Name Description Local AR70 C472 NCB31CK-473X C CAPACITOR 0.047uF 16V K CN381 QGA2501C1-06 CONNECTOR W-B (1-6) C473 NBE20JM-106X TA E CAPACITOR 10uF 6.3V M SHX7 C481... - Page 73 http://www.xiaoyu163.com 3 7 63 1515 0 Symbol No. Symbol No. Part No. Part Name Description Local Part No. Part Name Description Local R811 NRSA63J-102X MG RESISTOR 1kΩ 1/16W J S448 NSW0124-001X TACT SW R812 NRSA63J-102X MG RESISTOR 1kΩ 1/16W J S449 NSW0124-001X TACT SW...
- Page 74 http://www.xiaoyu163.com 3 7 63 1515 0 Symbol No. Symbol No. Part No. Part Name Description Local Part No. Part Name Description Local C622 NEA70JM-476X E CAPACITOR 47uF 6.3V M R515 NRSA63J-473X MG RESISTOR 47kΩ 1/16W J C623 NCS31HJ-470X C CAPACITOR 47pF 50V J R516...
- Page 75 http://www.xiaoyu163.com 3 7 63 1515 0 Symbol No. Part No. Part Name Description Local R624 NRSA63J-562X MG RESISTOR 5.6kΩ 1/16W J R625 NRSA63J-473X MG RESISTOR 47kΩ 1/16W J R626 NRSA63J-474X MG RESISTOR 470kΩ 1/16W J R627 NRSA63J-183X MG RESISTOR 18kΩ...
- Page 76 http://www.xiaoyu163.com 3 7 63 1515 0 Packing materials and accessories parts list Block No. A1 A2 A3 A8 A9 A10 A11 A13 A4 A5 A6 A7 A12 L 13942296513 KIT : A14 A15 A17 A18 u163 3-18 http://www.xiaoyu163.com...
- Page 77 http://www.xiaoyu163.com 3 7 63 1515 0 Packing and Accessories Block No. [M][3][M][M] Symbol No. Part No. Part Name Description Local LVT1158-001A INST BOOK ENG FRE SPA LVT1158-002A INSTALL MANUAL GET0213-001A CAUTION SHEET LVT0717-001B TROUBLE SHEET(C BT-51029-2 WARRANTY CARD AR7000 BT-51018-4 WARRANTY CARD SHX700...
Need help?
Do you have a question about the KD-AR7000 and is the answer not in the manual?
Questions and answers