Table of Contents
Advertisement
Thank you for purchasing a Panasonic Projector.
Before operating this product, please read the instructions carefully, and save this manual
J
for future use.
Before using your projector, be sure to read "Precautions with regard to safety"
(pages 6 - 10).
Operating Instructions
LCD Projector
PT-LB90NTU
Model No.
PT-LB90U
PT-LB78VU
PT-LB75VU
Commercial Use
TQBJ0302
E
NGLISH
Advertisement
Table of Contents

Related Manuals for Panasonic PT-LB75VU


Summary of Contents for Panasonic PT-LB75VU
-
Page 1: Operating Instructions
Thank you for purchasing a Panasonic Projector. Before operating this product, please read the instructions carefully, and save this manual for future use. Before using your projector, be sure to read “Precautions with regard to safety” (pages 6 - 10). Operating Instructions... -
Page 2: Important Safety Notice
We hope it will help you to get the most out of your new product, and that you will be pleased with your Panasonic LCD projector. The serial number of your product may be found on its bottom. You should note it in the space provided below and retain this booklet in case service is required. - Page 3 FCC CAUTION: To assure continued compliance, follow the attached installation instructions and use only shielded interface cables when connecting to computer and/or peripheral devices. Any changes or modifications not expressly approved by Panasonic Corp. of North America could void the user’s authority to operate this device.
-
Page 4: Table Of Contents
Screen size and throw distance ...15 Projection method ...16 Front leg adjusters and throwing angle ...16 Connections ... 17 Before connecting to the projector ...17 Connecting example: AV equipment ...17 Connecting example: Computers...18 Basic Operation Switching the projector on/off ... 19 Power cord ...19... - Page 5 AUTO SETUP ...37 SIGNAL SEARCH ...37 BACK COLOR ...37 WIDE MODE ...38 SXGA MODE ...38 OTHER FUNCTIONS ...38 PROJECTOR SETUP menu ... 39 STATUS ...39 NO SIGNAL SHUT-OFF ...39 INITIAL START UP ...39 INSTALLATION ...39 HIGH ALTITUDE MODE ...39 STANDBY MODE ...40 LAMP POWER ...40...
-
Page 6: Precautions With Regard To Safety
ON USE/INSTALLATION „ Do not place liquid containers on top of the projector. If water spills onto the projector or gets inside it, fire or electric shocks will result. If any water gets inside the projector, contact an Authorized Service Center. -
Page 7: Caution
Do not insert any foreign objects into the projector. Doing so will cause fire or electric shocks. Do not insert any metal objects or flammable ob- jects into the projector or drop them onto the pro- jector. Never attempt to remodel or disassemble the projector. -
Page 8: Cautions When Transporting
Precautions with regard to safety ON USE/INSTALLATION „ Do not put your weight on this projector. You could fall or the projector could break, and injury will result. Be especially careful not to let young children stand or sit on the projector. -
Page 9: Cautions On Use
It may be necessary to replace the optical compo- nents such as Liquid crystal panels and Polarizing plates in less than 1 year if using the projector in a high temperature environment or in a very dusty, oily smoke or tobacco smoke environment. For more details, please contact your dealer. -
Page 10: Accessories
Precautions with regard to safety Accessories Make sure the following accessories are provided with your projector. Remote control for PT-LB90NTU (×1) (N2QAYB000436) Note The protectors for enclosed products, such as a plug cover or foam cartons, must be treated properly. -
Page 11: Read This First
Read this first When you start the projection for the first time or after the projector is initialised ( menu and the INITIAL SETTING menu will be displayed. Set those menus according to the usage conditions and environment. The setting can be changed by navigating through the ON SCREEN MENU. -
Page 12: About Your Projector
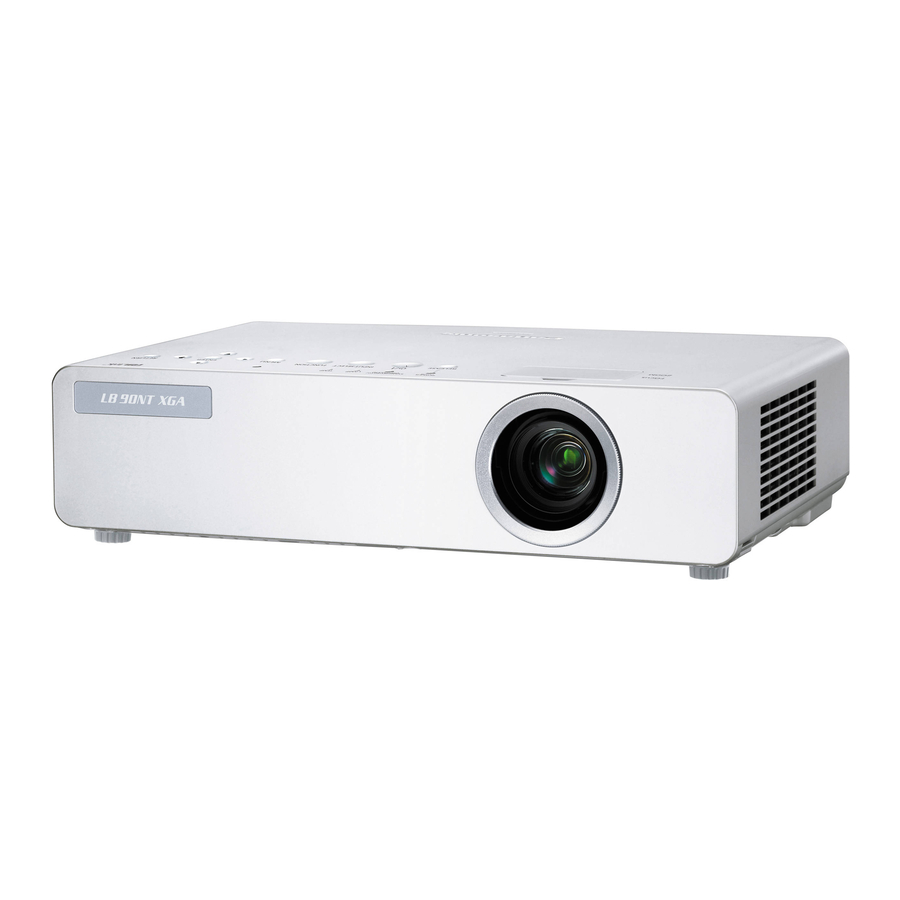
About Your Projector About Your Projector Projector body Top and front view Control panel Adjuster button page 16) Æ Remote control signal receptor Ambient Luminance Sensor (ALS) TEMP indicator Indicates the temperature status. page 46) Æ LAMP indicator Indicates the lamp unit status. - Page 13 Heated air comes out of the air outlet port. Do not place your hands or face, or objects which cannot withstand heat close to this port. Security lock Attach the commercial shackle lock, manufactured by Kensington, to protect your projector. Compatible with the Kensington MicroSaver Security System. Burglar hook port Air intake port...
-
Page 14: Remote Control
Do not let strong light shine onto the signal receptor. The remote control may malfunction under strong light such as fluorescent. You can operate the projector with the remote control within the remote range of 15 m (49'2"), approximately ±30 ° vertically and horizontally. -
Page 15: Setting Up
For the best quality of the projection image, install a screen where sunlight or room light does not shine directly onto the screen. Close window shades or curtains to block the light and turn off the lamps. Do not use the projector at a raised or a horizontally tilted position. Doing so may cause malfunction of the projector. -
Page 16: Projection Method
Setting up Projection method You can use the projector with any of the following 4 projection methods. To set the desired method in the projector, see “INSTALLATION” on page 39. Setting on a desk/floor and projecting from front Menu INSTALLATION... -
Page 17: Connections
Read and follow the operating instructions of each peripheral device. The peripheral devices must be turned off. One RGB cable is provided with the projector. If necessary, prepare commercial connecting cables that match with the projector and each peripheral device terminal. -
Page 18: Connecting Example: Computers
(PT-LB90NTU only) When you connect more than one computer, switch the computer connection manually. One RGB cable is provided with the projector. If necessary, prepare commercial connecting cables that match with the projector and each peripheral device terminals. 18 -... -
Page 19: Switching The Projector On/Off
Switching the projector on/off Power cord Be sure to fix the power cord to the projector with the provided “Power cord secure lock” to prevent the power cord from coming off. Connect the provided power cord securely. For details, see “Precautions with regard to safety”. (... -
Page 20: Power And Power Lock Indicators
The POWER indicator informs you of the status of the power and the POWER LOCK indicator shows the status of the RELEASE button. When the TEMP indicators are flashing, the POWER and POWER LOCK indicators will light red and you cannot switch the projector on. POWER LOCK indicator status... -
Page 21: Switching On The Projector
( If the projector is switched on again while the internal cooling fan is still operating by the internal power supply, the display may flicker for the characteristics of the lamp. Those are normal and will not affect the performance of the projector. -
Page 22: Switching Off The Projector
Switching the projector on/off Switching off the projector When operating the projector, check the status of the POWER indicator. ( POWER indicator POWER LOCK indicator Press the POWER button. The confirmation screen will be displayed. Without any operation for 10 seconds or press any button other than the screen will go off and return to the projection. -
Page 23: Adjust The Image Æ
Æ Positioning the image When setting up the projector for the first time or setting up at a new place, you must perform the following operations. 1 ) Adjust the vertical angle of the projector. Place the projector at the right angle from the screen. -
Page 24: Remote Control Operation
Press the FREEZE button again to escape. Stopping the projection temporarily You can stop the projection and audio sound through the projector temporarily. Press button. Press the AV MUTE button again to escape. Switching the input signal You can switch the input signal corresponding to the computer to be projected. -
Page 25: Setting Up The Image Position Automatically
Setting up the image position automatically When a RGB signal is input, the projector adjusts the SHIFT, DOT CLOCK and CLOCK PHASE automatically. Press button. Screen Projected image Remarks SIGNAL SEARCH operation is also performed. (When SIGNAL SEARCH is set to ON) page 37) Æ... -
Page 26: Enlarging The Image
Select DISABLE in this menu (FUNCTION BUTTON in the PROJECTOR SETUP menu). Press “+” Press the ENTER button. Select OK. Press the ENTER button. Remarks For details, see “FUNCTION BUTTON” in the “PROJECTOR SETUP menu”. ( button. page 27) page 41) Æ... -
Page 27: Settings
You cannot reset all the settings at a time to the factory default settings. To reset all the settings to the factory defaults, see “INITIALIZE ALL” in the “PROJECTOR SETUP menu”. ( Æ Some menu items are not available to reset by pressing the DEFAULT button. -
Page 28: On-Screen Menu
The ON-SCREEN MENU is displayed. The ON-SCREEN MENU consists of the main menu and sub-menu. Main menu PICTURE MODE PICTURE POSITION CONTRAST LANGUAGE BRIGHTNESS DISPLAY OPTION COLOR PROJECTOR SETUP TINT SECURITY SHARPNESS COLOR TEMPERATURE NETWORK DAYLIGHT VIEW STILL MODE RETURN NOISE REDUCTION SELECT TV-SYSTEM... -
Page 29: Display Option
WIDE MODE * AUTO SXGA MODE * SXGA OTHER FUNCTIONS The setting is active or deactive, depending on the input signal and the specific setting. PROJECTOR SETUP [ Sub-menu item Default STATUS NO SIGNAL SHUT-OFF DISABLE INITIAL START UP LAST MEMORY... -
Page 30: Picture Menu
PICTURE menu PICTURE menu Navigating through the MENU ( select PICTURE from the main menu and then select the required item from the sub-menu. Set the selected item with ◄►buttons. Remote control PICTURE MODE Depending on the projection environment, you can optimize the image projection. -
Page 31: Daylight View
AUTO Automatic adjustment Active Deactive Remarks Do not cover the Ambient Luminance Sensor ( of the projector. The AUTO mode may not operate normally. AUTO is not available when INSTALLATION in PROJECTOR SETUP menu is set to REAR/DESK or REAR/CEILING. -
Page 32: Position Menu
Set the selected item with ▲▼◄► buttons. Remote control REALTIME KEYSTONE If the projector is aligned non-perpendicularly to the screen, or if the projection screen has an angled surface, the keystone will be corrected automatically. Change setting... -
Page 33: Over Scan
OVER SCAN Use this function when characters or pictures are cropped near the periphery of the projected image. (Available with signals of S-VIDEO/VIDEO/RGB (Moving image)/YP only) Zoom out Setting range: 0 to +3 Remarks OVER SCAN is not available when network signals are input. -
Page 34: Frame Lock
POSITION menu S4:3 When a standard signal * will be sized down 75% and projected. S4:3 mode is effective when projecting 4:3 image onto a 16:9 screen. Input signal: XGA Image: Panel: THROUGH The image will be projected without any size adjustment. -
Page 35: Language Menu
LANGUAGE from the main menu and then display the sub-menu. Select the required language with▲▼buttons and press the ENTER button to set. Remote control Control panel PICTURE POSITION LANGUAGE DISPLAY OPTION PROJECTOR SETUP SECURITY NETWORK PICTURE POSITION LANGUAGE DISPLAY OPTION PROJECTOR SETUP SECURITY NETWORK The set language is highlighted. -
Page 36: Display Option Menu
Change setting Note When the the projector with utmost care due to the most of warning messages will not be displayed. CLOSED CAPTION SETTING If the input signal contains closed captions, you can turn on the feature and switch the channels. -
Page 37: Startup Logo
STARTUP LOGO You can set to display the Panasonic logo, your own image or Pre-set letters, when starting up the projector. Change setting Display “Panasonic” logo TEXT Display the original text Display the image registered by USER user No display... -
Page 38: Wide Mode
While the image is frozen, the audio sound through the projector will stop. Press the RETURN button to escape. AV MUTE If you will not be using the projector for some Change setting time, you can stop the projection and audio sound temporarily. -
Page 39: Projector Setup Menu
CEILING REAR/DESK REAR/CEILING Change setting HIGH ALTITUDE MODE If you use the projector at high elevation, the HIGH ALTITUDE MODE setting need to be ON to set the fan speed high. Change setting Remarks At 1 400 -2 700 m (4 593 - 8 858 ft) sea level, the setting must be ON. -
Page 40: Standby Mode
The lamp life varies with its condition of use (number of power-on times, etc. ). 40 - NGLISH EMULATE When the projector is controlled with a computer through serial input terminal, you can change the setting to use the former projector control commands. Change setting Press the ENTER button. -
Page 41: Function Button
3 seconds. When not using the FUNCTION button Select DISABLE in this menu (FUNCTION BUTTON in the PROJECTOR SETUP menu). Press the ENTER button. Select OK. Press the ENTER button. Remarks After the setting is completed, the text color and button color will change. -
Page 42: Test Pattern
INITIAL SETTING menu screen will display when the power is connected. page 11) Æ Remarks The usage time of the projector, lamp runtime and the NETWORK settings are not initialised. When PASSWORD in SECURITY menu is activated, be sure to enter the correct password when initialised. -
Page 43: Security Menu
SECURITY menu Navigating through the MENU ( Æ select SECURITY from the main menu and then select the required item from the sub-menu. When you apply to the SECURITY menu for the first time, you will be asked to perform the password operation. -
Page 44: Menu Lock
Remarks When using the projector for the first time or after INITIALIZE ALL operation is activated, the initial password is set as AAAA. Change your password regularly. Do not use a simple password that is too easy to guess. -
Page 45: Network Menu (Pt-Lb90Ntu Only)
ON. LIVE MODE CUT IN Set this function to ON to allow other users to connect to live mode while the projector is operating in the live mode of the network. COMPUTER SEARCH You can search for a computer on the network. -
Page 46: Lamp And Temp Indicators
If a problem should occur with the projector, the LAMP and/or TEMP indicators will inform you. Manage the indicated problems as follows. Note When managing a problem, be sure to turn off the power as described in “Switching off the projector”. Remarks Confirm the power supply status by the... -
Page 47: Care And Replacement
Cabinet Wipe off dirt and dust gently with a soft cloth. If it is difficult to remove the dirt, soak a cloth with water, wring the cloth well and then wipe the projector. Dry off the projector with dry cloth. -
Page 48: Replacing The Lamp Unit
You can find the duration of usage time by checking LAMP RUNTIME in the PROJECTOR SETUP menu. Do not use a lamp unit over 3 000 hours. Failure to observe this may result in explosion of the lamp. -
Page 49: Lamp Replacement Procedure
Lamp replacement procedure When the projector is mounted in the ceiling, do not work directly under the projector or put your face close to the projector. Be sure to install the lamp unit and attach the lamp unit cover securely. If they are not installed securely, it may cause the protection circuit to operate so that the power cannot be turned on. - Page 50 Press the POWER button and the projection starts. Remarks INITIAL START UP in the PROJECTOR SETUP menu is set to ON, the projector starts projecting when the power cord is connected to a wall outlet. ( Press the MENU button to display the main menu and press▲▼buttons to scroll to the PROJECTOR SETUP menu.
-
Page 51: Troubleshooting
) terminal. Note If the projector does not operate normally after the above remedies are taken, contact an Authorized Service Center. Cause or LAMP indicator is lit or flashes. -
Page 52: Technical Information
Technical Information Technical Information List of compatible signals This projector can project the following image signals. Display resolution Mode NTSC/NTSC4.43/ 720 × 480i PAL-M/PAL60 PAL/PAL-N/SECAM 720 × 576i 525i (480i) 720 × 480i 625i (576i) 720 × 576i 525p (480p) 720 ×... -
Page 53: Serial Terminal
1 byte - 4 bytes Note The projector can not receive any command for 10 seconds after the lamp is switched on. Wait for 10 seconds before sending the command. If sending multiple commands, check if a response has been received from the projector for one command before sending the next command. -
Page 54: Lan Terminal
Technical Information Cable specifications (When connected to a personal computer) Control commands The following commands are used for control of the projector with a computer. (Operation commands) Command Control contents Power on Power off Volume Input Lamp condition query AV mute Remarks STANDBY MODE is set to ECO, only PON and Q$S command can be used in the standby mode. -
Page 55: Specifications
F 1.65 - 1.93, f 18.53 mm - 22.18 mm UHM lamp (220 W) 3 500 lm (PT-LB90NTU/LB90U) 3 000 lm (PT-LB78VU) 2 600 lm (PT-LB75VU) 15 kHz - 91 kHz 50 Hz - 85 Hz Less than 110 MHz... - Page 56 Specifications Compatible Wireless LAN (PT-LB90NTU Wireless channel only) Distance Cabinet Dimensions Weight Operating environment Certifications Power supply Operating range Remote control Weight Dimensions Options Ceiling bracket Average value. Each product has an individual variability in weight. 56 - NGLISH IEEE802.11 b/IEEE802.11 g (Wireless LAN standard protocol) IEEE802.11 b/IEEE802.11 g: 1 - 13 channels Approx.
-
Page 57: Ceiling Mount Bracket Safeguards
Ceiling mount bracket safeguards Installation work of the ceiling mount bracket should only be carried by a qualified technician. Even if it is during guaranteed period, the manufacturer is not responsible for any hazard or damage caused by using a ceiling mount bracket which is not purchased from an authorized distributors, or environmental conditions. -
Page 58: Dimensions
Dimensions Dimensions Trademark acknowledgements VGA and XGA are trademarks of International Business Machines Corporation. S-VGA is a registered trademark of the Video Electronics Standards Association. HDMI, the HDMI logo and High-Definition Multimedia Interface are trademarks or registered trademarks of HDMI Licensing LLC. The font used in the on-screen displays is a Ricoh bitmap font, which is manufactured and sold by Ricoh Company, Ltd. -
Page 59: Index
Specifications ...55 STANDBY MODE ...40 STARTUP LOGO ...37 STATUS ...39 STILL MODE ...31 Sub-menu ...28 Switching off the projector ...22 Switching on the projector ...21 Switching the input signal ...24 SXGA MODE ...38 Index TEMP indicator ...46 TEST PATTERN ...42 TEXT CHANGE ...43... -
Page 60: Avis Important Concernant La Sécurité
Nous espérons qu’elle vous aidera à optimiser l’utilisation de votre nouveau produit et que vous serez satisfait de votre projecteur LCD Panasonic. Le numéro de série de votre produit se trouve sous le projecteur. Veuillez le noter dans l’espace ci-dessous prévu à... - Page 61 PT-LB90NTU/PT-LB90U/PT-LB78VU/PT-LB75VU Désignation commerciale: Panasonic Fabricant responsable: Panasonic Corporation of North America Adresse: One Panasonic Way, Secaucus, New Jersey 07094 Téléphone: (888) 411 - 1996 E-mail: projectorsupport@us.panasonic.com Cet appareil est conforme à la partie 15 des règles de la FCC (Federal Communicaitions Commission U.S.A.) ce qui signifie: (1) que l’appareil ne produit pas d’interférences nuisibles, et (2) que l’appareil est capable de supporter...
-
Page 62: Précautions De Sécurité
Précautions de sécurité AVERTISSEMENT ALIMENTATION „ La prise de courant ou le disjoncteur doivent être installés à proximité de l’appareil et doivent être d’accès facile en cas de problèmes. Si les problèmes suivants surviennent, coupez immédiatement l’alimentation électrique. Si l’on continue d’utiliser le projecteur dans ces conditions, cela peut entraîner un incendie ou des chocs électriques. -
Page 63: Mise En Garde
Veillez à ce que le faisceau lumineux n’éclaire pas directement votre peau pendant que vous utilisez le projecteur. Cela peut entraîner des brûlures ou une perte de la vue. Une lumière intense est émise par l’objectif du projecteur. Si vous vous placez dans ce faisceau lumineux. -
Page 64: Précautions Lors Du Transport
Précautions de sécurité LORS DE L’UTILISATION/INSTALLATION „ Ne pas peser de tout son poids sur ce projecteur. On risque de tomber ou de casser l’appareil, ce qui peut causer des blessures. Veiller tout particulièrement à ce que les enfants ne se tiennent pas debout ou ne s’asseyent pas sur le projecteur. -
Page 65: Précautions Lors De L'utilisation
Modifiez fréquemment votre mot de passe. N’utilisez pas un mot de passe facile à deviner. Panasonic et ses filiales ne vous demanderont jamais votre mot de passe de façon directe. Ne partagez pas votre mot de passe avec des personnes inconnues. -
Page 66: Remplacement De L'unité De La Lampe
Remplacement de l'unité de la lampe Remplacement de l'unité de la lampe Filtre à air Le filtre à air doit être remplacé lorsque le nettoyage ne donne pas de bons résultats ou lors du remplacement de l’unité de lampe. Un filtre à air ainsi qu’une lampe de rechange sont fournis (ET-LAB80). S’adresser à un centre technique agréé... - Page 67 Procédure de remplacement de la lampe En cas d’installation du projecteur au plafond, ne jamais travailler directement dessous et éloigner le visage du projecteur. S’assurer d’installer l’unité de la lampe et de fixer la protection de l’unité fermement. Si elles ne sont pas installées fermement, le circuit de protection peut s’enclencher et bloquer la mise sous tension de l’appareil.
- Page 68 NOTE: This product contains a CR Coin Cell Lithium Battery which contains Perchlorate Material - special handling may apply. See www.dtsc.ca.gov/hazardouswaste/perchlorate. F1009-1109B TQBJ0302...
Need help?
Do you have a question about the PT-LB75VU and is the answer not in the manual?
Questions and answers