Acer ASPIRE ONE 1410 Service Manual
Acer laptop user manual
Hide thumbs
Also See for ASPIRE ONE 1410:
- User manual (105 pages) ,
- Quick manual (13 pages) ,
- Service manual (129 pages)

Related Manuals for Acer ASPIRE ONE 1410


Summary of Contents for Acer ASPIRE ONE 1410
- Page 1 Aspire One 752/1810T/1410 Service Guide Service guide files and updates are available on the ACER/CSD web; for more information, please refer to http://csd.acer.com.tw PRINTED IN TAIWAN...
-
Page 2: Revision History
Revision History Please refer to the table below for the updates made on this service guide. Date Chapter Updates... - Page 3 Copyright Copyright © 2010 by Acer Incorporated. All rights reserved. No part of this publication may be reproduced, transmitted, transcribed, stored in a retrieval system, or translated into any language or computer language, in any form or by any means, electronic, mechanical, magnetic, optical, chemical, manual or otherwise, without the prior written permission of Acer Incorporated.
- Page 4 Conventions The following conventions are used in this manual: SCREEN MESSAGES NOTE WARNING CAUTION IMPORTANT Denotes actual messages that appear on screen. Gives bits and pieces of additional information related to the current topic. Alerts you to any damage that might result from doing or not doing specific actions.
- Page 5 DIFFERENT part number code to those given in the FRU list of this printed Service Guide. You MUST use the list provided by your regional Acer office to order FRU parts for repair and service of customer machines.
-
Page 7: Table Of Contents
System Specifications Features ............1 System Block Diagram . - Page 8 Table of Contents Removing the I/O Board ......... . .69 Removing the Mainboard .
- Page 9 POST Code Reference Tables .........143 Jumper and Connector Locations Mainboard Top View .
- Page 10 Table of Contents...
-
Page 11: System Specifications
Mobile Intel® GS45 Express Chipset • Intel® Wireless WiFi Link 5100* • Acer InviLink™ Nplify™ 802.11b/g/Draft-N* • Acer InviLink™ 802.11b/g System Memory AO752 • Intel® Celeron® processor 723/743 (1 MB L2 cache, 1.20/1.30 GHz, 800 MHz FSB, 10 W), supporting Intel® 64 architecture •... -
Page 12: Audio Subsystem
• MS-Sound compatible • Built-in digital microphone • S/PDIF (Sony/Philips Digital Interface) support for digital speakers Communication • Integrated Acer Crystal Eye webcam, supporting 0.3-megapixel resolution • WLAN: • Intel® Wireless WiFi Link 5100 • Acer InviLink™ Nplify™ 802.11b/g/Draft-N •... - Page 13 • Headphones/speaker/line-out jack with S/PDIF support • Microphone-in jack • Ethernet (RJ-45) port • DC-in jack for AC adapter Environment • Temperature: • Operating: 5°C to 35°C • Non-operating: -20°C to 65°C • Humidity (non-condensing): • Operating: 20% to 80% •...
-
Page 14: System Block Diagram
System Block Diagram PC B ST A C K UP 8L H DI L A Y E R 1 : T OP L A Y E R 2 : G ND L A Y E R 3 : I N1 L A Y E R 4 : V C C L A Y E R 5 : I N2 L A Y E R 6 : I N3... -
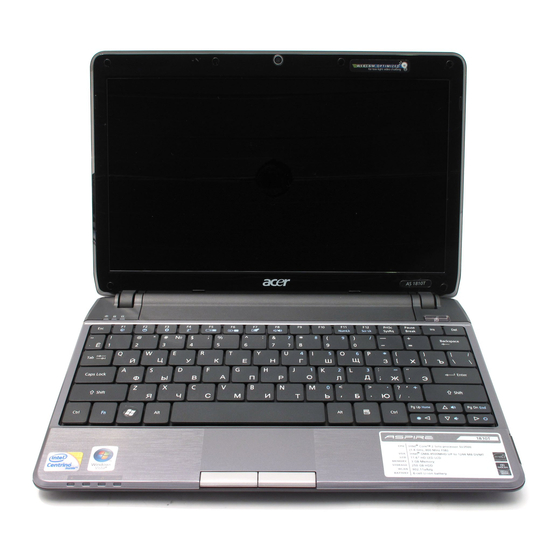
Page 15: Your Notebook Tour
Your Notebook Tour This section provides an overview of the features and functions of the notebook. Front View Icon Chapter 1 Item Acer Crystal Eye Web camera for video communication. webcam Microphone Internal microphone for sound recording. Display screen Also called Liquid-Crystal Display (LCD), displays computer output. -
Page 16: Closed Front View
Icon Closed Front View Icon Item Power Indicates the computer’s power status. Battery Indicates the computer’s battery status. 1. Charging: The light shows amber when the light is charging. 2. Fully charged: the light shows blue when in AC mode. Bluetooth Indicates the status of Bluetooth communication (only for certain models) -
Page 17: Left View
Left View Icon HDMI Right View Icon Chapter 1 Item External display Connects to a display device (e.g. external, (VGA) port LCD monitor, LCD projector). DC-in jack Connects to an AC adapter. Ventilation slots Enable the computer to stay cool, even after prolonged use. -
Page 18: Base View
Base View Icon Battery bay Battery lock Hard disk bay Memory compartment Ventilation slots and cooling fan Battery release latch Rear View Icon Battery bay Item Houses the computer’s battery pack. Note: The battery shown is for reference only. Your PC may have a different battery depending on the model purchased. -
Page 19: Indicators
Indicators The computer has several easy-to-read status indicators. The battery indicator is visible even when the computer cover is closed. Icon Function Power Battery Bluetooth Wireless LAN Num Lock Caps Lock NOTE: 1. Charging: The battery light shows amber when the battery is charging. 2. Fully charged: The light shows green when in AC mode. -
Page 20: Touchpad Basics
TouchPad Basics The following items show you how to use the TouchPad: • Move your finger across the TouchPad (1) to move the cursor. • Press the left (2) and right (3) buttons located beneath the TouchPad to perform selection and execution functions. -
Page 21: Using The Keyboard
Using the Keyboard Your computer has a close-to-full-sized keyboard and an embedded numeric keypad, separate cursor, lock, function and special keys. Lock Keys and embedded numeric keypad The keyboard has three lock keys which you can toggle on and off. Lock key Caps Lock When Caps Lock is on, all alphabetic characters typed are in uppercase. -
Page 22: Windows Keys
Windows Keys The keyboard has two keys that perform Windows-specific functions. Windows key Pressed alone, this key has the same effect as clicking on the Windows Start button; it launches the Start menu. It can also be used with other keys to provide a variety of functions: <... -
Page 23: Hot Keys
Hot Keys The computer employs hotkeys or key combinations to access most of the computer's controls like screen brightness and volume output. To activate hotkeys, press and hold the <Fn> key before pressing the other key in the hotkey combination. Hotkey Icon <Fn>... -
Page 24: Special Keys
Special Keys You can locate the Euro symbol and the US dollar sign at the upper-center and/or bottom-right of your keyboard. The Euro symbol Open a text editor or word processor. Hold <Alt Gr> and then press the <5> key at the upper-center of the keyboard. NOTE: Some fonts and software do not support the Euro symbol. -
Page 25: Hardware Specifications And Configurations
Intel® Dynamic Acceleration Technology and Enhanced Multi • Threaded • Thermal Management (EmTTM). • Support enhanced Intel Virtualization Technology. Cache Tech Speed Size 45nm 45nm 45nm 45nm 45nm Package Power Acer P/N 5.5W KC.35B0 1.SSU KC.NB00 1.723 KC.41B0 1.DSU KC.NB00 1.743 KC.23B0 1.CSU... - Page 26 CPU Fan True Value Table CPU Temperature (Celsius) Throttling 50%: On= 90°C; OFF=80°C OS shut down at 95°C; H/W shut down at 85°C North Bridge Specifications Item Chipset Package Features South Bridge Specifications Item Chipset Package Features System Memory Item Memory size DIMM socket number Supports memory size per socket...
- Page 27 Video Specifications Item Chipset Package Features Hard Disk Drive Interface Item Vendor & Hitachi HTS545050B Model 9A300 Name Capacity (GB) Bytes per sector Data heads Drive Format Disks Spindle speed (RPM) Performance Specifications Buffer size Interface Internal transfer rate (Gbits/ sec, max) I/O data 875 Mbits/s maximum...
- Page 28 Item Bytes per sector Data heads Drive Format Disks Spindle speed 5400 (RPM) Performance Specifications Buffer size 8 MB Interface SATA Internal transfer rate (Mbits/sec, max) I/O data transfer rate (Mbytes/sec max) DC Power Requirements Voltage Item Vendor & Model Toshiba MK1655GSX Name...
- Page 29 8 MB SATA 5V ±5% Specification Insyde • Flash ROM 1MB • Support ISIPP • Support Acer UI • Support multi-boot • Suspend to RAM (S3) / Disk (S4) • Various hot-keys for system control • Support SMBUS 2.0, PCI2.3 •...
- Page 30 Item Pixel Pitch (mm) Typical White Luminance (cd/m also called Brightness Contrast Ratio Response Time (Optical Rise Time/Fall Time) msec Typical Power Consumption (watt) Weight (without inverter) Physical Size (mm) Electrical Interface Viewing Angle (degree) Horizontal (Right) / (Left) Vertical (Upper) / (Lower) Bluetooth Item Bluetooth Controller...
- Page 31 • The AR8131L GbE controller supports checksum offload features for IP, TCP, and UDP, ACER NT1T JM11 Black 86/87/91 • Supports application keys for Windows XP version Alcor AU6433 •...
- Page 32 Item Dimensions (L x W x H 65 x 8 x 3.84 +/- 0.25 (H) mm Sensor type CMOS (OV9710) Pixel resolution 640x480 Pixel size Image size Wireless LAN Item Specification Type Atheros HB93 1x2 BGN 802.11g Radio Technology IEEE 802.11g standard compliant Operating 2412 ~ 2484MHz ISM band Frequency...
- Page 33 Item Pack capacity Number of battery cell Package configuration Chapter 1 Specification 6 Cell SANYO 6 cell 4400mAh SANYO 6 cell 5600mAh PANASONIC 6 cell 4400mAh PANASONIC 6 cell 5800mAh SAMSUNG 6 cell 4400mAh SAMSUNG 6 cell 5600mAh LGC 6 cell 5600mAh 3 cells in series, 2 series in parallel...
- Page 34 Chapter 1...
-
Page 35: System Utilities
System Utilities BIOS Setup Utility The BIOS Setup Utility is a hardware configuration program built into your computer’s BIOS (Basic Input/ Output System). Your computer is already properly configured and optimized, and you do not need to run this utility. However, if you encounter configuration problems, you may need to run Setup. -
Page 36: Information
Information The Information screen displays a summary of your computer hardware information. Information Main Security C P U T y p e C P U T y p e C P U S p e e d C P U S p e e d H D D M o d e l N a m e : H D D M o d e l N a m e : H D D S e r i a l N u m b e r :... -
Page 37: Main
Main The Main screen allows the user to set the system time and date as well as enable and disable boot option and recovery. Information Main S y s t e m T i m e : S y s t e m T i m e : S y s t e m D a t e : S y s t e m D a t e : S y s t e m M e m o r y :... -
Page 38: Security
Security The Security screen contains parameters that help safeguard and protect your computer from unauthorized use. Information Main S u p e r i s o r P a s s w o r d I s S u p e r i s o r P a s s w o r d I s U s e r P a s s w o r d I s : U s e r P a s s w o r d I s : H D D P a s s w o r d I s :... -
Page 39: Removing A Password
Use the and keys to highlight the Set Supervisor Password parameter and press the Enter key. The Set Supervisor Password box appears: C o n f i r m N e w P a s s w o r d Type a password in the “Enter New Password”... -
Page 40: Changing A Password
Changing a Password Use the and keys to highlight the Set Supervisor Password parameter and press the Enter key. The Set Password box appears. E n t e r C u r r e n t P a s s w o r C o n f i r m N e w P a s s w o r d Type the current password in the Enter Current Password field and press Enter. -
Page 41: Boot
Boot This menu allows the user to decide the order of boot devices to load the operating system. Bootable devices includes the USB diskette drives, the onboard hard disk drive and the DVD drive in the module bay. Information Main Security B o o t p r i o r i t y o r d e r : B o o t p r i o r i t y o r d e r :... -
Page 42: Exit
Exit The Exit screen allows you to save or discard any changes you made and quit the BIOS Utility. Information Main Security E x i t S a i n g C h a n g e s E x i t S a i n g C h a n g e s E x i t D i s c a r d i n g C h a n g E x i t D i s c a r d i n g C h a n g L o a d S e t u p D e f a u l t s... -
Page 43: Bios Flash Utility
BIOS Flash Utility The BIOS flash memory update is required for the following conditions: New versions of system programs • New features or options • Restore a BIOS when it becomes corrupted. • Chapter 2... -
Page 44: Dos Flash Utility
DOS Flash Utility Perform the following steps to use the DOS Flash Utility: Press F2 during boot to enter the Setup Menu. Select Boot Menu to modify the boot priority order, for example, if using USB HDD to Update BIOS, move USB HDD to position 1. -
Page 45: Winflash Utility
WinFlash Utility Perform the following steps to use the WinFlash Utility: Double click the WinFlash executable. Click OK to begin the update. A progress screen displays. When the process is complete, close all programs and applications and reboot the system. Chapter 2... -
Page 46: Remove Hdd/Bios Password Utilities
Remove HDD/BIOS Password Utilities This section provide you with removing HDD/BIOS method: Remove HDD Password: When the user keys in the wrong password three times, the system reports the following error code to user. To unlock the HDD password, perform the following steps: Press Enter to display the Select Item screen. -
Page 47: Removing Bios Passwords
Removing BIOS Passwords: If you key in the wrong Supervisor Password three times, System Disabled displays on the screen. See the image below. To reset the BIOS password, run clnpwd.exe as follows: From a DOS prompt, Execute clnpwd.exe Press 1 or 2 to clean the desired password shown on the screen. The onscreen message determines whether the function is successful or not. -
Page 48: Miscellaneous Utilities
Miscellaneous Utilities Using Boot Sequence Selector Boot Sequence Selector allows the boot order to be changes without accessing the BIOS. To use Boot Sequence Selector, perform the following steps: Enter into DOS. Execute BS.exe to display the usage screen. Select the desired boot sequence by entering the corresponding sequence, for example, enter BS2 to change the boot sequence to HDD|CD ROM|LAN|Floppy. - Page 49 Manufacturer (Type1, Offset04h): Acer Product Name (Type1, Offset05h): Aspire one xxxxx Serial Number (Type1, Offset07h): 01234567890123456789 UUID String (Type1, Offset08h): xxxxxxxx-xxxx-xxxx-xxxx-xxxxxxxxxxxx Asset Tag (Type3, Offset04h): Acer Asstag Example 2: Write Product Name to EEPROM Input: dmitools /wp Acer Example 3: Write Serial Number to EEPROM...
- Page 50 Chapter 2...
-
Page 51: Machine Disassembly And Replacement
Machine Disassembly and Replacement This chapter contains step-by-step procedures on how to disassemble the notebook computer for maintenance and troubleshooting. Disassembly Requirements To disassemble the computer, you need the following tools: • Wrist grounding strap and conductive mat for preventing electrostatic discharge •... -
Page 52: Pre-Disassembly Instructions
Pre-disassembly Instructions Before proceeding with the disassembly procedure, make sure that you do the following: Turn off the power to the system and all peripherals. Unplug the AC adapter and all power and signal cables from the system. Place the system on a flat, stable surface. Chapter 3... -
Page 53: Disassembly Process
Mainboard, you must first remove the Keyboard, and LCD Module then disassemble the inside assembly frame in that order. Main Screw List Screw M2-0.4*2- I(BNI)(NYLOK)(7,0.6)IRON M2.0X2.5-I(BNI)(NYLOK) IRON M2*3.0 I (BNI,NYLOK)IRON M2*5-I(BZN)(NYLOK) Chapter 3 Quantity Acer Part Number 86.W4107.002 86.SA107.002 86.SA107.001 86.TG607.004... -
Page 54: External Module Disassembly Process
External Module Disassembly Process NOTE: The product previews seen in the disassembly procedures may not represent the final product color or configuration. Screw List Step WAN Module Disassembly External Modules Disassembly Flowchart Remove DIMMs Screw Quantity Turn off system and peripherals power Disconnect power and signal cables... -
Page 55: Removing The Battery Pack
Removing the Battery Pack Turn the computer over. Slide the battery lock/unlock latch to the unlock position. Slide and hold the battery release latch to the release position (1), then slide out the battery pack from the main unit (2). Chapter 3... -
Page 56: Removing The Dummy Card
Removing the Dummy Card Press the dummy card in to allow it to spring out. Pull the dummy card out Chapter 3... -
Page 57: Removing The Hard Disk Drive Module
Removing the Hard Disk Drive Module DISCLAIMER: The notebook sample in the following images shows an FFC. The actual model includes an FPC as pictured in the image on the right. See “Removing the Battery Pack” on page 45. Loosen the two captive screws. Lift the HDD cover up and away by the corner. - Page 58 Grasp the transparent tab at the top of the HDD and lift up to eject the HDD from the bay. IMPORTANT:The transparent tab is attached to the bottom cover. Do not pull the transparent tab out of the chassis. Pull the tab upwards to free the HDD from the bay. At the same time, hold the HDD with the other hand and lift to remove from the chassis.
- Page 59 Detach the HDD board. Chapter 3...
-
Page 60: Removing The Dimm Module
Removing the DIMM Module See “Removing the Battery Pack” on page 45. Loosen the four captive screws in the memory cover. Lift the memory cover away. Push outwards the memory module clips. Chapter 3... - Page 61 Pull the memory module out. Repeat steps 4. and 5. for the second memory module. Chapter 3...
-
Page 62: Removing The Wlan Module
Removing the WLAN Module See “Removing the Battery Pack” on page 45.. Loosen the four captive screws in the memory cover. Lift and remove the memory cover. Detach the two cables from the Wireless LAN module. IMPORTANT:Take note of the Main (1. black) and Auxiliary (2. white) connectors. Chapter 3... - Page 63 Remove the one screw. Ensure the cables are well clear of the module Screw List Step WAN Module Disassembly Pull the WLAN module out and away. Chapter 3 Screw Quantity Screw Type...
-
Page 64: Main Unit Disassembly Process
Main Unit Disassembly Process IMPORTANT: Cable paths and positioning may not represent the actual model. During the removal and replacement of components, ensure all available cable channels and clips are used and that the cables are replaced in the same position. NOTE: The product previews seen in the disassembly procedures may not represent the final product color or configuration. - Page 65 Screw List Step Remove Upper Cover M2*3 M2*5 Remove Button Board M2-0.4*2 Remove LCD Module Remove LED Board M2*3 Remove I/O Board M2*3 Remove Mainboard M2*3 Remove Speaker M2*3 Module Chapter 3 Screw Quantity Part No. 86.SA107.001 86.TG607.004 86.W4107.002 86.TG607.004 86.SA107.001 86.SA107.001 86.SA107.001...
-
Page 66: Removing The Keyboard
Removing the Keyboard IMPORTANT: The keyboard is easily warped or damaged during the removal process. Take care not to use excessive force when removing to prevent damage. See “Removing the Battery Pack” on page 45. See “Removing the Hard Disk Drive Module” on page 47. See “Removing the DIMM Module”... - Page 67 Using the plastic pry, lift up the top edge of the keyboard and then lift the keyboard up. Flip the keyboard over. Unlock the FCC Chapter 3 Pull the keyboard away...
-
Page 68: Removing The Upper Cover
Removing the Upper Cover See “Removing the Keyboard” on page 56. Disconnect the button board FCC from the main board by unlocking the FCC cable and pulling away. Remove the nine screws in the upper cover. Screw List Step Upper Cover M2*3 Disassembly M2*5... - Page 69 Turn the computer over and remove the twelve screws in the bottom cover. Screw List Step Upper Cover M2*5 Disassembly Pull off the tape from the 3M module cables. Chapter 3 Size Quantity Screw Type...
- Page 70 Pull the 3M module and WLAN cables away from the computer. NOTE: Replace the plastic caps over the 3M module cable connectors immediately if they get dislodged during the process. Turn the computer over and grasp the upper cover by the hinges. Then pull the upper cover up and away from the computer.
-
Page 71: Removing The Button Board
Removing the Button Board IMPORTANT: The Touchpad Board cannot be removed individually. To replace the Touch Pad, replace the entire Upper Cover. See “Removing the Upper Cover” on page 58. Unlock and remove the touch-pad to mainboard FCC. Unlock and detach the touch-pad to touch-pad FCC. Chapter 3... - Page 72 Remove the two screws holding the button board. Screw List Step Button board M2-0.4*2 Lift the button board away Peel the touch-pad FCC away from the adhesive. Size Quantity Screw Type Chapter 3...
- Page 73 Unlock the touch-pad FCC and pull the cable away. Chapter 3...
-
Page 74: Removing The Lcd Module
Removing the LCD Module See “Removing the Upper Cover” on page 58. Pull the 3M module and WLAN cables away from the computer. Lift the transparent adhesive tape off the LCD connector. Chapter 3... - Page 75 Push out the LCD connector. Remove the two screws of the LCD module hinges. Screw List Step LCD Module M2*5 Disassembly Lift the LCD module away. Chapter 3 Screw Quantity Screw Type...
-
Page 76: Removing The Led Board
Removing the LED Board See “Removing the Upper Cover” on page 58. Unlock and remove the LCD board FCC. Remove the single screw securing the LED Board to the Lower Cover. Screw List Step LED Board Disassembly Screw Quantity Screw Type Chapter 3... - Page 77 Lift off the LCD Board. Unlock and remove the LED board FCC from the mainboard. Chapter 3...
-
Page 78: Removing The Bluetooth Module
Removing the Bluetooth Module See “Removing the Upper Cover” on page 58. Detach the Bluetooth module cable from the mainboard. LIft the Bluetooth module away from the computer. Detach the Bluetooth module cable from the module. Chapter 3... -
Page 79: Removing The I/O Board
Removing the I/O Board See “Removing the Upper Cover” on page 58.. Unlock and remove the I/O board FCC from the main board Unlock and remove the I/O board FCC from the I/O board. Remove the two screws from the I/O board. Chapter 3... - Page 80 Screw List Step Screw Quantity Screw Type. I/O Board Disassembly M2*3 Lift the board up from the internal edge and then pull away diagonally. Chapter 3...
-
Page 81: Removing The Mainboard
Removing the Mainboard See “Removing the Upper Cover” on page 58. See “Removing the LCD Module” on page 64. See “Removing the LED Board” on page 66. See “Removing the Bluetooth Module” on page 68. See “Removing the I/O Board” on page 69. Disconnect the speaker cable from the mainboard. - Page 82 Lift the main board and the CRT board out together. Lift the internal edge up first then pull out the external connector edge. Chapter 3...
-
Page 83: Removing The Crt Board
Removing the CRT Board See “Removing the Mainboard” on page 71. Disconnect the CRT cable from the CRT board. Disconnect the CRT cable from the main board. Chapter 3... -
Page 84: Removing The Thermal Module
Removing the Thermal Module See “Removing the Mainboard” on page 71. See “Removing the CRT Board” on page 73. Remove the five captive screws of the thermal module. Lift the thermal module up slightly and then disconnect the thermal module cable from the main board. Lift the thermal module away from the main board. -
Page 85: Removing The Rtc Battery
Removing the RTC Battery IMPORTANT:Observe local regulations in the disposal of all batteries. See “Removing the Mainboard” on page 71. Pry the RTC battery out of the holding clips. Chapter 3... -
Page 86: Removing The Speaker Modules
Removing the Speaker Modules See “Removing the Mainboard” on page 71. Remove the four screws from the speaker modules. Screw List Step Speaker Module M2*3 Disassembly Remove the black foam piece. Screw Quantity Screw Type Chapter 3... - Page 87 Pull the cables away from the two adhesive locations. Lift the modules away. Chapter 3...
-
Page 88: Lcd Module Disassembly Process
LCD Module Disassembly Process IMPORTANT: Cable paths and positioning may not represent the actual model. During the removal and replacement of components, ensure all available cable channels and clips are used and that the cables are replaced in the same position. NOTE: The product previews seen in the disassembly procedures may not represent the final product color or configuration. -
Page 89: Removing The Lcd Bezel
Removing the LCD Bezel See “Removing the LCD Module” on page 64. Remove the six rubber screw covers. Remove the six screws securing the bezel. Screw List Step LCD Bezel Disassembly Chapter 3 Screw Quantity Screw Type... - Page 90 Pull the bezel away from the top and then work down one side, along the bottom, then up the other side. Chapter 3...
- Page 91 Roll the bezel up and away from the hinges. Chapter 3...
-
Page 92: Removing The Camera Board
Removing the Camera Board See “Removing the LCD Bezel” on page 79. Disconnect the camera connector. Pull up the camera board. Chapter 3... -
Page 93: Removing The Lcd Panel
Removing the LCD Panel See “Removing the Camera Board” on page 82. Pull up the microphone. Remove the two screws. Screw List Step LCD Panel Disassembly Chapter 3 Screw Quantity Screw Type... - Page 94 Lift the LCD panel out lifting the bottom of the panel first. Chapter 3...
-
Page 95: Removing The Lcd Brackets
Removing the LCD Brackets See “Removing the LCD Panel” on page 83. Remove the four LCD bracket screws. Screw List Step LCD Brackets M2*2.5 Disassembly Chapter 3 Screw Quantity Screw Type... -
Page 96: Removing The Fpc Cable
Removing the FPC Cable See “Removing the LCD Panel” on page 83. Place the panel face down on a clean smooth surface. Pull the microphone/camera cable off the adhesive. Lift up the protective plastic tab. Disconnect the LCD connector. Chapter 3... -
Page 97: Removing The Antennas
Removing the Antennas See “Removing the LCD Panel” on page 83. Lift up the two foil flaps at the corners of the LCD module. Lift up the foil of the left antenna. Lift up the left antenna. Chapter 3... - Page 98 Pull the left antenna cable away from around the edges of the LCD module. Lift up the foil of the right antenna. Chapter 3...
- Page 99 Lift up the right antenna. Pull the right antenna cable away from the LCD module. Chapter 3...
-
Page 100: Lcd Reassembly Procedure
LCD Reassembly Procedure NOTE: Adhesive is required to be added at various steps to cables and components. Locations of adhesive to be added is designated with a: NOTE: During manufacture a cyanoacrylate glue is used provided by Holdtite Adhesives LTD. This is not a specified requirement. - Page 101 Ensure the cable is properly laid through the hinge. Apply adhesive on the locations shown. Relay the cables around the module edge for the right antenna. Chapter 3...
- Page 102 Relay the cables around the edge for the left antenna. Flatten the two foil tabs ensuring the screw holes are properly aligned. Chapter 3...
-
Page 103: Replacing The Fpc Cable
Replacing the FPC Cable Connect the FPC cable connector. Place the protective clear adhesive tape down firmly over the connector. Apply adhesive behind the cable and stick the FPC cable down on the rear of the panel. Chapter 3... -
Page 104: Replacing The Lcd Brackets
Replacing the LCD Brackets Replace the four screws holding the LCD brackets in place. Screw List Step LCD Brackets M2*2.5 Disassembly Screw Quantity Screw Type Chapter 3... -
Page 105: Replacing The Lcd Panel
Replacing the LCD Panel Place the LCD panel into LCD module as shown top edge first, making sure the cable is not trapped behind the panel. Replace the two screws while ensuring the cables pass through the hinges correctly. Screw List Step LCD Panel Assembly Chapter 3... - Page 106 Apply adhesive and stick the microphone down. Chapter 3...
-
Page 107: Replacing The Camera Board
Replacing the Camera Board Apply adhesive and lay the Camera Board board down pressing firmly. Connect the cable to the Camera Board. Chapter 3... -
Page 108: Replacing The Lcd Bezel
Replacing the LCD Bezel Place the bezel hinge covers over the hinges. Ensure the cables are correctly exiting the hinges. Chapter 3... - Page 109 Press down around the bezel starting from the bottom and working simultaneously around the edges to the top. Chapter 3...
- Page 110 Replace the six screws. Screw List Step LCD Bezel Assembly M2*5 Replace the six rubber screw covers. Screw Quantity Screw Type Chapter 3...
-
Page 111: Main Unit Reassembly Process
Main Unit Reassembly Process Replacing the Speaker Modules Put the speakers in place. Apply adhesive and attach the speaker cables in two locations. Replace the foam piece. Chapter 3... - Page 112 Replace the speaker module four screws. Screw List Step Speaker Module M2*3 Assembly Screw Quantity Screw Type Chapter 3...
-
Page 113: Replacing The Rtc Battery
Replacing the RTC Battery Place the RTC battery into the holding clips on the main board. Chapter 3... -
Page 114: Replacing The Thermal Module
Replacing the Thermal Module Connect the thermal module connector to the main board. Place the Thermal Module onto the main board. Then first tighten the three captive screws marked 1, 2, 3 on the thermal module in order: 1-2-3. First tighten Screw 1, then screw 2, then screw 3. IMPORTANT: Incorrect order of screw replacement could harm the CPU. -
Page 115: Replacing The Crt Board
Replacing the CRT Board Connect the CRT board cable to the main board. Connect the CRT board cable to the CRT board. Align the CRT board cable carefully between the main board and the CRT board and stick down the attached tape of the cable. -
Page 116: Replacing The Main Board
Replacing the Main Board Slide the main board external connector edge in first to the lower case. Replace the five screws to secure the mainboard to the lower cover. Screw List Step Main Board Assembly Screw Quantity Screw Type Chapter 3... - Page 117 Connect the speaker connector. Chapter 3...
-
Page 118: Replacing The I/O Card
Replacing the I/O Card Place the I/O card into the lower case edge first. Replace the two screws. Screw List Step I/O Card Assembly Screw Quantity Screw Type Chapter 3... - Page 119 Connect the I/O card FCC to the I/O board. Connect the I/O card FCC to the main board. Lock the I/O Card FCC on the main board. Chapter 3...
-
Page 120: Replacing The Bluetooth Module
Replacing the Bluetooth Module Connect the Bluetooth module cable to the Bluetooth module. Apply adhesive and place the Bluetooth module into place pressing down firmly. Connect the Bluetooth module cable to the main board. Chapter 3... -
Page 121: Replacing The Led Board
Replacing the LED Board Connect the LED board FCC to the mainboard. Place the LED board into place ensuring the slide switches on the front are properly aligned in the lower cover slots. Replace the one screw. Chapter 3... - Page 122 Screw List Step Screw Quantity Screw Type LED Board Assembly M2*3 Connect the LED board FCC to LED board. Chapter 3...
-
Page 123: Replacing The Lcd Module
Replacing the LCD Module Place the LCD module hinges into position on the lower case. Replace the two screws. Screw List Step LCD Module Assembly M2x5 Chapter 3 Screw Quantity Screw Type... - Page 124 Reconnect the LCD module connector. Press the adhesive plastic tape of the LCD module connector down firmly. Relay the WLAN and 3M module cables around and through the lower case. Chapter 3...
-
Page 125: Replacing The Button Board
Replacing the Button Board Apply adhesive and stick the touch pad FCC down onto the upper cover. Connect the touch pad FCC to the touch pad. Place the button board onto the upper cover and replace the two screws. Chapter 3... - Page 126 Screw List Step Button Board M2-0.4*2 Assembly Connect the touch pad FCC to the button board. Bring the button board FCC through the upper cover. Screw Quantity Screw Type Chapter 3...
- Page 127 Lay the button board FCC down carefully on the upper cover. Connect the button board FCC to the button board. Chapter 3...
-
Page 128: Replacing The Upper Cover
Replacing the Upper Cover Place the upper cover onto the lower cover aligning the hinges first and then press down around the edges. Replace the twelve screws. Chapter 3... - Page 129 Screw List Step Upper Cover M2*2.5 Assembly M2*3 M2*5 Turn the computer over, put on the bottom cover and lay out the WLAN card and 3M module cables around and through the bottom cover. Chapter 3 Size Quantity 3 (blue call out) 3 (green call out) 6 (red call out) Screw Type...
- Page 130 Place adhesive tape over the 3M module cables. Replace the bottom cover twelve screws. Screw List Step Upper Cover M2*5 Assembly Turn the computer back over and connect the button board FCC to the main board. Size Quantity Screw Type Chapter 3...
-
Page 131: Replacing The Keyboard
Replacing the Keyboard Connect the FCC to the mainboard. Turn the keyboard over and insert the bottom edge in. Push down the top edge ensuring the four latches across the top are fully secured. Chapter 3... -
Page 132: Replacing The Wireless Lan Module
Replacing the Wireless LAN Module Place the wireless LAN module into its connector. Replace the one screw. Screw List Step WLAN Assembly M2*3 Size Quantity Screw Type Chapter 3... - Page 133 Replace the connectors. The white (Aux) cable attaches to the connector marked 2 on the board. The black (Main) cable attaches to the connector marked 1 on the board. Chapter 3...
-
Page 134: Replacing The Dimm Module
Replacing the DIMM Module Slide the DIMM module into the connector and press down till the locking springs click into place. Repeat the process for the second DIMM module Place the DIMM module door down corner first. Chapter 3... - Page 135 Tighten the four captive screws. Chapter 3...
-
Page 136: Replacing The Hard Disk Drive
Replacing the Hard Disk Drive DISCLAIMER: The notebook sample in the following images shows an FFC. The actual model includes an FPC as pictured in the image on the right. Connect the HDD FPC to the HDD. Lift up the clear plastic tab and place the HDD into its bay. Connect the HDD FPC to the main board. - Page 137 Place the HDD cover in from one corner. Tighten the two captive screws. Chapter 3...
-
Page 138: Replacing The Battery
Replacing the Battery Slide the battery into position. Close the locking latch. Chapter 3... -
Page 139: Replace The Dummy Card
Replace the Dummy Card Push the dummy card into the slot until it clicks into place. Chapter 3... - Page 140 Chapter 3...
-
Page 141: Troubleshooting
Common Problems Use the following procedure as a guide for computer problems. NOTE: The diagnostic tests are intended to test only Acer products. Non-Acer products, prototype cards, or modified options can give false errors and invalid system responses. Obtain the failing symptoms in as much detail as possible. -
Page 142: Power On Issue
Power On Issue If the system doesn’t power on, perform the following actions one at a time to correct the problem. Do not replace non-defective FRUs: Computer Shuts down Intermittently If the system powers off at intervals, perform the following actions one at a time to correct the problem. Check the power cable is properly connected to the computer and the electrical outlet. -
Page 143: No Display Issue
No Display Issue If the Display doesn’t work, perform the following actions one at a time to correct the problem. Do not replace non-defective FRUs: Replace LCD Panel and Cable No POST or Video If the POST or video doesn’t display, perform the following actions one at a time to correct the problem. Make sure that the internal display is selected. -
Page 144: Random Loss Of Bios Settings
If the computer boots correctly, add the devices one by one until the failure point is discovered. Reseat the memory modules. Remove the drives (see “Disassembly Process” on page 43). If the Issue is still not resolved, see “Online Support Information” on page 241. Abnormal Video Display If video displays abnormally, perform the following actions one at a time to correct the problem. -
Page 145: Lcd Failure
If the Issue is still not resolved, see “Online Support Information” on page 241. LCD Failure If the LCD fails, perform the following actions one at a time to correct the problem. Do not replace non- defective FRUs: Check MB LCD Check MB LCD connector and connector and... -
Page 146: Built-In Keyboard Failure
Built-In Keyboard Failure If the built-in Keyboard fails, perform the following actions one at a time to correct the problem. Do not replace non-defective FRUs: Keyboard functioning? Start Keyboard properly connected? Replace mainboard Disconnect and reconnect Replace Keyboard Chapter 4... -
Page 147: Touchpad Failure
TouchPad Failure If the TouchPad doesn’t work, perform the following actions one at a time to correct the problem. Do not replace non-defective FRUs: Check M/B T/P Check M/B T/P Chapter 4 Start Start Check Check TouchPad TouchPad Swap M/B Swap M/B Re-assemble the Re-assemble the... -
Page 148: Internal Speaker Failure
Internal Speaker Failure If the internal Speakers fail, perform the following actions one at a time to correct the problem. Do not replace non-defective FRUs: Check M/B SPK Check M/B SPK Check Logic Check Logic Upper/Logic Upper/Logic Swap M/B Swap M/B Sound Problems If sound problems are experienced, perform the following actions one at a time to correct the problem. -
Page 149: Internal Microphone Failure
Remove and recently installed hardware or software. Restore system and file settings from a known good date using System Restore. If the issue is not fixed, repeat the preceding steps and select an earlier time and date. 10. Reinstall the Operating System. 11. -
Page 150: Hdd Not Operating Correctly
Select the microphone type from the list and click Next. Follow the onscreen prompts to complete the test. If the Issue is still not resolved, see “Online Support Information” on page 241. HDD Not Operating Correctly If the HDD does not operate correctly, perform the following actions one at a time to correct the problem. Disconnect all external devices. -
Page 151: Usb Failure (Right Up/Down Side)
USB Failure (Right up/down side) If the rightside USB port fails, perform the following actions one at a time to correct the problem. Do not replace non-defective FRUs: Check USB/B to Check USB/B to Check USB/B Check USB/B Other Failures If the VGA board, LAN Port, external MIC or Speakers, PCI Express Card, 5-in-1 Card Reader or Volume Wheel fail, perform the following general steps to correct the problem. -
Page 152: Intermittent Problems
Issue” on page 132.): Power-off the computer. Visually check them for damage. If any problems are found, replace the FRU. Remove or disconnect all of the following devices: • Non-Acer devices • Printer, mouse, and other external devices • Battery pack •... -
Page 153: Post Code Reference Tables
POST Code Reference Tables These tables describe the POST codes and components of the POST process. POST Routine Description PeiEventLog OemServices SioInit MonoStatusCode PentiumMCpuPeim PlatformStage1 Variable IchInit PlatformStage2 IchSmbusArpDisabled ClockGen OpPresence TcgPei FindFv DxeIpl LightMemoryInit S3ResumeSoftSmi Crc32SectionExtract OemServices EventLog ScriptSave AcpiS3Save SmartTimer JpegDecoder... - Page 154 POST Routine Description TcgDxe PhysicalPresence TpmDriver TcgSmm PhysicalPresenceReadyToBoot DataHubRecordPolicy Undi PxeDhcp4 IsaBus IsaSerial Ps2Mouse IdeBus LightPciBus UsbBot UsbCbi0 UsbCbi1 UsbKb UsbMassStorage UsbMouse Ehci Uhci UsbBus SmmBase SmmDisp SmmReloc SmmRuntime SmmThunk OemServices ChipsetInit SmmAccess PciHostBridge PciExpress GmchMbi IchInit IdeController SataController IchSmbusLight SmmControl Ich7MSmmDispatcher IsaAcpiDriver...
- Page 155 POST Routine Description SmmFwh PciHotPlug BootOptionPolicy SetupUtility Platform PlatformIde Platform Ihisi SetupMouse Int15Microcode SmmPnp Smbios MemorySubClass MiscSubclassDriver SysPassword PswdConsole HddPswdServiceBody HddPswdService HiiDatabase OemSetupBrowser Font(English) Font(French) Font( Chinese ) UnicodeCollation ConPlatform ConSplitter GraphicsConsole Terminal VgaClass SaveMemoryConfig AcpiSupport AcpiPlatform DataHub DataHubStdErr GenericMemoryTest DiskIo Partition PciPlatform...
- Page 156 POST Routine Description AsfInit IdeRController Legacy8259 LegacyRegion LegacyInterrupt BiosKeyboard BiosVideo MonitorKey LegacyBios LegacyBiosPlatform LegacyMouse SmmUsbLegacy AmtbxInvoke OemBadgingSupport Code Chapter 4...
-
Page 157: Jumper And Connector Locations
Jumper and Connector Locations Mainboard Top View TOP SIDE PJ1: DC-in CN18: HDMI CN17: USB CN2: LED board connector Item Description DC-in LCD connector JSIM2 SIM card connector Battery connector EC Winbond Codec Card reader board connector Speaker Connector Chapter 5 CN3: LCD connector CN4: Keyboard connector CN5: Touch Pad connector... -
Page 158: Mainboard Bottom View
Mainboard Bottom View BOTTOM SIDE CN10: DDR2 DIMM2 CN9: HDD connector CN11: Mini Card For WLAN Item CN10 DDR2 DIMM2 CN12 DDR2 DIMM1 NB GS45 CN16 CN12: DDR2 DIMM1 CN13: Mini Card For 3G card Description Item CN14 CN13 CN11 CN15: CRT board connector U18: CPU U17: NB GS45... -
Page 159: Clearing Password Check And Bios Recovery
Clearing Password Check and BIOS Recovery This section provides a procedure for clearing the password and BIOS. The Hardware Open Gap on the main board clears the CMOS of all user settings and restores factory defaults. Mainboard CMOS Discharge Discharging the CMOS clears all user settings. Disassemble the notebook and take out the Mainboard. -
Page 160: Bios Recovery By Crisis Disk
BIOS Recovery by Crisis Disk BIOS Recovery Boot Block The BIOS Recovery Boot Block is a special block of BIOS. It is used to boot up the system with minimum BIOS initialization. Users can enable this feature to restore the BIOS firmware to the factory settings if a BIOS flash process fails. -
Page 161: Fru (Field Replaceable Unit) List
Guide. For ACER AUTHORIZED SERVICE PROVIDERS, your Acer office may have a DIFFERENT part number code from those given in the FRU list of this printed Service Guide. You MUST use the local FRU list provided by your regional Acer office to order FRU parts for repair and service of customer machines. -
Page 162: Main Assembly
Main Assembly Item K/B Module Top Sub Assy CRTCable Assy CRT Board Assy PCB Assy LED Board Assy Thermal Module Assy Bluetooth Assy RAM Door Assy Touchpad Board Assy WirelessLAN Cardreader FFC Cable LAN Board Assy Base Assy FPC Cable HDD Door Assy Description Part Number... -
Page 163: Lcd Assembly
LCD Assembly Item Chapter 6 Camera Description Part Number LCD Cover 60.SA207.002 CableAssy 50.SA107.005 LCD Bracket_L 33.SA107.002 LCD Panel LK.11605.001 LCD Bezel 60.SA107.005 LCD Bracket_R 33.SA107.001 Camera 57.S6507.003... -
Page 164: Fru List
Lan Intel WLAN 512AG_HMWG Shirley Peak 5100 MM#897072 Lan Intel WLAN 512AN_HMWG Shirley Peak 5100 MM#895373 Lan Intel WLAN INT1000HBG Foxconn Bluetooth FOX BRM 2046 BT2.1 LED BOARD CRT BOARD LAN BOARD ACER P/N AP.03001.001 AP.03003.001 AP.0300A.001 BT.00607.106 BT.00607.107 BT.00603.096 BT.00607.102 BT.00607.103 LC.21300.008... - Page 165 POWER CORD(UK) 1.8M 3PBLACK FP010008-013 POWER CORD BRAZIL IMETRO 3 PIN POWER CORD UK 3PIN BLUETOOTH CABLE CRT CABLE FFC CABLE - CARD READER/B TO MB FFC CABLE - LED/B TO MB ACER P/N 55.SA107.005 MB.SAA06.001 MB.SA706.001 MB.SA706.002 MB.SA706.003 MB.SA506.001 MB.SA106.001...
- Page 166 LCD COVER ASSY IMR RED W/ANTENNA LCD COVER ASSY IMR RED W/ 3G ANTENNA LCD COVER ASSY IMR BLUE W/ANTENNA LCD COVER ASSY IMR BLUE W/ 3G ANTENNA LCD BEZEL ASSY BLACK LCD BRACKET W/HINGE R ACER P/N 50.SA107.005 50.SA107.006 60.SA207.001 60.SA307.001 60.SA107.001 60.SA107.002...
- Page 167 HDD TOSHIBA 2.5" 5400rpm 500GB MK5055GSX Libra SATA LF F/W:FG001J HDD HGST 2.5" 5400rpm 500GB HTS545050B9A300 Panther B SATA LF F/W:C60F Disk imbalance criteria = 0.014g-cm HDD WD 2.5" 5400rpm 500GB WD5000BEVT-22ZAT0 ML250 SATA LF F/W:01.01A01 ACER P/N 33.SA107.002 42.SA107.003 KH.16001.042 KH.16004.006 KH.16007.025 KH.16007.026 KH.16008.022...
- Page 168 CATEGORY KEYBOARD PARTNAME Keyboard ACER NT1T JM11 86KS Black Arabic Texture Keyboard ACER NT1T JM11 87KS Black FR/Arabic Texture Keyboard ACER NT1T JM11 87KS Black Brazilian Portuguese Texture Keyboard ACER NT1T JM11 87KS Black Belgium Texture Keyboard ACER NT1T JM11 87KS Black CZ/SK Texture...
- Page 169 M470T5663EH3-CE6 LF 128*8 0.055um Memory HYNIX SO-DIMM DDRII 667 2GB HYMP125S64CP8-Y5 LF THERMAL MODULE UMA SPEAKER SET LCD BEZEL SCREW RUBBER LCD BEZEL RUBBER RUBBER FOOT - FRONT (LONG) RUBBER FOOT - REAR ACER P/N LK.11605.001 LK.1160D.001 LK.11606.001 LK.11608.001 LK.11605.003 KN.1GB03.026 KN.1GB0B.016 KN.1GB0B.027 KN.1GB0G.012...
-
Page 170: Screw List
Screw List PARTNAME SCREW M2*3.0 I (BNI,NYLOK)IRON SCREW M2.0X2.5-I(BNI)(NYLOK) IRON SCREW M2*5-I(BZN)(NYLOK) SCREW M2-0.4*2-I(BNI)(NYLOK)(7,0.6)IRON SCREW M2.0*3-I(NI)(NYLOK)IRON SCREW M3.0*3.5-I(NI)STEEL ACER P/N 86.SA107.001 86.SA107.002 86.TG607.004 86.W4107.002 86.WF807.001 86.SA107.003 Chapter 6... -
Page 171: Model Definition And Configuration
Eastern 722G25n Europe AS1410- EMEA Czech 722G25n AS1410- EMEA Sweden 722G25n Appendix A Acer Part No LX.SA90X.048 AS1410-722G25n EM VHP32ATTH1 MC UMACbb 1*2G/250/BT/6L2.2/5R/ CB_bgn_0.3D_GEb_TH21 LX.SA90X.047 AS1410-721G16n EM VHP32ATTH1 MC UMACbb 1*1G/160/BT/6L2.2/5R/ CB_bgn_0.3D_GEb_TH21 LX.SA90X.046 AS1410-721G25n EM VHP32ATTH1 MC UMACbb 1*1G/250/BT/6L2.2/5R/ CB_bgn_0.3D_GEb_TH21 LX.SA90Y.006... - Page 172 Africa AS1410- EMEA Cyprus 722G25n AS1410- EMEA Algeria 722G25n AS1410- EMEA Portugal 722G25n Acer Part No LX.SA90X.025 AS1410-722G25n VHP32ATAT1 MC UMACbb 1*2G/250/6L2.2/5R/CB_bgn_0.3D_GEb_DE11 LX.SA90X.035 AS1410-722G25i VHP32ATRU1 MC UMACbb 1*2G/250/6L2.2/5R/CB_bg_0.3D_GEb_RU11 LX.SA90X.034 AS1410-722G25n VHP32ATNO3 MC UMACbb 1*2G/250/6L2.2/5R/ CB_bgn_0.3D_GEb_ENS4 LX.SA90X.033 AS1410-722G25n VHP32ATNO1 MC UMACbb 1*2G/250/6L2.2/5R/ CB_bgn_0.3D_GEb_NO12...
- Page 173 AS1410- EMEA Switzerland 722G25n AS1410- EMEA Italy 722G25n AS1410- EMEA Greece 722G25n Appendix A Acer Part No LX.SA90X.020 AS1410-722G25n VHP32ATFI2 MC UMACbb 1*2G/250/6L2.2/5R/CB_bgn_0.3D_GEb_FI11 LX.SA90X.021 AS1410-722G25n VHP32ATEU3 MC UMACbb 1*2G/250/6L2.2/5R/ CB_bgn_0.3D_GEb_RU23 LX.SA90X.022 AS1410-722G25n VHP32ATEU7 MC UMACbb 1*2G/250/6L2.2/5R/ CB_bgn_0.3D_GEb_ENR2 LX.SA90X.003 AS1410-722G25n VHP32ATPL1 MC UMACbb 1*2G/250/6L2.2/5R/CB_bgn_0.3D_GEb_PL11...
- Page 174 EMEA South 722G25n Africa AS1410- EMEA South 722G25n Africa AS1410- EMEA Portugal 722G25n Acer Part No LX.SA90X.009 AS1410-722G25n VHP32ATIL1 MC UMACbb 1*2G/250/6L2.2/5R/CB_bgn_0.3D_GEb_HE12 LX.SA90Y.001 AS1410-722G16n VHB32ATTW1 MC UMACbb 1*2G/160/BT/6L2.2/5R/ CB_bgn_0.3D_BAG_GEb_TC11 LX.SA90Y.002 AS1410-722G25n VHB32ATTW1 MC UMACbb 1*2G/250/BT/6L2.2/5R/ CB_bgn_0.3D_BAG_GEb_TC11 S2.SA90Y.001 AS1410-721G16i VHB32AWW1 MC UMACbb 1*1G/160/BT/6L/5R/CB_bg_0.3D_GEb_ENX1...
- Page 175 Middle East 722G25n AS1410- EMEA Middle East 722G25n AS1410- EMEA Middle East 722G25n Appendix A Acer Part No LX.SA70X.038 AS1410-722G25n VHP32ATBE1 MC UMACkk 1*2G/250/6L2.2/5R/CB_bgn_0.3D_GEk_NL13 LX.SA70X.032 AS1410-722G25n VHP32ATAT1 MC UMACkk 1*2G/250/6L2.2/5R/CB_bgn_0.3D_GEk_DE11 LX.SA70X.033 AS1410-722G25i VHP32ATRU1 MC UMACkk 1*2G/250/6L2.2/5R/CB_bg_0.3D_GEk_RU11 LX.SA70X.034 AS1410-722G25n VHP32ATNO3 MC UMACkk 1*2G/250/6L2.2/5R/...
- Page 176 EMEA Eastern 722G25n Europe AS1410- EMEA Czech 722G25n AS1410- EMEA Hungary 722G25n Acer Part No LX.SA70X.023 AS1410-722G25n EM VHP32ATDZ1 MC UMACkk 1*2G/250/6L2.2/5R/ CB_bgn_0.3D_GEk_ES81 LX.SA70X.022 AS1410-722G25n VHP32ATIT1 MC UMACkk 1*2G/250/6L2.2/5R/CB_bgn_0.3D_GEk_IT12 LX.SA70X.021 AS1410-722G25n VHP32ATIL1 MC UMACkk 1*2G/250/6L2.2/5R/CB_bgn_0.3D_GEk_HE12 LX.SA70X.020 AS1410-722G25n VHP32ATGR1 MC UMACkk 1*2G/250/6L2.2/5R/CB_bgn_0.3D_GEk_EL32...
- Page 177 AS1410- EMEA Austria 722G25n AS1410- EMEA Czech 722G25n AS1410- EMEA Eastern 722G25n Europe Appendix A Acer Part No LX.SA70Y.004 AS1410-722G25n VHB32ATTW1 MC UMACkk 1*2G/250/BT/6L2.2/5R/ CB_bgn_0.3D_BAG_GEk_TC21 LX.SA70Y.005 AS1410-722G25n VHB32ATTW1 MC UMACkk 1*2G/250/BT/6L2.2/5R/ CB_bgn_0.3D_BAG_GEk_TC11 LX.SA70Y.002 AS1410-722G16n VHB32ATTW1 MC UMACkk 1*2G/160/BT/6L2.2/5R/ CB_bgn_0.3D_BAG_GEk_TC21 LX.SA70Y.003 AS1410-722G25i VHB32ATUS1 MC UMACkk 2*1G/250/6L/5R/CB_bg_0.3D_GEk_EN32...
- Page 178 Africa AS1410- EMEA France 722G25n AS1410- EMEA Germany 722G25n AS1410- EMEA Belgium 722G25n Acer Part No LX.SAB0X.04 AS1410-722G25n VHP32ATSE1 MC UMACrr 1*2G/250/6L2.2/5R/CB_bgn_0.3D_GEk_FI13 LX.SAB0X.04 AS1410-722G25i VHP32ATRU1 MC UMACrr 1*2G/250/6L2.2/5R/CB_bg_0.3D_GEk_RU11 LX.SAB0X.03 AS1410-722G25n VHP32ATEU7 MC UMACrr 1*2G/250/6L2.2/5R/ CB_bgn_0.3D_GEk_ENR2 LX.SAB0X.03 AS1410-722G25n VHP32ATEU5 MC UMACrr 1*2G/250/6L2.2/5R/CB_bgn_0.3D_GEk_PL13...
- Page 179 722G25n AS1410- EMEA Middle East 722G25n AS1410- GCTWN 722G16n AS1410- GCTWN 722G25n Appendix A Acer Part No LX.SAB0X.01 AS1410-722G25n VHP32ATIL1 MC UMACrr 1*2G/250/6L2.2/5R/CB_bgn_0.3D_GEk_HE12 LX.SAB0X.01 AS1410-722G25n EM VHP32ATME6 MC UMACrr 1*2G/250/6L2.2/5R/ CB_bgn_0.3D_GEk_EN15 LX.SAB0X.01 AS1410-722G25n EM VHP32ATME2 MC UMACrr 1*2G/250/6L2.2/5R/ CB_bgn_0.3D_GEk_EN15 LX.SAB0X.01 AS1410-722G25n EM VHP32ATME9 MC UMACrr 1*2G/250/6L2.2/5R/...
- Page 180 413G32n AS1810T EMEA Portugal 413G32n AS1810T EMEA Middle East 413G32n AS1810T EMEA Eastern Europe 413G32n Acer Part No LX.PJ30X.040 AS1810TZ-413G32n VHP32ATCH1 MC UMACbb 2G+1G/320/6L2.8/5R/ CB_bgn_0.3D_GEb_IT42 LX.PJ30X.037 AS1810TZ-413G32n VHP32ATDE1 MC UMACbb 2G+1G/320/6L2.8/5R/ CB_bgn_0.3D_GEb_DE13 LX.PJ30X.033 AS1810TZ-413G32i VHP32ATRU1 MC UMACbb 2G+1G/320/6L2.8/5R/ CB_bg_0.3D_GEb_RU11 LX.PJ30X.031 AS1810TZ-413G32n EM VHP32ATME9 MC UMACbb 2G+1G/320/6L2.8/5R/...
- Page 181 EMEA Middle East 413G32n AS1810T EMEA Middle East 413G32n AS1810T EMEA Denmark 413G32n Appendix A Acer Part No LX.PJ30X.006 AS1810TZ-413G32n VHP32ATEU5 MC UMACbb 2G+1G/320/6L2.8/5R/ CB_bgn_0.3D_GEb_RO12 LX.PJ30X.008 AS1810TZ-413G32n EM VHP32ATTR1 MC UMACbb 2G+1G/320/6L2.8/5R/ CB_bgn_0.3D_GEb_TR33 LX.PJ30X.010 AS1810TZ-413G32n VHP32ATEU3 MC UMACbb 2G+1G/320/6L2.8/5R/ CB_bgn_0.3D_GEb_RU23 LX.PJ30X.011...
- Page 182 AS1810T Thailand 412G32n AS1810T CHINA China 411G25n AS1810T CHINA Hong Kong 411G25n AS1810T Thailand 412G32n Acer Part No LX.PJ30X.036 AS1810TZ-413G32n VHP32ATBE1 MC UMACbb 2G+1G/320/6L2.8/5R/ CB_bgn_0.3D_GEb_NL13 LX.PJ30X.038 AS1810TZ-413G32n VHP32ATFR1 MC UMACbb 2G+1G/320/6L2.8/5R/ CB_bgn_0.3D_GEb_FR23 LX.PJ30X.039 AS1810TZ-413G32n VHP32ATGB1 MC UMACbb 2G+1G/320/6L2.8/5R/ CB_bgn_0.3D_GEb_EN14 LX.PJ30X.042 AS1810TZ-413G32n VHP32ATGR1 MC UMACbb 2G+1G/320/6L2.8/5R/...
- Page 183 EMEA Ukraine 413G32n AS1810T EMEA Austria 413G32n AS1810T EMEA Finland 413G32n Appendix A Acer Part No LX.PJ50X.049 AS1810TZ-412G32n EM VHP32ATTH1 MC UMACkk 1*2G/320/BT/6L2.8/5R/ CB_bgn_0.3D_ACER 11inch Netbook Bag Black_GEk_TH21 LX.PJ50X.028 AS1810TZ-413G32n VHP32ATFR1 MC UMACkk 2G+1G/320/6L2.8/5R/ CB_bgn_0.3D_GEk_FR23 LX.PJ50X.029 AS1810TZ-413G32n VHP32ATDE1 MC UMACkk 2G+1G/320/6L2.8/5R/ CB_bgn_0.3D_GEk_DE13...
- Page 184 413G32n AS1810T EMEA Greece 413G32n AS1810T EMEA Spain 413G32n AS1810T EMEA Portugal 413G32n Acer Part No LX.PJ50X.026 AS1810TZ-413G32n EM VHP32ATME4 MC UMACkk 2G+1G/320/6L2.8/5R/ CB_bgn_0.3D_GEk_EN11 LX.PJ50X.025 AS1810TZ-413G32n EM VHP32ATZA1 MC UMACkk 2G+1G/320/6L2.8/5R/ CB_bgn_0.3D_GEk_FR23 LX.PJ50X.044 AS1810TZ-413G32n EM VHP32ATCS1 MC UMACkk 2G+1G/320/6L2.8/5R/ CB_bgn_0.3D_GEk_SL11 LX.PJ50X.007...
- Page 185 China 412G25n AS1810T CHINA Hong Kong 412G25n AS1810T Thailand 412G32n AS1810T Thailand 412G32n Appendix A Acer Part No LX.PJ50X.015 AS1810TZ-413G32n VHP32ATEU5 MC UMACkk 2G+1G/320/6L2.8/5R/ CB_bgn_0.3D_GEk_PL13 LX.PJ50X.014 AS1810TZ-413G32n EM VHP32ATTR1 MC UMACkk 2G+1G/320/6L2.8/5R/ CB_bgn_0.3D_GEk_TR33 LX.PJ50X.013 AS1810TZ-413G32n VHP32ATEU4 MC UMACkk 2G+1G/320/6L2.8/5R/ CB_bgn_0.3D_GEk_SV22 LX.PJ50X.012...
- Page 186 AS1810T EMEA Middle East 413G32n AS1810T EMEA Middle East 413G32n AS1810T EMEA Middle East 413G32n Acer Part No LX.PJ40X.027 AS1810TZ-413G32n EM VHP32ATZA4 MC UMACrr 2G+1G/320/6L2.8/5R/ CB_bgn_0.3D_GEk_ENI1 LX.PJ40X.012 AS1810TZ-413G32n VHP32ATNO1 MC UMACrr 2G+1G/320/6L2.8/5R/ CB_bgn_0.3D_GEk_NO12 LX.PJ40X.011 AS1810TZ-413G32n VHP32ATLV1 MC UMACrr 2G+1G/320/6L2.8/5R/ CB_bgn_0.3D_GEk_RU21 LX.PJ40X.010...
- Page 187 413G32n AS1810T EMEA Luxembour 413G32n AS1810T EMEA Sweden 413G32n AS1810T EMEA Poland 413G32n Appendix A Acer Part No LX.PJ40X.013 AS1810TZ-413G32n VHP32ATDK1 MC UMACrr 2G+1G/320/6L2.8/5R/ CB_bgn_0.3D_GEk_NO13 LX.PJ40X.048 AS1810TZ-413G32i VHP32ATRU1 MC UMACrr 2G+1G/320/6L2.8/5R/ CB_bg_0.3D_GEk_RU11 LX.PJ40X.003 AS1810TZ-413G32n VHP32ATIL1 MC UMACrr 2G+1G/320/6L2.8/5R/ CB_bgn_0.3D_GEk_HE12 LX.PJ40X.047 AS1810TZ-413G32n VHP32ATUK1 MC UMACrr 2G+1G/320/6L2.8/5R/...
- Page 188 412G32n AS1810T CHINA Hong Kong 412G32n AS1810T Philippines 411G25n AS1810T Philippines 412G25n AS1810T GCTWN 352G25n Acer Part No LX.PJ40X.030 AS1810TZ-413G32n VHP32ATEU7 MC UMACrr 2G+1G/320/6L2.8/5R/ CB_bgn_0.3D_GEk_SL11 LX.PJ40X.034 AS1810TZ-413G32n VHP32ATCH1 MC UMACrr 2G+1G/320/6L2.8/5R/ CB_bgn_0.3D_GEk_IT42 LX.PJ40X.043 AS1810TZ-413G32n VHP32ATIT1 MC UMACrr 2G+1G/320/6L2.8/5R/ CB_bgn_0.3D_GEk_IT12 LX.PJ40X.045 AS1810TZ-413G32n VHP32ATGR1 MC UMACrr 2G+1G/320/6L2.8/5R/...
- Page 189 AS1810T Australia/ 354G25n Zealand AS1810T Australia/ 354G32n Zealand AS1810T Australia/ 352G25n Zealand Appendix A Acer Part No LX.SA10X.017 AS1810T-352G25n EM VHP32ATPH1 MC UMACbb 1*2G/250/BT/6L2.8/5R/ CB_n2_0.3D_GEb_EN14 LX.SA10X.016 AS1810T-351G25n VHP32ATCN1 MC UMACbb 1*1G/250/BT/6L2.8/5R/ CB_n2_0.3D_GEb_SC11 LX.SA10X.015 AS1810T-351G25n VHP32ATHK2 MC UMACbb 1*1G/250/BT/6L2.8/5R/ CB_n2_0.3D_GEb_ZH31 LX.SA10X.014 AS1810T-354G32n EM VHP32ATTH1 MC UMACbb 2*2G/320/BT/6L2.8/5R/...
- Page 190 353G25n AS1810T EMEA Finland 353G25n AS1810T EMEA Middle East 353G25n AS1810T EMEA South Africa 353G25n Acer Part No LX.SA20X.060 AS1810T-353G25n VHP32ATPT1 MC UMACkk 2G+1G/250/6L2.8/5R/ CB_n2_0.3D_GEk_PT12 LX.SA20X.059 AS1810T-353G25n VHP32ATES1 MC UMACkk 2G+1G/250/6L2.8/5R/ CB_n2_0.3D_GEk_ES22 LX.SA20X.058 AS1810T-353G25n VHP32ATGR1 MC UMACkk 2G+1G/250/6L2.8/5R/ CB_n2_0.3D_GEk_EL32 LX.SA20X.057 AS1810T-353G25n VHP32ATIT1 MC UMACkk 2G+1G/250/6L2.8/5R/CB_n2_0.3D_GEk_IT12...
- Page 191 Middle East 353G25n AS1810T EMEA Middle East 353G25n AS1810T EMEA Middle East 353G25n Appendix A Acer Part No LX.SA20X.041 AS1810T-353G25n EM VHP32ATZA2 MC UMACkk 2G+1G/250/6L2.8/5R/ CB_n2_0.3D_GEk_EN16 LX.SA20X.042 AS1810T-353G25n EM VHP32ATME2 MC UMACkk 2G+1G/250/6L2.8/5R/ CB_n2_0.3D_GEk_AR13 LX.SA20X.025 AS1810T-353G25n EM VHP32ATTR1 MC UMACkk 2G+1G/250/6L2.8/5R/ CB_n2_0.3D_GEk_TR33...
- Page 192 352G25n AS1810T Australia/ 354G25n Zealand AS1810T Thailand 354G32n AS1810T Thailand 354G32n AS1810T Indonesia 352G25n Acer Part No LX.SA20X.047 AS1810T-353G25n EM VHP32ATME9 MC UMACkk 2G+1G/250/6L2.8/5R/ CB_n2_0.3D_GEk_FR22 LX.SA20X.048 AS1810T-353G25n VHP32ATDK1 MC UMACkk 2G+1G/250/6L2.8/5R/ CB_n2_0.3D_GEk_NO13 LX.SA20X.049 AS1810T-353G25i VHP32ATRU1 MC UMACkk 2G+1G/250/6L2.8/5R/ CB_abg_0.3D_GEk_RU11 LX.SA20X.050 AS1810T-353G25n VHP32ATNO1 MC UMACkk 2G+1G/250/6L2.8/5R/...
- Page 193 CHINA Hong Kong 352G32n AS1810T Thailand 354G32n AS1810T Thailand 354G32n AS1810T Indonesia 352G25n Appendix A Acer Part No LX.SA20X.009 AS1810T-352G25n EM VHP32ATVN1 MC UMACkk 1*2G/250/BT/6L2.8/5R/ CB_n2_0.3D_GEk_EN13 LX.SA20X.008 AS1810T-352G25n VHP32ATSG1 MC UMACkk 1*2G/250/BT/6L2.8/5R/ CB_n2_0.3D_GEk_EN12 LX.SA20X.007 AS1810T-352G32n VHP32ATSG1 MC UMACkk 1*2G/320/BT/6L2.8/5R/ CB_n2_0.3D_GEk_EN12 LX.SA20X.005...
- Page 194 CM723B 722G25n AS1410- CM723B 722G25n AS1410- CM723B 722G25n AS1410- CM723B 722G25n AS1410- CM723B 722G25n Acer Part No LX.SA30X.005 AS1810T-352G25n VHP32AJP1 MC UMACrr 1*2G/250/BT/6L2.8/5R/ CB_n2_0.3D_GEk_JA11_RR22 LX.SA30X.004 AS1810T-352G25n VHP32APJP1 MC UMACrr 1*2G/250/BT/6L2.8/5R/ CB_n2_0.3D_GEk_JA11_RR22F LX.SA30X.003 AS1810T-353G32n VHP32ATUS1 MC UMACrr 2G+1G/320/6L2.8/5R/ CB_n2_0.3D_GEk_EN32 LX.SA30X.002 AS1810T-352G25n VHP32ATIN1 MC UMACrr 1*2G/250/BT/6L2.8/5R/...
- Page 195 Model AS1410- CM723B 722G25i AS1410- CM723B 722G25n AS1410- CM723B 722G25n AS1410- CM723B 722G25n AS1410- CM723B 722G25n AS1410- CM723B 722G25n AS1410- CM723B 722G25n AS1410- CM723B 722G25n AS1410- CM723B 722G25n AS1410- CM723B 722G25n AS1410- CM723B 722G25n AS1410- CM723B 722G25n AS1410- CM723B 722G25n AS1410- CM723B 722G25n...
- Page 196 Model AS1410- CM723B 722G25n AS1410- CM723B 722G25n AS1410- CM723B 722G25n AS1410- CM723B 722G25n AS1410- CM723B 722G25n AS1410- CM723B 722G25n AS1410- CM723B 722G25n AS1410- CM723B 722G25n AS1410- CM723B 722G25n AS1410- CM723B 722G25n AS1410- CM723B 722G25n AS1410- CM723B 722G25n AS1410- CM723B 722G25n AS1410- CM723B 722G16n...
- Page 197 Model AS1410- CM723B 722G25n AS1410- CM723B 722G25n AS1410- CM723B 723G25n AS1410- CM723B 722G25n AS1410- CM723B 722G25n AS1410- CM723B 722G25n AS1410- CM723B 722G25n AS1410- CM723B 722G25n AS1410- CM723B 722G25i AS1410- CM723B 722G25n AS1410- CM723B 722G25n AS1410- CM723B 722G25n AS1410- CM723B 722G25n AS1410- CM723B 722G25n...
- Page 198 Model AS1410- CM723B 722G25n AS1410- CM723B 722G25n AS1410- CM723B 722G25n AS1410- CM723B 722G25n AS1410- CM723B 722G25n AS1410- CM723B 722G25n AS1410- CM723B 722G25n AS1410- CM723B 722G25n AS1410- CM723B 722G25n AS1410- CM723B 722G25n AS1410- CM723B 722G25n AS1410- CM723B 722G25n AS1410- CM723B 722G25n AS1410- CM723B 722G25n...
- Page 199 Model AS1410- CM723B 722G16n AS1410- CM723B 722G25i AS1410- CM723B 723G25n AS1410- CM723B 721G16n AS1410- CM723B 721G16n AS1410- CM723B 721G25n AS1410- CM723B 722G25n AS1410- CM723B 722G25n AS1410- CM723B 721G25n AS1410- CM723B 721G16n AS1410- CM723B 721G16n AS1410- CM723B 721G16n AS1410- CM723B 722G25n AS1410- CM723B 722G25n...
- Page 200 Model AS1410- CM723B 722G25n AS1410- CM723B 722G25n AS1410- CM723B 722G25n AS1410- CM723B 722G25n AS1410- CM723B 722G25n AS1410- CM723B 722G25n AS1410- CM723B 722G25n AS1410- CM723B 722G25n AS1410- CM723B 722G25n AS1410- CM723B 722G25n AS1410- CM723B 722G25n AS1410- CM723B 722G25n AS1410- CM723B 722G25n AS1410- CM723B 722G25n...
- Page 201 Model AS1410- CM723B 722G25n AS1410- CM723B 722G25n AS1410- CM723B 722G25n AS1410- CM723B 722G25n AS1410- CM723B 722G25n AS1410- CM723B 722G25n AS1410- CM723B 722G25n AS1410- CM723B 722G16n AS1410- CM723B 722G25n AS1810TZ PMDSU -413G32n 4100B AS1810TZ PMDSU -413G32n 4100B AS1810TZ PMDSU -413G32i 4100B AS1810TZ PMDSU -413G32n...
- Page 202 Model AS1810TZ PMDSU -413G32n 4100B AS1810TZ PMDSU -413G32n 4100B AS1810TZ PMDSU -413G32n 4100B AS1810TZ PMDSU -413G32n 4100B AS1810TZ PMDSU -413G32n 4100B AS1810TZ PMDSU -413G32n 4100B AS1810TZ PMDSU -413G32n 4100B AS1810TZ PMDSU -413G32n 4100B AS1810TZ PMDSU -413G32n 4100B AS1810TZ PMDSU -413G32n 4100B AS1810TZ PMDSU...
- Page 203 Model AS1810TZ PMDSU -413G32n 4100B AS1810TZ PMDSU -413G32n 4100B AS1810TZ PMDSU -413G32n 4100B AS1810TZ PMDSU -413G32n 4100B AS1810TZ PMDSU -413G32n 4100B AS1810TZ PMDSU -412G32n 4100B AS1810TZ PMDSU -412G32n 4100B AS1810TZ PMDSU -411G25n 4100B AS1810TZ PMDSU -411G25n 4100B AS1810TZ PMDSU -412G32n 4100B AS1810TZ PMDSU...
- Page 204 Model AS1810TZ PMDSU -413G32n 4100B AS1810TZ PMDSU -413G32n 4100B AS1810TZ PMDSU -413G32n 4100B AS1810TZ PMDSU -413G32n 4100B AS1810TZ PMDSU -413G32n 4100B AS1810TZ PMDSU -413G32n 4100B AS1810TZ PMDSU -413G32n 4100B AS1810TZ PMDSU -413G32n 4100B AS1810TZ PMDSU -413G32n 4100B AS1810TZ PMDSU -413G32n 4100B AS1810TZ PMDSU...
- Page 205 Model AS1810TZ PMDSU -413G32n 4100B AS1810TZ PMDSU -413G32n 4100B AS1810TZ PMDSU -413G32n 4100B AS1810TZ PMDSU -413G32n 4100B AS1810TZ PMDSU -413G32n 4100B AS1810TZ PMDSU -413G32n 4100B AS1810TZ PMDSU -413G32n 4100B AS1810TZ PMDSU -412G25n 4100B AS1810TZ PMDSU -412G25n 4100B AS1810TZ PMDSU -412G32n 4100B AS1810TZ PMDSU...
- Page 206 Model AS1810TZ PMDSU -413G32n 4100B AS1810TZ PMDSU -413G32n 4100B AS1810TZ PMDSU -413G32n 4100B AS1810TZ PMDSU -413G32n 4100B AS1810TZ PMDSU -413G32i 4100B AS1810TZ PMDSU -413G32n 4100B AS1810TZ PMDSU -413G32n 4100B AS1810TZ PMDSU -413G32n 4100B AS1810TZ PMDSU -413G32n 4100B AS1810TZ PMDSU -413G32n 4100B AS1810TZ PMDSU...
- Page 207 Model AS1810TZ PMDSU -413G32n 4100B AS1810TZ PMDSU -413G32n 4100B AS1810TZ PMDSU -413G32n 4100B AS1810TZ PMDSU -413G32n 4100B AS1810TZ PMDSU -413G32n 4100B AS1810TZ PMDSU -413G32n 4100B AS1810TZ PMDSU -413G32n 4100B AS1810TZ PMDSU -412G32n 4100B AS1810TZ PMDSU -412G32n 4100B AS1810TZ PMDSU -411G25n 4100B AS1810TZ PMDSU...
- Page 208 Model AS1810T- C2SSU3 352G32n 500B AS1810T- C2SSU3 354G25n 500B AS1810T- C2SSU3 354G32n 500B AS1810T- C2SSU3 352G25n 500B AS1810T- C2SSU3 353G25n 500B AS1810T- C2SSU3 353G25n 500B AS1810T- C2SSU3 353G25n 500B AS1810T- C2SSU3 353G25n 500B AS1810T- C2SSU3 353G25n 500B AS1810T- C2SSU3 353G25n 500B AS1810T- C2SSU3...
- Page 209 Model AS1810T- C2SSU3 353G25n 500B AS1810T- C2SSU3 353G25n 500B AS1810T- C2SSU3 353G25n 500B AS1810T- C2SSU3 353G25n 500B AS1810T- C2SSU3 353G25n 500B AS1810T- C2SSU3 353G25n 500B AS1810T- C2SSU3 353G25n 500B AS1810T- C2SSU3 353G25n 500B AS1810T- C2SSU3 353G25n 500B AS1810T- C2SSU3 353G25n 500B AS1810T- C2SSU3...
- Page 210 Model AS1810T- C2SSU3 352G25n 500B AS1810T- C2SSU3 354G25n 500B AS1810T- C2SSU3 354G32n 500B AS1810T- C2SSU3 354G32n 500B AS1810T- C2SSU3 352G25n 500B AS1810T- C2SSU3 352G25n 500B AS1810T- C2SSU3 352G25n 500B AS1810T- C2SSU3 352G32n 500B AS1810T- C2SSU3 352G25n 500B AS1810T- C2SSU3 352G25n 500B AS1810T- C2SSU3...
- Page 211 Model AS1810T- C2SSU3 352G25n 500B AS1810T- C2SSU3 352G32n 500B Extra Model Card Reader AS1410- McAfee 5 in 1-Build in 722G25n AS1410- McAfee 5 in 1-Build in 721G16n AS1410- McAfee 5 in 1-Build in 721G25n AS1410- McAfee 5 in 1-Build in 721G16n AS1410- McAfee...
- Page 212 Extra Model Card Reader AS1410- McAfee 5 in 1-Build in 722G25n AS1410- McAfee 5 in 1-Build in 722G25n AS1410- McAfee 5 in 1-Build in 722G25n AS1410- McAfee 5 in 1-Build in 722G25n AS1410- McAfee 5 in 1-Build in 722G25n AS1410- McAfee 5 in 1-Build in 722G25n...
- Page 213 Extra Model Card Reader AS1410- McAfee 5 in 1-Build in 722G25n AS1410- McAfee 5 in 1-Build in 722G25n AS1410- McAfee 5 in 1-Build in 722G25n AS1410- McAfee 5 in 1-Build in 722G25n AS1410- McAfee 5 in 1-Build in 722G25n AS1410- McAfee 5 in 1-Build in 722G25n...
- Page 214 Extra Model Card Reader AS1410- McAfee 5 in 1-Build in 722G25n AS1410- McAfee 5 in 1-Build in 722G25n AS1410- McAfee 5 in 1-Build in 722G25n AS1410- McAfee 5 in 1-Build in 722G25n AS1410- McAfee 5 in 1-Build in 722G25n AS1410- McAfee 5 in 1-Build in 722G25i...
- Page 215 Extra Model Card Reader AS1410- McAfee 5 in 1-Build in 722G25n AS1410- McAfee 5 in 1-Build in 722G25n AS1410- McAfee 5 in 1-Build in 722G25n AS1410- McAfee 5 in 1-Build in 722G25n AS1410- McAfee 5 in 1-Build in 722G25n AS1410- McAfee 5 in 1-Build in 722G25n...
- Page 216 Extra Model Card Reader AS1410- McAfee 5 in 1-Build in 722G25i AS1410- McAfee 5 in 1-Build in 723G25n AS1410- McAfee 5 in 1-Build in 721G16n AS1410- McAfee 5 in 1-Build in 721G16n AS1410- McAfee 5 in 1-Build in 721G25n AS1410- McAfee 5 in 1-Build in 722G25n...
- Page 217 Extra Model Card Reader AS1410- McAfee 5 in 1-Build in 722G25n AS1410- McAfee 5 in 1-Build in 722G25n AS1410- McAfee 5 in 1-Build in 722G25n AS1410- McAfee 5 in 1-Build in 722G25n AS1410- McAfee 5 in 1-Build in 722G25n AS1410- McAfee 5 in 1-Build in 722G25n...
- Page 218 Extra Model Card Reader AS1410- McAfee 5 in 1-Build in 722G25n AS1410- McAfee 5 in 1-Build in 722G25n AS1410- McAfee 5 in 1-Build in 722G25n AS1410- McAfee 5 in 1-Build in 722G25n AS1410- McAfee 5 in 1-Build in 722G25n AS1410- McAfee 5 in 1-Build in 722G25n...
- Page 219 Extra Model Card Reader AS1810TZ McAfee 5 in 1-Build in -413G32n AS1810TZ McAfee 5 in 1-Build in -413G32n AS1810TZ McAfee 5 in 1-Build in -413G32n AS1810TZ McAfee 5 in 1-Build in -413G32n AS1810TZ McAfee 5 in 1-Build in -413G32n AS1810TZ McAfee 5 in 1-Build in -413G32n...
- Page 220 Extra Model Card Reader AS1810TZ McAfee 5 in 1-Build in -413G32n AS1810TZ McAfee 5 in 1-Build in -413G32n AS1810TZ McAfee 5 in 1-Build in -413G32n AS1810TZ McAfee 5 in 1-Build in -413G32n AS1810TZ McAfee 5 in 1-Build in -413G32n AS1810TZ McAfee 5 in 1-Build in -413G32n...
- Page 221 Extra Model Card Reader AS1810TZ McAfee 5 in 1-Build in -413G32n AS1810TZ McAfee 5 in 1-Build in -413G32n AS1810TZ McAfee 5 in 1-Build in -413G32n AS1810TZ McAfee 5 in 1-Build in -413G32n AS1810TZ McAfee 5 in 1-Build in -413G32n AS1810TZ McAfee 5 in 1-Build in -413G32n...
- Page 222 Extra Model Card Reader AS1810TZ McAfee 5 in 1-Build in -413G32n AS1810TZ McAfee 5 in 1-Build in -413G32n AS1810TZ McAfee 5 in 1-Build in -413G32n AS1810TZ McAfee 5 in 1-Build in -413G32n AS1810TZ McAfee 5 in 1-Build in -413G32n AS1810TZ McAfee 5 in 1-Build in -413G32n...
- Page 223 Extra Model Card Reader AS1810TZ McAfee 5 in 1-Build in -413G32n AS1810TZ McAfee 5 in 1-Build in -413G32n AS1810TZ McAfee 5 in 1-Build in -413G32n AS1810TZ McAfee 5 in 1-Build in -413G32n AS1810TZ McAfee 5 in 1-Build in -413G32n AS1810TZ McAfee 5 in 1-Build in -413G32n...
- Page 224 Extra Model Card Reader AS1810TZ McAfee 5 in 1-Build in -413G32n AS1810TZ McAfee 5 in 1-Build in -413G32n AS1810TZ McAfee 5 in 1-Build in -413G32n AS1810TZ McAfee 5 in 1-Build in -413G32n AS1810TZ McAfee 5 in 1-Build in -413G32n AS1810TZ McAfee 5 in 1-Build in -413G32n...
- Page 225 Extra Model Card Reader AS1810T- McAfee 5 in 1-Build in 352G25n AS1810T- McAfee 5 in 1-Build in 352G25n AS1810T- McAfee 5 in 1-Build in 352G25n AS1810T- McAfee 5 in 1-Build in 352G32n AS1810T- McAfee 5 in 1-Build in 352G25n AS1810T- McAfee 5 in 1-Build in 352G25n...
- Page 226 Extra Model Card Reader AS1810T- McAfee 5 in 1-Build in 353G25i AS1810T- McAfee 5 in 1-Build in 353G25n AS1810T- McAfee 5 in 1-Build in 353G25n AS1810T- McAfee 5 in 1-Build in 353G25n AS1810T- McAfee 5 in 1-Build in 353G25n AS1810T- McAfee 5 in 1-Build in 353G25n...
- Page 227 Extra Model Card Reader AS1810T- McAfee 5 in 1-Build in 353G25i AS1810T- McAfee 5 in 1-Build in 353G25n AS1810T- McAfee 5 in 1-Build in 353G25n AS1810T- McAfee 5 in 1-Build in 353G25n AS1810T- McAfee 5 in 1-Build in 353G25n AS1810T- McAfee 5 in 1-Build in 353G25n...
- Page 228 Extra Model Card Reader AS1810T- McAfee 5 in 1-Build in 352G25n AS1810T- McAfee 5 in 1-Build in 352G32n AS1810T- McAfee 5 in 1-Build in 352G32n AS1810T- McAfee 5 in 1-Build in 352G32n AS1810T- McAfee 5 in 1-Build in 352G32n AS1810T- McAfee 5 in 1-Build in 354G32n...
-
Page 229: Aspire One 752
AO752-72Dr AO752-72Dw AO752-741b CHIN AO752-741k CHIN AO752-741rr EMEA AO752-742b AO752-742bb AO752-742bb EMEA AO752-742bb AO752-742r AO752-742rr EMEA Appendix A Country Acer Part No S2.SB80D.001 S2.SBE0D.001 S2.SBF0D.001 S2.SBG0D.001 S2.SBH0D.001 S2.SB70D.001 S2.SB90D.001 S2.SBA0D.001 China LU.SB801.001 China LU.SB701.001 Middle East LU.SB901.003 GCTWN LU.SB802.051 Australia/ LU.SB802.126... - Page 230 EMEA AO752-748rr EMEA AO752-748rr EMEA AO752-748rr EMEA AO752-748rr EMEA AO752-748ws EMEA AO752-748ws EMEA AO752-748ws EMEA AO752-74Cb EMEA Country Acer Part No Denmark LU.SB902.166 GCTWN LU.SB902.168 GCTWN LU.SBA02.047 Denmark LU.SBA02.169 Denmark LU.SBA02.170 Middle East LU.SB808.031 Russia LU.SB808.029 Russia LU.SB808.030 Middle East LU.SB908.020...
- Page 231 AO752-74Crr EMEA AO752-74Crr EMEA AO752-74Crr AO752-74Cw CHIN AO752-74Cw CHIN AO752-74Cw EMEA AO752-74Cw AO752-74Cw EMEA AO752-74Cws EMEA Appendix A Country Acer Part No India LU.SB80C.004 India LU.SB80C.005 China LU.SB70C.008 India LU.SB70C.009 India LU.SB70C.010 India LU.SB70C.017 China LU.SB90C.002 India LU.SB90C.003 Baltic LU.SB90C.004 Baltic LU.SB90C.005...
- Page 232 AO752-748rr Russia AO752-748rr Russia AO752-748ws Middle East AO752-748ws Russia AO752-748ws Russia AO752-74Cb Eastern Europe AO752-74Cbb India AO752-74Cbb India Country Acer Part No India LU.SBA0C.008 India LU.SBA0C.009 Country Acer Part No S2.SB80D.001 S2.SBE0D.001 S2.SBF0D.001 S2.SBG0D.001 S2.SBH0D.001 S2.SB70D.001 S2.SB90D.001 S2.SBA0D.001 LU.SB801.001 LU.SB701.001 LU.SB901.003...
- Page 233 AO752-742rr Austria AO752-742rr Denmark AO752-742rr GCTWN AO752-742w GCTWN AO752-742ws Denmark AO752-742ws Denmark AO752-748bb Middle East AO752-748bb Russia Appendix A Country Acer Part No LU.SB70C.008 LU.SB70C.009 LU.SB70C.010 LU.SB70C.017 LU.SB90C.002 LU.SB90C.003 LU.SB90C.004 LU.SB90C.005 LU.SB90C.006 LU.SBA0C.003 LU.SBA0C.004 LU.SBA0C.002 LU.SBA0C.006 LU.SBA0C.005 LU.SBA0C.007 LU.SBA0C.008 LU.SBA0C.009...
- Page 234 Model AO752-72Db AO752-72DGb AO752-72DGk AO752-72DGr AO752-72DGw AO752-72Dk AO752-72Dr AO752-72Dw AO752-741b China AO752-741k China AO752-741rr Middle East AO752-742b GCTWN Country Acer Part No LU.SB808.030 LU.SB908.020 LU.SB908.022 LU.SB908.018 LU.SB908.019 LU.SB908.021 LU.SBA08.007 LU.SBA08.005 LU.SBA08.006 LU.SB80C.003 LU.SB80C.004 LU.SB80C.005 LU.SB70C.008 LU.SB70C.009 LU.SB70C.010 LU.SB70C.017 LU.SB90C.002 LU.SB90C.003 LU.SB90C.004...
- Page 235 AO752-74Cw China AO752-74Cw China AO752-74Cw Eastern Europe AO752-74Cw India AO752-74Cw Russia AO752-74Cws Denmark AO752-74Cws India AO752-74Cws India Appendix A Country Acer Part No LU.SB802.126 LU.SB802.125 LU.SB802.127 LU.SB902.047 LU.SB902.167 LU.SB902.166 LU.SB902.168 LU.SBA02.047 LU.SBA02.169 LU.SBA02.170 LU.SB808.031 LU.SB808.029 LU.SB808.030 LU.SB908.020 LU.SB908.022 LU.SB908.018 LU.SB908.019 LU.SB908.021...
- Page 236 Eastern Europe AO752-74Cbb India AO752-74Cbb India AO752-74Ck China AO752-74Ck India AO752-74Ckk India AO752-74Ckk India AO752-74Cr China AO752-74Cr India Country Acer Part No S2.SB80D.001 S2.SBE0D.001 S2.SBF0D.001 S2.SBG0D.001 S2.SBH0D.001 S2.SB70D.001 S2.SB90D.001 S2.SBA0D.001 LU.SB801.001 LU.SB701.001 LU.SB901.003 LU.SB802.051 LU.SB802.126 LU.SB802.125 LU.SB802.127 LU.SB902.047 LU.SB902.167 LU.SB902.166 LU.SB902.168...
- Page 237 AO752-748bb Russia AO752-748bb Russia AO752-748rr Middle East AO752-748rr Middle East AO752-748rr Russia AO752-748rr Russia AO752-748rr Russia Appendix A Country Acer Part No LU.SB90C.004 LU.SB90C.005 LU.SB90C.006 LU.SBA0C.003 LU.SBA0C.004 LU.SBA0C.002 LU.SBA0C.006 LU.SBA0C.005 LU.SBA0C.007 LU.SBA0C.008 LU.SBA0C.009 Country Acer Part No S2.SB80D.001 S2.SBE0D.001 S2.SBF0D.001 S2.SBG0D.001...
- Page 238 China AO752-741rr Middle East AO752-742b GCTWN AO752-742bb Australia/New Zealand AO752-742bb Denmark AO752-742bb GCTWN AO752-742r GCTWN AO752-742rr Austria AO752-742rr Denmark Country Acer Part No LU.SBA08.007 LU.SBA08.005 LU.SBA08.006 LU.SB80C.003 LU.SB80C.004 LU.SB80C.005 LU.SB70C.008 LU.SB70C.009 LU.SB70C.010 LU.SB70C.017 LU.SB90C.002 LU.SB90C.003 LU.SB90C.004 LU.SB90C.005 LU.SB90C.006 LU.SBA0C.003 LU.SBA0C.004 LU.SBA0C.002...
- Page 239 AO752-74Cw China AO752-74Cw China AO752-74Cw Eastern Europe AO752-74Cw India AO752-74Cw Russia AO752-74Cws Denmark AO752-74Cws India AO752-74Cws India Appendix A Country Acer Part No LU.SB902.168 LU.SBA02.047 LU.SBA02.169 LU.SBA02.170 LU.SB808.031 LU.SB808.029 LU.SB808.030 LU.SB908.020 LU.SB908.022 LU.SB908.018 LU.SB908.019 LU.SB908.021 LU.SBA08.007 LU.SBA08.005 LU.SBA08.006 LU.SB80C.003 LU.SB80C.004 LU.SB80C.005...
- Page 240 Appendix A...
-
Page 241: Test Compatible Components
Appendix B Test Compatible Components This computer’s compatibility is tested and verified by Acer’s internal testing department. All of its system ® ® functions are tested under Windows XP Home, Windows XP Pro environment. Refer to the following lists for components, adapter cards, and peripherals which have passed these tests. -
Page 242: Aspire 1810T/1410
Qualcomm Gobi2000 Black IMR Blue IMR Red IMR ACER Accessory ACER 11" Netbook Bag Black Adapter DELTA 30W 19V 1.7x5.5x11 Black ADP-30JH BA Adapter DELTA 65W_BR 19V 1.7x5.5x11 Yellow ADP- 65JH DB A, LV5 LED LF (Brazil) Adapter HIPRO 30W 19V 1.7x5.5x11 Black HP-A0301R3 B1LF LF Adapter LITE-ON 30W 19V 1.7x5.5x11 Black PA-1300-... - Page 243 BRAND Camera Chicony 0.3M LDV Liteon 0.3M LDV Suyin 0.3M LDV Card Reader 5 in 1-Build in INTEL C2SSU3500B INTEL CM723B INTEL CM723B_BR INTEL PMDSU4100B HGST N160GB5.4KS HGST N160GB5.4KS HGST N250GB5.4KS HGST N250GB5.4KS HGST N250GB5.4KS_BR HGST N320GB5.4KS SAMSUNG N250GB5.4KS_BR SAMSUNG N250GB5.4KS_BR SEAGATE N160GB5.4KS...
- Page 244 HDD WD 2.5" 5400rpm 250GB WD2500BEVT-22ZCT0 ML160 SATA LF F/W:11.01A11 (Brazil) HDD WD 2.5" 5400rpm 320GB WD3200BEVT-22ZCT0 ML160 SATA LF F/W:11.01A11 Keyboard ACER NT-1T JV11 Internal 11 Standard Black NONE Texture Atheros AR8131L LED LCD AUO 11.6" WXGA Glare B116XW02 V0 LF 200nit 8ms 500:1 LED LCD AUO 11.6"...
- Page 245 BRAND SAMSUNG SO2GBII6 SAMSUNG SO2GBII6 SAMSUNG SO2GBII8 SAMSUNG SO2GBII8_BR NB Chipset INTEL GS45 SB Chipset INTEL ICH9M-SFFE Software McAfee VGA Chips None WiFi Antenna PIFA WirelessLAN Foxconn 3rd WiFi 1x2 BGN INTEL INT1000H INTEL SP1x2HABG INTEL SP1x2HMW Appendix B Type Memory SAMSUNG SO-DIMM DDRII 667 2GB M470T5663QZ3-CE6 LF Memory SAMSUNG SO-DIMM DDRII 667 2GB...
-
Page 246: Aspire One 752
Aspire One 752 Vendor 60016072 Gobi1000-AT&T QUALCOMM 60016072 Gobi2000 QUALCOMM 60016072 UNDP-1 QUALCOMM Adapter 10001023 LITE-ON 65W_BR 10001023 LITE-ON 65W_BR 60002015 HIPRO 60002015 HIPRO 60003544 LITE-ON Audio Codec 10004786 ALC269X REALTEK Battery 60001535 3CELL2.2 PANASONIC 60001535 6CELL2.2 PANASONIC 60001535 6CELL2.2 PANASONIC 60001535 6CELL2.9... - Page 247 Vendor 60002162 SIMPLO 3CELL2.2 60002162 SIMPLO 3CELL2.2 60002162 SIMPLO 6CELL2.2 10001067 INTEL C2DSU7300B 10001067 INTEL C2SSU3500B 10001067 INTEL CM723B 10001067 INTEL CM723B_BR 10001067 INTEL CM743B 10001067 INTEL CMSU2300B 10001067 INTEL CMSU2300B_BR 10001067 INTEL PMDSU4100B 60001922 TOSHIBA N250GB5.4KS DIGI 60001994 WD N160GB5.4KS 60001994 WD N250GB5.4KS...
- Page 248 Vendor 60002005 HGST N500GB5.4KS 60002036 N160GB5.4KS SEAGATE 60002036 N250GB5.4KS_BR SEAGATE 60002215 N250GB5.4KS_BR SAMSUNG 10001038 CMO NLED11.6WXGAG 10001038 CMO NLED11.6WXGAG 60002215 NLED11.6WXGAG SAMSUNG 60003089 LG NLED11.6WXGAG 60003316 AUO NLED11.6WSVGAG 60003316 AUO NLED11.6WXGAG 60003316 AUO NLED11.6WXGAG_ 60001928 SO1GBII8 TRANSCEND 60001928 SO2GBII8 TRANSCEND 60001993 NANYA SO1GBII6 60002000...
- Page 249 Vendor 60004668 ELPIDA SO1GBII8 60004668 ELPIDA SO2GBII8 F0000434 SMART SO1GBII8_BR F0000434 SMART SO2GBII8_BR VGA Chip 10001067 INTEL VRAM 9999995 ONE TIME VENDER Wireless LAN 10001067 INTEL EP1x2HABG 10001067 INTEL INT1000H 10001067 INTEL INT1000H_BG 10001067 INTEL INT1000H_BR 10001067 INTEL SP1x2HABG 10001067 INTEL SP1x2HMW Appendix B Type...
- Page 250 Appendix B...
-
Page 251: Online Support Information
This section describes online technical support services available to help you repair your Acer Systems. If you are a distributor, dealer, ASP or TPM, please refer your technical queries to your local Acer branch office. Acer Branch Offices and Regional Business Units may access our website. However some information sources will require a user i.d. -
Page 253: Index
Antennas Removing 87 Battery Pack Removing 45 BIOS ROM type 19 vendor 19 Version 19 – BIOS Utility Advanced 28 Boot 31 Exit 32 Navigating 25 Power 31 Save and Exit 32 Security 28 System Security 32 brightness hotkeys 13 Button Board Removing 61 Camera Board... - Page 254 Removing 83 Main Unit Disassembly Flowchart 54 Mainboard Removing 71 media access on indicator 9 Memory Check Microphone Removing 83 Model Definition No Display Issue num lock on indicator 9 ODD Failure Online Support Information Panel left 5 PC Card Power On Failure Speaker Module Removing 68...
Need help?
Do you have a question about the ASPIRE ONE 1410 and is the answer not in the manual?
Questions and answers