Philips MC-500 User Manual
Philips mini hi-fi system user manual
Hide thumbs
Also See for MC-500:
- Service manual (63 pages) ,
- User manual (27 pages) ,
- Specifications (2 pages)
Table of Contents
Advertisement
Quick Links
500
500
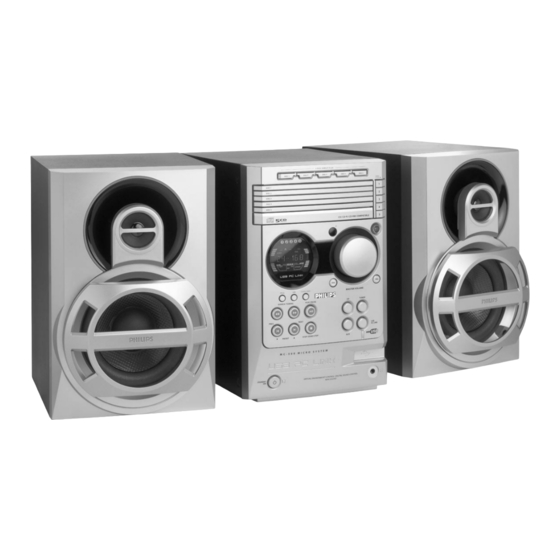
Mini Hi-Fi System
MC
MC
Need help? Call us!
Return
Philips representatives are ready to help you with
your Warranty
any questions about your new product. We can guide you
Registration Card
within 10 days
through Connections, First-time Setup, or any of the Features.
We want you to start enjoying your new product right away!
CALL US BEFORE YOU CONSIDER
RETURNING THE PRODUCT!
1-800-531-0039
or
Visit us on the web at www.philips.com
visit our website
www.audio.philips.com
to download latest UPDATES of USB PC Link Driver
MusicMatch Jukebox softwares and FAQs.
1
Advertisement
Table of Contents

Related Manuals for Philips MC-500


Summary of Contents for Philips MC-500
- Page 1 Mini Hi-Fi System Need help? Call us! Return Philips representatives are ready to help you with your Warranty any questions about your new product. We can guide you Registration Card within 10 days through Connections, First-time Setup, or any of the Features.
- Page 2 AVOID DIRECT EXPOSURE TO BEAM. PHILIPS Tested To Comply With FCC Standards FOR HOME OR OFFICE USE Philips Consumer Electronics North America P.O.Box 14810 Knoxville, TN 37914-1810 Phone no.: 1-800-531-0039 CAUTION Use of controls or adjustments or performance of procedures other...
- Page 3 5 D I S C D I R E C T P L AY DISC 1 DISC 2 DISC 3 DISC 1 DISC 2 DISC 3 DISC 4 DISC 5 1 2 3 4 5 PROG CLOCK SEARCH •TUNING PLAY•PAUSE PREV NEXT PRESET...
- Page 4 Return your Warranty Registration card today to ensure you receive all the benefits you’re entitled to. • Once your Philips purchase is registered, you’ r e eligible to receive all the privileges of owning a Philips product. Warranty Verification Registering your product...
- Page 5 As a member of the Philips “family,” you’re entitled to protection by one of the most comprehensive warranties and outstanding service networks in the industry.
-
Page 6: Important Safety Instructions
IMPORTANT SAFETY INSTRUCTIONS Read these instructions. Keep these instructions. Heed all warnings. Follow all instructions. Do not use this apparatus near water. Clean only with dry cloth. Do not block any ventilation openings. Install in accordance with the manufacturer´s instructions. Do not install near any heat sources such as radiators, heat registers, stoves, or other apparatus (including amplifiers) that... - Page 7 Index English ------------------------------------------------ 8 Français -------------------------------------------- 30 Español --------------------------------------------- 53...
-
Page 8: Table Of Contents
Contents General Information Supplied accessories ... 9 Environmental information ... 9 Care and safety information ... 9 Functional Overview Main unit and remote control ... 10–11 Control buttons available on the remote only ... Connections Step 1: Connecting FM/AM antennas ... 12 Step 2: Connecting the speakers ... -
Page 9: General Information
Refer to the type plate on the rear or bottom of the system for identification and supply ratings. Supplied accessories (page 3 - P1) – USB PC LINK software installer CD-ROM – USB cable – Remote control and two AA batteries –... -
Page 10: Functional Overview
Functional Overview 5 D I S C D I R E C T P L AY DISC 1 DISC 2 DISC 3 DISC 1 DISC 2 DISC 3 DISC 4 DISC 5 1 2 3 4 5 PROG CLOCK•TIMER SEARCH •TUNING PLAY•PAUSE PREV NEXT... -
Page 11: Control Buttons Available On The Remote Only
Display screen – Point the remote control towards this sensor. Disc trays (1~5) 5 DISC DIRECT PLAY 1~5 (CD 1~5) – Selects a disc tray to playback. OPEN/CLOSE 0 1~5 – Opens/closes the individual disc tray. MAX SOUND (MAX ON/OFF) –... -
Page 12: Connections
Connections Refer to page 3 - P5 WARNING! – Use only the supplied speakers. The combination of the main unit and speakers provide the best sound. Using other speakers can damage the unit and sound quality will be negatively affected. –... -
Page 13: Step 2: Connecting The Speakers
Step 2: Connecting the speakers Connect the speaker wires to the SPEAKERS terminals, right speaker to "R" and left speaker to "L", colored (marked) wire to "+" and black (unmarked) wire to "-". Fully insert the stripped portion of the speaker wire into the terminal as shown. -
Page 14: Usb Pc Link
– It is not possible to create a playlist from the system’s 5 CD changer. If you encounter problem using USB PC LINK, please refer to the FAQ (Frequently Asked Questions) stored in your USB PC LINK installer disc or visit “www.audio.philips.com” for latest update on FAQ. -
Page 15: Enable Digital Cd Audio Output
Enable digital CD audio output Before playing the CD through your PC’s CD-ROM drive, it is necessary to configure your PC’s hardware as follows: For Windows ME/ 2000/ XP Enter the system control panel menu and select: “SYSTEM ™ HARDWARE ™ DEVICE MANAGER ™... -
Page 16: Basic Operations
Basic Operations Switching on/off Switching to active mode Press CD, TUNER, AUX or USB PC LINK. Switching to standby mode (view clock) Press B. ➜ The clock is displayed. Note: – Before switching the system to standby mode, make sure the demonstration mode has been deactivated. -
Page 17: Selecting Different Display Mode
Selecting different display mode Dim mode You can select the desired brightness for the display panel. In any active mode, press DIM repeatedly to select DIM 1, DIM 2, DIM 3 or DIM OFF display mode. ➜ is shown, except for DIM OFF mode. DIM mode button display... -
Page 18: Disc Operations
Disc Operations IMPORTANT! – This system is designed for regular discs. Therefore, do not use any accessories such as disc stabilizer rings or disc treatment sheets, etc., as offered on the market, because they may jam the changer mechanism. – Do not load more than one disc onto each tray. -
Page 19: Repeat And Shuffle
To interrupt playback Press É Å . ➜ To resume normal playback, repeat the above. To stop playback Press Ç. ➜ If the system remains in stop mode for 30 minutes, it will switch to standby mode. Repeat and Shuffle You can select and change the various play modes before or during playback. -
Page 20: Checking The Program
Disc Operations Checking the program Stop playback, then press í or ë repeatedly. Press Ç to exit. Press ÉÅ to start playback from the current programmed track Playing a disc without clearing the program Press one of the CD 1~5 buttons on the remote to select a disc for playback. -
Page 21: Tuner Operations
IMPORTANT! Make sure the FM and AM antennas are connected. Tuning to radio stations Press TUNER to enter tuner mode. To select another waveband (FM or AM), press TUNER again. Press and hold à or á until the frequency indication starts to change, then release. ➜... -
Page 22: Timer Operations
Timer Operations Timer setting The system can switch on to CD, TUNER or USB PC LINK mode automatically at a preset time, serving as an alarm to wake you up. IMPORTANT! – Before setting the timer, ensure that the clock is set correctly. –... -
Page 23: Temporarily Deactivating The Wake Up Timer
Timer Operations Temporarily deactivating the wake up timer You are only able to activate the Snooze function within 30 minutes after the timer wake up from Standby mode. After timer wake up, press SNOOZE on the remote. ➜ The system will switch to standby mode for five minutes. -
Page 24: Specifications
Specifications AMPLIFIER Output power 100 W total power 2 x 50 W RMS 2 x 45 W FTC Signal-to-noise ratio 75 dB A (IEC) Frequency response 50 – 20000 Hz, –3 dB Input sensitivity AUX In / CDR In 500 mV / 1V Output 6 Ω... -
Page 25: Troubleshooting
WARNING Under no circumstances should you try to repair the system yourself, as this will invalidate the warranty. Do not open the system as there is a risk of electric shock. If a fault occurs, first check the points listed below before taking the system for repair. If you are unable to remedy a problem by following these hints, please call 1-800-531-0039 for help. -
Page 26: Limited Warranty
No other warranties are expressed or implied, including any implied warranties of merchantability or fit- ness for a particular purpose. Philips is not liable under any circumstances for any direct, indirect, special, incidental or consequential damages, howsoever incurred, even if notified of the possibility of such damages.) -
Page 27: Laser Product
PHILIPS CONSUMER ELECTRONICS NORTH AMERICA Knoxville, Tennessee 37914-1810, USA MC-500 CLASS 1 LASER PRODUCT 3139 115 22113 IB8399T001 Printed In China SgpJP-0251/37-3...
Need help?
Do you have a question about the MC-500 and is the answer not in the manual?
Questions and answers