Table of Contents
Advertisement
Advertisement
Table of Contents

Related Manuals for Philips VR620CAT


Summary of Contents for Philips VR620CAT
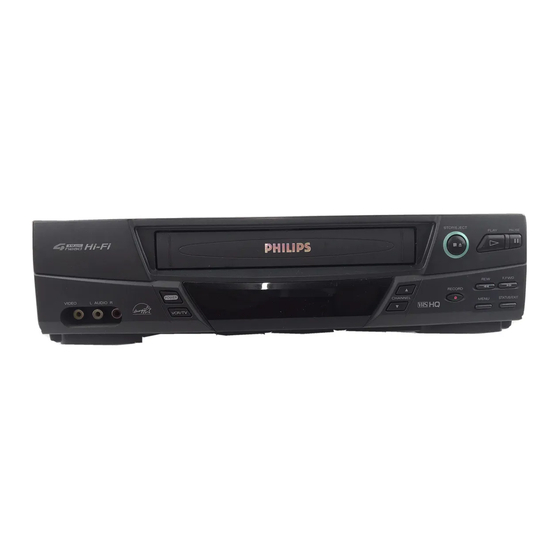
- Page 1 VR620CAT Video Cassette Recorder Owner’s Manual...
- Page 2 Return your Warranty Registration card today to ensure you receive all the benefits you’re entitled to. Once your PHILIPS purchase is registered, you’re eligible to receive all the privileges of owning a PHILIPS product. So complete and return the Warranty Registration Card enclosed with your purchase at once.
-
Page 3: Introduction 3
This VCR has a High Quality (HQ) system and is compatible with existing Video Home System (VHS) equipment. Philips Consumer Electronics recommends you use only video cas- sette tapes that have the mark. The use of other tapes may result in poor picture quality and excessive deposits on the video heads, which may not be covered by the warranty if damage occurs. -
Page 4: Table Of Contents
4 Table of Contents Setting Up Your VCR Introduction ............3 Table of Contents . -
Page 5: Before Using Your Vcr 5
Putting Batteries in the Remote Control Remove the battery compartment lid on the bottom of the remote control by pressing the tab, then lifting the lid. Place two AA batteries inside the battery compartment with their + and – ends aligned as indicated. Replace the battery compartment lid. -
Page 6: Hookups Without A Cable Box/Direct Broadcast System
6 Hookups Without a Cable Box/Direct Broadcast System The basic VCR/TV connection – antenna/cable to VCR to TV – is shown below. If you have a Cable Box or a Direct Broadcast System, please see pages eight-nine. If you have a Stereo TV, please see page 10. - Page 7 Hookups Without a Cable Box/Direct Broadcast System (cont’d) 7 Connect the supplied black RF coaxial cable to the OUT Jack on the back of the VCR and to the ANTENNA IN Jack on the TV. (You may use either a snap-on type (supplied) or screw-on type of coaxial cable, whichever you prefer.) A N T C A B...
-
Page 8: Hookups With A Cable Box/Direct Broadcast System
8 Hookups With a Cable Box/Direct Broadcast System There are two ways to connect your Cable Box/DBS to the VCR. With this connection: You may view any channel. You must select channels at the Cable Box/DBS. Channels cannot be changed at the VCR. You may not view a channel other than the one you are recording. - Page 9 Hookups With a Cable Box/Direct Broadcast System (cont’d) 9 With this connection: You may watch one channel while recording another. You may not record scrambled channels. Cable Signal RF coaxial cable Connections Connect a Cable signal to the VCR’s ANT(enna) IN Jack. Use the supplied black RF coaxial cable to connect the OUT Jack on the VCR to the IN Jack on the Cable Box/DBS.
-
Page 10: Hookups With A Stereo Tv
10 Hookups with a Stereo TV antenna or cable to ANT(enna) IN Jack Audio and Video IN Jacks on TV VIDEO (yellow) and AUDIO (red and white) Video Cable OUT Jacks Stereo Audio Cable Audio and Video cables are not supplied. Connect the antenna or cable to the ANT(enna) IN Jack on the back of the VCR. -
Page 11: Turning On Your Vcr 11
Before turning on your VCR, make sure batteries are in the remote control and you have connected the VCR and TV correctly. Details are on pages five-10. You can not program channels if you are using a Cable Box or a Direct Broadcast System. -
Page 12: Automatic Channel Setup
12 Automatic Channel Setup Although your VCR may automatically memorize the channels you receive when you turn it on for the first time, this function lets you set up the channels again. Press the VCR button, then press the MENU button. SELECT op CHOOSE B PROGRAM VCR SET UP... -
Page 13: Adding/Deleting Channels
Adding/Deleting Channels If your channel lineup changes, you may want to add newly avail- able channels or remove channels that are no longer available in your area. You can use the CH(annel) o/p buttons to scroll through only the available channels. To add or delete channels from the VCR’s memory, follow these steps. -
Page 14: Automatic Channel Setup
14 Automatic Channel Setup (cont’d) Reviewing Memorized Channels Press the VCR button, then press the MENU button. SELECT op CHOOSE B PROGRAM VCR SET UP TUNER SET UP SET CLOCK TO END PUSH EXIT Press the PLAY/o button or the STOP/p button to select TUNER SET UP, then press the F.FWD/B button. -
Page 15: Setting The Clock 15
Follow the steps below to set your VCR’s clock. Make sure: The VCR is on and the VCR light appears on the display panel. (If it does not, press the VCR/TV button once.) You make each entry within 60 seconds of the previous entry. Press the VCR button, then press the MENU button. -
Page 16: Daylight-Savings Time
16 Daylight-Savings Time You may program the VCR so its clock will automatically move forward one hour in April and turn back one hour in October. Daylight-Savings Time is ON when you receive your VCR. Turn Daylight-Savings Time ON or OFF by following the steps below. Before you begin: Make sure you have set the clock. -
Page 17: Language Selection 17
Follow the steps below to change the language of the on-screen displays and menus. Press the VCR button, then press the MENU button. SELECT op CHOOSE B PROGRAM VCR SET UP TUNER SET UP SET CLOCK TO END PUSH EXIT Press the PLAY/o button or the STOP/p button to select VCR SET UP, then press the F.FWD/B button. -
Page 18: Setting The Remote To Operate A Tv
TV. PHILCO ....14 PHILIPS ....01 PHILIPS MAGNAVOX. .01, 02, 03 QUASAR . -
Page 19: Setting The Remote To Operate A Cable Box/Direct Broadcast System 19
CURTIS ... 08, 09 OAK SIGMA ... 11, 46 DIAMOND ... 01, 44 PANASONIC .. 16, 17, 97 EAGLE ... 26, 40, 62 PHILIPS ... 07, 23, 50 PIONEER ... 05, 06 EASTERN/REGENCY ... 28 PULSAR ... 04, 30, 42, GC BRAND ... -
Page 20: Remote Control Buttons
20 Remote Control Buttons Press to turn on or off the VCR, TV, Cable Box, or Direct Broadcast System. (You must first press the VCR, TV, or CBL/DBS button.) Press to access the VCR menu or some TV menus. Press to select channels at the VCR, TV, Cable Box, or Direct Broadcast System;... - Page 21 Press to erase incorrect information when programming VCR functions. Also, press to reset the real-time counter. Details are on page 36. Press to access or remove the VCR’s on-screen status display. Details are on page 22. Press to exit on-screen VCR menus. Or, press to access or remove a status display or menu of some TVs.
-
Page 22: On-Screen Status Displays
22 On-Screen Status Displays A status display will appear when you press the STATUS/EXIT but- ton or certain function buttons. The contents of the status display will vary. To choose the status display mode, follow the steps below. If you select STATUS ON, then select COUNTER ONLY Whenever you press the STOP/p button or the PLAY/o button, the status display will appear for five seconds. -
Page 23: Vcr Display Panel 23
POWER VIDEO L AUDIO R VCR/TV PWR.(power) Light This light appears when the power is on. Cassette-Inside Light This light appears when a tape is in the VCR. VCR Light This light appears when the VCR is in VCR position. This light does not appear when the VCR is in TV position. -
Page 24: Front Panel
24 Front Panel Remote Sensor Receives a signal from your remote control so you can oper- ate your VCR from a distance. POWER Button Press to turn the VCR power on and off. VIDEO In Jack Connect a video cable coming from the video out jack of a camcorder, another... -
Page 25: Rear Panel 25
VIDEO OUT Jack Connect a video cable going to the VIDEO IN Jack of a camcorder, another VCR, or an audio-visual system (monitor, laser disc player, digital video disc player, etc.) here. Details are on pages 34 and 40. VIDEO IN Jack Connect a video cable coming from the VIDEO OUT Jack of a AC Power Cord... -
Page 26: Playing
26 Playing Read and follow the steps below to play a tape. Turn on the TV and set it to channel 3 or 4, whichever channel the CH3/CH4 switch on the back of the VCR is set to. Insert a tape in the VCR. The PWR., VCR, and Cassette-Inside lights will appear on the display panel. -
Page 27: Recording 27
Read and follow the steps below to record a television program. Turn on the TV and set it to channel 3 or 4, whichever channel the CH3/CH4 switch on the back of the VCR is set to. Insert a tape with its record tab intact in the VCR. If playback begins, press the VCR button, then press the STOP/p button to stop the tape. -
Page 28: Recording One Channel/Watching Another
28 Recording One Channel/Watching Another Press the VCR button. Press the REC(ord)/OTR button to start a recording of the current channel. (See page 27.) The REC(ord) light will appear on the VCR display panel. Press the VCR/TV button to put the VCR in TV position. The VCR light will disappear from the VCR’s display panel. -
Page 29: One-Touch Recording 29
The One-Touch Recording (OTR) feature allows you to set an immediate timed recording 30 minutes to eight hours long. Before you begin: Set up the channels at the VCR. Details are on page 12. Select a recording speed (SP, SLP) with the SPEED button. Put a tape in the VCR. -
Page 30: Timer Recording
30 Timer Recording Follow the steps below to program your VCR to record TV pro- grams while you’re away from home. The VCR will turn itself on, record, and turn itself off automatically. Before you begin: Set up the channels at the VCR. Details are on page 12. Set the clock. - Page 31 Use the Number buttons (1-8) to select a slot in which to store the timer recording. There are eight slots. Numbers for open slots will flash on the screen. NOTE: If you enter a number for a slot that has already been used to store a timer recording, PREVIOUSLY SET PROGRAM will appear on the screen briefly.
-
Page 32: The Vcr
32 Timer Recording (cont’d) Press the Number 1 button to record in SP speed or the Number 2 button to record in SLP speed. (See the chart below.) You cannot use the SPEED button at this time. ONE TIME PROGRAM PROGRAM CHANNEL TIME ON... -
Page 33: Timer Recording
Checking or Cancelling Timer Recordings With the VCR on and in VCR position (the VCR light will appear on the display panel), press the VCR button, then press the MENU button. Press the PLAY/o button or the STOP/p button to select PROGRAM, then press the F.FWD/B button. -
Page 34: Rerecording (Tape Duplication)
34 Rerecording (Tape Duplication) 1. Audio cables from AUDIO OUT Jacks of VCR 1 to AUDIO IN Jacks of VCR 2 VCR 1 Playing VCR 2. Video cable from VIDEO OUT Jack of VCR 1 to VIDEO IN Jack of VCR 2 Audio and Video cables are not supplied. -
Page 35: Repeat Play 35
Follow the steps below to make the VCR play a tape over and over. Press the VCR button, then press the MENU button. SELECT op CHOOSE B PROGRAM VCR SET UP TUNER SET UP SET CLOCK TO END PUSH EXIT Press the PLAY/o button or the STOP/p button to select VCR SET UP, then press the F.FWD/B button. -
Page 36: Real-Time Counter Memory
36 Real-Time Counter Memory Follow the steps below to reset the real-time counter to zero at a tape location you want to refer to later. Press the VCR button. Play, fast forward, or rewind a tape to the location that you would like to refer to later. -
Page 37: Time Search 37
Follow the steps below to program the VCR to search forward or backward on a tape a specific length of time. There must be a tape in the VCR. Press the VCR button, then press the TIME SEARCH but- ton. TIME SEARCH 0:00 ENTER SEARCH TIME... -
Page 38: Special Effects Playback
38 Special Effects Playback Forward and Reverse Searching (SP/LP/SLP) During tape playback, press and release the F.FWD/B button or the REW(ind)/{ button. A fast forward or reverse picture search will begin. To return to playback, press the PLAY/o button. Super High Speed Searching (LP/SLP) During tape playback, press the F.FWD/B button or the REW(ind)/{ button, then press again. -
Page 39: Automatic Operation Features 39
The following playback features will always operate. Automatic Playback When you put a tape in the VCR, the power will come on auto- matically. If the tape’s record tab is missing, playback will begin. If a timer recording is set, the power will not come on automati- cally when you insert a tape with the record tab intact. -
Page 40: Multi-Channel Television Sound System
40 Multi-Channel Television Sound System Your VCR can play recordings broadcast in Hi-Fi (high fidelity) stereo, which produces a crisp, clear sound from two sources. Your VCR also can play tapes recorded in a second audio (usually, that means your program is recorded in a second language). -
Page 41: Multi-Channel Television Sound System
Multi-Channel Television Sound System (cont’d) 41 Press the VCR button, then press the MENU button. SELECT op CHOOSE B PROGRAM VCR SET UP TUNER SET UP SET CLOCK TO END PUSH EXIT Press the PLAY/o button or the STOP/p button to select TUNER SET UP, then press the F.FWD/B button. -
Page 42: Hi-Fi Stereo Sound System
42 Hi-Fi Stereo Sound System Multi-Channel Television Sound system broadcasts are automatically recorded in Hi-Fi stereo sound. To play in Hi-Fi stereo the tapes recorded in Hi-Fi stereo, however, you’ll need to follow steps 1-5. Press the VCR button, then press the MENU button. SELECT op CHOOSE B PROGRAM VCR SET UP... -
Page 43: Blue Background 43
If you want the TV screen to be solid blue when a weak signal is received, set BLUE BACKGROUND to ON. The screen will be blue and the sound will be muted. Or, if you want to receive the weak signal, set BLUE BACK- GROUND to OFF. -
Page 44: Helpful Hints
44 Helpful Hints If you are having problems with your product, check this list of problems and possible solutions before requesting service. You may be able to solve the problem yourself. If you need to call a customer service representative, please know the model number and serial number of your product before you call. -
Page 45: Helpful Hints
You can not insert a tape. • Insert the tape, window side up, with the record tab facing you. • Make sure a tape isn’t already in the VCR by pressing the STOP/EJECT button on the VCR. • Gently push on the center of the tape when putting it in the VCR. Never force the tape into the VCR. •... -
Page 46: Limited Warranty
90 days thereafter, you may exchange the defective product for a new product at the store from which it was purchased or through Philips. This exchange is made at no cost to you. From 91 days to one year from the date of purchase, you must follow the exchange procedures set out on the next page. - Page 47 After 12 months from the day of original purchase, contact Philips Service Solutions Group at 1-800-531-0039 for information regarding out-of-warranty exchange. • If you do not have your original sales receipt, or if you have any questions, call Philips Service Solutions Group at 1-800-531-0039. To obtain a replacement product from Philips: 1.
-
Page 48: Glossary/Specifications
48 Glossary / Specifications Glossary AUDIO IN/OUT Jacks: jacks on the front and back of the VCR that record audio from another source (IN) or send audio to another system (OUT). Automatic Channel Setup: process in which the VCR mem- orizes all available channels. -
Page 49: Index 49
ac power cord...25 accessories ...52 alt.ch button...21 ant(enna) in jack ...6-10, 25 audio in/out jacks ...10, 24, 25, 34, 40, 48 automatic playback ...39 rewind, eject, off...39 batteries ...5 blue background...43 cassette compartment...23 cassette-inside light ...23 cbl/dbs button...5, 19, 21 ch3/ch4 switch ...6-9, 25 channel adding ...13... -
Page 52: Accessories
The following additional items are not provided with your VCR, but they are designed for use with your new VCR. To order these optional accessories, contact us at: Philips Parts & Accessories Marketing Department 401 East Old Andrew Johnson Highway Jefferson City, TN 37760...
Need help?
Do you have a question about the VR620CAT and is the answer not in the manual?
Questions and answers