Table of Contents
Advertisement
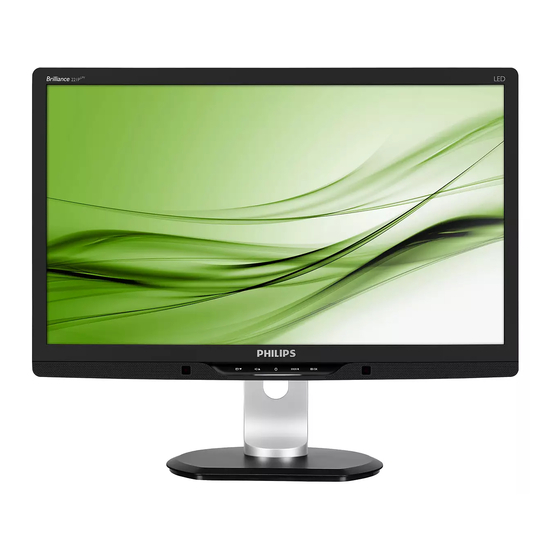
21.5 LCD Color Monitor
Service
Service
Service
Description
Table of Contents......................................................1
Revision List.............................................................2
Important Safety Notice............................................3
1. Monitor Specifications............................................5
2. LCD Monitor Description........................................7
3. Operation Instructions............................................8
3.1 General Instructions.....................................8
3.2 Control Buttons.............................................8
3.3 OSD Menu......................................................9
4. Input/output Specification...................................10
4.1 Input Signal Connector.....................................10
4.2 Resolution & Preset Modes.................................11
4.3 Pixel Defect Policy.......................................12
4.4 Failure Mode of Panel...................................14
5. Block Diagram...............................................15
5.1 Scaler Board.....................................................15
5.2 Adapter/Converter/USB Board...........................16
6. Schematic Diagram.............................................. 17
6.1 Scaler Board..............................................17
6.2 Adapter Board....................................................22
6.3 Converter Board.................................................24
6.4 USB Board..............................................26
ANY PERSON ATTEMPTING TO SERVICE THIS CHASSIS MUST FAMILIARIZE HIMSELF WITH THE
CHASSIS AND BE AWARE OF THE NECESSARY SAFETY PRECAUTIONS TO BE USED WHEN
SERVICING ELECTRONIC EQUIPMENT CONTAINING HIGH VOLTAGES.
CAUTION: USE A SEPARATE ISOLATION TRANSFOMER FOR THIS UNIT WHEN SERVICING
REFER TO BACK COVER FOR IMPORTANT SAFETY GUIDELINES
Copyright 2011 Philips Consumer Lifestyle
221P3LPYES/00
221P3LPYEB/00
221P3LPYEB/69
221P3LPYEB/75
221P3LPYEB/93
221P3LPYEB/96
Page
Description
6.5 IR Board....................................................28
6.6 Light Board..............................................30
6.7 Key Board.................................................31
7. PCB Layout................................................32
7.1 Scaler Board............................................32
7.2 Adapter Board....................................................34
7.3 Converter Board.................................................36
7.4 USB Board.................................................38
7.5 IR Board..................................................40
7.6 Light Board..............................................41
7.7 Key Board..................................................41
8. Wiring Diagram.............................................42
9. Scaler Board Overview...................................44
10. Mechanical Instructions..............................45
11. Repair Flow Chart........................................48
12. ISP Instructions..................................................52
13. DDC Instructions................................................59
14. White Balance, Luminance Adjustment..............72
15. Monitor Exploded View.......................................74
16. Recommended & Spare Parts List...................75
17. Different Parts List......................................96
18. General Product Specification.........................98
SAFETY NOTICE
Subject to modification
K
Chassis: Meridian 3
Jan.27, 2011
Page
Advertisement
Chapters
Table of Contents

Related Manuals for Philips 221P3LPYES/00


Summary of Contents for Philips 221P3LPYES/00
-
Page 1: Table Of Contents
CHASSIS AND BE AWARE OF THE NECESSARY SAFETY PRECAUTIONS TO BE USED WHEN SERVICING ELECTRONIC EQUIPMENT CONTAINING HIGH VOLTAGES. CAUTION: USE A SEPARATE ISOLATION TRANSFOMER FOR THIS UNIT WHEN SERVICING REFER TO BACK COVER FOR IMPORTANT SAFETY GUIDELINES Copyright 2011 Philips Consumer Lifestyle Subject to modification Jan.27, 2011... -
Page 2: Revision List
Jun.02,2011 Add CPT panel for 221P3LPYEB/69 and 221P3LPYEB/93 Delete CPT V2 panel for 221P3LPYES/00, 221P3LPYEB/69 and 221P3LPYEB/93 Add CMI L10 panel for 221P3LPYES/00 and CPT 8EA panel for 221P3LPYES/00, Oct.19,2011 221P3LPYES/69 and 221P3LPYES/75 Lead into the converter board (PCB: 715G4013P03001004S) for CMI L10 and CPT panel Dec.22,2011... -
Page 3: Important Safety Notice
Meridian 3 Important Safety Notice This electronic user guide is intended for anyone who uses the Philips monitor. Take time to read this user manual before you use your monitor. It contains important information and notes regarding operating your monitor. The... - Page 4 Meridian 3 IMPORTANT: Always activate a moving screen saver program when you leave your monitor unattended. Always activate a periodic screen refresh application if your monitor will display unchanging static content. Uninterrupted display of still or static images over an extended period may cause “burn in”, also known as “after-imaging”...
-
Page 5: Monitor Specifications
Meridian 3 1. Monitor Specifications Technical specifications Picture/Display Monitor Panel Type TFT-LCD Backlight WLED Panel Size 21.5" W (54.6 cm) Aspect Ratio 16:9 Pixel Pitch 0.24825 x 0.24825 mm Brightness 250 cd/m² SmartContrast 20,000,000:1 Contrast Ratio (typical) 1000:1 (typ.) Response Time (typical) 5 ms Optimum Resolution 1920 x 1080 @ 60Hz... - Page 6 Color Black / Silver Finish Texture Note: 1. EPEAT Gold or Silver is valid only where Philips registers the product. Please visit www.epeat.net registration status in your country. 2. This data is subject to change without notice. Go to www.philips.com/support to download the latest version of leaflet.
-
Page 7: Lcd Monitor Description
Meridian 3 2. LCD Monitor Description The LCD monitor will contain a scaler board, an adapter board, a converter board, an USB board, a light board, a key board and two IR boards. The scaler board houses the flat panel control logic, brightness control logic and DDC. -
Page 8: Operation Instructions
Meridian 3 3. Operating Instructions Connecting to your PC 3.1 General Instructions Press the power button to turn the monitor on or off. The other control knobs are located at front panel of the monitor. By changing these setting, the picture can be adjusted to your personal preference. -
Page 9: Osd Menu
Meridian 3 3.3 OSD Menu The OSD tree On-screen Display (OSD) is feature in all Philips Below is an overall view of the structure of the monitors. It allows an end user to adjust screen On-Screen Display. You can use this as a reference... -
Page 10: Input/Output Specification
Meridian 3 4. Input/ Output Specification +5V Power 4.1 Input Signal Connector Ground (for +5V) Analog Connector Hot plug detect Pin No. Signal Name T.M.D.S. data0- T.M.D.S. data0+ T.M.D.S. data0 shield Green/ SOG No Connect Blue No Connect Sense (GND) T.M.D.S clock shield Cable Detect (GND) T.M.D.S. -
Page 11: Resolution & Preset Modes
Meridian 3 4.2 Resolution & Preset Modes Maximum Resolution 1920 x 1080 at 60 Hz (analog input) 1920 x 1080 at 60 Hz (digital input) Recommended Resolution 1920 x 1080 at 60 Hz (digital input) H. freq (kHz) Resolution V. freq (Hz) 31.47 720 x 400 70.09... -
Page 12: Pixel Defect Policy
No manufacturer can guarantee that the monitor displays a dark pattern. There are three panels will be free from pixel defects, but Philips types of bright dot defects: guarantees that any monitor with an unacceptable... - Page 13 In order to qualify for repair or replacement due to pixel defects during the warranty period, a TFT LCD panel in a Philips flat panel monitor must have pixel or sub pixel defects exceeding the tolerances listed in the following tables.
-
Page 14: Failure Mode Of Panel
Meridian 3 4.4 Failure Mode Of Panel Quick reference for failure mode of LCD panel this page presents problems that could be made by LCD panel. It is not necessary to repair circuit board. Simply follow the mechanical Polarizer has bubbles instruction on this manual to eliminate failure by replace LCD panel. -
Page 26: Usb Board
1 2 3 4 1 2 3 4 5 6 7 8 1 2 3 4 NC/10K 1/10W 5%... -
Page 32: Pcb Layout
Meridian 3 7. PCB Layout 7.1 Scaler Board (715G4593M0H000004I) Remark: Parts position can be searched by using FIND function in PDF. D701 C703 CN408 R712 C704 C433 R724 C715 U702 R719 R708 R726 R449 Q703 U704 CN701 R706 CN409 U701 R448 C711 R725... - Page 33 Meridian 3 Remark: Parts position can be searched by using FIND function in PDF.
-
Page 34: Adapter Board
Meridian 3 7.2 Adapter Board (715G3974P1E001001S) Remark: Parts position can be searched by using FIND function in PDF. J902 J901 SCR1 CN903 R947 CN902A C915 R946 L903 L904 L905 ZD902 F903 CN801 D906 C916 C917 C918 Q903 F902 FB901 D903 D905 D904 C913... - Page 35 Meridian 3 Remark: Parts position can be searched by using FIND function in PDF. R943 C910 C912 C935 C929 R962 C911 R961 RJ901 R935 C924 R927 R930 R924 R925 R940 R926 R929 R912 R906 C923 R914 R909 R907 Q608 R612 R601 R619 R620...
-
Page 36: Converter Board
Meridian 3 7.3 Converter Board 715G4107P02000004S for CMI LA1 panel Remark: Parts position can be searched by using FIND function in PDF. C813 R810 C808 C807 C801 L801 Q801 IC802 IC801 C811 R844 ZD801 CN802 R843 CN801 R849 CN803 CN804... - Page 37 Meridian 3 715G4013P03001004S for CMI L10 and CPT panel Remark: Parts position can be searched by using FIND function in PDF. D801 Q806 Q801 C807 L801 C809 R801 C805 F801 R822 U801 C813 C810 R821 R826 Q802 C804 C803 R820 R805 CN802 R830...
-
Page 38: Usb Board
Meridian 3 7.4 USB Board (715G4597T0E000004I) Remark: Parts position can be searched by using FIND function in PDF. F751 F754 F753 F752 C766 C783 CN751 FB751 L701 ZD758 C768 L755 R789 ZD757 R788 C758 U752 R787 L754 FB755 R762 C717 R786 C710 C761... - Page 39 Meridian 3 Remark: Parts position can be searched by using FIND function in PDF. FB761 FB753 U753 FB760 U751 U705 R714 C714 C722 R726 R713...
-
Page 40: Ir Board
Meridian 3 7.5 IR Board 715G4594T0B000004S Remark: Parts position can be searched by using FIND function in PDF. R051 ZD051 U051 C052 R052 LED051 C054 R053 Q052 R056 R054 R057 U052 R058 C055 R061 R059 R060 C051 ZD054 ZD052 CN052 ZD053 CN051 715G4595R0A000004S... -
Page 41: Light Board
Meridian 3 7.6 Light Board (715G3997T01000004F) Remark: Parts position can be searched by using FIND function in PDF. LED001 CN002 7.7 Key Board (715G4596K0D000004F) Remark: Parts position can be searched by using FIND function in PDF. R010 R011 CN001 C013 LED009 LED008 LED001... -
Page 42: Wiring Diagram
CN404 CN405 CN701 CN401... -
Page 44: Scaler Board Overview
Meridian 3 9. Scaler Board Overview DC-DC FFC Cable Scaler IC Flash ROM VGA EEPROM DVI EEPROM... -
Page 45: Mechanical Instructions
Meridian 3 10. Mechanical Instructions Step 2: Remove the rear cover 1. Open the latches and along the red arrowhead direction as the picture to open other latches, take the 221S3 for example: 2. Disconnect the rocker switch cable and remove the two screws to remove the USB board. - Page 46 Meridian 3 2. Disconnect the light cable and key cable. 3. Disconnect the FFC cables. Step 4: Remove the mainframe 1. Disconnect the IR cables and remove the two screws to remove the IR boards.
- Page 47 Meridian 3 Step 5: Remove the boards 1. Remove the five screws that secure the connectors. 2. Remove the four screws to remove the power board and scaler board from the main frame. 3. Disconnect all the connectors.
-
Page 48: Repair Flow Chart
Meridian 3 11. Repair Flow Chart 1. No Power No power Check power cable is Re-plug the power cable tightened? Check Power “On/Off” Turn on the Power “On/Off” switch is “On”? Check the LED Check the AC power indicator is OK? Replace the power board and check connections Replace main board and check connections Replace key board and check connections... - Page 49 Meridian 3 No Video (Power LED White) No Video (Power LED White) Press the power Replace the main board button is OK? Replace the power The end board and connection Replace the main The end board and connection Check the FFC cable Replace the FFC cable or panel or panel...
- Page 50 Meridian 3 3. DIM DIM (image overlap, focus or flicker) Reset in factory mode The end Set to the optimal The end frequency, select the recommended frequency Readjust the phase and pixel The end clock in the user mode Pull out signal cable and Check the signal cable check “Self Test Feature and the PC...
- Page 51 Meridian 3 4. Color is not optimal Color is not optimal Color shift Miss color Reset the factory mode Replace the signal cable In the user mode, set the “color settings” until customer satisfy The end Pull out the signal cable and check the screen color display is normal? Replace the signal cable or PC...
-
Page 52: Isp Instructions
Meridian 3 12. ISP Instruction When do the parts, need the tools as follow: 1. An i486 (or above) personal computer or compatible. 2. Microsoft operation system Windows 95/98/2000/XP. 3. USB driver “FTC100103(Mstar)” and ISP tool “ISP_Tool.exe” 4. ISP Board (715GT089-B/C) x1 5. - Page 53 Meridian 3 Click “Finish” to complete the USB driver installation.
- Page 54 Meridian 3 12.3 Install the ISP tool and run it: Note: These three files must be put in one folder. 1. Double-click to install ISP program. 2. Click the “Device” and set the parameters as follow:...
- Page 55 Meridian 3 3. Click the “Connect”, the tool will communicate with the monitor which can detect the flash type. 4. Click the “Read”, and load the software you want to upgrade...
- Page 56 Meridian 3 5. Set the restore address to save HDCP key for DVI or HDMI. 6. Click the “Auto” and set the parameter as follow: 7. Click the “Run”, if it writes successfully, it will show as below picture:...
- Page 57 Meridian 3 12.4 Check the firmware version: Connect VGA source and power off the monitor. Press buttons at the same time, power on the monitor, and then press the menu again; the picture will appear on the top left corner. Select the “Factory”...
- Page 58 Meridian 3 12.5 Troubleshooting: Can’t Entry ISP Mode!! (1) Check the cables and ISP Board are connected fluently. (2) AC off the monitor for a while and retry it. (3) Click the “Dis Con” and click “Connect” again. (4) Change ISP JIG or cable. (5) Change PC...
-
Page 59: Ddc Instructions
Meridian 3 13. DDC Instruction General DDC Data Re-programming In case the main EEPROM with Software DDC which store all factory settings were replaced because a defect repaired monitor’ the serial numbers have to be re-programmed. It is advised to re- soldered the main EEPROM with Software DDC from the old board onto the new board if circuit board have been replaced, in this case the DDC data does not need to be re-programmed. - Page 60 2. Put the “wa.dat”, “wd.dat”, “wp.dat” and “config.ini” files into one folder named Philips 221P3LPY. 3. Copy the folder named Philips 221P3LPY to the “ddc” folder (It must be “ddc” instead of other names), and put the “DDC” folder and “VGA_PHL.exe” into the same folder.
- Page 61 Meridian 3 5. Choose the “Analog and DVI”, and click “Loadfile” to set the parameters as below picture: 6. Click the “Next” to load the EDID file.
- Page 62 Meridian 3 7. Click “OK”, the tool will read the EDID information: 8. Choose the “ ANALOG ” and “Write SN”, and key in the 14 digital S/N which must be the same as the barcode S/N of monitor.
- Page 63 Meridian 3 9. Click the “Program” to start programming after monitor DC on. When it shows “Analog: PASS!”, “DVI: PASS!”, “DP: PASS!” and “SN write OK”. The EDID and SN writing process are finished. 13.4 Check the SN 1. Connect the VGA or DVI source and power on monitor. 2.
- Page 64 Meridian 3 221P3LPY EDID Analog 00 01 02 03 04 05 06 07 08 09 0A 0B 0C 0D 0E 0F ----------------------------------------------- 00| 00 FF FF FF FF FF FF 00 41 0C A3 08 94 BA 0A 00 10| 23 14 01 03 6C 30 1B 78 2E 12 F5 A7 55 4A 9B 25 20| 15 50 54 BD 4B 00 D1 C0 81 80 B3 00 95 00 95 0F 30| 01 01 01 01 01 01 02 3A 80 18 71 38 2D 40 58 2C 40| 45 00 DD 0C 11 00 00 1E 00 00 00 FF 00 31 33 32...
- Page 65 Meridian 3 800 x 600 @ 60Hz VESA Established Timings 2:4B 800 x 600 @ 75Hz VESA 1024 x 768 @ 60Hz VESA 1024 x 768 @ 75Hz VESA 1280 x1024 @ 75Hz VESA Established Timings 3:00 <-Standard Timing Identification: -> 1920 x 1080 @ 60Hz 1280 x 1024 @ 60Hz 1680 x 1050 @ 60Hz...
- Page 66 Meridian 3 Digital 00 01 02 03 04 05 06 07 08 09 0A 0B 0C 0D 0E 0F ----------------------------------------------- 00| 00 FF FF FF FF FF FF 00 41 0C A3 08 94 BA 0A 00 10| 23 14 01 03 80 30 1B 78 2E 12 F5 A7 55 4A 9B 25 20| 15 50 54 BD 4B 00 D1 C0 81 80 B3 00 95 00 95 0F 30| 01 01 01 01 01 01 02 3A 80 18 71 38 2D 40 58 2C 40| 45 00 DD 0C 11 00 00 1E 00 00 00 FF 00 31 33 32...
- Page 67 Meridian 3 Established Timings 2:4B 800 x 600 @ 75Hz VESA 1024 x 768 @ 60Hz VESA 1024 x 768 @ 75Hz VESA 1280 x1024 @ 75Hz VESA Established Timings 3:00 <-Standard Timing Identification: -> 1920 x 1080 @ 60Hz 1280 x 1024 @ 60Hz 1680 x 1050 @ 60Hz 1440 x 900 @ 60Hz...
- Page 68 Meridian 3 00 01 02 03 04 05 06 07 08 09 0A 0B 0C 0D 0E 0F --------------------Block 0-------------------- 00| 00 FF FF FF FF FF FF 00 41 0C A3 08 94 BA 0A 00 10| 23 14 01 04 A5 30 1B 78 E2 12 F5 A7 55 4A 9B 25 20| 15 50 54 BD 4B 00 D1 C0 81 80 B3 00 95 00 95 0F 30| 01 01 01 01 01 01 02 3A 80 18 71 38 2D 40 58 2C 40| 45 00 DD 0C 11 00 00 1A 00 00 00 FF 00 31 33 32...
- Page 69 Meridian 3 <-Established Timings: -> Established Timings 1: BD 720 x 400 @ 70Hz VGA, IBM 640 x 480 @ 60Hz VGA, IBM 640 x 480 @ 67Hz Apple, Mac II 640 x 480 @ 72Hz VESA 640 x 480 @ 75Hz VESA 800 x 600 @ 60Hz VESA Established Timings 2:4B 800 x 600 @ 75Hz VESA...
- Page 70 Meridian 3 ------------------------------------------------------- Block 1: Extended Block Type: CEA 861B Detailed Timing Blocks start at Byte: 1C DTV Underscan YES DTV Basic Audio YES YCbCr (4:4:4) NO YCbCr (4:2:2) NO <-Video Short Block Description: -> 640 x 480 P 59.94/60Hz 4:3 720 x 480 P 59.94/60Hz 4:3 720 x 480 P 59.94/60Hz 16:9 1280 x 720 P 59.94/60Hz 16:9...
- Page 71 Meridian 3 Detailed Timing Descriptions: 720x480 @ 60Hz H Image Size: 477 mm V Image Size: 268 mm Pixel Clock: 27 Hz Refreshed Mode: Non-Interlaced Detailed Timing Descriptions: 720x576 @ 50Hz H Image Size: 477 mm V Image Size: 268 mm Pixel Clock: 27 Hz Refreshed Mode: Non-Interlaced Detailed Timing Descriptions: 1280x720 @ 50Hz...
-
Page 72: White Balance, Luminance Adjustment
Meridian 3 14. White Balance, Luminance Adjustment 1. Apparatuses and program: analyzer CA-210, PC, tool, FGA adjustment program (PHILIPS 221P3LPY.DDCI), Pattern generator. 2. Equipment installation: a. Connect analyzer CA-210 to PC by USB connector, install drive program CA-SDK Ver4.00 for CA-210 and restart PC after finish installing b. - Page 73 Meridian 3 5. Color Temp confirmation Connect the signal to the monitor, the monitor displays white-picture, use CA-210 to measure the Color Temp of the screen center and select the OSD to make sure whether the Color Temps accord with the SPEC. 11500K 8200K 7500K...
-
Page 75: Recommended & Spare Parts List
Meridian 3 16. Recommended & Spare Parts List Recommended Parts List for 221P3LPYES/00 Note: the parts information listed below are for reference only, and are subject to change without notice. Please go http://cs.tpv.com.cn/hello1.asp for the latest information Item Location PCM Codes... - Page 76 Meridian 3 U402 100GPMCI005NT1 MCU ASSY(056G2233 11) 056G 665 42 Others RBS311115 DIP-4 X401 093G 2253B H XAT01431AFI1H-3OHX AT-49 14.31818MHZ X401 093G 22 53 YC Crystal 14.31818MHz/32PF 49U/S YC U401 056G 562240 IC TSUMP5PKHT-LF PQFP-128 U702 056G 563126 IC G1117T63Uf SOT-223 U702 056G 133 30AAC AZ1117H-ADJ-E1...
- Page 77 Meridian 3 Spare Parts List for 221P3LPYES/93 Note: the parts information listed below are for reference only, and are subject to change without notice. Please go http://cs.tpv.com.cn/hello1.asp for the latest information Location PCM Codes Description SP01 078G020A 4 V SPEAKER 6 OHM 2W 26.8X13.8mm 280/200mm E08904 089G 17356C553 AUDIO CABLE 1800MM...
- Page 78 Meridian 3 CN602 033G3802 6B Y CONN 6PIN 2.0 CN905 033G8029 3A H CONN 3.96mm 3(2N)P R/A 11.88mm 9.5mm CN603 033T3802 4B Y CONNECTOR CN604 033T3802 5B Y CONNECTOR IC903 056G 139 7 IC EL817MC M-TYPE IC903 056G 139 7 1 IC EL817MA M-TYPE IC601 056G 616 51...
- Page 79 Meridian 3 R930 061G06031002FI RST 0603 10K 1% 1/10W TA-I R927 061G06031002FT RST CHIP 10K 1/10W 1% R617 061G0603102 JF RST CHIPR 1K OHM +-5% 1/10W FENGHUA R617 061G0603102 JT RST CHIP 1K 1/10W 5% TZAI YUAN R619 061G0603103 JF RST CHIPR 10K OHM +-5% 1/10W FENGHUA R601 061G0603103 JT...
- Page 80 Meridian 3 R907 061G1206475 JT RST CHIPR 4.7 MOHM +-5% 1/4W TZAI YUAN C611 065G060310131J CAP CHIP 0603 100PF J 50V NPO SAMSUNG C611 065G060310131J CAP CHIP 0603 100PF J 50V NPO C932 065G060310232K CAP CHIP 0603 1000pF K 50V X7R C932 065G060310232K CAP CHIP 0603 1N 50V X7R +/-10%...
- Page 81 Meridian 3 R811 061G0603000 JT RST CHIP MAX 0R05 1/10W TZAI YUAN R814 061G0603100 JF RST CHIPR 10 OHM 5% 1/10W FENGHUA R807 061G0603100 JT RST CHIP 10R 1/10W 5% TZAI YUAN R812 061G0603101 JY RST CHIPR 100 OHM +-5% 1/10W YAGEO R826 061G0603109 JY RST CHIPR 1 OHM +-5% 1/10W YAGEO...
- Page 82 Q101 057G 763511 MOSFET SRK7002LT1G SOT-23 LRC Q702 057G 763513 P6403FMG BY NIKO-SEM Q101 057G 763904 TRA FET 2N7002 SOT-23 PHILIPS R728 061G0402000 JF RST CHIPR MAX0R05 1/16W FENGHUA R420 061G0402000 JT RST CHIPR MAX0R05 1/16W TZAI YUAN R516 061G0402100 JF...
- Page 83 Meridian 3 R719 061G0402223 JT RST CHIP 22K 1/16W 5% TZAI YUAN R403 061G04023900FF RST CHIPR 390 OHM +-1% 1/16W FENGHUA R403 061G04023900FI TEST ONLY RST 0402 390R 1% 1/16W TA-I R430 061G04023901FF RST CHIPR 3.9KOHM +-1% 1/16W FENGHUA R430 061G04023901FT RST 0402 3.9K 1% 1/16W TZAI YUAN R104...
- Page 84 Meridian 3 C455 065G060310522K CAP 0603 1UF 10% 25V X7R C706 065G060322515K CAP 0603 2.2UF 10% 16V X5R C706 065G060322515K CAP 0603 2.2UF 10% 16V X5R C456 065G0805106A5K CAP 0805 10UF 10% 10V X5R C456 065G0805106A5K CHIP 10uF 10V X5R 0805 U402 070GHDCP500HDC HDCP CODE...
- Page 85 Meridian 3 R012 061G0603472 JT RST CHIP 4K7 1/10W 5% TZAI YUAN R012 061G0603472 JY RST CHIPR 4.7KOHM £«-5£¥ 1/10W YAGEO C008 065G040210131J CAP CHIP 0402 100pF 50V NPO C008 065G040210131J CAP CHIP 0402 100P 50V NP0 +/-5% C013 065G0402105A7Z CAP CHIP 0402 1uF Z 10V Y5V C004 065G040212031J...
- Page 86 Meridian 3 C765 065G040233031J CAP CHIP 0402 33P 50V NP0 +/-5% C711 065G060310232K CAP CHIP 0603 1NF K 50V X7R C712 065G060310432K CAP CHIP 0603 0.1uF K 50V X7R C715 065G060310432K CAP 0603 100NF 10% 50V X7R C715 065G060310432K CAP 0603 100NF 10% 50V X7R C766 065G080547515K MLCC 0805 4U7 16V X5R +/-10%...
- Page 87 Meridian 3 FQ212 Q45G 88609204 epe bag FQ207 Q70G22C1813 9A CD MANUAL M3221PE1T 221P3 E08907 S89G179T30N8 FFC CABLE 30PIN 177mm P1.0MM FQ124 A15G1137A01801 MAIN_FRAME FQ133 A85G0290101 SHIELD USB FQ205 803GQA44100 L215WA-Tph1b-P2 221P3 EPS ASSY FQ010 ADPCA1603QCS ADAPTER BOARD ASSY CN603 033G3802 4B Y CONNECTOR 4P 2.0 CN903...
- Page 88 Meridian 3 CN902A 095G 82013X529 HARNESS 13P(SAN)-9P(2008) 120mm IC901 056G 379196 AC/DC CONVERTER TOP268EG ESIP-7C D906 093G 60294 IODE MBRF10150CT 10A/150V ITO-220 D906 093G 60903 RECT MBRF10150CT C0 10A 150V ITO-220AB Q608 057G 417 18 T PMBT3904 SOT-23 Q607 057G 417512 MMBT3906 Q608 057G 417518...
- Page 89 Meridian 3 R912 061G12060004JI RST 1206 MAX 5% 1/4W R962 061G1206101 JF RST CHIPR 100 OHM +-5% 1/4W FENGHUA R918 061G1206101 JT RST CHIPR 100 OHM +-5% 1/4W TZAI YUAN R910 061G1206103 JF RST CHIPR 10KOHM +-5% 1/4W FENGHUA R910 061G1206103 JT RST CHIPR 10KOHM +-5% 1/4W TZAI YUAN R901...
- Page 90 Meridian 3 D901 093G110050152T DIODE PR1007 1A/1000V 500ns DO-41 C813 067G 4151017KV EC 100uF 50V ED 8*12 C813 067G 4151017LV EC 100uF 20% 50V RZY 8*11.5 C804 067G 415330 9K EC 33UF 20% 100V ED 8*12 C804 067G 415330 9L EC 33UF 20% 100V RZW 8*11.5 CN802 311GB254A02AAF...
- Page 91 Q101 057G 763511 MOSFET SRK7002LT1G SOT-23 LRC Q702 057G 763513 P6403FMG BY NIKO-SEM Q101 057G 763904 TRA FET 2N7002 SOT-23 PHILIPS R728 061G0402000 JF RST CHIPR MAX0R05 1/16W FENGHUA R420 061G0402000 JT RST CHIPR MAX0R05 1/16W TZAI YUAN R516 061G0402100 JF...
- Page 92 Meridian 3 R709 061G0402102 JF RST CHIPR 1KOHM +-5% 1/16W FENGHUA R117 061G0402102 JI RST 0402 1K 5% 1/16W TA-I R117 061G0402102 JT RST CHIP 1K 1/16W 5% TZAI YUAN R412 061G0402103 JF RST CHIPR 10KOHM +-5% 1/16W FENGHUA R439 061G0402103 JT RST CHIP 10K 1/16W 5% TZAI YUAN R509...
- Page 93 Meridian 3 C434 065G040210427Z CAP 0402 100NF -20%+80% 25V Y5V C717 065G0402105A5K CAP 0402 1UF 10% 10V X5R C717 065G0402105A5K CAP 0402 1UF 10% 10V X5R C111 065G040222131J CAP 0402 220PF 5% 50V NP0 C111 065G040222131J CAP CHIP 0402 220pF 50V NPO C109 065G040222415K CAP 0402 220NF 10% 16V X5R...
- Page 94 Meridian 3 C053 065G040210412K CAP 0402 0.1UF 10% 16V X7R C052 065G040210412K CAP 0402 100NF 10% 16V X7R C051 065G120610612K MLCC 1206 CAP 10uF 16V X7R C051 065G120610612K CAP 1206 10UF 10% 16V X7R FQ007 IRPCAQPH IR BOARD ASSY U053 056G 627911 IR 38KHZ KSM-603TM2M CN503...
- Page 95 Meridian 3 R779 061G0402153 JI RST 0402 15K 5% 1/16W R727 061G0402304 JF RST 0402 300K 5% 1/16W FENGHUA R727 061G0402304 JI RST 0402 300K 5% 1/16W TA-I R752 061G0402513 JI RST 0402 51K 5% 1/16W R752 061G0402513 JT RST CHIP 51K 1/16W 5% TZAI YUAN R713 061G04026801FF RST CHIPR 6.8K +-1% 1/16W FENGHUA...
-
Page 98: General Product Specification
Windows 7 / Vista Premium / XP Logo Certification HDCP SUPPORT SMART CONTROL PREMIUM Smart Contrast 500000:1 (typ.) (lamp), 20M:1 (LED) Waiting for supplier input SmartImage PerfectTune ll (formerly FGA, FACTORY GAMMA Alignment) PHILIPS LOGO DISPLAYED WHILE POWER ON WEEE REQUIREMENT RoHS REQUIREMENT TCO5.0 REQUIREMENT... - Page 99 4.4 Brightness Uniformity 4.5 Check Cross Talk(s) 4.6 Color Temperature Adjustment 5. Mechanical Characteristics 5.1 Cosmetic 5.2 Mechanical Data Files 5.3 Location of Philips Logo 5.4 Gap between Panel and Front Bezel 5.5 Location Control Icons 5.6 Color for Resin/Paint...
- Page 100 5.12 Texture/Glossing of House 5.13 Tilt and Swivel Base 5.14 Kensington Lock 5.15 Label 5.16 Product Dimension / Weight (refer to Philips approved SHT191 / SHT560) 5.17 Transportation 5.18 Pallet / Container Loading (refer to Philips approved SHT560) 6. Environmental Characteristics 6.1 Susceptibility of Display to External Environment...
-
Page 101: Foreword
2. Product Profile 2.1 EDID Header Data for EDID & .inf file User visible strings on .inf file Philips 221P (22inch WIDE LCD MONITOR 221P3) Manufacturer ID ( EDID data) Product ID, "xxxx" 4 codes MSB(byte 12): 08 LSB (byte 11): A2... - Page 102 102 Meridian 3 Type NR. : CPT CLAA215FA04 345366 Resolution : 1920 x 1080 (WSXGA+) Outside dimensions : 495.6 (H) x 292.2 (V) x 9.85 (D) (typ.) Pitch (mm) : 0.248 mm x 0.248 mm Color pixel arrangement : RGB vertical strip Display surface : Hard coating (3H), Anti-glare treatment of the front polarizer Color depth...
-
Page 103: Scanning Frequencies
Scaler should be capable of below items. 1) Scaler must support color engine for Image enhancement feature (SmartImage) 2) Scaler must have enough memory to support PerfecTune feature and Philips OSD 3) Scaler must support SmartContras, 500K: 1 DCR preferred 3.1 Interface signals... -
Page 104: Interface
104 Meridian 3 3.2 Interface 3.2.1 D-Sub Cable Length : 1.8 M +/- 50 mm Fix with monitor when packing, with transplant pin protective cover. Connector type : D-Sub male with DDC2B pin assignments. Blue connector thumb-operated jack screws Pin assignments: Signal Assignment Signal Assignment DDC +3.3V or +5V... -
Page 105: Timing Requirement
Meridian 3 105 3.2.3 DP Cable (for 221P3LPY) The input signals are applied to the display through DP cable. Length : 1.8 M +/- 50 mm Connector type : DP male with DDC-2B pin assignments White connector thumb-operated jackscrews With transplant pin protective cover. Pin Assignment: Signal Assignment Signal Assignment... -
Page 106: Horizontal Scanning
OSD LANGUAGES 8 LANGUAGES OSD TREE Power On Logo: Power On Show up Philips logo 3 seconds Change to input signal. POWER ON LOGO This picture is reference only. The official drawing will send out by PM. -
Page 107: Power Management
Check if the device can work properly. 3.12 DDC /CI Support and Smart Manage /Control In accordance with VESA DDC/CI and MCCS ver.2.0, the monitor should be workable with Philips SmartManage, SmartControl V6.1 and Portrait Display Tune at least. -
Page 108: Hot-Key Definition
108 Meridian 3 3.13 Pivot Function (Auto Pivot) It needs to support AUTO PIVOT function with Smart Control PC application tool. 3.14 Hot-key definition 3.15 Smart Contrast (Dynamic Contrast Ratio) Smart Contrast is a kind of dynamic backlight control. This function changes the panel backlight dynamically according to the frame brightness histogram. At least the minimum contrast ratio has to be >... - Page 109 Meridian 3 109 If the model has multiple inputs including VGA and DVI, each input has their own set of profiles. When user switch input, the profile to be applied will also change. Each input can memorize their individual “Smart Image” profile status. For example, Smart Image is on with “Office”...
- Page 110 110 Meridian 3 C. Photo Purpose: Design for image viewing application, especially in slide show. The screen is dominated by picture. PowerPoint presentation could use this profile also. Enhancement Point: Dynamic contrast enhancement by histogram analysis (DLC) should be off. 2.
-
Page 111: Perfect Tune
Meridian 3 111 iii. The OSD word color is white with transparent background. The demo profile will be “Video Playback” profile with “High” ODC setting. C. Hot keys to trigger: Press [Smart Image] 3 seconds or more to trigger the demo mode. When demo mode is On, press 3 seconds or more to turn off the demo mode. -
Page 112: Usb Support
112 Meridian 3 3.18.8 Monitor Audio Amplifier Input Impedance The monitor audio amplifier shall have minimum 10K ohm AC input impedance. 3.19 USB HUB 2.0 Support Connect the HUB port of the monitor to host PC’s USB port via USB cable, then attach external device to the downstream port of the monitor. -
Page 113: Visual Characteristics
Meridian 3 113 The monitors may influence each other. So Monitor 1 may produce unexpected brightness-switches in monitor 2 (and vice versa). Furthermore, user 1 could perhaps (via monitor 1) influence the power sensor readout on monitor 2 Set up of multiple monitors under an angle Factory requirements Factory requirements are taken into account. -
Page 114: Check Cross Talk(S)
114 Meridian 3 Where B_max = Maximum brightness B_min = Minimum brightness 4.5 Check Cross talk (s) Apply Pattern 2. Set contrast and brightness at 100 %. Measure YA. Then output Pattern 3 and measure YB. The cross talk value: ABS (YA - YB) X 100% <... -
Page 115: Mechanical Characteristics
All Plastics to be Flame Retardant UL 94-HB or better. Base / Rear to be Flame Retardant UL 94-HB. All major plastic parts (bezel, back cover) need to be molded from same resin. Plastic resin type selection should be referred to “plastic-Philips Pool monitor”. -
Page 116: Texture/Glossing Of House
116 Meridian 3 5.12 Texture/Glossing of housing The texture area and texture no should follow Philips make-up sheet. The exterior surfaces shall have a uniform texture. Philips must approve the mold texturing. Detail document for texture refer to “UN-D249”, “UN-D 600”. -
Page 117: Pallet / Container Loading (Refer To Philips Approved Sht560)
Meridian 3 117 A. Transportation test specification for all regions Package test 1. Random Vibration test 2. Drop test 3. Cold Drop test (for design reference) Un-package test 1. Half sine shock test (non operation) B. Transportation test specification for China/India Package test 1. -
Page 118: Bright Dot Defects
According to MIL-STD-1916D Control II level AQL: NA (Please also refer to annual quality agreement) Customer acceptance criteria: UAW0377/00 9. Philips’ Flat Panel Monitors Pixel Defect Policy Philips’ Flat Panel Monitors Pixel Defect Policy Bright Dot Defects Acceptable Level MODEL... -
Page 119: Black Dot Defects
Meridian 3 119 Bright dot defects within 20 mm circle Total bright dot defects of all type Black Dot Defects Acceptable Level MODEL 221P3 1 dark sub-pixel 2 adjacent dark sub-pixels 3 adjacent dark sub-pixels (one white pixel) Distance between two black dots 15mm Black dot defects within 20 mm circle* Total black dot defects of all type... - Page 120 120 Meridian 3 Fig 2: Cross talk pattern Gray level 127 (255 Gray level) Fig 3: Cross talk Pattern Center at Gray level 0 (Black)
-
Page 121: Regulatory Compliance
10.2 EMC Requirements Supplier DVT EMI test result must be submitted prior to DVT samples delivery, and PVT EMI test result must be submitted again prior to PVT samples delivery, which also has to meet Philips' immunity testing specification. 10.3 RoHS Restriction on the use of certain hazardous substances. - Page 122 4. When the HV circuitry is operating properly there is no possibility of an x- tube must be the same type as the original, including suffix letter, or a Philips radiation problem. High voltage should always be kept at the manufacturer's approved type.
Need help?
Do you have a question about the 221P3LPYES/00 and is the answer not in the manual?
Questions and answers