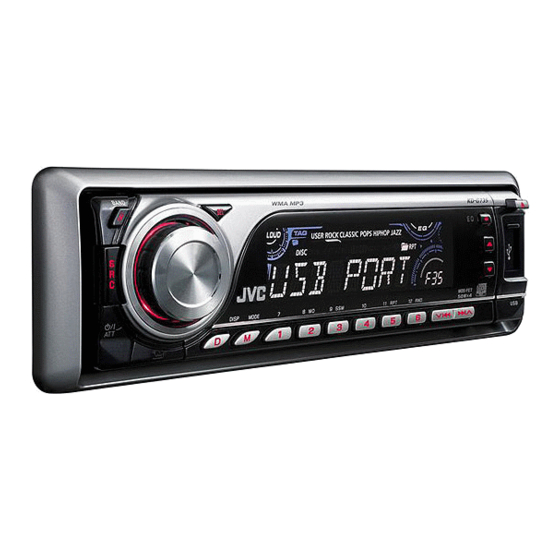
JVC KD-G735 Instructions Manual
Cd receiver
Hide thumbs
Also See for KD-G735:
- Instructions manual (43 pages) ,
- Installation & connection manual (4 pages)
Table of Contents
Advertisement
Available languages
Available languages
CD RECEIVER
ALAT PENERIMA CD
For canceling the display demonstration, see page 4.
Untuk membatalkan tampilan demonstrasi, lihat halaman 4.
For installation and connections, refer to the separate manual.
Untuk instalasi dan penyambungan, lihat buku pedoman terpisah.
INSTRUCTIONS
BUKU PETUNJUK
KD-G735
KD-G735
GET0428-004A
[UN]
Advertisement
Table of Contents

Related Manuals for JVC KD-G735


Summary of Contents for JVC KD-G735
- Page 1 CD RECEIVER KD-G735 ALAT PENERIMA CD KD-G735 For canceling the display demonstration, see page 4. Untuk membatalkan tampilan demonstrasi, lihat halaman 4. For installation and connections, refer to the separate manual. Untuk instalasi dan penyambungan, lihat buku pedoman terpisah. INSTRUCTIONS...
- Page 2 Thank you for purchasing a JVC product. Please read all instructions carefully before operation, to ensure your complete understanding and to obtain the best possible performance from the unit. IMPORTANT FOR LASER PRODUCTS 1. CLASS 1 LASER PRODUCT 2. CAUTION: Do not open the top cover. There are no user serviceable parts inside the unit; leave all servicing to qualified service personnel.
- Page 3 Detaching the control panel CONTENTS INTRODUCTIONS Preparation ..........4 OPERATIONS Basic operations ........5 • Using the control panel ....... 5 Attaching the control panel • Using the remote controller (RM-RK50) ......... 6 Listening to the radio ....... 8 Disc operations ........9 Listening to the USB device .......
-
Page 4: Preparation
Preparation Cancel the display demonstration and set the clock • See also page 23. When the power is turned off: Check the current clock time When the power is turned on: Change the display information Turn on the power. Ÿ Enter the PSM settings. -
Page 5: Basic Operations
Basic operations Using the control panel Select the source. Enter functions mode. CD * USB * CD-CH */IPOD */ FM/AM Press M MODE, then one of the following buttons D.PLAYER * (or EXT IN) BT-PHONE (Bluetooth (within 5 seconds)... Phone)* BT-AUDIO (Bluetooth Audio)* : Turn on/off monaural reception. - Page 6 Display window Playback source indicators Bluetooth indicator Loudness indicator Main display (Time, menu, playback information) Track information indicators Track indicator Sound mode indicators • lights up for the selected item. Source display/Preset No./Track No./Folder No./ Disc No. Tuner reception indicators Status of Bluetooth device Playback mode/item indicators (Device number, [1 –...
- Page 7 • Do not install any battery other than CR2025 or – Changes the folder if pressed and held. its equivalent. • While listening to an Apple iPod or a JVC • Do not leave the remote controller in a place D. player: ∞...
-
Page 8: Listening To The Radio
Listening to the radio Select preset station. Change the display information Lights up when receiving an FM stereo Select “FM/AM.” broadcast with sufficient signal strength. Ÿ Select the bands. Search for a station to listen—Auto Search. Manual Search: Hold either one of the buttons until “M” flashes on the display, then press it repeatedly. * If no title is assigned to a station, “NO NAME”... -
Page 9: Disc Operations
Disc operations Open the control panel and insert the disc. Playback starts automatically. To stop play and eject the disc Change the display information • Press SRC to listen to another playback source. Prohibiting disc ejection If the file does not have Tag information or “TAG DISP” is set to To cancel the prohibition, repeat the “TAG OFF”... -
Page 10: Listening To The Usb Device
After pressing , press the following buttons to... Disc type Skip 10 tracks (within TRK RPT: FLDR RND: the same folder) Repeat current track Randomly play all tracks of FLDR RPT: current folder, then tracks of Repeat current folder next folders DISC RND: Randomly play all tracks Skip 10 tracks... - Page 11 To stop play and detach the USB device Straightly pull it out from the unit. • Press SRC to listen to another playback source. Cautions: • Avoid using the USB device if it might hinder your safety driving. • Do not pull out and attach the USB device repeatedly while “CHECK” is flashing on the display. •...
-
Page 12: Registering A Bluetooth Device
Using the Bluetooth ® devices For Bluetooth operations, it is required to connect the Bluetooth Adapter (KS-BTA200) to the CD changer jack on the rear of this unit. See also page 21. • Refer also to the instructions supplied with the Bluetooth adapter and the Bluetooth device. •... - Page 13 Select a device you want to connect. Use the Bluetooth device to search and connect. On the device to be connected, enter the same PIN code you have just entered for this unit. “CONNECT” Use “OPEN’ or “SEARCH’ to connect. flashes on the display.
-
Page 14: Using The Bluetooth Cellular Phone
Using the Bluetooth cellular phone Change the display information Select “BT-PHONE.” Ÿ Enter Bluetooth menu. Make a call or setting using the Bluetooth setting menu. (See pages 15 and 25.) When a call comes in..When a text message comes in..The source is automatically changed to “BT-PHONE.”... -
Page 15: Making A Call
Making a call You can make a call using the following methods. Select “BT-PHONE,” then follow the following steps to make a call: (unless mentioned otherwise) Call history Display the Dial Select a call history. Select a name (if it is registered) or Menu. -
Page 16: Using The Bluetooth Audio Player
If playback did not start automatically, operate the Bluetooth audio player to start playback. • Refer also to page 13 for connecting/disconnecting/deleting a registered device. Bluetooth Information: If you wish to receive more information about Bluetooth, visit our JVC web site. -
Page 17: Listening To The Cd Changer
Change the display information (see page 9) It is recommended to use a JVC MP3-compatible CD changer with your unit. You can connect a CD changer to the CD changer jack on the rear of the unit. See also page 21. - Page 18 After pressing , press the following buttons to... Disc type Skip 10 tracks (within TRK RPT: FLDR RND: the same folder) Repeat current track Randomly play all tracks of FLDR RPT: current folder, then tracks of Repeat all tracks of current folder next folders DISC RPT: DISC RND:...
-
Page 19: Listening To The Ipod / D. Player
Listening to the iPod / D. player Change the display information Before operating, connect either one of the following (separately purchased) to the CD changer jack on the rear of the unit. See also page 21. • Interface adapter for iPod—KS-PD100 for controlling an iPod. •... -
Page 20: Listening To The Other External Components
After pressing , press the following buttons to... ONE RPT: Functions the same as “Repeat One” of the iPod or “Repeat Mode One” of the D. player. ALL RPT: Functions the same as “Repeat All” of the iPod or “Repeat Mode All”... - Page 21 Concept diagram of the external device connection For connection, see Installation/Connection manual (separate volume). Unit CD changer jack JVC CD changer, [17] Apple iPod, [19] (see page 24 of the ”EXT IN” setting) JVC D. player, [19] with or without MD player, etc., [20]...
-
Page 22: Selecting A Preset Sound Mode
Selecting a preset sound mode Preset values BAS * (bass), [–06 to +06] Adjust the bass. Indication (For) MID * (mid-range), [–06 to +06] Adjust the mid-range frequencies sound level. USER (Flat sound) TRE * (treble), [–06 to +06] Adjust the treble. ROCK FAD * (fader), [R06 to F06]... -
Page 23: General Settings — Psm
General settings — PSM You can change PSM (Preferred Setting Mode) items Select or adjust the selected PSM item. listed in the table that follows. Enter the PSM settings. Repeat steps 2 and 3 to adjust other PSM items if necessary. Select a PSM item. - Page 24 : Frequencies lower than 180 Hz are sent to the subwoofer. EXT IN * • CHANGER : To use a JVC CD changer, [17], or an Apple iPod/a JVC D. player, [19]. External input • EXT IN : To use any other external component, [20].
-
Page 25: Bluetooth Settings
Bluetooth settings You can change the settings listed on the right column Setting menu : Initial) according to your preference. AUTO CNT (connect) When the unit is turned on, the connection is Select “BT-PHONE” or “BT-AUDIO.” established automatically with..OFF: No Bluetooth device. -
Page 26: Assigning Titles
Assigning titles You can assign titles to 30 station frequencies (FM and To erase the entire title AM) and up to 8 characters for each title. In step Ÿ on the left... Select FM/AM. Ÿ Show the title entry screen. Assign a title. -
Page 27: Moisture Condensation
Maintenance How to clean the connectors To keep discs clean Frequent detachment will deteriorate the connectors. A dirty disc may not play correctly. To minimize this possibility, periodically wipe the If a disc does become dirty, wipe it with connectors with a cotton swab or cloth moistened with a soft cloth in a straight line from center alcohol, being careful not to damage the connectors. -
Page 28: More About This Unit
More about this unit Ejecting a disc General • If the ejected disc is not removed within 15 seconds, Turning on the power the disc is automatically inserted again into the • By pressing SRC on the unit, you can also turn on the loading slot to protect it from dust. - Page 29 If you connect an MTP device featuring “USB digital characters for file/folder names in case the total media streaming” to this unit (except JVC D. Player number of files and folders is 271 or more. XA-HD500), you can play back the WMA-DRM10 •...
-
Page 30: Bluetooth Operations
• This unit is compatible with the USB Full-Speed. • This unit cannot play back the following files: • If the connected USB device does not have the correct – MP3 files encoded with MP3i and MP3 PRO format. files, “NO FILE” appears. –... - Page 31 40 characters. Notice: When operating an iPod or a D. player, some operations may not be performed correctly or as intended. In this case, visit the following JVC web site: For iPod users: <http://www.jvc.co.jp/english/ car/support/ks-pd100/index.html> For D. player users: <http://www.jvc.co.jp/ english/car/support/ks-pd500/index.html>...
-
Page 32: Troubleshooting
Troubleshooting What appears to be trouble is not always serious. Check the following points before calling a service center. Symptom Remedy/Cause • Sound cannot be heard from the speakers. • Adjust the volume to the optimum level. • Check the cords and connections. •... - Page 33 Symptom Remedy/Cause • Tracks do not play back in the order you have Playback order is determined when files are recorded. intended them to play. • Elapsed playing time is not correct. This sometimes occurs during play. This is caused by how the tracks are recorded on the disc.
- Page 34 Symptom Remedy/Cause • Bluetooth device does not detect the unit. The unit can be connected with one Bluetooth cellular phone and one Bluetooth audio device at a time. While connecting a device, this unit cannot be detected from another device. Disconnect currently connected device and search again.
- Page 35 • The Bluetooth word mark and logos are owned by the Bluetooth SIG, Inc. and any use of such marks by Victor Company of Japan, Limited (JVC) is under license. Other trademarks and trade names are those of their respective owners.
-
Page 36: Specifications
Specifications AUDIO AMPLIFIER SECTION Maximum Power Output: Front and rear: 50 W per channel Continuous Power Output (RMS): Front and rear: 19 W per channel into 4 Ω, 40 Hz to 20 000 Hz at no more than 0.8% total harmonic distortion. Load Impedance: 4 Ω... - Page 37 CD PLAYER SECTION Type: Compact disc player Signal Detection System: Non-contact optical pickup (semiconductor laser) Number of Channels: 2 channels (stereo) Frequency Response: 5 Hz to 20 000 Hz Dynamic Range: 96 dB Signal-to-Noise Ratio 98 dB Wow and Flutter: Less than measurable limit MP3 Decoding Format: (MPEG1/2 Audio Layer 3) Max.
- Page 38 Terima kasih telah membeli produk JVC. Harap membaca seluruh petunjuk dengan teliti sebelum mengoperasikan, untuk memastikan anda memahami secara keseluruhan dan mendapatkan performansi terbaik dari unit ini. PENTING UNTUK PRODUK-PRODUK LASER 1. PRODUK LASER KELAS 1 2. PERHATIAN: Jangan membuka penutup atas. Tidak ada bagian yang dapat diperbaiki oleh pengguna di dalam unit tersebut;...
- Page 39 Melepaskan panel kontrol DAFTAR ISI PENDAHULUAN Persiapan ..........4 PENGOPERASIAN Pengoperasian dasar ....... 5 • Menggunakan panel kontrol ....5 Memasang panel kontrol • Menggunakan remote kontrol (RM-RK50) ......... 6 Mendengarkan radio ....... 8 Pengoperasian disk ......... 9 Mendengarkan perangkat USB ....10 ALAT EKSTERNAL Menggunakan perangkat Bluetooth ®...
- Page 40 Persiapan Batalkan demo tampilan dan setel jam • Lihat juga halaman 23. Apabila daya dimatikan: Periksa waktu jam sekarang Apabila daya dihidupkan: Mengubah informasi tampilan layar Menghidupkan power. Ÿ Masukkan pengaturan PSM. ⁄ Batalkan demo tampilan Pilih “DEMO” kemudian “DEMO OFF”. Setel jam Pilih “CLOCK H”...
- Page 41 Pengoperasian dasar Menggunakan panel kontrol Memilih sumber. Masukkan mode fungsi. CD * USB * CD-CH */IPOD */ FM/AM Tekan M MODE, kemudian salah satu tombol D.PLAYER * (atau EXT IN) BT-PHONE berikut (dalam 5 detik)... (Bluetooth Phone)* BT-AUDIO (Bluetooth : Aktifkan/nonaktifkan penerimaan mono. Audio)* (kembali ke permulaan) SSM : Preset stasiun otomatis [Tahan].
- Page 42 Jendela tampilan Indikator-indikator sumber putar ulang Indikator Bluetooth Indikator kenyaringan Tampilan utama (Informasi waktu, menu, pemutaran) Indikator informasi trek Indikator trek Indikator-indikator mode suara • menyala untuk item yang dipilih. Tampilan sumber/No. Prasetel/No. Trek./No. Folder/No. Disc Indikator-indikator penerima tuner Status perangkat Bluetooth Indikator mode putar ulang/indikator item (Nomor perangkat, [1 –...
- Page 43 – Mengubah folder-folder jika ditekan dan yang setara. ditahan. • Jangan meninggalkan remote kontrol dalam • Sewaktu mendengarkan Apple iPod atau JVC tempat (seperti dasbor) yang terkena sinar D. player: matahari langsung untuk waktu yang lama. – Jeda/berhenti atau melanjutkan pemutaran ∞...
- Page 44 Mendengarkan radio Pilih stasiun preset. Mengubah informasi tampilan layar Menyala ketika menerima sebuah siaran Pilih “FM/AM”. stereo FM dengan kekuatan sinyal yang cukup. Ÿ Memilih jalur. Mencari stasiun yang akan didengarkan—Auto Search [Pencarian Otomatis]. Manual Search [Pencarian Manual]: Tekan terus salah satu tombol sampai “M” berkedip-kedip pada tampilan, kemudian tekan tombol berulang-ulang.
- Page 45 Pengoperasian disk Buka panel kontrol dan masukkan disk. Putar ulang mulai secara otomatis. Untuk menghentikan putar dan Mengubah informasi tampilan layar mengeluarkan disk • Tekan SRC [Sumber] untuk mendengarkan sumber pemutaran yang lain. Mencegah pengeluaran disk Jika file tidak memiliki informasi Tag atau “TAG DISP” disetel ke “TAG OFF”...
- Page 46 Setelah menekan , tekan tombol berikut untuk... Tipe disk Meloncati 10 trek TRK RPT: FLDR RND: (dalam folder yang Mengulangi trek yang sekarang Memutar secara acak semua sama) diputar trek dari folder yang sekarang FLDR RPT: diputar, kemudian trek dari Mengulangi folder yang folder berikutnya.
- Page 47 Untuk menghentikan pemutaran dan mencopot perangkat USB Tarik lurus keluar perangkatnya dari unit. • Tekan SRC [Sumber] untuk mendengarkan sumber pemutaran yang lain. Perhatian-perhatian: • Jangan gunakan perangkat USB jika akan mengganggu keamanan pengemudian Anda. • Jangan menarik dan memasangkan perangkat USB berulang-ulang sewaktu “CHECK” berkedip pada tampilan. •...
- Page 48 Menggunakan perangkat Bluetooth ® Untuk operasi Bluetooth, Anda harus menghubungkan Bluetooth Adapter (KS-BTA200) ke jack CD changer di bagian belakang. Lihat juga halaman 21. • Bacalah juga Petunjuk yang disertakan dengan adaptor Bluetooth dan perangkat Bluetooth ini. • Lihat daftar (disertakan dalam kemasan) untuk negara-negara yang memungkinkan Anda menggunakan fungsi Bluetooth®.
- Page 49 Pilih perangkat yang ingin Anda hubungkan. Gunakan perangkat Bluetooth untuk mencari dan menghubungkan. Pada perangkat yang akan dihubungkan, masukkan kode PIN yang sama seperti yang baru Gunakan “OPEN’ atau “SEARCH’ untuk saja Anda masukkan untuk unit ini. “CONNECT” menghubungkan. berkedip pada tampilan. Koneksi baru sekarang terjalin dan Anda dapat Menghubungkan/memutuskan perangkat menggunakan perangkat melalui unit.
- Page 50 Menggunakan ponsel Bluetooth Mengubah informasi tampilan layar Pilih “BT-PHONE”. Ÿ Masuk ke menu Bluetooth. Lakukan panggilan atau buat pengaturan dengan menggunakan menu pengaturan Bluetooth. (Lihat halaman 15 dan 25.) Apabila ada panggilan masuk..Apabila ada pesan teks yang masuk..Sumber otomatis berubah ke “BT-PHONE”. Jika ponsel kompatibel dengan MSG (Pesan) dan “MSG-INFO”...
- Page 51 Melakukan panggilan Anda dapat melakukan panggilan dengan cara berikut ini. Pilih “BT-PHONE” lalu ikuti langkah-langkah berikut untuk melakukan panggilan: (kecuali ditentukan lain) Riwayat Tampilkan Dial Pilih riwayat panggilan. Pilih nama (jika terdaftar) atau panggilan Menu. REDIAL [PANGGIL ULANG], RECEIVED nomor telepon. [DITERIMA], MISSED [TIDAK TERJAWAB] Buku telepon...
- Page 52 Mengubah informasi tampilan layar Pilih “BT-AUDIO”. Jika playback tidak mulai secara otomatis, operasikan audio player Bluetooth untuk menjalankan pemutaran. • Lihat halaman 13 untuk menghubungkan/memutuskan/menghapus perangkat terdaftar. Informasi Bluetooth: Jika ingin menerima informasi lebih lanjut mengenai Bluetooth, kunjungi situs web JVC kami.
- Page 53 Mengubah informasi tampilan layar (lihat halaman 9) Disarankan untuk menggunakan JVC CD changer yang kompatibel-MP3 dengan alat penerima anda. Anda dapat menghubungkan CD changer ke jack CD changer yang ada di bagian belakang unit. Lihat juga halaman 21. • Anda hanya dapat memutar CD konvensional (termasuk Teks CD) dan disk MP3.
- Page 54 Setelah menekan , tekan tombol berikut untuk... Tipe disk Meloncati 10 trek TRK RPT: FLDR RND: (dalam folder yang Mengulangi trek yang sekarang Memutar secara acak semua sama) diputar trek dari folder yang sekarang FLDR RPT: diputar, kemudian trek dari Mengulang semua trek dari folder berikutnya.
- Page 55 Mendengarkan iPod / D. player Mengubah informasi tampilan layar Sebelum mengoperasikan, hubungkan salah satu dari yang berikut ini (dibeli terpisah) ke jack CD changer di belakang unit. Lihat juga halaman 21. • Adaptor antarmuka untuk iPod—KS-PD100 untuk mengontrol iPod. • Adaptor antarmuka D. player—KS-PD500 untuk mengontrol D. player. Persiapan Pastikan Anda memilih “CHANGER”...
- Page 56 Setelah menekan , tekan tombol berikut untuk... ONE RPT: Fungsinya sama seperti “Repeat One” untuk iPod atau “Repeat Mode One” untuk D. player. ALL RPT: Fungsinya sama seperti “Repeat All” untuk iPod atau “Repeat Mode All” untuk D. player. ALBM RND*: Fungsinya sama seperti “Shuffle Albums”...
- Page 57 Diagram konsep dari sambungan perangkat eksternal Untuk penyambungan, lihat Manual Pemasangan/Penyambungan (bagian yang terpisah). Unit Jack CD changer JVC CD changer, [17] Apple iPod, [19] (lihat halaman 24 mengenai pengaturan JVC D. player, [19] ”EXT IN”) dengan atau tanpa MD player, dsb., [20] (lihat halamans 12 –...
- Page 58 Memilih mode suara preset Nilai-nilai preset BAS * (bas), [–06 ke +06] (pengaturan awal) Setel bas. MID * (nada tengah), [–06 ke +06] Menyesuaikan tingkat nada frekuensi tengah. Indikasi (Untuk) TRE * (trebel), [–06 ke +06] USER Setel trebel. 00 OFF (Suara rata) FAD * (feder (pemudar)), [R06 ke F06]...
- Page 59 Pengaturan-pengaturan umum — PSM Anda dapat mengganti bagian PSM (Mode Pengaturan Memilih atau menyesuaikan item PSM yang Disukai) yang telah terdaftar dalam tabel berikut. yang dipilih. Masukkan pengaturan PSM. Ulangi langkah 2 dan 3 untuk menyetel bagian-bagian PSM lain jika diperlukan. Pilih sebuah bagian PSM.
- Page 60 • HIGH : Frekuensi-frekuensi yang lebih rendah dari 180 Hz dikirim ke subwoofer. EXT IN * • CHANGER : Untuk menggunakan JVC CD changer, [17], atau Apple iPod/JVC Input eksternal D. player, [19]. • EXT IN : Untuk menggunakan komponen eksternal yang lain, [20].
- Page 61 Pengaturan Bluetooth Anda dapat mengubah pengaturan yang tercantum Menu Setting : Permulaan) pada kolom kanan sesuai preferensi Anda. AUTO CNT (connect) Apabila unit diaktifkan, koneksi dilakukan secara Pilih “BT-PHONE” atau “BT-AUDIO”. otomatis dengan... OFF: Tidak ada perangkat Bluetooth. LAST: Perangkat Bluetooth yang terakhir dihubungkan.
- Page 62 Menentukan judul Anda dapat menentukan judul ke 30 frekuensi stasiun Untuk menghapus semua judul (FM dan AM) hingga 8 karakter untuk setiap nama Dalam langkah Ÿ pada bagian kiri... stasiun. Pilih FM/AM. Ÿ Menampilkan layar entri judul. Karakter yang tersedia Tetapkan sebuah judul.
- Page 63 Perawatan Bagaimana membersihkan konektor- Untuk menjaga disk-disk bersih konektor Sebuah disk yang kotor mungkin tidak dapat diputar secara benar. Sering melepaskan akan memperburuk konektor- Jika sebuah disk menjadi kotor, lap konektor. dengan sebuah kain lembut dalam satu Untuk meminimalkan kemungkinan ini, secara periodik garis lurus dari tengah ke pinggir.
- Page 64 Lebih lagi tentang alat penerima ini Mengeluarkan sebuah disk Umum • Jika disk yang dikeluarkan tidak dipindahkan dalam Menghidupkan daya 15 detik, disk secara otomatis akan disisipkan • Dengan menekan tombol SRC pada alat penerima, kembali ke dalam tempat pemuatan untuk anda dapat juga menghidupkan power.
- Page 65 • Alat penerima ini dapat mengenali total 512 file, 200 “pengaliran (streaming) media digital USB” ke folder, dan 8 hirarki. unit ini (kecuali JVC D. Player XA-HD500), Anda • Alat penerima ini dapat memutar ulang file yang dapat memutar kembali file WMA-DRM10 (Digital terekam dalam VBR (Kecepatan bit variabel).
- Page 66 • Unit ini kompatibel dengan USB Full-Speed. • Alat penerima ini tidak dapat memutar ulang file • Jika perangkat USB yang terhubung tidak memiliki berikut: file yang benar, muncul tulisan “NO FILE” [Tidak Ada – File MP3 yang disandikan dengan format MP3i dan File].
- Page 67 40 karakter. Pemberitahuan: Sewaktu pengoperasian sebuah iPod atau sebuah D. player, beberapa pengoperasian mungkin tidak bisa dilakukan dengan benar atau sebagaimana mestinya. Jika ini terjadi, kunjunglah situs web JVC berikut: Untuk pengguna iPod: <http://www.jvc.co.jp/ english/car/support/ks-pd100/index.html> Untuk pengguna D. player: <http://www.jvc.
- Page 68 Pemecahan Masalah Apa yang muncul dan menjadi masalah tidak selalu serius. Cek poin-poin berikut sebelum memanggil sebuah pusat layanan. Gejala Perbaikan/Sebab • Suara tidak dapat didengar dari speaker- • Sesuaikan volume ke level optimum. speaker. • Cek kabel-kabel dan penyambungan-penyambungan. •...
- Page 69 Gejala Perbaikan/Sebab • Trek tidak berputar ulang dalam Urutan putar ulang ditentukan ketika file-file direkam. urutan yang Anda inginkan. • Waktu putar yang sudah lewat Ini kadang-kadang terjadi selama putar. Hal ini tidak benar. disebabkan dengan bagaimana trek-trek tersebut direkam pada disk. •...
- Page 70 Gejala Perbaikan/Sebab • Perangkat Bluetooth tidak mendeteksi unit. Unit ini dapat dihubungkan dengan satu ponsel Bluetooth dan satu perangkat audio Bluetooth secara bersamaan. Sewaktu menghubungkan suatu perangkat, unit ini tidak dapat dideteksi dari perangkat lain. Putuskan perangkat yang sekarang terhubung lalu cari lagi. •...
- Page 71 • iPod adalah merek dagang dari Apple Computer, Inc., terdaftar di Amerika Serikat dan di negara-negara lain. • Tanda kata dan logo Bluetooth dimiliki oleh Bluetooth SIG, INC. dan segala penggunaan tanda tersebut oleh Victor Company of Japan, Limited (JVC) adalah berdasarkan lisensi. Merek dagang dan nama dagang lainnya adalah hak pemilik masing-masing.
- Page 72 Spesifikasi-spesifikasi SEKSI PENGUAT AUDIO Maksimum keluaran power: Depan dan 50 W per saluran Belakang: Output Power Kontinu (RMS): Depan dan 19 W per saluran dalam 4 Ω, 40 Hz ke 20 000 Hz pada Belakang: tidak lebih dari 0.8% total distorsi harmoni. Impedansi Beban: 4 Ω...
- Page 73 SEKSI ALAT PEMUTAR CD Tipe: Alat Pemutar CD kompak Sistem Pendeteksi Sinyal: Optik non kontak terbuka (laser semikonduktor) Jumlah Saluran: 2 saluran (stereo) Respon Frekuensi: 5 Hz sampai 20 000 Hz Cakupan Dinamik: 96 dB Perbandingan Sinyal ke derau 98 dB Wow dan Flutter: Kurang dari batas ukuran Format Penguraian Sandi MP3: (MPEG1/2 Lapisan Audio 3)
- Page 74 Having TROUBLE with operation? Please reset your unit Refer to page of How to reset your unit Ada MASALAH dengan cara pengoperasian? Setel kembali unit Anda Lihat halaman mengenai Bagaimana mereset unit anda EN, IN © 2007 Victor Company of Japan, Limited 0107DTSMDTJEIN...
Need help?
Do you have a question about the KD-G735 and is the answer not in the manual?
Questions and answers