Advertisement
Quick Links
Download this manual
See also:
User Manual
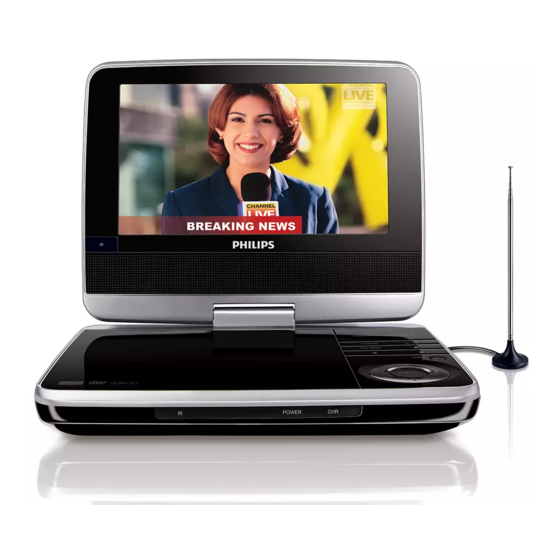
DVD Portable Player
Service Manual
TABLE OF CONTENTS
Technical Specification & Service Tips......................... 1
Safety Instructions..................................................... 2
Instruction for Use...................................................... 3
Mechanical Instructions.............................................. 4
Troubleshooting .........................................................5
Overall Block Diagram................................................. 6
Electrical Diagram...................................................... 7
Service Part List.......................................................... 8
Revision List............................................................. 9
©Copyright 2005 Philips Consumer Electronics B.V. Eindhoven, The Netherlands
All rights reserved. No part of this publication may by reproduced, stored in a
retrieval system or transmitted, in any form or by any means, electronics,
mechanical, photocopying, or otherwise without the prior permission of Philips
Published by BU AVM - FK
Version 1.0
Printed in the Netherlands
PET748/58
Chapter
3141 785 34170
Subject to modification
Advertisement

Related Manuals for Philips PET748/58


Summary of Contents for Philips PET748/58
-
Page 1: Table Of Contents
All rights reserved. No part of this publication may by reproduced, stored in a retrieval system or transmitted, in any form or by any means, electronics, mechanical, photocopying, or otherwise without the prior permission of Philips 3141 785 34170 Published by BU AVM – FK... -
Page 2: Technical Specification
1.0 TECHNICAL SPECIFICATION General Pixel specification Dimensions (W x H x D): 200 x 160 x 43.5 mm Max. 0 bright-dot & max. 3 dark-dots Bear Unit Weight: 0.84Kg Power supply: Supply voltage AC 100~240V (adapter) Supply Power 9V/1.5A consumption Operating Temp &... - Page 3 5. Refer below table for your region code setting Select “0” setting = Region Free (confidential) Procedure for SW upgrade 1. Download the “PHILIPS.BIN” file from the Philips support site 2. Power on PET739 with AC/DC adapter 3. Insert the USB drive to USB port of the main 4.
- Page 4 2.0 SAFTETY INSTRUCTIONS WAARSCHUWING WARNING Alle IC’s en vele andere halfgeleiders zijn All ICs and many other semi-conductors are gevoelig voor electrostatische ontladingen susceptible to electrostatic discharges (ESD). (ESD). Careless handling during repair can reduce life Onzorgvuldig behandelen tijdens reparatie kan drastically.
- Page 5 2.1 ESD PROTECTION When the power supply is being turned on, you may not remove this laser cautions label. If it removes, radiation of laser may be received. PREPARATION OF SERVICING Pickup Head consists of a laser diode that is very susceptible to external static electrocity. Although it operates properly after replacement, if it was subject to electrostatic discharge during replacement, its life might be shortened.
- Page 6 SAFTY NOTICE SAFTY PRECAUTIONS LEAKAGE CURRENT CHECK Plug the AC line cord directly into a 120V AC outlet (do Measure the AC voltage across the 1500 resistor. not use an isolation transformer for this check). Use an The test must be conducted with the AC switch on and AC voltmeter, having 5000 per volt or more sensitivity.
-
Page 7: Instruction For Use
3.0 INSTRUCTION FOR USE... - Page 8 3.0 INSTRUCTION FOR USE...
-
Page 9: Mechanical Instructions
4.0 MECHANICAL INSTRUCTION Disassembly Procedure on PET748 Remove eight screws on back cabinet to separate top cabinet and back screws 8pcs cabinet. Generally open the front cabinet. Disassemble hous and connecter. Disassemble hous and connecter,and take out the DVD LOADER. Disassemble hous and screws,and screws 7pcs take out the main board、sw board. - Page 10 Remove one screws fabrics and screws 1pcs and connecter hous connecter hous on IR board. 1pcs Remove fabrics and hous. Remove the screws on the TFT board. screws 1pcs...
-
Page 11: Troubleshooting
5.0 TROUBLESHOOTING SYMPTOM: NO IMAGE / NO SOUND SYMPTOM: NO IMAGE OUTPUT ( THE PANEL SHOW BLUE PICTURE) Start Check DVD Drive work? Replace DVD Drive Check the external AV NOTE: AV Cable TYPE from outside to note Cable TYPE Exchange AV cable Inside L-Audio, R-Audio, Video, Ground connection is OK? - Page 12 5.0 TROUBLESHOOTING SYMPTOM: THE DVD DRIVE DOES NOT WORK SYMPTOM: THE DVD DRIVE DOESN'T WORK Start Check DVD-Loader Cable Reinsertion connection OK? Check the DVD-Loader Replace DVD- Loader Replace main board...
- Page 13 5.0 TROUBLESHOOTING SYMPTOM: ADAPTOR CANNOT POWER ON Adaptor can not Power ON Start Check Adaptor OK? Change adaptor SET OK? Check the Power-ON Return set to Replace Main Board button and cable OK? Customer Replace Button or Cable...
- Page 14 5.0 TROUBLESHOOTING SYMPTOM: KEY & BOTTON FAILURE SYMPTOM: Key & Botton Fail Start Check CABLE form board to Cable Reinsertion board connection OK? Check KEY board OK? Replace KEY board Replace main board Return to custormer...
- Page 15 PET 739 BLOCK PET748 WIRING DIAGRAM BATTERY LED DRIVER DC_DC SS661O 9VDC_IN SS7701 POWER ON/OFF AVOUT CVBS SDRAM 16M POWER O/P4558 1389R EON 8M TDA2822 TCOM 4558 MOTOR DRIVER Foryou 520+ 1200X 720C M12WTP-2PS-E TV_CVBS MSTAR TENA KEY1 KEY2 FLASH...
- Page 16 CIRCUIT DIAGRAM MAIN BORAD 89L_3V3 DV18 V1.8 FB600R FB600R DACVDD3 89L_3V3 RFV33 RFV33 FB600R FB600R EC16 EC16 10uF/10V0805 10uF/10V0805 0.1uF 0.1uF 0.1uF 0.1uF 6800pF 6800pF 100uF/10V 100uF/10V EC17 EC17 0.1uF 0.1uF 100uF/10V 100uF/10V 0.1UF 0.1UF 100k 100k VCC5V IR_IN 10uF/25V 10uF/25V 27MHz 27MHz...
- Page 17 DV33 VCC5V VCC5V VCC5V 2 VLCDSW VLCDSW TC89 TC89 CIRCUIT DIAGRAM-MT720C TR74 TR74 TRN1 33RX4 TRN1 33RX4 0.1uF 0.1uF HOLD# SDI_EEP_SDA VDD_LCD VDD_LCD 2 SCK_EEP_SCL VEE_LCD VEE_LCD TQ11 TQ11 VCC5V AVDD_PWM POWER 2N3904/SOT23 2N3904/SOT23 CURRENT=32mA ENF05_512K ENF05_512K LED_BRIGHTNESS LED_BRIGHTNESS SOP8 SOP8 TUNER_PW Keep away of Analog Area...
- Page 18 CIRCUIT DIAGRAM-SDRAM SDRAM (Dual Layout) DV33 SD33 DV33 DV33 FB600R FB600R SD33 SD33 SD33 + EC32 + EC32 DCLK DCLK 100uF/10V 100uF/10V 0.1uF 0.1uF 0.1uF 0.1uF 0.1uF 0.1uF CAS# CAS# RAS# RAS# SD33 SDCKE MA10 DQ10 A10/AP DQ10 MA11 DQ11 MA[0..10] SD33 DQ11...
- Page 19 battery charge CIRCUIT DIAGRAM-POWER COMMON1389L/K_HD65_V5_Ext BATTERY BATTERY Desktop Model 2307 2307 MT1389L/K (LQFP128) DVD TEST Board w/ Sanyo HD6x Series PUHs +9VDCIN CHARGE 22k 1% 22k 1% 100R 100R B-CHARG 3904 3904 100uF/25V 100uF/25V LED2 LED2 3904 3904 0.1uF 0.1uF 910 1% 910 1% CHARGE ON INDICATION...
- Page 20 ADKEY1 ADKEY1 CIRCUIT DIAGRAM-PANEL KEY 1.27*3 KJ1 1.27*3 ADKEY1 ADKEY2 ENTER ENTER 3.9K 3.9K SOURCE SOURCE key board connect 3.9K 3.9K LEFT LEFT DOWN DOWN RIGHT RIGHT MENU MENU SW10 SW10 KEY_GND SW11 SW11 1<< 1<< STOP STOP SW12 SW12 SW13 SW13 >>1...
- Page 21 CIRCUIT DIAGRAM-TFT PANEL POWER VCC5V VCC5V VCC5V (1) VEE_LCD VDD_LCD 100mHz/600R 100mHz/600R LED+ CURRENT=10mA TL34 TL34 TL33 TL33 CURRENT=2mA TC68 TC68 TC69 TC69 TCN2 TCN2 TO LED B/L TO LED B/L VDD_LCD VDD_LCD (1) TEC14 TEC14 TC70 TC70 100mHz/600R 100mHz/600R TC71 TC71 TEC15...
- Page 22 CIRCUIT DIAGRAM-ANALOG TUNER DVCC DVCC TV_AUDIO TV_AUDIO VCC5V TUNER TUNER VCC5V (1,2) TV_CVBS_OUT IR_IN VIDEO IR_IN TV_AUDIO I2C_INT I2C_INT AUDIO 5V_TV AF_OUT L40 10UH L40 10UH 5V_TV 5V_TUNER RF_AGC DV33 DV33 + EC52 + EC52 100uF/10V 100uF/10V SIFOUT 0.1uF 0.1uF 1000pf 1000pf TV_SCL...
- Page 23 CIRCUIT DIAGRAM AUDIO&VIDEO 100pF 100pF AV-OUT-L FB2K2 FB2K2 EC34 EC34 EC35 EC35 5.1K 5.1K R139 R139 EC55 EC55 DVD_L EC36 EC36 10uF/16V 10uF/16V 330R 330R 1.8uH 1.8uH AOUT_L AV-OUT-L A_L_SPEAKER CVBS_OUT CVBS-AVOUT FB2K2 FB2K2 10uF/16V 10uF/16V 10uF/16V 10uF/16V 220uF/16V 220uF/16V NJM4558-SOP-8 NJM4558-SOP-8 5.1R...
-
Page 26: Service Partlist
8.0 SERVICE PARTLIST Electrical Part List: Service 12NC Service Description Photo Pos. PET748/58 996510027075 MAIN PCBA PET748/58 PET748/58 996510027071 TFT PCBA PET748/58 PET748/58 996510027072 KEY PCBA PET748/58 PET748/58 996510027081 7” HANNSTAR PANEL ASSY PET748/58 996510027079 BATTERY LI-ION POLYMER 7.4V PET748/58... - Page 27 8.0 SERVICE PARTLIST Mechanical Part List: Service Service Description Photo Pos. 12NC PET748/58 996510022105 MONITOR TOP FRAME DISPLAY FRAME + PET748/58 996510022268 SPEAKER PET748/58 996510027076 DVD DOOR PET748/58 996510022094 DVD MIDDLE FRAME PET748/58 996510022099 KEY 1 (PLAY) PET748/58 996510027078 KEY 2 (MENU)
- Page 28 8.0 SERVICE PARTLIST Mechanical Part List: Service Service Description Photo Pos. 12NC PET748/58 996510027073 DVD BOTTOM CABINET PET748/58 996510022039 FFC 24P/0.5MM 150MM PET748/58 996510022097 HINGE + HOUSING...
- Page 29 8.0 SERVICE PARTLIST Accessories Part List: Service Service Description Photo Pos. 12NC PET748/58 996510022078 AC ADAPTER ADAPT PET748/58 9965100????? ROD ANT PET748/58 9965100????? AV CABLE AVCABLE PET748/58 996510021031 CAR ADAPTER CARAPT PET748/58 996510027077 REMOTE CONTROL 29KEY...
-
Page 30: Revision List
9.0 REVISION LIST Version 1.0 • Initial release PET748/58...
Need help?
Do you have a question about the PET748/58 and is the answer not in the manual?
Questions and answers