Table of Contents
Advertisement
Advertisement
Table of Contents

Related Manuals for Haier HDW13G1


Summary of Contents for Haier HDW13G1
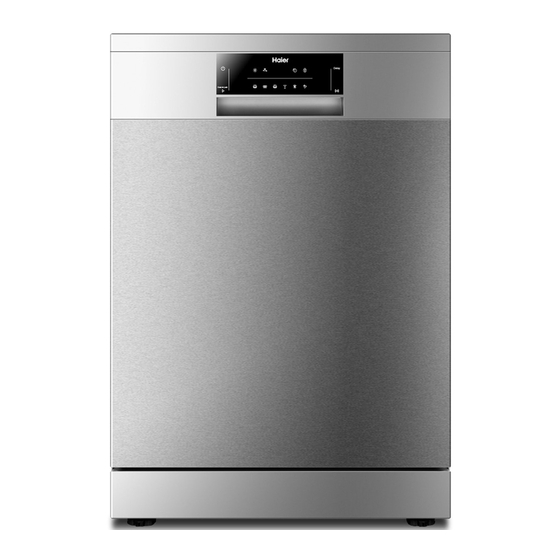
- Page 1 User Manual Dishwasher HDW13G1 / HDW14G2 HDW15G2P / HDW15G3 Models...
- Page 2 Thank you for purchasing a Haier Pro Please read these instructions carefully before using this appliance. The instructions contain important information which will help you get the best out of the appliance and ensure safe and proper installation, use and maintenance.
-
Page 3: Table Of Contents
Content Safety ....................3 Product Description ............... 5 Control-Panel ................. 6 Programmes ................... 8 ................Daily Use ..................12 Care and Cleaning ................ 22 Troubleshooting ................24 Economic and Environmental Use ..........27 Installation ..................28 Technical Data ................32 Customer Service ................ -
Page 4: Safety
Safety Intended Use The appliance is designed for domestic use inside the house. It is not intended for commercial or industrial use. Do not use it for purposes other than that for which it was designed. may cause hazards and loss of warranty claims. Standards and Directives This product meets the requirements of all applicable EC directives with the corresponding harmonised standards, which provide for CE marking. - Page 5 Safety During Daily Use Do… supervise children to prevent them playing with the appliance. put sharp pointed objects (e.g. knives) in a way that there is no danger of injury. Do not… open the door while a programme operates. The appliance can release hot steam.
-
Page 6: Product Description
U-support User manual 1) , 2) Applicable to models HDW14G2, HDW15G2P and HDW15G3 . 3) Applicable to models HDW13G1 and HDW14G2 . 4) Applicable to models HDW15G2P and HDW15G3. 5) Applicable to models HDW13G1, HDW14G2 and HDW15G2P. -
Page 7: Control-Panel
Control Panel HDW13G1/HDW14G2/HDW15G2P : 3 sec to Lock 7. Deficit Indicators 1. ON / OFF button PROGRAMME SELECT button Rinse aid indicator 3. START DELAY button Water tap indicator 8. Option Indication 4. START / PAUSE button 5. Time & Info Display... -
Page 8: Control Panel
Control Panel Time & Info display like Programme cycle time ► Programme start delay time ► Error codes and service information ► Remaining time in hours of a delayed programme starts, e.g. ► Remaining programme cycle time in hours + minutes, e.g. ►... -
Page 9: Programmes
Programmes Non-delicate: Light to heavy soil: Dinnerware, cutlery, Casseroles, sauces, potatoes, pots and pans pasta, rice, roasted or fried food Auto 45–70°C Non-delicate: Heavy soil: Casseroles, sauces, potatoes , Dinnerware, cutlery, pasta , rice, roasted or fried f ood pots and pans Heavy 70°C Normal soil: Non-delicate:... - Page 10 First Steps Remove all packaging materials, keep them out of childrens reach and dispose them in an environmentally friendly manner. There could be water residue inside the appliance due to quality checks in the factory. Perform the following steps: 1. Install the appliance. Refer to section INSTALLATION.
- Page 11 Different Settings for Rinse Aid Rinse aid is added during the last rinsing phase to dry the dishes without streaks and stains. Detergent (e.g. powder, tabs, ...) requires separate rinse aid: Factory default setting: . No settings are necessary. The rinse aid is added from the rinse aid dispenser only. Detergent with multifunction (e.g.
-
Page 12: Child Lock
How to Adjust Settings To adjust the Rinse Aid level 1. The appliance is switched off. 2. Press and hold “ ”about 3 seconds until (for HDW15G3, Press and hold “ and Option”): The display shows the current Rinse Aid setting (the default is ►... -
Page 13: Daily Use
Daily Use Please note that not all sales models comes with identical features and options. So pictures of that chapter are sometimes different to your dish- washer model. Explanations try only to point out basic model variants. Load the baskets. Open the water tap. -
Page 14: Lower Basket
Daily Use Load the Baskets With delicate glasses and porcelain make sure they are labelled dishwasher-proof. Do not put in the appliance items made of wood, horn, aluminium, pewter and copper. Do not put in the appliance items that can absorb water (sponges, household cloths). -
Page 15: Cutlery Basket
Fold down these spikes to improve arrangement of pots, pans and bowls. Cutlery Basket Mix spoons with other cutlery to HDW13G1 and HDW14G2: prevent them to bond together. Use the grid element in order to separate the cutlery. Place cutlery with the handles down for better washing results. - Page 16 Daily Use Upper Basket and utensil tray HDW13G1: The upper basket is designed to hold ► items like glasses, cups, saucers, plates, small bowls and shallow pans. Use the utensil tray to securely hold ► long or sharp items like knives, chopsticks, or ladles.
- Page 17 Daily Use Model with lever for easy height adjustment of the upper basket. HDW13G1 : HDW14G2 / HDW15G2P / HDW15G3 : Lift the basket 1. Pull out the upper basket. 2. Hold the basket on both sides on the edge above the lever.
- Page 18 Daily Use The third Basket The third basket can be pulled out, it is easy to put down and take out the cutlery. Depengding on the model, you can take out the third basket. Depengding on the model, you can take out the left and right side shelves to provide more room for taller goblet.
- Page 19 Daily Use Detergent Please use only a dedicated dishwasher detergent and follow the related instructions and dosage on its package. 1. If the lid is closed press the release button (A) to open the lid. 2. Put any detergent into compart- ment (B).
- Page 20 Daily Use Start a Programme 1. Close the door. 2. Open the water tap. 3. Press the ON/OFF button 4. Press sequentially the PROGRAMME SELECT button until the required programme indicator lights up. 5. If desired select a start time for a delay start. Refer to section START A PROGRAMME WITH DELAY.
- Page 21 Daily Use 6. Press the option button to select ON (or OFF). The option is activated (deactivated). 8. Repeat step 3 to 7 to activate more options. 9. Press the button to start the programme. Start a Programme with Delay Set a start time by the following procedure in order to delay a programme start: Set a programme.
-
Page 22: End Of Programme
Daily Use Cancel Start Delay / Programme Press the ON/OFF button for about 1 second. The start delay is cancelled. The programme is aborted. The appliance is switched off. Start a new programme and a delayed start if desired. CAUTION! If a programme will be aborted in the process of washing dishes, the residue of detergent remains on the dishes. -
Page 23: Care And Cleaning
Care and Cleaning Inspect and clean your appliance at regular intervals. Basically any detergent Care and Cleaning the Filters A anticlockwise and remove it. A press the latches and unplug A1 from A2. B to its initial posi- tion. A and put it into B. -
Page 24: External Cleaning
Care and Cleaning Care and Cleaning of the Spray Arms Spray arms should be regularly inspected for dirt. If needed the spray arms could be removed. Upper spray arm 1. Turn bayonet socket to the left to remove spray arm. 2. -
Page 25: Troubleshooting
Troubleshooting expertise. In case of a problem please check all shown possibilities and follow below instructions before you contact an after sales service CAUTION! Before maintenance, deactivate the appliance and disconnect the mains plug from the mains socket. trical experts, because improper repairs can cause considerable consequential damages. - Page 26 Troubleshooting Error codes on the display Problem Possible cause Possible solution Acoustic alarm, Water tap is closed. • Open the water tap. display shows Note: Whenever „Error 10“ is solved switch off the appliance ALARMCODE and restart the programm. The appliance does Water inlet hose has a kink or Make sure that the position of a bend.
- Page 27 Troubleshooting Washing Results are not satisfactory Problem Possible cause Possible solution The dishes are not Filters are clogged. clean. Filters are not correctly assem- bled and installed. correctly assembled and installed. Spray arms are clogged. Remove remaining food remnants with a thin pointed object. Programme was not applicable Make sure that the programme is for the type of load and food...
-
Page 28: Economic And Environmental Use
Troubleshooting Problem Possible cause Possible solution Dry water drop Rinse aid dosage is too low.. Increase the released quantity of rinse aid. stains on glasses Refer to section DIFFERENT SETTINGS and dishes. FOR RINSE AID. Quality of rinse aid or Multitab. Cleaning product too old; change the product. -
Page 29: Installation
Installation WARNING! Any i refer to section SAFETY. Free Standing Installation 1. Install the appliance on solid ground. Adjust accurately all feet INFORMATION! Only with a correct level the appliance door closes and seals correctly. Installation under Worktop 1. The dimensions of the recess should at least agree with the dimensions in 2. -
Page 30: Fresh Water Connection
Installation Fresh Water Connection IMPORTANT! The appliance should be connected to the water main using the new water >10mm inlet hose supplied. Old hoses should not be used. Do not shorten the inlet hose. fig.A Take note of water connection requirements. The dishwasher has a single valve water connection. - Page 31 Installation Some models are fitted with an “Aquastop” water supply hose (see fig.B) in which the small filter is already housed in the threaded end. fig.B Anti-Flooding protection The dishwasher is equipped with a system that stops the supply of water in the event of a problem with the water supply hose, or leaks within the unit, in order to prevent damage to your home.
- Page 32 Installation Drain Water Connection Fix the water drain hose properly to the piping. The hose has to reach at one point a height between 400 and 850 mm above the appliance bottom line! An extension hose for the water drain hose must not exceed a total length of 4 m and must have the same diameter as the water drain hose.
-
Page 33: Technical Data
Suppliers name Haier or trade mark Supplier´s model identifier HDW13G1 HDW14G2 HDW15G2P HDW15G3 Rated capacity in standard -place settings Mains water pressure 0.03-1 MPa (= 0.3-10 bar) -
Page 34: Customer Service
Customer Service We recommend our Haier Customer Service and the use of original spare parts. TROUBLESHOOTING. your local dealer or the Service & Support area at www.haier.com.au or at www.haier.co.nz To contact our Service, ensure that you have the following data available. -
Page 35: Standards Test
100mm to help with drying Powdered detergent quantities 5 g pre-wash + 26.25 g main wash Rinse aid dosage level (HDW13G1 model ) Maximum number of place settings Height adjustment of upper basket Ensure the upper basket is in its lower most... - Page 36 Standards Test Wash programme When the programme is finished, open the door 100mm to help with drying Powdered detergent quantities 5 g pre-wash + 27.5 g main wash Rinse aid dosage level (HDW14G2 model ) Maximum number of place settings Height adjustment of upper basket Ensure the upper basket is in its lower most position...
- Page 37 Standards Test Wash programme When the programme is finished, open the door 100mm to help with drying Powdered detergent quantities 5 g pre-wash + 28.75 g main wash Rinse aid dosage level (HDW15G2P / HDW15G3 models) Maximum number of place settings Height adjustment of upper basket Ensure the upper basket is in its lower most position...
Need help?
Do you have a question about the HDW13G1 and is the answer not in the manual?
Questions and answers