Sony PVM-9L1 Service Manual
Trinitron color video monitor
Hide thumbs
Also See for PVM-9L1:
- Operating instructions manual (100 pages) ,
- Pocket manual (5 pages) ,
- Specifications (4 pages)

Related Manuals for Sony PVM-9L1


Summary of Contents for Sony PVM-9L1
- Page 1 TRINITRON COLOR VIDEO MONITOR ® PVM-9L1 CHASSIS NO. SCC-M04H-A SERVICE MANUAL 1st Edition...
- Page 2 LES SCHÉMAS DE PRINCIPE, LES VUES EXPLOSÉES ET LES CRITICAL TO SAFE OPERATION. REPLACE THESE COMPO- LISTES DE PIECES SONT D’UNE IMPORTANCE CRITIQUE NENTS WITH SONY PARTS WHOSE PART NUMBERS APPEAR POUR LA SÉCURITÉ DU FONCTIONNEMENT. NE LES AS SHOWN IN THIS MANUAL OR IN SUPPLEMENTS PUB- REMPLACER QUE PAR DES COMPOSANTS SONY DONT LE LISHED BY SONY.
-
Page 3: Table Of Contents
2-15-1. 525 Horizontal Deflection Adjustment ........2-13 2-15-2. 625 Horizontal Deflection Adjustment ........2-13 2-16. Sub Contrast Adjustment ................2-14 2-17. Adjustment of NTSC Mode ..............2-14 2-17-1. NTSC Composite Input ............2-14 2-17-2. NTSC Y/C Input ..............2-14 PVM-9L1... - Page 4 Frame Wiring .................... 7-2 7-2. Schematic Diagrams and Board Layouts ............ 7-3 Schematic Diagrams A (1/2) ....................... 7-3 A (2/2) ....................... 7-4 C ........................ 7-9 G ......................7-10 Board Layouts A ........................ 7-6 C ........................ 7-8 G ......................7-11 PVM-9L1...
-
Page 5: Service Overview
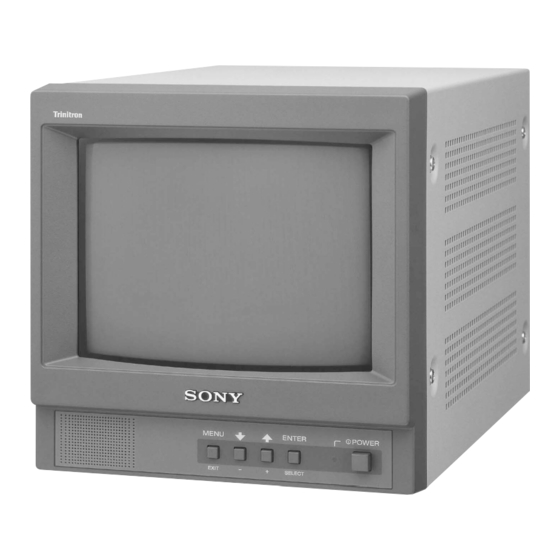
Section 1 Service Overview 1-1. Appearance Figure 1-2. Board Locations PVM-9L1... -
Page 6: Disassembly
(M 4 x 8) 1-3-2. G Board . Remove the top cover. (Refer to 1-3-1.) 2 G shield lid 3 Remove the G board in the direction of the arrow. 1 Screw (+BVTT 3 x 6) CN604 CN601 CN602 PVM-9L1... -
Page 7: Rear Cover Assembly
Screen 3 Three screws CN802 (+PWHTP 3 x 10) Dowel CN801 6 A board 2 Anode cap CN102 5 Power switch button Note : Be careful not to damage the power switch button. 1 Remove the harness. PVM-9L1... -
Page 8: C Board And Deflection Yoke
1 Remove the harness. CN102 2 Anode cap 7 Power switch button Note : Be careful not to damage 3 Two screws the power switch button. (+K M3 x 6) 5 Two screws (+KTP M3 x 8) 6 Two positioning juts Cushion PVM-9L1... -
Page 9: Speaker
. Remove the rear cover assembly. (Refer to 1-3-3.) . Remove the C board. (Refer to 1-3-5.) . Remove the bottom and A board. (Refer to 1-3-6.) 1 Four self tapping screws 3 Front chassis assembly 4 Picture tube Cushion 2 Bezel assembly PVM-9L1... -
Page 10: Anode Cap
Cord type SB-SVT H05VV-F VCTF Minimum cord set rating 10A/125V 10A/250V 7A/125V Safety approval UL/CSA SEMKO, NEMKO, DEMKO, SEV, DENAN-HO KEMA, EI (FIMKO), CEBEC, VDE, BS a) Note : Use an appropriate rating plug which is applied to local regulations. PVM-9L1... -
Page 11: Set-Up Adjustment
Press the [ENTER] key to save the adjustment value. Press the [MENU] key to cancel the entry. 3. Finishing the service mode Simultaneously press the [ENTER] key and the [MENU] key shown on the display of the menu 3 seconds or more. PVM-9L1... - Page 12 → [FACTORY SAVE] to write the factory data in the [ENGINEER] _ [FACTORY SAVE] to save the memory. FACTORY SAVE is protected from miss adjustment data. operation so that FACTORY SAVE cannot be execut- ed unless MAINTENANCE ID is set. PVM-9L1...
- Page 13 • V CENTER • V SCROLL • V SLOPE • V ZOOM GEOMETRY DEFLECTION V LINEARITY • • S CORRECTION • PIN AMP • PIN PHASE • U CORNER PIN • L CORNER PIN • V ANGLE • V BOW PVM-9L1...
- Page 14 • SDC SYNCHRONIZATION 1 SIG • NCIN • DL • FORFS • OSO • FSL • STM DEFLECTION SIG • HCO • EVG • AVG • SBL • XDT • DFL • OSVE SOUND 0 SIG • AVL • SM PVM-9L1...
- Page 15 • CLEAR NVM ON A... • COMB FILTER AUTO • COMB FILTER AUTO AUTO* SAVE FACTORY DATA [ENTER]: ENTER [MENU]: CANCEL * MAINTENANCE ID = 111 selection possible CLEAR NVM ON A CLEAR NVM ON A BOARD [ENTER]: ENTER [MENU]: CANCEL PVM-9L1...
-
Page 16: Preparation (2). Initialization
358NT 100 % white 0.714 V Model name Voltage video 75 % white 0.536 V AC 100 V to 240 V ±10 % PVM-9L1 100 % white 0.7 V Table. 2-3 75 % white 0.525 V Voice/sound _5 dBu 0.436Vrms Table 2-1 2-6. -
Page 17: Rough Adjustment For Size
G2 control (SCREEN) so that the pedestal level satisfies the specification. RED : GREEN : BLUE : Focus Screen Focus Fig. 2-11 Screen Purity control Pedestal level Purity Deflection yoke ± Standard value A = 95 Fig. 2-13 Fig. 2-12 PVM-9L1... -
Page 18: Deflection Yoke Neck Rotation Adjustment
CRT viewed from the CRT both sides of the screen. screen. screen. Fig. 2-21 Fig. 2-20 Fig. 2-21 2. Insert the wedge between the deflection yoke and CRT funnel to lock the deflection yoke. (Fig.2-18) Fig. 2-18 PVM-9L1... -
Page 19: Convergence Adjustment (1)
7. Paint-lock the knobs after adjustment. When the right convergence is not gotten even after Convergence Adjustment (1), use the permalloy sheet to adjust and fix the permalloy with RTV. Fig. 2-23 Bad example PVM-9L1... -
Page 20: Landing Adjustment (2)
Switch the item R 8 G with [ENTER], and change Specification : 4 JND or less the data with [+]/[_]. 6. Repeat the manual 2 to 5 until be able to adjust GAIN side and BIAS side to the same value. 2-10 PVM-9L1... -
Page 21: White Balance Adjustment [D93]
. Confirm upper/lower V PIN side and BIAS side to the same value. 7. Adjust the Horizontal trapezoid with [TLY] at DY. 8. Adjust V.LIN with [V LINEARITY], [S-CORREC- TION] in [DEFLECTION]-[GEOMETRY] at SER- VICE MENU. V LINEARITY S-CORRECTION 2-11 PVM-9L1... - Page 22 9. Set to 16:9 mode. 10. Adjust 16:9 V.SIZE with [V SIZE] in [DEFLEC- TION]-[GEOMETRY] at SERVICE MENU. Confirm these items and data as follows. V. SCROLL : V. SLOPE : V. ZOOM : 11. Back to 4 : 3 mode. 2-12 PVM-9L1...
-
Page 23: Horizontal Deflection Adjustment
ANGLE], [V BOW] in [DEFLECTION]-[GEOME- PHASE], [U CORNER PIN], [L CORNER PIN], [V TRY] at SERVICE MENU. ANGLE], [V BOW] in [DEFLECTION]-[GEOME- PIN AMP TRY] at SERVICE MENU. PIN PHASE U CORNER PIN L CORNER PIN V ANGLE V BOW 2-13 PVM-9L1... -
Page 24: Sub Contrast Adjustment
2. Adjust SUB PHASE so that CN301-pin1 (JL301) waveform B and C fall on same level. Less than 800 mV Target; 0 mV 3. Repeat steps 1 and 2, and adjust so that A, B, C, D fall on same level. 2-14 PVM-9L1... -
Page 25: Adjustment Of Pal Mode
2-18-2. PAL Y/C Input Input PAL 75% color bar signal. 1. Adjust SUB CHROMA so that CN301-pin1 (JL301) waveform A from D fall on same level. Less than 800 mV Target; 0 mV Less than 800 mV Target; 0 mV 2-15 PVM-9L1... -
Page 27: Safety Related Adjustment
4. Confirm that the protector circuit is not activated. 5. Apply the following voltage between the C314 +side and GND on the A board, and confirm that the protec- tor circuit is activated and raster disappears. 4.98 to 5.13 V PVM-9L1... -
Page 28: Ik Protector Confirmation
10 pin (ABL) on the A board and external DC power supply (-6 V). Connection diagram FBT 10 pin DC power supply 3 kZ 47 Z 4. Turn ON the DC power supply. 5. Confirm that the protector circuit is activated and raster disappears. PVM-9L1... -
Page 29: Semiconductors
D1NL20U EGP20G EL1Z(RECTI) GP08D 2SC2958 GP08DPKG23 2SC2958-TL RGP10GPKG23 CATHODE CXA1211M CXA1211M-T4 LM358M M24C08-WMN6T TDA8177 M24C08-WMN6T(A) ANODE 2SD1134 D1NS4 2SD1134-C CATHODE TOP VIEW 8pin SOP LM358M-FL63 ANODE TDA9394H/N1/5.518 TOP VIEW TDA9394H/N1/5/1179.518 8pin DIP 2SD2578-CA D4SB60L PST573IMT TOP VIEW 80pin QFP PVM-9L1... - Page 30 Diode, LED FMN-G12S SLR-56MC3F SLR-56MC3F CATHODE ANODE MA111-(K8).S0 MA111-TX UDZSTE-173.9B UDZS-TE17-5.1B UDZSTE-175.1B UDZS-TE17-6.2B UDZS-TE17-9.1B UDZSTE-179.1B ANODE ANODE CATHODE MM3Z12VST1 MM3Z22VT1 CATHODE UDZS-TE17-5.6B ANODE ANODE CATHODE RGP15J-6040G23 CATHODE CATHODE UDZSTE-175.6B ANODE CATHODE ANODE RN1Z-LF-B1 RU-1P CATHODE ANODE PVM-9L1...
-
Page 31: Spare Parts
Ne les remplacer que par une pièce portant le numéro spécifié. 2. Standardization of Parts Some repair parts supplied by Sony differ from those used for the unit. These are because of parts common- ality and improvement. Parts List has the present standardized repair parts. -
Page 32: Exploded Views
4-847-802-11 s SET SCREW, CASE 4X8 EP-FE/CU, NI 4-097-991-01 s SCREW +K M 3X6 EG 4-050-077-02 s SCREW +PSW M 4X8 Screws/Washers 7-685-871-09 s SCREW, +BVTT 3X6 (S)(BLACK) 7-685-871-01 s SCREW, +BVTT 3X6 (S) 7-685-647-29 s SCREW +BVTP 3X10 (EP-FE/ZNBK/CM2) 7-685-873-09 s SCREW,+BVTT 3X10 (S)(BLACK) PVM-9L1... - Page 33 4-096-812-01 s BOTTOM A-1302-231-A s MOUNTED CIRCUIT BOARD, A 4-039-356-21 s SCREW, (+) BVTP 3X12 4-097-991-01 s SCREW +K M 3X6 EG 1-439-526-31 s TRANSFORMER ASSY, FLYBACK 3-703-137-11 s SCREW +PWHTP 3X10 Screws/Washers 7-685-246-19 s SCREW +KTP 3X8 (EP-FE/ZNBK/CM2) PVM-9L1...
- Page 34 1-452-884-12 o MAGNET 4-051-735-42 s PIECE A (75), CONV, CORRECT 4-035-332-01 s CLOTH, PROTECTION 4-072-725-01 o HOLDER, DEGAUS COIL X-4041-936-1 s BEZEL ASSY 4-203-648-11 s SELFTAPPING SCREW 5 4-039-356-21 s SCREW, (+) BVTP 3X12 Screws/Washers 7-685-871-09 s SCREW +BVTT 3X6 PVM-9L1...
-
Page 35: Electrical Parts List
1-162-970-11 s CAPACITOR CERAMIC 0.01MF/25V B C505 1-126-971-11 s CAPACITOR ELECT 470MF/50V C054 1-162-970-11 s CAPACITOR CERAMIC 0.01MF/25V B C509 1-137-545-11 s CAPACITOR FILM 13000PF/600VH C055 1-162-970-11 s CAPACITOR CERAMIC 0.01MF/25V B C510 1-137-544-11 s CAPACITOR FILM 10000PF/600VH C512 1-107-385-11 s CAPACITOR,FILM 0.056/200V PETP PVM-9L1... - Page 36 8-759-562-43 s IC TDA6108JF/N1B CN203 1-778-695-11 s CONNECTOR, S TERMINAL CN301 1-564-510-11 o PLUG,CONNECTOR (7P) IC301 8-759-502-80 s IC LM358M CN801 1-508-766-00 o 4P PLUG IC302 8-759-140-85 s IC UPC1093J CN802 1-564-508-11 o PLUG,CONNECTOR (5P) IC551 8-759-339-59 s IC TDA8177 PVM-9L1...
- Page 37 8-729-026-49 s TRANSISTOR 2SA1037AK-T146-R R058 1-216-817-11 s RESISTOR,CHIP 470 1/10W 1608 Q558 8-729-120-28 s TRANSISTOR 2SC1623-L5L6 Q559 1-801-806-11 s TRANSISTOR DTC144EKA R059 1-216-837-11 s RESISTOR,CHIP 22K 1/16W 1608 Q560 1-801-806-11 s TRANSISTOR DTC144EKA R060 1-216-809-11 s RESISTOR,CHIP 100 1/10W 1608 PVM-9L1...
- Page 38 R310 1-216-821-11 s RESISTOR,CHIP 1.0K 1/10W(1608) R565 1-216-830-11 s RESISTOR,CHIP 5.6K 1/10W 1608 R311 1-218-881-11 s RESISTOR, CHIP 27K 1/10W(1608) R566 1-216-821-11 s RESISTOR,CHIP 1.0K 1/10W(1608) R312 1-218-889-11 s RESISTOR,CHIP 56K 1/10W(1608) R567 1-216-823-11 s RESISTOR, CHIP 1.5K 1/10W PVM-9L1...
- Page 39 1-571-433-21 s SWITCH, PUSH (AC POWER) S501 1-572-707-11 s SWITCH,LEVER T501 1-439-526-31 s TRANSFORMER ASSY, FLYBACK T502 1-426-668-11 s TRANSFORMER, FERRITE (HDT) THP101 1-803-744-11 s THERMISTOR, POSITIVE THP102 1-809-827-11 s THERMISTOR,POSITIVE VDR101 1-810-622-11 s VARISTOR X001 1-578-774-11 s VIBRATOR, CRYSTAL PVM-9L1...
- Page 40 1-219-769-11 s RESISTOR (SURGE) 3.3M/1/2W R603 1-219-769-11 s RESISTOR (SURGE) 3.3M/1/2W R604 1-220-820-31 s RESISTOR, CEMENT 1.5/10W R605 1-220-820-31 s RESISTOR, CEMENT 1.5/10W R620 1-202-933-61 s RESISTOR, FUSE 0.1 1/2W R621 1-215-926-00 s RESISTOR,METAL FILM 33K/3W R622 1-215-926-00 s RESISTOR,METAL FILM 33K/3W 5-10 PVM-9L1...
-
Page 41: Block Diagrams
CN703 FUNCTION 2 KEY RESET +3.3V Q001 A(2/2)BOARD IC003 120V CN502 RESET RESET IC3501 J202 AUDIO AMP CN704 AUDIO BUFF CN3501 (FBT) Q206 AUDIO VOL AUDIO OUT MUTE AUDIO Q3501 +15V Q3502 PR 16:9 MUTE AUDIO MUTE Q3503 CN201 PVM-9L1... -
Page 42: A (2/2), G, Dy
REF V NEUTRAL L-IN L-OUT S101 T601 CN604 CN1502 D619 Q102,103 +B PROTECTOR CN602 D601 NEUTRAL IC601 AC RECT REG OSC L-IN L-OUT IC501 D618 VCC 4 CN601 F601 T603 LIVE OCP/FB LINE FILTER NEUTRAL PH601 +B FEEDBACK IC651 ERROR PVM-9L1... -
Page 43: Diagrams
: STYROL : POLYPROPYLENE : MYLAR : METALIZED POLYESTER : METALIZED POLYPROPYLENE : BIPOLAR : HIGH TEMPERATURE : HIGH RIPPLE • When replacing components marked , make the necessary ad- justments indicated. PVM-9L1... -
Page 44: Frame Wiring
C N 701 TO FB T S C R E E N 7P WH T 7P WH T S- MICRO S- MICRO 2 N C C N 705 4 N C 1 G N D 6 N C 7 120V 120V PVM-9L1... -
Page 45: Schematic Diagrams And Board Layouts
B:CHIP 1SS226 B:CHIP B:CHIP B:CHIP B:CHIP B:CHIP B:CHIP PROT :CHIP R233 R234 560k C225 :CHIP :CHIP J202 R236 C221 JL204 100k R225 :CHIP :CHIP Q206 R237 2SA1037AK 220k AUDIO BUFFER :CHIP R235 A(1/2) 1/2W Y/C JUNGLE & CONTROLLER B-SS9773-A-P1 PVM-9L1... - Page 46 13.4 1 2 3 4 JL105 2SC2412K Q302 1/4W HV DET BUF-2 Q304 :FPRD DTC144EKA C315 DG-2 INVERTOR 12.7 R326 2SC2412K HV DET BUF-1 :CHIP A(2/2) R325 C312 R323 JL306 C314 R324 4.7k 3.3k :CHIP :CHIP (REGULATOR) B:CHIP B-SS9773-A-P2 PVM-9L1...
- Page 47 A (2/2) TDA8177 (IC551) OUTPUT OUTPUT A STAGE SUPPLY FLYBAK GEN INPUT A – OUTPUT B INPUT A + INPUT B – INPUT B + FLYBACK GENERATOR INVERTING IN 1 POWER OUTPUT AMPLIFIER NON INVERT IN 7 TERMINAL PROTECTION PVM-9L1...
- Page 48 JW20 C034 EY028 IC3501 R327 EY038 T502 C315 EY030 EY032 EY043 EY039 JW21 Q565 EY040 IC302 EY042 EY041 L551 EY52 C561 C314 R510 C516 EY53 JW22 Q501 EY018 L501 EY54 EY017 EY015 EY016 L508 C302 -A SIDE- SUFFIX: -11 PVM-9L1...
- Page 49 R 3 1 4 R 3 0 8 C 3 0 9 R 3 0 4 R 3 0 5 J L 3 0 5 J R 3 0 1 R 3 1 3 Q 3 0 1 -B SIDE- SUFFIX: -11 PVM-9L1...
- Page 50 CN701 R713 R712 R711 CN705 CN704 C701 R704 CN702 R707 R706 L701 CN703 -A SIDE- -B SIDE- SUFFIX: -11 SUFFIX: -11 PVM-9L1...
- Page 51 C701 CN301 0.0047 D706 D704 1SS83TA JL710 1SS83TA PROT JL701 PROT 120V R706 R707 D705 220k 100k 1/2W 1SS83TA 1/2W CN705 :SURGE :SURGE PROT C704 680p L701 27µH :EL0607 JL707 JL706 JL708 B-SS9773-C CN703 :S-MICRO TO A BOARD CN802 PVM-9L1...
- Page 52 D1NL20U RECT R603 50/60Hz D610 RECT 3.3M R627 D1NL20U 1/2W R629 FB605 :RN-CP 2.4k :RN-CP CN605 R626 D609 C620 0.68 C622 R628 C623 D1NS4 470p 0.001 B:CHIP PROT CN606 C621 R625 470p 0.68 SHASSIS (AC IN) B-SS9773-G 7-10 7-10 PVM-9L1...
- Page 53 R 6 2 8 D609 EY601 D610 EY626 R 6 2 9 C601 EY625 EY633 D611 R602 R603 -A SIDE- -B SIDE- SUFFIX: -11 SUFFIX: -11 G BOARD *:B SIDE D601 D609 D610 D611 D612 D613 D616 D618 IC601 IC651 7-11 7-11 PVM-9L1...
- Page 55 2 V AC range are suitable. (See Fig. A) To Exposed Metal Parts on Set 0.15 µ F 1.5 k Z voltmeter (0.75V) Earth Ground Fig A. Using an AC voltmeter to check AC leakage. PVM-9L1...
- Page 56 Printed in Japan Sony Corporation PVM-9L1 (SY, AU) E 2003. 9 16 B&P Company 9-870-385-01 ©2003...
Need help?
Do you have a question about the PVM-9L1 and is the answer not in the manual?
Questions and answers