Table of Contents
Advertisement
Advertisement
Table of Contents
Troubleshooting

Related Manuals for Philips VideoTracer DVT3120


Summary of Contents for Philips VideoTracer DVT3120
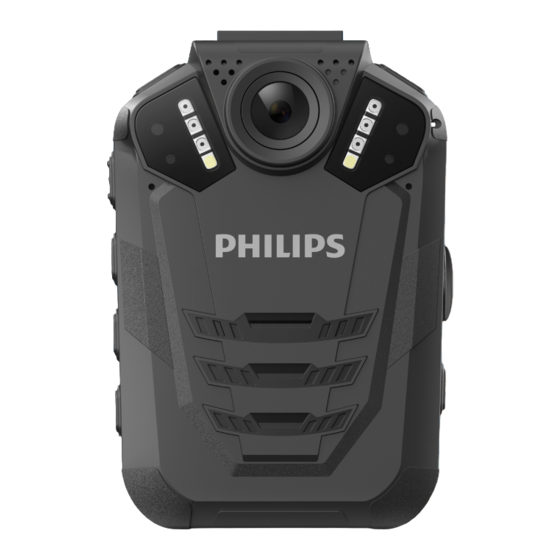
- Page 1 VideoTracer Body-worn Recorder DVT3120 User manual...
-
Page 2: Table Of Contents
Reset your device settings Disposal of your old product 11 Service and support About this user manual Symbols used Display device information Contact a Philips partner 2 Your body-worn recorder Troubleshooting Product highlights 12 Technical data What’s in the box... -
Page 3: Important Information
Data reset by the European Directive 2011/65/EU. Please get informed about the local separate collection Philips VideoTracer has an internal memory with 16 GB system for electrical and electronic products. built-in storage. If you want to perform a factory data... -
Page 4: About This User Manual
• Contact your local town or city officials for battery disposal information. You can also call 888-224-9764 or visit www.call2recycle.ca for battery drop-off locations. • For assistance, visit our website www.philips.com/ support or call 1-800-243-7884 toll free. Rechargeable NiMH battery: • Your product is designed and manufactured with high quality materials and components, which can be recycled and reused. -
Page 5: Your Body-Worn Recorder Troubleshooting
2 Your body-worn What’s in the box recorder We are delighted that you have chosen a Philips device. Visit our website for comprehensive support, such as user manuals, software downloads, warranty information and more: www.philips.com/dictation. Product highlights • HD video and audio recording •... -
Page 6: Overview Of The Recorder
Overview of the recorder Slot for camera clip Stop/Return button Microphone for radio set (radio set not included) Menu button Infrared lamp Fast rewind, Previous track, Navigation button Light sensor Play/Pause, Confirmation button Record/Status LED Fast forward, Next track, Navigation button LED light Notch for pin Camera lense... - Page 7 AV OUT port AV IN port On/Off button Video recording button Push-to-talk button for radio set (radio set not included) Photo button Lighting/Laser button Infrared/File marking button Reset button Interface for docking station (docking station not included) Your body-worn recorder...
-
Page 8: Getting Started
3 Getting started Connect the VideoTracer to your computer via the supplied USB cable. Caution • Before you connect and install your recorder, first read the safety instructions (see Safety instructions). Charging the battery Charge the built-in battery before you use the device for the first time or if you haven’t used it for an extended time period. -
Page 9: Turn The Device On And Off
Turn the device on and off To turn the device on or off: • Press and hold the Power button for two seconds until the device gently vibrates. Note • When the battery indicator is displayed, charge the device promptly. Set the date and time You can always change the date and time as well as the time format on your device. -
Page 10: Video Recording
4 Video recording Record a video Before you start recording: Recording screen • Make sure your device has enough battery power left. When the battery is almost discharged, the battery icon on your display will start flashing red. When the battery is empty, the device will turn off and your current recording will automatically be saved. -
Page 11: Night Vision
Night vision Photos When you are filming at night or in a low-light You can take pictures of an event while video recording. environment, you can improve the visibility and quality of your video by using the night mode or the additional •... -
Page 12: Audio Recording
Start and finish an audio recording 5 Audio recording On the start screen, press the Audio recording button on the top of the device. Recording screen X The device vibrates once. X The Record/Status LED flashes orange. To finish recording, press the Audio recording button on the top of the device.again. -
Page 13: Playback
6 Playback Playback screen audio recordings Playback screen video recordings Passed playback time Repeat mode Passed playback time File name Playback status File number of current file Total time of recording Total number of files in folder File name Playback status File number of current file Playback screen photos Total number of files in folder... -
Page 14: Play Back Files
Start playback Play back files Select your desired file as described in Select a file. To start playback of a recording, press the Play/ Note Pause button. • If you have connected headphones to your To pause playback, press the Play/Pause button VideoTracer, the built-in speakers are disabled. -
Page 15: Mark Important Files
Mark important files You can mark important recordings and images in order to prevent them from being deleted by loop recording. Select and open your desired file as described in Select a file. Press the Infrared button to mark the recording. X An orange star appears in the bottom right corner of the recording. -
Page 16: Settings
Audio recording settings 7 Settings Settings mode Quality In the settings mode, you can change and adjust various You can set the bit rate for each recording according to settings according to your own preferences. your own preferences. Mic sensitivity Adjust the microphone sensitivity of your VideoTracer. -
Page 17: Photo Settings
Device settings Pre-recording When the pre-recording function is enabled, the device will start recording a video some seconds prior to the event. At maximum resolution (2304 × 1296 px at 30 fps), Language pre-recording starts 20 seconds before the event. At lowest resolution (848 ×... - Page 18 Auto divide ID Number During recording, the auto-divide feature will Set the ID number of your VideoTracer, which identifies automatically split the current recording and save a new your device. Your ID number is helpful for support file at the time interval you have pre-selected. enquiries, for example.
-
Page 19: Using The Camera Clip
8 Using the camera clip How to wear the clip Use the supplied camera clip to attach your VideoTracer to your clothes. Attach camera clip Detach camera clip Using the camera clip... -
Page 20: Using The Magnetic Pin
9 Using the magnetic Use the supplied magnetic pin additionally to the camera clip to allow even firmer attachment of your VideoTracer. Attach pin Using the magnetic pin... -
Page 21: Data Management
10 Data management Reset your device settings You can reset your menu settings to their default state— the way they were when you first purchased your device Transfer data to a computer and turned it on. You can use your recorder as a USB mass storage to Caution conveniently store, back up and move files. -
Page 22: Service And Support
If you have any questions about your VideoTracer or experience technical issues, contact one of our supporting Philips partners. The local partner you purchased your VideoTracer from will strive to answer your questions and to solve your problem as soon as possible. -
Page 23: Troubleshooting
Find the most common problems you could encounter with your VideoTracer in the following table. If you are unable to solve the problem with the information below, contact the supporting Philips partner you purchased your device from. Problem Possible cause Solution The device doesn’t turn on. -
Page 24: Technical Data
12 Technical data Photo capturing • Image size: 32 MP, 23 MP, 20 MP, 18 MP, • 16 MP, 14 MP, 12 MP, 8 MP, 5 MP, 3 MP Device • Image format: JPEG • Photo quality: super fine, fine, normal •... - Page 25 Neither Speech Processing Solutions GmbH nor its FCC Warning Statement affiliates shall be liable to the purchaser of this product or third parties with respect to claims for damages, œ losses, costs or expenses incurred by purchaser or third parties as a result of an accident,misuse or abuse of this product or unauthorized modifications, repair, Changes or modifications not expressly approved by the modification of the product or failure to meet the...
- Page 26 © 2018 Speech Processing Solutions GmbH. All rights reserved. Specifications are subject to change without notice. Philips and the Philips shield emblem are registered trademarks of Koninklijke Philips N.V. and are used by Speech Processing Solutions GmbH under license from Koninklijke Philips N.V.
Need help?
Do you have a question about the VideoTracer DVT3120 and is the answer not in the manual?
Questions and answers