
Related Manuals for Sony DPS5032N


Summary of Contents for Sony DPS5032N
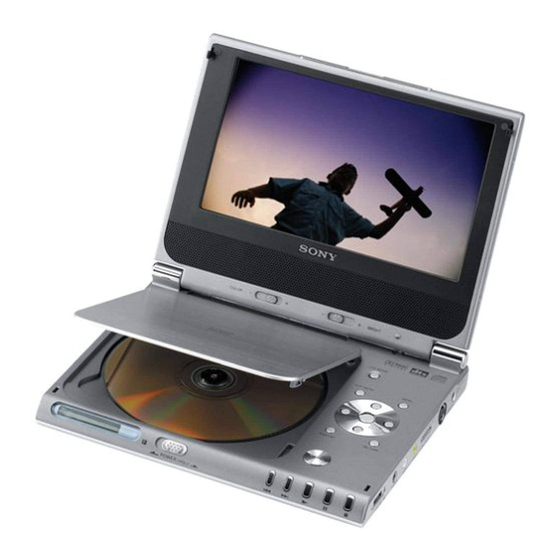
- Page 1 Portable CD/DVD Player Operating Instructions DVP-FX700 © 2003 Sony Corporation 3-088-314-12(1)
-
Page 2: Warning
WARNING To prevent fire or shock hazard, do not expose the unit to rain or moisture. To avoid electrical shock, do not open the cabinet. Refer servicing to qualified personnel only. CAUTION The use of optical instruments with this product will increase eye hazard. As the laser beam used in this CD/DVD player is harmful to eyes, do not attempt to disassemble the cabinet. -
Page 3: Important Safety Instructions
Important Safety Instructions 1. Read these instructions. 2. Keep these instructions. 3. Heed all warnings. 4. Follow all instructions. 5. Do not use this apparatus near water. 6. Clean only with dry cloth. 7. Do not block any ventilation openings. Install in accordance with the manufacturer’s instructions. -
Page 4: Precautions
Owner’s Record The model and serial numbers are located on the bottom of the unit. Record the serial number in the space provided below. Refer to them whenever you call upon your Sony dealer regarding this product. Model No. DVP-FX700 Serial No.______________... - Page 5 Precautions (continued) • The power requirements and power consumption of this are indicated on the AC power adaptor. Check that the unit’s operating voltage is identical with your total power supply. On safety • Caution – The use of optical instruments with this product will increase eye hazard.
- Page 6 Precautions (continued) On the rechargeable battery • Charge the rechargeable battery before you start using it. • Do not allow dust to come into contact with the battery terminals of the player and rechargeable battery. • Do not short the terminals. •...
- Page 7 Precautions (continued) On handing the player • Keep the lens on the player clean and do not touch it. If you do so, the lens may be damaged and the player will not operate properly. • Place the player in a location with adequate ventilation to prevent heat build-up in the player.
- Page 8 Precautions (continued) On handing the LCD screen • The LCD is manufactured using high precision technology. You may , however, see tiny black points and/or bright points(red,blue,green) that continuously appear on the LCD. This is a normal result of the manufacturing process and does not indicate a malfunction.
- Page 9 Plasma Display Panel televisions and projection televisions are especially susceptible to this. If you have any questions or problems concerning your player, please consult your nearest Sony dealer. RECYCLING LITHIUM-ION BATTERIES Lithium-Ion batteries are recyclable. You con help preserve our environment by...
-
Page 10: About This Manual
About This Manual • Instructions in this manual describe the controls on the remote. You can also use the controls on the player if they have the same or similar names as those on the remote. • Some DVD video discs have functions that may not be explained in this owner’s manual. -
Page 11: Table Of Contents
Table of Contents Introductions ❏ WARNING ........2 ❏... -
Page 12: Identification Of Controls
Identification of Controls Main Unit COLOR BRIGHT LCD MODE TOP MENU MENU PUSH ENTER DISPLAY RETURN OPEN 1. LCD screen 2. Speaker 3. COLOR control slide (page 21) 4. BRIGHT control slide (page 21) 5. LCD MODE (page 22) NORMAL → FULL → ZOOM → OFF 6. -
Page 13: Main Unit
Identification of Controls (continued) Main Unit POWER /HOLD 1. Display Window See details on next page. 2. POWER and HOLD switch To turn off the power, you need to press the POWER switch for at least one second. This is to prevent the player from being accidentally turned off. -
Page 14: Display Window
Identification of Controls (continued) Display Window Disc type Repeat mode Playing status Battery remaining indicator When playing back a DVD: Playing time of the current title or current Title/ Chapter number (Press PLAY button while playing disc. Title/ Chapter number appears for 2 seconds.) When playing back a VIDEO CD with Playback Control(PBC): Playing time of the current track. - Page 15 Identification of Controls (continued) Inserting batteries into the remote You can control the player using the supplied remote. Insert two size AA(R6) batteries (supplied) by matching ends on the batteries to the markings inside the compartment. When using the remote, point at the remote sensor on the player.
-
Page 16: Remote Control
Identification of Controls (continued) Remote Control AUDIO ANGLE REPEAT PROGRAM RANDOM PREV NEXT SCAN SLOW CLEAR SET UP PLAY PAUSE STOP TOP MENU MENU ENTER DISPLAY RETURN DVD PORTABLE 1. AUDIO button (page 32) 2. ANGLE button (page 33) 3. REPEAT button (page 35) 4. -
Page 17: Identification Of Controls
Identification of Controls (continued) 16. STOP button 17. MENU button Use the MENU button to display the menu screen included on a DVD disc. To operate a menu screen, follow the instructions in “Using a DVD Menu” (page 30). 18. PAUSE button 19. -
Page 18: Power Connections
Power Connections AC power Adaptor Follow steps 1 to 3 to connect. When disconnecting, reverse the order. V O L U M E P H O N E S A U D I O V I D E O LINE SELECT NOTES: •... -
Page 19: Battery Pack
Power Connections (continued) Battery Pack You can use the NP-FX700 rechargeable battery pack (supplied) to enjoy the player when an AC out- let is not available. • Charge the battery pack before using it for the first time. Attaching the battery pack (supplied) 1. -
Page 20: Power Connections
Power Connections (continued) Charging the battery pack 1. Attach the battery pack to the player. 2. Connect the AC power adaptor to the player and the plug into an AC outlet. Player DC IN 9.8V VO LU M E P HO N ES A UDIO V IDE O LINE SELECT... -
Page 21: Playing A Disc
Playing a Disc Basic Playback - Prepare the power supply. 1. Open the outer cover and slide the POWER switch to the left to turn unit on. Power indicator lights and then the indicator will disap- pear after 5 seconds. 2. - Page 22 Playing a Disc (continued) Changing the size of the picture Use the LCD MODE button to change the picture mode. The mode is shown on the unit’s display window as follows. The picture mode and size The picture shown on the LCD depends on the display mode and the size recorded on the disc. Mode NORMAL Software...
- Page 23 Playing a Disc (continued) When a menu screen appears on the LCD screen. In case of interactive DVDs with control, a menu screen appears on the LCD screen. Example of interactive DVD On-Screen Menu Press B/V/v/b and press ENTER, or press the numeric button(s), to select the desired item.
-
Page 24: Stopping Play
Playing a Disc (continued) Stopping Play Press STOP during playback. Resume Play When play is stopped, the unit records the point where STOP was pressed (RESUME function). Press PLAY and play will resume from this point. NOTES: • This operation works only with discs for which the elapsed playing time appears in the display window dur- ing stop. -
Page 25: Pause
Playing a Disc (continued) Pause Press PAUSE during playback. DVD/Video CD • The player will be placed in the still picture mode. • The player will be placed in the pause mode. DVD VCD Skipping Chapters and Tracks Skipping forward Press NEXT during playback. -
Page 26: To Scan At Fast Forward Or Fast Reverse Playback
Playing a Disc (continued) To Scan at Fast Forward or Fast Reverse Playback Press SCAN/SLOW button during playback. [LCD screen] • The speed of advance (reverse) is relatively slow at first. When the button is pressed again, the speed becomes faster. (Each time the button is pressed, the speed increases up to 4 steps (DVD) or 3 steps (Video CD).) •... -
Page 27: General Information About Gui Menu Icons
General information about GUI Menu lcons This unit features GUI* Menu Icons showing disc information (title/chapter/track number, elapsed play- ing time, audio/subtitle language, angle, and sound) and player information (repeat play, play mode, marker, etc.). Some icons only show the indicated information. -
Page 28: Detailed Description Of Each Gui Menu Icon
Detailed Description of each GUI Menu Icon You can view information about a disc and its operational status on the LCD screen. Press DISPLAY during playback. [LCD screen] (Press B/b to select desired item) DVD GUI Shows the current title number and total number of titles, and skips to the desired title number. - Page 29 Detailed Description of each GUI Menu Icon (continued) Press DISPLAY during playback. [LCD screen] (Press B/b to select desired item) Video CD GUI Shows the current track number, total number of tracks and PBC On mode, and skip to the desired track number. 1 /3 Shows the elapsed playing time (Display only) 0:20:09...
-
Page 30: Using A Title Menu
Using a Title/DVD Menu Using a Title Menu Some movie discs may contain two or more titles. If the disc has a title menu recorded on it, the TOP MENU button can be used to select the movie title. (The details of operation differ depending on the disc used.) •... -
Page 31: Changing Subtitle Language
Changing Subtitle Language It is possible to change the subtitle language to a dif- ferent language from the one selected at the initial settings. (See page 45 for further info.) This operation works only with discs on which multi- ple subtitle languages are recorded. TOP MENU MENU 2, 3... -
Page 32: Changing Audio Soundtrack Language
Changing Audio Soundtrack Language It is possible to change the audio soundtrack lan- guage (or encoding method, channel number) to a different language from the one selected at the initial settings in case of DVD disc. (See page 45 for fur- ther info.) This operation works only with discs on which multiple audio soundtrack languages are recorded. -
Page 33: Viewing From Another Angle
Viewing from another Angle Some DVDs may contain scenes which have been shot simultaneously from a number of different angles. For these discs, the same scene can be viewed from each of these different angles using the ANGLE button. (The recorded angles differ depend- ing on the disc used.) 1 /3 2 /3... -
Page 34: Product A 3D Surround Effect
Product a 3D Surround Effect This unit can produce a 3D Surround effect, using 3D Surround Sound technology, which simulates multi- channel audio playback from two conventional stereo speakers instead of the five or more speakers nor- mally required to listen to multi-channel audio from a home theater. -
Page 35: Repeat Play
Repeat Play Repeating viewing (listening) Press REPEAT during playback. Each time this button is pressed, the LCD screen changes as shown below and the disc will repeat a chapter or title (DVD) or a track (Audio and Video CD). AUDIO ANGLE REPEAT PROGRAM... -
Page 36: Repeat Play
Repeat Play (continued) Repeating sections between two specific points (A-B repeat) AUDIO ANGLE REPEAT PROGRAM RANDOM 1, 2 PREV NEXT SCAN SLOW CLEAR SET UP PLAY PAUSE STOP TOP MENU MENU ENTER NOTES: • Repeat play works only with discs for which the elapsed playing time appears in the display win- dow during playback. -
Page 37: Random Play
Random Play Random play (Karaoke DVD, Video CD (PBC OFF)) NOTE: This function only works with karaoke DVD and Video CD. Random does not work with DVD movie discs. You can playback titles or tracks in random order. (Random playback) The DVD player automatically selects the titles on a DVD video karaoke disc only and plays them back randomly. -
Page 38: Program Play
Program Play Programmed Playback with Audio CD and MP3 disc The Program function enables you to store your favorite tracks from any disc in the player memory. Program can contain 30 tracks. 1. Press PROGRAM during playback or in the stop mode to enter the Program Edit mode. -
Page 39: Program Play
Program Play (continued) Programmed Playback with Video CD NOTE: On a Video CD with PBC, you must set PBC to Off on the setup menu to use the Program function. 1.Insert Video CD and close the tray. 2. Press PROGRAM while playback is stopped. The VCD Program menu will appear. -
Page 40: Operation With Audio Cd And Mp3 Disc
Operation with Audio CD and MP3 disc The DVD Player can play MP3 formatted recordings on CD-ROM, CD-R or CD-RW discs. Before playing MP3 recordings, read the “Notes on MP3 Recordings” on page 41. 1. Insert a disc and close the tray. Audio CD;... - Page 41 Operation with Audio CD and MP3 disc (continued) Notes on MP3 Recordings About MP3 An MP3 file is audio data compressed by using the MPEG1 audio layer-3 file-coding scheme. We call files that have the “.mp3” file extension “MP3 files”. The player can not read an MP3 file that has a file extension other than “.mp3”.
- Page 42 Operation with Audio CD and MP3 disc (continued) Repeat Track/All/Off 1. To repeat the track currently playing, press REPEAT. The Repeat icon and “TRACK” appears on the menu screen. 2. To repeat all tracks on a disc, press REPEAT a second time.
-
Page 43: Operation With Jpeg Disc
Operation with JPEG disc This DVD Player can play discs with JPEG files. Before playing JPEG recordings, read the notes on JPEG Recordings on page 44. 1. Insert a disc and close the tray. The MP3-JPEG choice menu appears on the LCD screen. -
Page 44: Operation With Jpeg Disc
Operation with JPEG disc (continued) Moving to another File Press . or > once during viewing a picture to advance to the next file or to the previous file. Still Picture 1. Press X (PAUSE) during slide show. The player will now go into PAUSE mode. 2. -
Page 45: Selection Of Initial Settings
Selection of Initial Settings Once the initial settings have been completed, the player can always be operated under the same con- ditions (especially with DVD discs). The settings will be retained in the memory until they are changed, even if the power is switched off. PREV NEXT SCAN... -
Page 46: Selecting Disc Language
Selecting Disc Language This is to select the audio soundtrack language, sub- title language and the language used in title menus or DVD menus which will always be used for every disc to be played back. When you play back a DVD video disc, the DVD player automatically displays the pre-selected subti- tle language if it is included on the disc. -
Page 47: Selecting Rating Level
Selecting Rating Level Movies on DVDs may contain scenes not suitable for children. Therefore, discs may contain Parental Control information that applies to the complete disc or to certain scenes on the disc. These scenes are rated from 1 to 8, and alternatively, more suitable scenes are available for selection on some discs. -
Page 48: Selecting Area Code
Selecting Area Code Enter the code of a country/area whose standards were used to rate the DVD video disc, referring to the list (See “Area Code List”, page 55-56.). Disc Audio Code Set Disc Subtitle Disc Menu Rating Area Code TV Aspect Menu Language Digital Audio Output... -
Page 49: Selecting Tv Aspect
Selecting TV Aspect Select the appropriate screen type according to your TV set; conventional size screen (4:3) or wide-screen (16:9). SCAN SLOW CLEAR SET UP PLAY PAUSE STOP TOP MENU MENU ENTER DISPLAY RETURN 1. At the SETUP menu screen, press V/v to select “TV Aspect”... -
Page 50: Selecting Menu Language
Selecting Menu Language Selects language for SETUP menus and displays on the TV. AUDIO ANGLE REPEAT PROGRAM RANDOM PREV NEXT SCAN SLOW CLEAR SET UP PLAY PAUSE STOP TOP MENU MENU ENTER DISPLAY RETURN DVD PORTABLE 1. At the SETUP menu screen, press V/v to select “Menu Language”... -
Page 51: Selecting Digital Audio Output
Selecting Digital Audio Output Each DVD disc has a variety of audio output options. Set the player’s Digital Audio Output according to the type of audio system you use. 1. At the SETUP menu screen, press V/v to select “Digital Audio Output” and press b. Disc Audio DOLBY /PCM... -
Page 52: Selecting Digital Audio Output
Selecting Digital Audio Output (continued) Sampling Frequency To change the Sample Frequency setting, first select the desired digital audio output type as indicated on page 51. If your A/V receiver or surround processor is NOT capable of handling 96kHz signals, select the 48kHz option. -
Page 53: Others
Others The DRC, PBC settings can be changed. 1. At the SETUP menu screen, press V/v to select “Others” and press b. Disc Audio Disc Subtitle Disc Menu Rating Area Code TV Aspect Menu Language Digital Audio Output Others 2. Press V/v to select the desired items and press ENTER. -
Page 54: Table Of Languages And Their Code Numbers
Table of Languages and their Code Numbers Enter the appropriate code number for the initial settings “Audio”, “Subtitle” and/or “Menu” (See page 46). Code Language Code Language 6565 Afar 7079 Faroese 6566 Abkhazian 7082 French 6570 Afrikaans 7089 Frisian 6577 Ameharic 7165 Irish... -
Page 55: Area Code List
Area Code List Enter the appropriate code number for the initial setting “Area Code” (See page 48). Code Area Code Area Andorra Bouvet Island United Arab Emirates Botswana Afghanistan Belarus Antigua and Barbuda Belize Anguilla Canada Albania Cocos (Keeling) Islands Armenia Central African Republic Netherlands Antilles... -
Page 56: Area Code List
Area Code List (continued) Code Area Code Area Sri Lanka Norfolk Island Liberia Nigeria Lesotho Nicaragua Lithuania Netherlands Luxembourg Norway Latvia Nepal Libya Nauru Morocco Niue Monaco New Zealand Moldavia Oman Madagascar Panama Marshall Islands Peru Macedonia Polynesia (French) Mali Papua New Guinea Myanmar Philippines... -
Page 57: Connecting To A Tv
Connecting to a TV Right side of unit DC IN 9.8V V O L U M E P H O N E S A U D I O V I D E O LINE SELECT S-VIDEO OUT To S-VIDEO OUT Right side of unit V O L U M E P H O N E S... -
Page 58: Connecting To An Amplifier Equipped With A Dolby Digital Decoder
Connecting to an amplifier equipped with a Dolby Digital decoder You must set the LINE SELECT switch to the "Out" mode Right side of unit Amplifier equipped with a DC IN 9.8V Dolby Digital decoder V O L U M E P H O N E S A U D I O V I D E O... -
Page 59: Connecting To An Amplifier Equipped With A Dolby Pro Logic Surround
Connecting to an amplifier equipped with a Dolby Pro Logic Surround Dolby Pro Logic Surround You can still enjoy the excitement of Surround Sound even if your A/V receiver does not offer Dolby Digital decoding. If your A/V receiver has a Dolby Pro Logic ll/ Pro Logic decoder, refer to the following connection diagram. You must set the LINE SELECT switch to the "Out"... -
Page 60: Connecting To An Amplifier Equipped With A Dts Decoder
Connecting to an amplifier equipped with a DTS decoder Digital Theater System(DTS) DTS is high quality surround technology used in theaters and now available for home use, on DVD video discs or audio CDs. If you have a DTS decoder or processor, you can obtain the full benefit of 5.1 channel DTS encoded sound tracks on DVD video discs or audio CDs. -
Page 61: Connecting To An Amplifier Equipped With A Digital Audio Input
Connecting to an amplifier equipped with a digital audio input 2 Channel Digital Stereo You can enjoy the dynamic sound of 2 Channel Digital Stereo by connecting this DVD player to a receiver equipped with a digital audio input and speaker system (right and left front speakers). You must set the LINE SELECT switch to the "Out"... -
Page 62: Disc Requirements
Disc Requirements Playable Discs This DVD player can play back the following discs. Disc mark Contents Audio+Video DVD video (moving pictures) discs Video CDs Audio+Video Audio CDs Audio In addition, this unit can play a DVD-RW (Video Mode), DVD-R, DVD+RW and CD-R or CD-RW that con- tains audio titles or MP3 or JPEG files. -
Page 63: Copyright Information
Copyright Information Region Management Information Region Management Information: This DVD Player is designed and manufactured to respond to the Region Management Information that is recorded on a DVD disc. If the Region number described on the DVD disc does not correspond to the Region number of this DVD player, this DVD player cannot play that disc. -
Page 64: Before Calling Service Personnel
Before Calling Service Personnel Symptoms and Correction Check the following guide for the possible cause of a problem before contacting service. Symptom Cause • The power cord is disconnected. No power. • Hold switch is set to HOLD position. • The battery is discharged. The power is on, but •... - Page 65 Before Calling Service Personnel (continued) Symptom Cause No sound. • The equipment connected with the audio cable is not set to receive DVD signal output. • The audio cables are not connected securely. • The power of the equipment connected with the audio cable is turned off.
-
Page 66: Before Calling Service Personnel
Before Calling Service Personnel (continued) Symptom Cause The LCD is dark. • Check that Brightness control is set to “–”. No response when • Some discs prohibit certain operations. buttons are pressed. • Hold switch is set to HOLD position. •... -
Page 67: Specifications
Specifications Power supply Power consumption Weight External dimensions (W X D X H) Signal system Laser Frequency range (audio) Signal-to-noise ratio (audio) Dynamic range (audio) Harmonic distortion (audio) Operating conditions Video input/output (VIDEO In/Out) S-video output Audio output (optical audio) Audio input/output (AUDIO In/Out, analog audio) Earphone terminal... - Page 68 Specifications (continued) Panel size Projection system Driving system Resolution • Audio/Video connecting cord ...1 • AC Adaptor (AC-FX100) ...1 • Power Cord ...1 • Battery Pack (NP-FX100) ...1 • Remote control (RMT-D163A)...1 • Size AA (R6) batteries ...2 ❋ Designs and specifications are subject to change without notice. 7 inches (16:9) TN color transmission a-Si TFT active matrix...
- Page 69 Sony Corporation Printed in Korea http://www.sony.net/...
Need help?
Do you have a question about the DPS5032N and is the answer not in the manual?
Questions and answers