Table of Contents

Related Manuals for Sony MKS-9011A


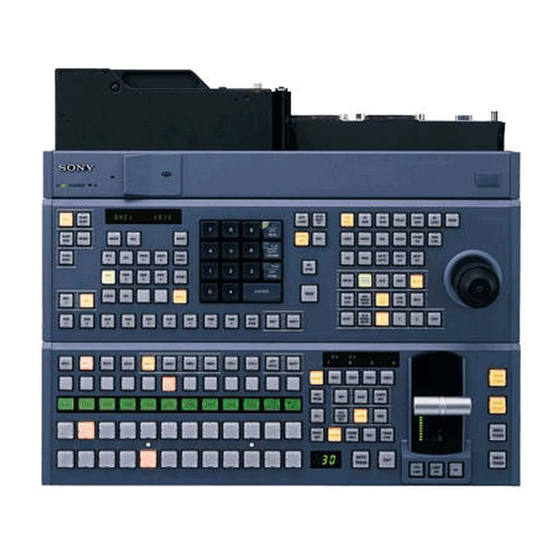
Summary of Contents for Sony MKS-9011A
- Page 1 CENTER CONTROL PANEL PACK CCP-9000A-C 1 M/E CONTROL PANEL MKS-9011A 2 M/E CONTROL PANEL MKS-9012A HK-PSU11 SWC-5002 MKS-8011A SWC-5005 MKS-8031ATB SWC-5010 MKS-8032A MKS-8033A MKS-8035A MKS-8041 MKS-8075A INSTALLATION MANUAL 2nd Edition...
- Page 2 Serial No. 10001 and Higher MKS-8035A Serial No. 10001 and Higher MKS-8041 Serial No. 10001 and Higher MKS-8075A Serial No. 10001 and Higher MKS-9011A Serial No. 10001 and Higher MKS-9012A Serial No. 20001 and Higher SWC-5002 Serial No. 10001 and Higher SWC-5005 Serial No.
- Page 3 For safety, do not connect the connector for peripheral WARNING device wiring that might have excessive voltage to the This unit has no power switch. following ports. When installing the unit, incorporate a readily : PERIPH (peripheral) connector accessible disconnect device in the fixed wiring, or : CTRL (control) connector connect the power cord to a socket-outlet which must be : DATA connector...
-
Page 5: Table Of Contents
1-10-1. System Connection of the MVS-8000A Series ......1-24 1-10-2. Connecting the Center Control Panel ........1-25 2. Service Overview 2-1. Troubleshooting ..................2-1 2-1-1. Center Control Panel MKS-9011A/9012A ........ 2-1 2-1-2. Menu Panel MKS-8011A ............2-1 2-2. Periodic Inspection and Maintenance ............2-2 2-2-1. -
Page 6: Manual Structure
This manual describes the application and operation of CCP-9000A-C..Maintenance Manual (Available on request) This manual describes the detailed service information. If this manual is required, please contact your local Sony Sales Office/Service Center. Contents This manual is organized by following sections. -
Page 7: Installation
Recommended power cord MKS-8011A : Approx. 2.3 kg This unit does not come with a power cord. MKS-8031ATB : Approx. 0.7 kg To get a power cord, please contact your local Sony Sales MKS-8032A : Approx. 0.7 kg Office/Service Center. MKS-8033A : Approx. -
Page 8: Installation Space
1-3. Installation Space 1-3-1. External Dimensions Center control panel MKS-9012A 119.4 142.6 186.6 (4U + 9) Unit : mm CCP-9000A... - Page 9 Center control panel MKS-9011A/Menu panel MKS-8011A MKS-8011A MKS-9011A 80.8 115.3 175 (4U) Unit : mm CCP-9000A...
- Page 10 Extension adaptor MKS-8075A BANK BANK BANK BANK DSK1 DSK2 UNDO WIPE K-SS K-SS DSK3 DSK4 SHIFT STORE DSK1 DSK2 DSK3 DSK4 TAKE TAKE TAKE TAKE Unit : mm CCP-9000A...
-
Page 11: Installation Space
1-3-2. Installation Space When the control panel is recessed into a control console or similar, make holes as shown below into the control console with the following dimensions. Center control panel MKS-9012A 120 or more 50 or more 6-M5 39.4 30 or more 30 or more Unit : mm... - Page 12 Center control panel MKS-9011A 120 or more 50 or more 6-M5 39.4 30 or more 30 or more Unit : mm CCP-9000A...
-
Page 13: Installing On The Control Console
. Screw B3 x 6 (4) Rack angle assembly (R) 1. Remove the six screws (B4 x 6) of the MKS-9011A. 2. Remove the screws (B3 x 4) from the rack angle assembly (L) and the rack angle assembly (R) respec- 4. -
Page 14: Mks-9012A
1-4-2. MKS-9012A 5. Install the MKS-9011A on the control console with the supplied six screws (B5 x 8). MKS-9011A Be sure to install the MKS-9012A on the control console by two or more persons. Installing it by one person may... - Page 15 3. Install the rack angle assembly (L) and the rack angle 5. Install the rack angle cover (L) and the rack angle cover (R) removed in step 2 on the rack angle assem- assembly (R) on the MKS-9012A with the supplied six screws (B4 x 12) .
-
Page 16: Installing The Menu Panel
Connect the 50-pin cable attached to the menu panel, and then perform the following steps. Model name MKS-9011A 1 M/E CONTROL PANEL 1. Install the adapter to the menu panel with the attached four screws (B3 x 5). -
Page 17: Installing Hk-Psu11
1-6-1. Installing HK-PSU11 3. Remove the blank panel. Blank panel Before installing the HK-PSU11, be sure to unplug the power cord, and confirm that the power is off. 1. Remove the screw which secures the release lever. Store the removed blank panel in a safe place. 4. -
Page 18: Installation To Mks-8075A (Extension Adaptor)
1-6-2. Installation to MKS-8075A (Extension Removal Adaptor) 1. Remove the screw which secures the release lever. 2. Turn the release lever in either of the following direction. Be sure to disconnect the power cord before starting to To remove the HK-PSU11 on slot A : 2 install modules. -
Page 19: How To Connect The Mks-8075A
1-6-3. How to Connect the MKS-8075A 5. Install the module covers. Structure of MKS-8075A (Extension adaptor) For MKS-8031ATB, installation of the track ball is Adaptor case : required after the module is installed in steps 1 to 5. Screw (BV3 x 10) : Install the track ball by following the procedure below. - Page 20 Connecting procedure When the Vertical connection is selected 1. Remove the module covers. Remove the screws (BV3 (1) Connect the adaptor cases together. x 10) fixing the caps (L) and (R), and remove the caps (Be careful of the direction of the adaptor cases. See the in the direction of the arrow.
- Page 21 When the Horizontal connection is selected 5. Install the side panel. (1) Connect the adaptor cases together. (Be careful of the direction of the adaptor cases. See The screw positions that fix the side panel are different the instruction given on the bottom of the adaptor in the connection methods (A), (B) and (C) respective- case.) ly.
- Page 22 Fig. 2 : Side panel installation methods FRONT FRONT Left side Connecting plate A FRONT FRONT Right side : Connecting plate screw fixing position : Side plate screw fixing position Connection method (A) FRONT FRONT Left side Connecting plate A FRONT FRONT Right side...
-
Page 23: How To Connect The Cables
In order to rack mount the MKS-8075A, the following 1. Connect the EXT PANEL connector of the control conditions must be met. panel MKS-9011A/9012A to the SCU IN connector of . Two or more adaptors must be configured to the two the MKS-8075A using the panel cable SWC-5002/ rows as shown in the illustration by connecting them 5005/5010. - Page 24 Rack mounting procedures Install the adaptor into the rack using rack mounting screws (RK5 x 16) and ornamental washers as shown in the illustration. (The illustration below shows the configuration when 4 adaptors are installed.) RK5 x 16 Ornamental washer Ornamental washer RK5 x 16...
-
Page 25: Matching Connectors And Cables
Matching connector and cable Name Sony part No. MKS-9011A/9012A EXT PANEL D-sub 50-pin, Female Use the dedicated cable MENU PANEL specified by Sony Corp. D-sub 25-pin, Female D-sub 25-pin, Male Connector 25-pin, Male 1-566-356-11 Junction Shell 25-pin 1-563-377-11 EXT DISPLAY... -
Page 26: Input/Output Signals Of Connectors
1-8. Input/Output Signals of Connectors Pin No. Signal Name Function GPI OUT 6 General-purpose open collector Input and output signals of the connectors on the rear panel output (B) (*2) GPI OUT 8 are as follows. GPI OUT COM Ground for open collector output CTRL/DATA/PERIPH : 100BASE-TX, RJ-45 (8-pin) Ground GPI IN 1... - Page 27 EDITOR PANEL: RS-422A (D-sub 15-pin, Female) EXT DISPLAY : (High-density D-sub 15-pin, analog (*3) <CONTROLLER> RGB, Female) to External Display EXT VIEW _ EXT VIEW _ Pin No. Signal name Function Pin No. Signal Name Function Ground Video red Received data (_) GREEN Video green Transmitted data (+)
-
Page 28: Description Of On-Board Switches And Leds
1-9. Description of On-board Switches and LEDs The number shown in the parentheses ( ) indicates the address on the circuit board. FP-141 board D107 D106 D105 D104 D115 D114 D113 D112 D123 D122 D121 D120 D131 D130 D103 D102 D101 D100 D111 D110... - Page 29 <Switch> S100 (B-1) : MAIN RESET switch Reset switch for the entire this control panel. S101 (B-1) : C0-RESET switch Independent reset switch for the CTRL LAN control IC. S102 (C-1) : C1-RESET switch Independent reset switch for the PERIPH LAN control sub CPU.
-
Page 30: System Connection
Connection example Reference video signal MVE-8000A DME Processor Pack Ethernet switch Ethernet switch DATA CTRL CTRL DATA CTRL MKS-9011A/9012A Control Panel DATA EDITOR PERIPH Reference video signal MVS-8000ASF Switcher Processor Pack Reference video signal BKS-R Series Editing Key board... -
Page 31: Connecting The Center Control Panel
1-10-2. Connecting the Center Control Panel Connect the center control panel such as MKS-9011A/9012A, MKS-8011A and others referring to the following connection example. Connection example MKS-8075A Extension Adaptor SCU IN 100 to 240 V AC power supply SCU OUT SCU IN (Max. -
Page 33: Service Overview
Is the main power of the diagram “The main MKS-9011A/9012A turned on? power cannot be turned on”. Connect it Is the power cord of the MKS-9011A/ correctly. 9012A connected correctly? Is the connection cable is connected Connect the D-sub correctly? (Is the connector (SCU) 50-pin cable. -
Page 34: Periodic Inspection And Maintenance
This may have an adverse effect on performance and the life of the machine. Cleaning of the fan every month is recommended. Contact your local Sony Sales Office/Service Center for information on cleaning the fan. CCP-9000A... -
Page 35: About The Data Backup Capacitor
Fit the notches in the chassis into the grooves in the line, and macro, etc. front panel, then attach the front panel. Leave the main power of the MKS-9011A/9012A turned on for two hours or longer to charge this capacitor. Notches... - Page 37 The material contained in this manual consists of information that is the property of Sony Corporation. Sony Corporation expressly prohibits the duplication of any portion of this manual or the use thereof for any purpose other than the operation or maintenance of the equipment described in this manual without the express written permission of Sony Corporation.
- Page 38 Printed in Japan Sony Corporation CCP-9000A-C (SY) E 2006. 7 08 3-857-283-11 ©2006...
Need help?
Do you have a question about the MKS-9011A and is the answer not in the manual?
Questions and answers