
Related Manuals for Philips PET731/12


Summary of Contents for Philips PET731/12
-
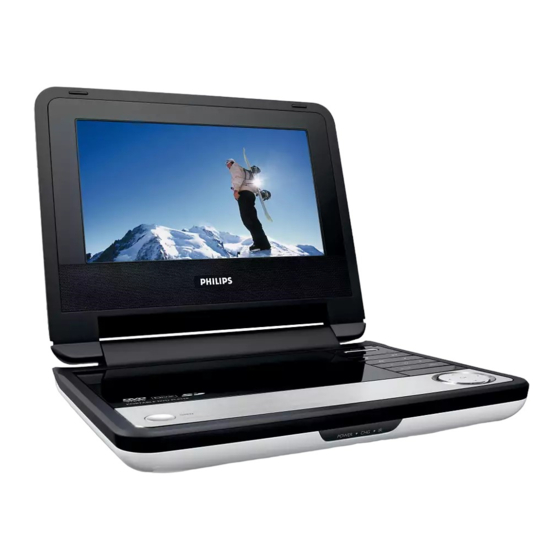
Page 1: User Manual
Portable DVD player PET731 Register your product and get support at www.philips.com/welcome User manual... -
Page 4: Table Of Contents
English Content Control elements and functional com- ponents 1.1 Main unit controls 1.2 Remote Control Introduction 2.1 Your portable DVD player 2.2 Unpacking 2.3 Placement 2.4 Playable disc formats 2.5 Zero Bright Dot General information Charging the units 4.1 Charge the DVD player 4.2 Powering your remote control Start up... -
Page 5: Main Unit Controls
Congratulations on your purchase and welcome to Philips! To fully benefit from the support that Philips offers, register your product at www.philips.com/welcome. 1.1 Main unit controls (see figure 1) 1 POWER 3 2; 4 J( / )K 5 - VOL +... - Page 6 VOL+ / - 3 DISPLAY 4 J( 5 2; 7 0 - 9 8 SUBTITLE 9 RETURN 10 A - B 11 SETUP 12 OPTION 13 )K 14 s 15 AUDIO 16 ZOOM Volume control Adjust the display value of the system Skip to previous chapter, track or title Start / pause / resume playback Press twice to stop playback...
-
Page 7: Remote Control
2 Introduction 2.1 Your portable DVD player Your portable DVD player plays digital video discs conforming to the universal DVD Video standard.With it, you will be able to enjoy full-length movies with true cinema picture quality, and stereo or multichannel sound (depending on the disc and on your playback set-up). -
Page 8: Playable Disc Formats
2.4 Playable disc formats In addition to DVD-Video disc, you will also be able to play all Video CDs, CDs, CDR, CDRW,DVD±R and DVR±RW. 2.4.1 DVD-Video Depending on the material on the disc (a movie, video clips, a drama series, etc.) these discs may have one or more Titles, and each Title may have one or more Chapters.To make access easy and convenient, your player lets you move between Titles, and also between Chapters. -
Page 9: Zero Bright Dot
Portable DVD Players, our LCD displays are produced with zero tolerance for bright dots. Select Portable DVD Players come with Philips Zero Bright Dot Policy to guarantee optimal screen quality.Warranty service varies from region to region. Contact your local Philips representative for more detailed information. -
Page 10: General Information
3 General information Power Sources This unit operates on a supplied AC adaptor, car adapter, or a rechargeable battery pack. • Make sure that the input voltage of the AC adaptor is in line with the local voltage. Otherwise, the AC adaptor and unit may be damaged. -
Page 11: Hearing Safety
• Apparatus shall not be exposed to dripping or splashing. Do not place any sources of danger on the appartus (e.g. liquid filled objects,lighted candles) • Do not touch the lens! Hearing Safety Listen at a moderate volume. • Using headphones at a high volume can impair your hearing.This product can produce sounds in decibel ranges that may cause hearing loss for a normal person, even for exposure less than a minute.The higher decibel ranges are offered for those that may have already experienced some... - Page 12 • Important (for models with by-packed headphones): Philips guaran- tees compliance with the maximum sound power of its audio players as determined by relevant regulatory bodies only with the original model of provided headphones.
-
Page 13: Handling Discs
Handling discs • Do not attach paper or tape to the disc. • Keep the disc away from direct sunlight or heat sources. • Store the disc in a disc case after playback. • To clean, wipe the disc outwards from the center with a soft, lint-free clean cloth. -
Page 14: Charging The Units
4 Charging the units 4.1 Charge the DVD player Plug in the AC/DC adaptor • The RED LED indicates that charging is in progress. • When the set is not in use, it will take about 4 hours to fully charge it. The RED LED will turn off when the set is fully charged. - Page 15 CAUTION • Batteries contain chemical substances, so they should be disposed of properly. • Batteries shall not be exposed to excessive heat such as sunshine, fire or the like. • Danger of explosion if battery is incorrectly replaced. Replace only with the same or equivalent type. •...
-
Page 16: Start Up
5 Start up 5.1 Setup 1 Press SETUP. A list of features is shown. 2 Use 3 / 4 to highlight your selection. 3 Use 2 to enter a sub-menu 4 Use 3, 4, 1, 2 to highlight your desired setting and press OK to confirm. -
Page 17: Playback Dvd
Audio Dolby Digital (SPDIF) Set digital output format 5.2 Playback DVD 1 Briefly press POWER on the main control of the player to switch on the set. 2 Open the disc door and insert the disc. • The player will start to play the disc automatically. 3 Use 1, 2, 3, 4 to select an item from the DVD disc menu, such as play now, select languages and subtitle, and press OK to con- firm. -
Page 18: Playback Vcd
Angle Zoom A-B Repeat 5.3 Playback VCD 1 Briefly press POWER on the main control of the player to switch on the set. 2 Open the disc door and insert the disc. • The set will start to play the disc automatically. The following functions are available during playback: Pause Previous/Next Briefly press J( or )K once or several times to... -
Page 19: Playback Super (S)-Vcd
Language Zoom A-B Repeat 5.4 Playback Super (S)-VCD (Super) Video CDs may feature PBC (Play Back Control).This allows you to play the video CDs interactively, following the menu on the display. 1 Briefly press POWER on the main control of the player to switch on the set. -
Page 20: Playback Music Mp3/Wma-Cd
The following functions are available during playback: Pause Previous/Next Briefly press J( or )K once or several times to Fast backward / Fast forward Volume Control Repeat Shuffle Stop A-B Repeat 5.6 Playback Music MP3/WMA-CD 1 Briefly press POWER on the main control of the player to switch on the set. -
Page 21: Playback Picture-Cd
The following functions are available during playback: Pause Previous/Next Briefly press J( or )K once or several times to Fast backward / Fast forward Volume Control Repeat Shuffle Stop 5.7 Playback Picture-CD The player can only read pictures in JPEG format. 1 Briefly press POWER on the main control of the player to switch on the set. -
Page 22: Playback From Sd/Mmc Card
• The set will start to play the disc automatically. 3 Use 1, 2, 3, 4 to select the folder and JPEG file to be played. Pause Previous/Next Briefly press J( or )K once or several times to Rotate Slide show Zoom Stop 5.8 Playback from SD MMC card... - Page 23 2 Insert an SD/MMC memory card into the SD/MMC card slot. • The player will browse and show the contents of the SD/MMC card automatically. 3 Use 3, 4, 1, 2 to select the file you want to access, then press OK to play it.
-
Page 24: Addition Functions
6 Addition Functions 6.1 DISPLAY Menu When you press DISPLAY during playback, the following menu will appear and you can access the corresponding function and information: Brightness Contrast Color Turn off LCD You can turn off the screen in some situations, Battery level It shows type of power source in using. -
Page 25: Component Video(Ypbpr/Ycbcr)
6.2.2 TV You can connect the player to a TV and enjoy your DVD. White Yellow 6.2.3 Component Video(YPbPr/YCbCr) Component Video connection provides higher picture quality.This option must be available on your TV. 1 Press OPTION. 2 Press 3 or 4 to select SOURCE, then press 2 to enter its sub-menu. -
Page 26: Sd/Mmc Card Slot
6.2.4 SD/MMC card slot You can play video/audio/picture files stored in an SD/MMC card by inserting it into the SD/MMC CARD slot. TIP Make sure the metal contact of the card to be inserted is fac- ing down. 6.2.5 Coaxial It provides digital audio output signal that you can connect to your home theater equipment to decode the digital audio signal. -
Page 27: Troubleshooting
7 Troubleshooting If it appears that the DVD-Video player is faulty, first consult this checklist. It may be that something has been overlooked. WARNING Under no circumstances should you try to repair the set yourself as this will invalidate the guarantee. If a fault occurs, first check the points listed, before taking the set for repair. - Page 28 Symptom Disc can’t be played The player does not respond to the remote control Distorted or B/W picture with DVD No audio at digital output • Check the digital connections. Player does not respond to all operating com- mands during playback Cannot detect SD/MMC card Player feels warm...
-
Page 29: Technical Data
Power Consumption Operating temperature range Laser wavelength Video system PHILIPS reserves the right to make design and specification changes for product improvement without prior notice. Modifications not authorized by the manufacturer may void users authority to operate this device. All rights reserved.
Need help?
Do you have a question about the PET731/12 and is the answer not in the manual?
Questions and answers