Table of Contents
Advertisement
Quick Links
Advertisement
Table of Contents

Related Manuals for Philips WAS7000/05B


Summary of Contents for Philips WAS7000/05B
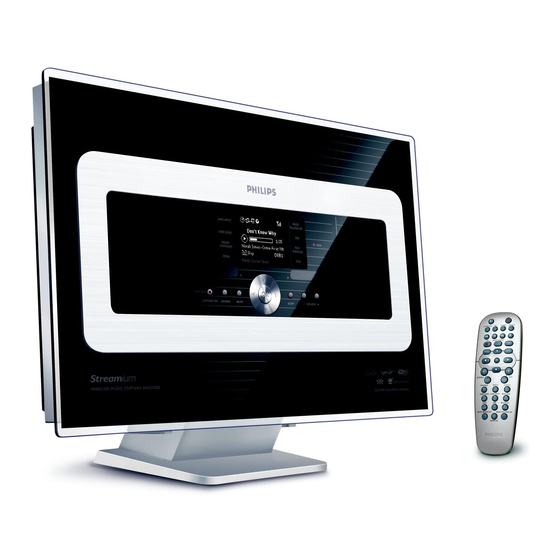
- Page 1 Wireless Music Station WAS7000 User manual Manuel d'utilisation User manual...
- Page 3 Important notes for users in the U.K. Mains plug This apparatus is fitted with an approved 13- Amp plug.To change a fuse in this type of plug, proceed as follows: Remove fuse cover and fuse. Fix the new fuse which should be a BS1362 5- Amp, A.S.T.A.
- Page 4 This product contains Linux 2.4.27-vrsl, that is made available under the GNU LGPL license version 2.1 (hereafter called “the Library”). Philips Electronics Hong Kong Ltd. hereby offers to deliver or make available, upon request, for a charge no more than the cost of physically...
-
Page 5: Table Of Contents
1. General information 1.1 About WAS7000 _______________ 7 1.2 Supplied accessories _____________ 7 1.3 Philips on-line support ____________ 8 1.4 Environmental information 1.5 Maintenance ___________________ 9 1.6 Safety information ______________ 10 2. Controls 2.1 Controls on the Station _______ 11-12 2.2 Station’s remote control _______13-14... - Page 6 Contents 9. UPnP (Universal Plug and Play) 9.1 About UPnP _________________ 32 9.1.1 About the UPnP-enabled device 9.2 Connecting to the UPnP device __ 32 9.3 UPnP playback ________________ 32 9.3.1 Playing music from the UPnP device 10. Sleep _______________________ 33 11.Alarm 11.1 Setting alarm _________________ 34 11.1.1 Setting alarm time...
-
Page 7: General Information
– 1 x PC Suite CD – 1 x Mounting kit This set complies with the radio interference requirements of the European Community. Philips Consumer Electronics, BG Entertainment Solutions, hereby declares that this product WAS7000 is in compliance with the essential requirements and other relevant provisions of Directive 1999/5/EC. -
Page 8: Philips On-Line Support
● Interactive troubleshooting As it is possible for you to upgrade your product, we recommend that you register your product on www.club.philips.com so that we can inform you as soon as new and free upgrades are available. Enjoy your WAS7000! -
Page 9: Environmental Information
1.4 Environmental information All redundant packaging material has been omitted.We have done our utmost to make the packaging easily separable into three mono materials: cardboard (box), polystyrene foam (buffer) and polyethylene (bags, protective foam sheet). The set consists of materials which can be recycled if disassembled by a specialised company. -
Page 10: Safety Information
1. General information 1.6 Safety information ● Place the set on a flat, firm and stable surface. ● Keep the system, batteries or discs away from excessive moisture, rain, sand or any heat sources, such as heating equipment or direct sunlight. -
Page 11: Controls
2. Controls 123 4 5 6 7... -
Page 12: Controls On The Station
2. Controls 2.1 Controls on the Station (Top and front panels) STANDBY-ON/ ECO POWER – press briefly to switch the set on or to standby mode; – press and hold to switch the set to power- saving mode or on –... -
Page 13: Station's Remote Control
CD/MP3-CD SOURCE SEARCH MARK/UNMARK MENU VIEW & SCROLL REPEAT SHUFFLE PROGRAM SAME GENRE SAME ARTIST INCR.SURR. SLEEP RDS/NEWS ¡ pqrs wxyz ™ MUSIC BROADCAST MUSIC FOLLOWS ME £ ≤ SMART EQ 2.2 Station’s remote control –– press briefly to switch on the set or to put it on standby mode;... -
Page 14: Icons On Lcd Display
2. Controls CD/MP3-CD (works with WAC7000 Center only) HARDDISK (HD) – selects HD (hard disk) source – In standby mode: switches the set on and selects HD source SOURCE – selects Radio source, UPnP source, USB source or AUX from an additional connected appliance –... -
Page 15: Installation
3.1 Place Station With detachable stand and by-packed wall mounting kits,WAS7000 Station allow you to place them in two ways: on desktops with stand or on wall without stand. (on desktop with stand) (on wall without stand) To learn more about wall mounting, see 16. -
Page 16: Rear Connections
3. Installation 3.3 Rear connections Warning: – Never make or change the connections when the mains is switched on. 3.3.1 Connecting antennas Extend the wire antenna and fit it to the FM ANTENNA as shown below (Optional) To improve FM reception, fit the plug of the wire antenna into the plug of the extension line (sold separately) as shown below Extend the extension line and move it in... -
Page 17: Connecting Other Additional Device
3.3.3 Connecting to other additional devices It is possible to play audio output from an external source, e.g.TV,VCR, Laser Disc player, DVD player on the Station. On the additional device Connect one end of the audio cable (not supplied) to the AUDIO OUT terminals on the additional device On the Station Connect the other end of the audio cables to the... -
Page 18: Preparation
4. Preparation 4.1 Setting clock The time can be displayed in 24-hour or 12-hour format. Press MENU to enter the menu screen. Use the navigation controls 3 or 4 and 2 to select Settings followed by Time To set clock time, a. -
Page 19: Using The Remote Control
4.2 Using the remote control IMPORTANT! – The remote control might not be able to operate the other wireless music systems from Philips (e.g.WACS700,WACS5) – Always point the remote control directly towards the IR sensor on the Station you wish to operate. -
Page 20: Basic Functions
5. Basic functions 5.1 Switching to standby/on and selecting functions When the set is switched on, press STANDBY- ON/ ECO POWER to switch it to standby mode (or press on the remote control) ➜ The Red indicator lights up ➜ Display shows the connected or previously connected Center –... -
Page 21: Auto-Standby
5.3 Auto-standby When the set has reached the end of playback and remains in the stop position for more than 20 minutes, the set will switch to standby mode automatically to save power. 5.4 Volume control Check that playback has started Adjust the volume with VOL +/- buttons ➜... -
Page 22: Display Adjustment
5. Basic functions 5.6.3 Incredible surround ● Press INCR. SURR. once or more times to toggle the surround sound effect on or off ➜ Display shows IS ON or IS OFF SAME GENRE SAME GENRE SLEEP pqrs MUSIC BROADCAST MUSIC FOLLOWS ME 5.7 Display adjustment You can adjust the backlight and contrast settings of the display. -
Page 23: Playing Harddisk (Hd)
6.1 Playing Hard Disk (HD) Music is centrally stored in the 80GB hard disk on the WAC7000 Center. All the stored music can be streamed and played on the Station via Wi-Fi. Check that the set is switched on IMPORTANT: also check that the Center is switched on or in standby mode Press SOURCE once or more times to select HD (or press HD on the remote control) -
Page 24: Selecting And Searching
6.HD(Located on Center) 6.2 Selecting and searching 6.2.1 Selecting a different option If necessary, press 1 repeatedly to enter previous option lists Press the navigation controls 3 or 4 repeatedly and 2 to select the option Press VIEW to return to the playback screen, if necessary MARK/UNMARK MENU... -
Page 25: Selecting Tracks Of A Particular Artist
6.2.3 Selecting tracks of a particular artist During playback, press SAME ARTIST ➜ Playback of tracks by the current artist continues after current track. 6.2.4 Selecting tracks of a particular genre During playback, press SAME GENRE ➜ Playback of tracks with the same genre as the current track continues after the current track. -
Page 26: Viewing Track Information
6.HD(Located on Center) 6.5 Viewing track information Press VIEW on the remote control once or more times to enter the playback screen. MENU Press 2 ➜ The display shows the track information (e.g. track name, file type, file size, bit rate of mp3/wma files) Press VIEW once or more times to return to the playback screen... -
Page 27: Music Broadcast
6.6.2 MUSIC BROADCAST MUSIC BROADCAST allows you to broadcast music from Center to Stations. On the Stations Check that the Station is switched on or is already in standby mode (see 5. Basic functions) On the Center In HD source, select and play the album or playlist that you wish to broadcast to the Stations (see 6.2: Selecting and searching) Press MUSIC BROADCAST to activate... -
Page 28: Fm Radio
7. FM radio 7.1 Tuning to radio stations Connect the supplied FM wire antenna to the Station (see 3. Installation) Check that the set is switched on or in standby mode (see 5. Basic functions) Press SOURCE once or more times to select Radio ➜... -
Page 29: To Listen To A Preset Station
On the Station, press 3 or 4 or the Numeric Keypad (0-9) to select your desired preset number. Press OK ➜ Current radio station is stored to that preset location. 7.2.3 To listen to a preset station Press 1 to enter the list of preset stations Use the navigation controls 3 or 4 followed by 2 to select the desired station. -
Page 30: External Sources
8. External sources 8.1 Playing USB mass storage device You can playback music from a USB mass storage device on the Station. 8.1.1 About the USB device Compatible USB mass storage devices: The following devices can be used on the Station: –... -
Page 31: Playing Music From The Usb Device
8.1.2 Playing music from the USB device Check that the USB device is properly connected to the Station (see 3.3.2: Connecting a USB mass storage device ) Press SOURCE once or more times to select ➜ The icon appears – No USB Device Present appears if the USB device is not supported by the Station –... -
Page 32: Upnp (Universal Plug And Play)
To play the music library of your UPnP device on the Station, check that the UPnP server software is properly installed and enabled on the device (e.g. Philips Media Manager in the by-packed PC Suite CD, Musicmatch ,Window Media ®... -
Page 33: Sleep
10.1 SLEEP You can preset a certain period of time after which the Station will switch to standby mode.. On the remote control, press SLEEP repeatedly to select the desired time period (in minutes): ➜ The display shows in sequence: Sleep 15, 30, 45, 60, 90, 120, Off. -
Page 34: Alarm
11.Alarm 11.1 Setting alarm IMPORTANT! Before setting the alarm, check that the clock setting is correct. 11.1.1 Setting alarm time Enter the alarm setting menu Press MENU b. Use the navigation controls 3 or 4 and 2 to select Settings followed by Alarm To turn on the alarm a. -
Page 35: Network Setting
12.1 Adding Additional Station to the Wi-Fi network on the Center Up to 5 Stations can be connected to the WAC7000 Center.When adding a Station to the Center’s Wi-Fi network, you can play the Center’s music library on the Station or move music playback between the Center and Stations (see 6. -
Page 36: Connecting To External Wi-Fi Network
12. Network setting 12.2 Connecting to external Wi- Fi network The external Wi-Fi network can be a single PC or a PC network For music playback within the external network, see 9.3: UPnP playback. 12.2.1 Network setting on Station Check that the PC is switched on and the firewall is switched off On the Station, search for networks a. -
Page 37: Connecting To External Wired Network
12.3 Connecting to external wired network The external wired network can be a single PC, a PC network, or a Station The Station can access the wired and wireless network at the same time. Using the supplied Ethernet cable, you can connect the a Station separately to a wired network while maintaining its Wi-Fi connection (e.g. -
Page 38: Viewing The Connection With External Network
12. Network setting 12.4 Viewing the connection with external network Check that the Station is in HD source Select Information on the Station a. Press MENU to enter the menu screen b. Press the navigation controls 3 or 4 and 2 to enter Information menu. -
Page 39: Reset
13.1 Reset If desired, you can restore the Station to their default settings (including the network settings). When to reset the Station: – Resetting the Station helps to re-establish the Wi-Fi connection between the Center and Station. – Change the way the Station connects to an external Wi-Fi/wired network. -
Page 40: Firmware Upgrade
14.1 Firmware upgrade You can upgrade your WAS7000 Station with the supplied PC Installer CD Wireless Audio Device Manager (WADM). Register your WAS7000 on www.club.philips.com Download the firmware upgrade file and store it on your PC Connect your WAS7000 to power supply... -
Page 41: Troubleshooting
If a fault occurs, first check the points listed below before taking the system for repair. If you are unable to resolve a problem by following these hints, consult your dealer or Philips for help. Problem During the first-time setup, the display... - Page 42 15.Troubleshooting Problem Stations react when you operate the Center’s remote control The remote control does not function properly Sound cannot be heard or is of poor quality. Some files on the USB device are not displayed Radio reception is poor There is interference on the radio reception whenever the Station is near my How do I mount the Station...
-
Page 43: How To Mount Your Station Onto Walls
16.1 How to mount your Station onto wall IMPORTANT! – The wall mounting instructions are for the use of the qualified wall mounting person only! – Ask a qualified person to help you with the wall mounting, which includes drilling holes on the wall, fixing the mounting brackets to the wall, and mounting the sets onto the brackets. - Page 44 Meet Philips at the Internet http://www.philips.com Need help? Online Go to www.philips.com/support WAS 7000 CLASS 1 LASER PRODUCT 3141 075 21831 C Royal Philips Electronics N.V. 2006 Printed in China PDCC-2006...
Need help?
Do you have a question about the WAS7000/05B and is the answer not in the manual?
Questions and answers