Table of Contents
Advertisement
Advertisement
Table of Contents

Related Manuals for Philips MCD139/55


Summary of Contents for Philips MCD139/55
- Page 1 DVD Micro Theatre MCD139 user manual manual del usuario manual do usuário...
- Page 2 Philips Electronics HK, Ltd. ______________________________ ANTES DE USAR SU APARATO. AVISO IMPORTANTE Philips Mexicana, S.A. de C.V. no se hace responsable por daños o desperfectos causados por: – Maltrato, descuido o mal uso, presencia de insectos o roedores (cucarachas, ratones etc.).
- Page 3 Manufactured under license from Dolby Laboratories. "Dolby", "Pro-logic" and the double-D symbol are trademarks of Dolby Laboratories. MANUFACTURED UNDER LICENSE FROM DIGITAL THEATER SYSTEMS, INC. US PAT. NO 5,451,942,5,956,674, 5,974,380, 5,978,762 AND OTHER WORLDWIDE PATENTS ISSUED AND PENDING. "DTS" AND "DTS DIGITAL SURROUND"...
-
Page 4: Table Of Contents
Contents General Information Features ... 6 Supplied accessories ... 6 Environment information ... 6 Safety information ... 7 Maintenance ... 7 Connections Step1: Placing speakers and subwoofer ... 9 Step2: Connecting speakers and subwoofer... 9 Step3: Connecting TV set ... 9~10 Using Video in jack (CVBS) Using Componet Video in jack (Pr Pb Y) Using S-Video in jack... - Page 5 Contents Tuner Tuning to radio stations...30 Storing preset radio stations...30 Manual programming...30 Automatic programming...30 Listening to preset radio stations...30 Deleting a preset radio station...30 Clock/Timer Viewing clock...31 Setting clock...31 Setting wake-up timer...31 Setting sleep timer...31 Specifications ... 32 Troubleshooting ... 33~35 Glossary ...
-
Page 6: General Information
– FM wire antenna – User Manual and Quick Start Guide If any item is damaged or missing, contact your retailer or Philips. Environmental information All unnecessary packaging has been omitted. We have tried to make the packaging easy to... -
Page 7: Safety Information
Safety information ● Before operating the system, check that the operating voltage indicated on the typeplate (or the voltage indication beside the voltage selector) of your system is identical with the voltage of your local power supply. If not, please consult your dealer. -
Page 8: Connections
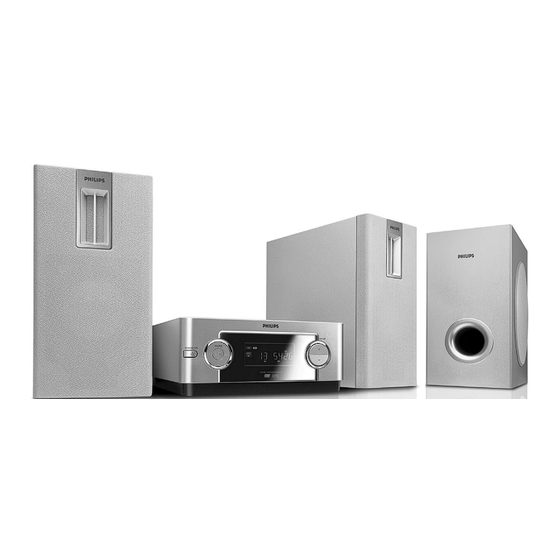
Connections Step 1: Placing speakers and subwoofer For best possible surround sound, locate your speakers and subwoofer as follows: ● Place the left and right speakers at equal distances from the TV set and at an angle of approximately 45 degrees from the listening position. -
Page 9: Step3: Connecting Tv Set
Step 3: Connecting TV set IMPORTANT! – You only need to make one video connection from the following options, according to the capabilities of your TV system. – S-Video or Component Video connection provides higher picture quality. These options must be available on your TV set. -
Page 10: Using S-Video In Jack
Antenna In jack (or labeled as 75 ohm or RF In), you will need a RF modulator in order to view the DVD playback via TV. See your electronics retailer or contact Philips for details on RF modulator availability and operations. (75Ω) ●... -
Page 11: Step4: Connecting The Fm Antenna
Step 4: Connecting the FM antenna ● Connect the supplied FM antenna to the FM (75 Ω) jack at the back of the main unit. Extend the FM antenna and fix its end to the wall. Step 5: Connecting the power cord IMPORTANT! –... -
Page 12: Step7: Connecting Digital Audio Equipment
Connections Step 7: Connecting digital audio equipment ANTENNA (75Ω) DVD player Digital audio recorder Recording (digital) Connect the system’s COAXIAL OUT (digital out) jack to the DIGITAL IN jack on a digital recording device (DTS-Digital Theater System compatible, with a Dolby Digital decoder, for example). -
Page 13: Functional Overview
Controls on the system – enables or disables bass enhancement. – selects different types of preset sound equalizer settings (CLASSIC, ROCK, JAZZ or POP). TUNING à / á Tuner...tunes to a radio station Disc... fast searches backward/forward in a disc at different speeds. Clock...sets the minutes STANDBY-ON B –... - Page 14 Functional Overview – switches the system to standby mode. SOURCE (DISC/AUX/TUNER) – switches on the system – selects the respective sound source for disc/FM/ – repeats playback of a specific section within a chapter of DVD or a track of VCD/CD. SYSTEM MENU –...
- Page 15 & MUTE – disables or enables sound output. VOL +/- – adjusts the volume upward/downward. GOTO – fast searches in a disc by entering a time, title or chapter (For VCD with PBC feature, PBC must be turned off.) ZOOM –...
-
Page 16: Remote Control
Switch the DVD system on and then select DISC source. (See “Switching the system on/off”). Turn on the TV and set to the correct video-in channel. You should see the blue Philips DVD background screen on the TV. ➜ Usually these channels are between the lowest and highest channels and may be called FRONT, A/V IN, or VIDEO. -
Page 17: Setting Up Progressive Scan Feature
In disc mode, stop playback then press SYSTEM MENU. ➜ The menu bar will appear across the top of the TV screen. Select icon and press 4. Press à / á / 4 / 3 keys on the remote control to navigate in the menu. ➜... -
Page 18: To Deactivate Progressive Manually
Getting Started ➜ Progressive scan is now set on. TV screen comes to the system menu. ➜ If distored picture still appears, it indicates that your TV doesn’t support progressive scan. In this case, turn off progressive scan as described in “To deactivate Progressive manually”. -
Page 19: Switching The System On/Off
IMPORTANT! – Before you operate the system, complete the connection procedures. – When the system is switched to Standby mode, it is still consuming power.To disconnect the system from the power supply completely, reomve the AC power plug from the wall socket. Switching the system on/off ●... -
Page 20: Disc Operations
Disc Operations IMPORTANT! – Depending on the DVD or VIDEO CD, some operations may be different or restricted. – Do not push on the disc tray or put any objects other than disc on the disc tray. Doing so may cause the disc player malfunction. -
Page 21: Playing Discs
Press SOURCE on the system once or more to select DVD mode ( or DISC on the remote control). ➜ You should see the blue Philips DVD background screen on the TV. Push OPEN/CLOSE on the top of the system to open the disc tray. -
Page 22: Fast Forwarding/Reversing
Disc Operations Fast forwarding/reversing For DVD/VCD/CD/MP3: During playback, press á / à repeatedly to select fast search speed in forward (FF) or reverse (FR) playback. ➜ The disc plays at a high speed with no sound. To resume to normal playback, pressÉ Å. Or, press à... -
Page 23: Programming Favourite Tracks
Programming favourite tracks For VCDs/CDs You can select and program up to 99 desired tracks for playback in the desired sequence. If you like, store any track/chapter/title more than once. During playback, press 9 twice to fully stop the playback. Press PROGRAM to activate programming mode. -
Page 24: Zoom
Disc Operations ZOOM For DVDs/VCDs/JPEG Zooming allows you to enlarge the video/ JPEG image during playback. ● Press ZOOM repeatedly to zoom in on the playback video image. ➜ For JPEP picture disc, press ZOOM to display “ZOOM ON”, then press ¡/ ™ to select different enlarging rates. -
Page 25: Playing Mp3 Music And Jpeg Picture
In the stop position, press à / á / 3 / 4 to select a desired album, then select a desired title in the album. Press OK or 2; to start playback. ● You can also use the numeric keys (0-9) to enter your choice. -
Page 26: Dvd Menu Operations
DVD Menu Operations Using the menu bar You can continue some operations directly via the multiple menu bars on the TV screen without interrupting the disc playback. But when you enter (SETUP MENU), the playback will pause. MODE CLOCK SLEEP/TIMER SYSTEM MENU DISC MENU AUDIO... -
Page 27: Using Setup Menu (User Preference Settings)
Using the setup menu (user preference settings) This DVD setup is carried out via your TV set, enabling you to customize the DVD System to suit your particular requirements MODE CLOCK SLEEP/TIMER SYSTEM MENU DISC MENU AUDIO MUTE In disc mode, press SYSTEM MENU. ➜... -
Page 28: Night Mode
DVD Menu Operations Night Mode NIGHT MODE TEST TONE NIGHT MODE SET TO OFF Select this when you want to enjoy the surround sound with its full dynamic range. Select this to level out the volume. High volume output will be softened and low volume output will be brought upward to an audio level. -
Page 29: Restricting Playback By Setting Parental Level
Restricting playback by setting parental level Some DVDs may have a parental level assigned to the complete disc or to certain scenes on the disc. This feature lets you set a playback limitation level. The rating levels are from 1 to 8 and are country specific. -
Page 30: Tuner
Tuner Tuning to radio stations Press STANDBY -ON y on the set to switch on the last selected source. Press repeatedly SOURCE (or TUNER on the remote) until FM is displayed. Press and hold TUNING à / á on the set until the frequency in the display starts changing. -
Page 31: Clock/Timer
Viewing clock The clock (if it is set) will be shown in standby mode. To view the clock in any source mode (DISC or TUNER for example) ● Press briefly CLOCK on the remote. ● You may press MODE on the set to toggle between 12-hour and 24-hour display. -
Page 32: Specifications
Specifications AMPLIFIER Outpurt power L/R speakers ... 25 W /channel RMS Subwoofer ... 50 W RMS Speaker channel Frequency Response ..200 Hz - 18 kHz / ± 3 dB Signal-to-Noise Ratio ... > 60dB (A-weighted) Input Sensitivity AUX In ... 500 mV Output Sensitivity Line Out(1KHZ 0dB) ... -
Page 33: Troubleshooting
Do not open the system as there is a risk of electric shock. If a fault occurs, first check the points listed below before taking the system for repair. If you are unable to remedy a problem by following these hints, consult your dealer or Philips for help. - Page 34 Troubleshooting The aspect ratio of the screen cannot be changed even though you have set the TV shape. No sound or distorted sound. The micro DVD player does not start playback. The DVD micro system does not respond when the buttons are pressed. Cannot activate some features, such as Subtitles, or multi-language Audio.
- Page 35 The timer is not working. The Clock/Timer setting is erased. The remote control does not function. Low hum or buzz sound. Low bass response. Unable to select Progressive Scan Troubleshooting ✔ Set the clock correctly. ✔ Power has been interrupted or the power cord has been disconnected.
-
Page 36: Glossary
Glossary Analog: Sound that has not been turned into numbers. Analog sound varies, while digital sound has specific numerical values. These jacks send audio through two channels, the left and right. Aspect ratio: The ratio of vertical and horizontal sizes of a displayed image. The horizontal vs.
Need help?
Do you have a question about the MCD139/55 and is the answer not in the manual?
Questions and answers