Table of Contents
Advertisement
Available languages
Available languages
Quick Links
Download this manual
See also:
Service Manual
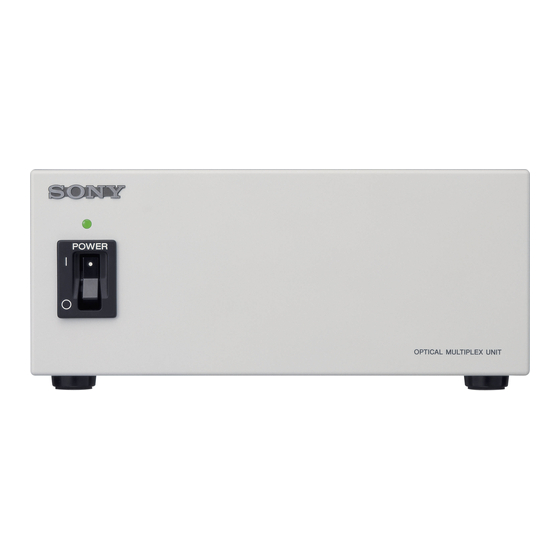
Optical Multiplex
Unit
取扱説明書
__________________________________________
Operating Instructions
Mode d'emploi
________________________________________
Manual de instrucciones
Gebrauchsanweisung
お買い上げいただきありがとうございます。
電気製品は安全のための注意事項を守らないと、
火災や人身事故になることがあります。
この取扱説明書には、 事故を防ぐための重要な注意事項と製品の取り扱いかたを示してあり
ます。この取扱説明書をよくお読みのうえ、製品を安全にお使いください。お読みになった
あとは、いつでも見られるところに必ず保管してください。
BRU-300/300P
© 2004 Sony Corporation
__________________________________
________________________________
__________________________________
3-854-214-02 (1)
JP
GB
FR
ES
DE
Advertisement
Chapters
Table of Contents

Summary of Contents for Sony BRU-300
- Page 1 3-854-214-02 (1) Optical Multiplex Unit 取扱説明書 __________________________________________ Operating Instructions __________________________________ Mode d’emploi ________________________________________ Manual de instrucciones ________________________________ Gebrauchsanweisung __________________________________ お買い上げいただきありがとうございます。 電気製品は安全のための注意事項を守らないと、 火災や人身事故になることがあります。 この取扱説明書には、 事故を防ぐための重要な注意事項と製品の取り扱いかたを示してあり ます。この取扱説明書をよくお読みのうえ、製品を安全にお使いください。お読みになった あとは、いつでも見られるところに必ず保管してください。 BRU-300/300P © 2004 Sony Corporation...
- Page 2 安全のために ソニー製品は正しく使用すれば事故が起きないように、 警告表示の意味 安全には充分配慮して設計されています。しかし、電気 製品は、まちがった使いかたをすると、火災や感電など 取扱説明書および製品では、次のような表示をし により死亡や大けがなど人身事故につながることがあり、 ています。表示の内容をよく理解してから本文を 危険です。 お読みください。 事故を防ぐために次のことを必ずお守りください。 安全のための注意事項を守る 4、5 ページの注意事項をよくお読みください。製品全般 この表示の注意事項を守らないと、火災や感電な および設置の注意事項が記されています。 どにより死亡や大けがなど人身事故につながるこ とがあります。 定期点検を実施する 長期間、安全にお使いいただくために、定期点検をする ことをおすすめします。点検の内容や費用については、 お買い上げ店またはソニーのサービス窓口にご相談くだ この表示の注意事項を守らないと、感電やその他 さい。 の事故によりけがをしたり周辺の物品に損害を与 故障したら使用を中止する えたりすることがあります。 すぐに、お買い上げ店またはソニーのサービス窓口にご 連絡ください。 注意を促す記号 万一、異常が起きたら ・ 煙が出たら ・ 異常な音、においがしたら 行為を禁止する記号 ・ 内部に水、異物が入ったら ・ 製品を落としたり、キャビネットを破損したと きは...
-
Page 3: Table Of Contents
目次 特長 ....................6 システム接続例 .............6 各部の名称と働き ............... 7 インターフェースカードを取り付ける ........ 8 本機の性能を維持するために ..........9 仕様 ....................9 寸法図 ..............10 端子のピン配列 ..........10 VISCA RS-422 端子台コネクターの使いかた .. 11 保証書とアフターサービス ........... 11 目次... - Page 4 火災 感電 死亡 大けが 下記の注意を守らないと、 や により や につながる ことがあります。 電源コードのプラグおよびコネク 設置は専門の工事業者に依頼する ターは突き当たるまで差し込む 設置については、必ずお買い上げ店または まっすぐに突き当たるまで差し込まないと、 ソニーの業務用製品ご相談窓口にご相談く ださい。 火災や感電の原因となります。 壁面や天井などへの設置は、本機と取り付 け金具を含む重量に充分耐えられる強度が 水にぬれる場所で使用しない あることをお確かめください。充分な強度 水ぬれすると、漏電による感電発火の原因 がないと、落下して、大けがの原因となり となることがあります。 ます。 また、一年に一度は、取り付けがゆるんで ぬれた手で電源プラグをさわらない いないことを点検してください。 ぬれた手で電源プラグを抜き差しすると、 不安定な場所に設置しない 感電の原因となることがあります。 次のような場所に設置すると、倒れたり落 分解や改造をしない ちたりして、けがの原因となることがあり ます。 分解や改造をすると、火災や感電、けがの ・ ぐらついた台の上 原因となることがあります。 ・...
- Page 5 けが 損害 下記の注意を守らないと、 をしたり周辺の物品に を与えることがあります。 付属の電源コードを使う お手入れの際は、電源を切る 付属の電源コードを使わないと、火災や感 電源を接続したままお手入れをすると、感 電の原因となることがあります。 電の原因となることがあります。 コード類は正しく配置する 運搬時には、接続ケーブルを取り外 電源コードや接続ケーブルは、足に引っか す けると本機の落下や転倒などによりけがの 本機を運搬する際には、AC 電源コードお 原因となることがあります。十分注意して よび接続ケーブルを必ず取り外してくださ 接続・配置してください。 い。接続ケーブルに引っかかると、転倒や 落下の原因となることがあります。 指定された電源コード、カメラケー ブルなどの接続ケーブルを使う この取扱説明書に記されている電源コード、 カメラケーブルなどの接続ケーブルを使わ ないと、火災や故障の原因となることがあ ります。 内部に水や異物を入れない 水や異物が入ると、火災の原因となります。 万一、水や異物が入ったときは、すぐに本 機の電源を切り、電源コードや接続ケーブ ルを抜いて、お買い上げ店またはソニーの 業務用製品ご相談窓口にご相談ください。 雨のあたる場所や、油煙、湯気、湿 気、ほこりの多い場所には設置しな い 上記のような場所やこの取扱説明書に記さ れている仕様条件以外の環境に設置すると、 火災や感電の原因となることがあります。...
-
Page 6: システム接続例
システム接続例 特長 オプチカルマルチプレックスユニット BRU-300 は、 3CCD カラービデオカメラ BRC-300 を中継接続するた めのユニットです。 カメラ BRC-300 光ファイバーケーブルによる、長距離伝送が可能(BRC- 300 のみ) 本機には、マルチ光ファイバーケーブル接続用のコネク 1 2 3 4 5 6 7 8 9 1 2 3 ターを装備しています。 IR SELECT VISCA RS-422 カメラ BRC-300 にオプチカルマルチプレックスカード DC IN EXT SYNC IN... -
Page 7: 各部の名称と働き
各部の名称と働き 外部映像同期信号を出力します。 コンポジット映像出力端子 前面 本機に接続したカメラの映像をコンポジット信号と して出力します。 S VIDEO 端子 本機に接続したカメラの映像を S 映像信号として出 力します。 VISCA RS-422 端子 カメラまたは別の BRU-300 の VISCA RS-422 端 子と接続します。 VISCA RS-422 端子への接続のしかたは、 「VISCA RS-422 端子台コネクターの使いかた」 (11 ペー 電源スイッチ ジ)をご覧ください。 本機の電源を入切します。 VISCA FUNCTION スイッチ 電源インジケーター VISCA 通信の設定を行います。... -
Page 8: インターフェースカードを取り付ける
VISCA RS-232C IN 端子 インターフェースカード 別売りのリモートコントロールユニット RM-BR300 と接続します。また、複数のカメラを接続するとき を取り付ける は、前のカメラの VISCA RS-232C OUT 端子と接 続します。 後面のカードスロットへ別売りのインターフェースカー ド BRBK-301 や BRBK-302 などを取り付けます。 VISCA RS-232C OUT 端子 複数のカメラを接続するとき、次のカメラの VISCA ネジを 2 本ゆるめ、カバーを取り外す。 RS-232C IN 端子と接続します。 CAMERA 端子 光ファイバーケーブル CCFC-M100 を使って、カメ ラ BRC-300 に挿入したオプチカルマルチプレック スカード... -
Page 9: 本機の性能を維持するために
本機の性能を維持するた 仕様 めに システム 映像信号 NTSC カラー JEITA 標準方式 使用・保管場所について 同期方式 内部同期 / 外部同期方式切り換え自動対 次のような場所での使用および保管は避けてください。 応 故障の原因となります。 アスペクト比 4:3/16:9(ワイド)自動対応 ・ 極端に暑い所や寒い所 ( 使用温度は 0 ℃~+ 40 ℃ ) 映像 S/N 50 dB ・ 直射日光が長時間あたる場所や暖房器具の近く ・ 強い磁気を発するものの近く 入出力端子 ・ 強力な電波を発するテレビやラジオの送信所の近く カメラ入力 CCFC-M100 光コネクター(1)... -
Page 10: 寸法図
本機の仕様および外観は、改良のため予告なく変更する 端子のピン配列 ことがありますが、ご了承ください。 VISCA RS-232C IN 端子(8 ピンミニ DIN、メス) この装置は、情報処理装置等電波障 害自主規制協議会 (VCCI) の基準に基づくクラス B 情報技術装置です。 こ の装置は、家庭環境で使用することを目的としていま すが、この装置がラジオやテレビジョン受信機に近接 して使用されると、受信障害を引き起こすことがあり VISCA RS-232C ます。取扱説明書に従って正しい取り扱いをしてくだ さい。 ピン番号 機能 DTR IN DSR IN 寸法図 TXD IN RXD IN 上面 未使用 未使用 VISCA RS-232C OUT 端子(8 ピンミニ DIN、メス) VISCA RS-232C ピン番号... -
Page 11: Visca Rs-422 端子台コネクターの使いかた
VISCA RS-422 端子台コネクター 保証書とアフターサービ の使いかた ス ワイヤー(AWG No.28 ~ 18)を接続したい穴に差 し込み、入れた穴に対応するネジをマイナスドライ 保証書 バーで固定する。 ・ この製品には保証書が添付されていますので、お買い上 げの際にお受け取りください。 ・ 所定事項の記入および記載内容をお確かめのうえ、大切 マイナスドライバー に保存してください。 アフターサービス 調子が悪いときはまずチェックを ワイヤー この説明書をもう一度ご覧になってお調べください。 それでも具合の悪いときはサービスへ VISCA RS-422 端子台コネクターを VISCA RS-422 端子へ差し込む。 お買い上げ店、または添付の「業務用製品ご相談窓口の ご案内」にあるお近くのソニーサービス窓口にご相談く ださい。 保証期間中の修理は 保証書の記載内容に基づいて修理させていただきます。 詳しくは保証書をご覧ください。 コネクタープラグを取り外すには 保証期間経過後の修理は 修理によって機能が維持できる場合は、ご要望により有 VISCA RS-422 端子台コネクタープラグの両端を持ち、... - Page 12 Sony's Business Information Center (BIC) at THIS APPARATUS MUST BE EARTHED. 1-800-686-Sony (7669) WARNING or Write to: Sony Customer Information Services The mains plug on this equipment must be used to Center disconnect mains power. 6900-29, Daniels Parkway, PMB 330...
- Page 13 Table of Contents Features ..............4 Connecting Cables ..........4 Example of System Configuration ..... 4 Location and Function of Parts ......5 Attaching an Interface Card ........ 6 Precautions ............. 7 Specifications ............7 Dimensions ............8 Pin Assignments ..........8 Using the VISCA RS-422 Connector Plug ..
-
Page 14: Features
IN VISCA RS-232C OUT using the CCFC-M100 Optical Fiber Cable. Two interface card slots equipped BRBK-303 Optical The BRU-300/300P is equipped as standard with a Multiplex Card composite video output (BNC) and S video output. In CCFC-M100 Optical Fiber Cable... -
Page 15: Location And Function Of Parts
Y/C separate (S video) signals. I VISCA RS-422 connector Connect to the VISCA RS-422 connector of the camera or another BRU-300/300P Optical Multiplex Unit. For the connection to the VISCA RS-422 connector, see “Using the VISCA RS-422 Connector Plug”... -
Page 16: Attaching An Interface Card
K VISCA RS-232C IN connector Attaching an Interface Connect to the RM-BR300 Remote Control Unit (not supplied). When you connect multiple Card cameras, connect it to the VISCA RS-232C OUT connector of the previous camera in the daisy chain connection. Attach an interface card such as BRBK-301 or BRBK- 302 (not supplied) to the card slot on the rear of this unit. -
Page 17: Precautions
Specifications Operating or storage location System Operating or storing the unit in the following locations Video signal BRU-300: NTSC color, JEITA may cause damage to the unit: standards • Extremely hot or cold places (Operating temperature: BRU-300P: PAL color, CCIR °... -
Page 18: Dimensions
Supplied accessories Pin Assignments AC power cord (1) RS-232C connecting cable (1) VISCA RS-232C IN connector (mini DIN 8-pin, RS-422 connector plug (1) female) Operating Instructions (1) Design and specifications are subject to change without notice. VISCA RS-232C Dimensions Pin No. Function DTR IN DSR IN... -
Page 19: Using The Visca Rs-422 Connector Plug
Using the VISCA RS-422 Connector Plug Insert a wire (AWG Nos. 28 to 18) into the desired wire opening on the VISCA RS-422 connector plug, and tighten the screw for that wire using a flat- head screwdriver. Flat-head screwdriver Wire Insert the VISCA RS-422 connector plug into the VISCA RS-422 connector. - Page 20 この説明書は 100% 古紙再生紙を使用しています。 Printed on 100% recycled paper. Printed in Japan...


Need help?
Do you have a question about the BRU-300 and is the answer not in the manual?
Questions and answers