Philips CEM2000/00 User Manual
Philips car audio system cem2000 usb cd
Hide thumbs
Also See for CEM2000/00:
- Quick start manual (1 page) ,
- Brochure (2 pages) ,
- Service manual (72 pages)

Related Manuals for Philips CEM2000/00


Summary of Contents for Philips CEM2000/00
- Page 1 Register your product and get support at CEM2000 www.philips.com/welcome User manual ZH-HK...
-
Page 2: Table Of Contents
Contents 1 Important Safety Notice 2 Your car audio system Introduction What’s in the box Overview of the main unit Overview of the remote control 3 Get started Install the car audio Install remote control battery Turn on Set clock 4 Listen to radio Tune to a radio station Store radio stations in memory... -
Page 3: Important
1 Important Safety • Read and understand all instructions before you use your apparatus. If damage is caused by failure to follow instructions, the warranty does not apply. • This apparatus is designed for negative ground (earth) 12 V DC operation only. •... - Page 4 Any changes or modifications made to this device that are not expressly approved by Philips Consumer Lifestyle may void the user’s authority to operate the equipment. 2011 © Koninklijke Philips Electronics N.V. All rights reserved.
-
Page 5: Your Car Audio System
2 Your car audio system Congratulations on your purchase, and welcome to Philips! To fully benefit from the support that Philips offers, register your product at www.philips.com/welcome. Introduction With the in-car audio system, you can enjoy your drive while listening to: •... -
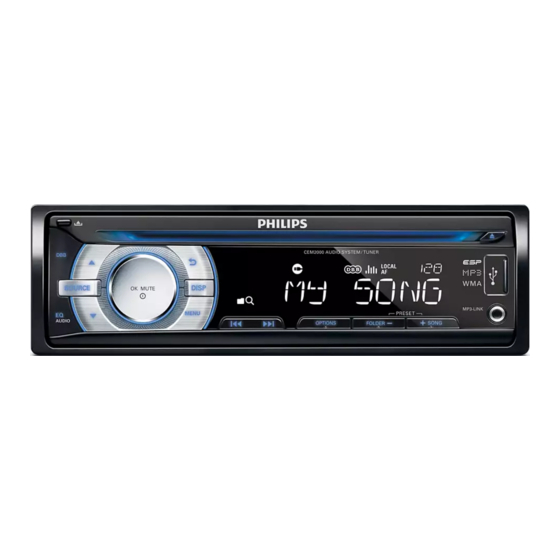
Page 6: Overview Of The Main Unit
Overview of the main unit SUB-W a DBB/SUB-W • Turn on or off Dynamic Bass Boost (DBB) sound. • Turn on or off subwoofer. • Unlock the panel. • Select tuner band. • Select MP3/WMA folder. • Scroll up/down menu. -
Page 7: Overview Of The Remote Control
• Turn the unit on or off. • Confirm selection. • Mute or unmute sound. • Rotate to adjust volume. • Return to previous menu. • Eject disc. • USB socket. h MP3 LINK • Connect external audio device. i +SONG/FOLDER - •... - Page 8 /PWR/ • Turn the unit on or off. • Mute or restore volume. • Select tuner band. • Scroll up/down menu. • Select MP3/WMA folder. • Return to previous/top menu. k SOURCE • Select audio source. l VOLUME +/- • Adjust volume.
-
Page 9: Get Started
Always follow the instructions in this chapter in sequence. If you contact Philips, you will be asked for the model and serial number of your apparatus. The model number and serial number are on the bottom of your apparatus. Write the numbers here: Model No. - Page 10 Connect the other end of the supplied standard connector to the unit. Connect the antenna and amplifier as illustrated, if applicable. You can connect the car audio to the amplifier through RCA-TO-RCA cables (not supplied). Connector ANTENNA FRONT LINE OUT R (Socket) FRONT LINE OUT L (Socket) Connection: for cars without ISO...
-
Page 11: Mount Into The Dashboard
Cut off the bigger end of the supplied standard connector. Check the car’s wiring carefully and connect them to the supplied standard connector. Green/black strip Left speaker (Rear) White/black strip Left speaker (Front) Gray/black strip Right speaker (Front) Purple/black strip Right speaker (Rear) Ignition key +12V DC when ON/ACC... - Page 12 Remove the mounting sleeve with the supplied disassembly tools. Install the sleeve into the dashboard and bend the tabs outward to fix the sleeve. Note • If the unit is not fixed by sleeve but by the supplied screws, skip this step. Place the supplied rubber cushion over the end of the mounting bolt.
-
Page 13: Install Remote Control Battery
Reconnect the negative terminal of the car battery. Attach the front panel Attach the trim plate. Insert the right side of the panel in the chassis until it is correctly engaged. Press the left side of the panel until the mechanism locks it into place. -
Page 14: Set Clock
Set clock Press MENU. Press repeatedly until currently time is displayed. Turn clockwise to set hour. Press to confirm. Turn anti-clockwise to set minute. Press to confirm. View clock Press and hold OPTIONS repeatedly until the clock is displayed. -
Page 15: Listen To Radio
4 Listen to radio Tune to a radio station Press SOURCE repeatedly to select Tuner. Press to select band: [FM1], [FM2], [FM3], [AM1], or [AM2] . Press and hold 4 seconds to tune to a radio station manually. » The radio station is broadcasted. »... -
Page 16: Play With Rds
5 Play with RDS The RDS (Radio Data System) function operates only in areas with FM stations broadcasting RDS signals. If you tune to an RDS station, an RDS icon (AF/TA/LOCAL) and the station name are displayed. Turn on RDS Note •... -
Page 17: Receive Traffic Announcement
• [AF OFF]: Turn off the AF mode. Set region for AF tuning You can define AF tuning region: [REG Only stations in current region can be tuned to automatically. [REG All stations can be tuned to OFF] automatically. Press MENU. Press repeatedly until [REG] (Regional Radio) is displayed. -
Page 18: Play Audio Files
6 Play audio files Note • Ensure that the disc or device contains playable files. Play a disc Note • You cannot play CDs encoded with copyright protection technologies. You can play commercially available audio CDs and these discs: • CD-Recordables (CD-R) •... -
Page 19: Search For An Mp3/Wma Track
Search for an MP3/WMA track Search within the current folder Press +SONG. » The name of the current track is displayed. Turn to select anther track in current folder Press to confirm. Search in other folder Press FOLDER -. » The name of the current folder is displayed. -
Page 20: Adjust Sound
7 Adjust sound Adjust volume Turn clockwise/anticlockwise to increase/decrease volume. Mute You can turn off the sound of your audio. During play, press • To resume sound, press Turn DBB and subwoofer on/ Press DBB, then the current setting is displayed: »... -
Page 21: Adjust System Settings
8 Adjust system settings Select anti-shock setting You can select anti-shock setting according to the stability of your car and the condition of the road. Press MENU. Press repeatedly until [ESP] is displayed. Turn to select a setting: • [ESP 10S]: when the road is smooth and there are few bumps. -
Page 22: Reset
Reset You can reset the unit to its default setting. Detach the front panel. Press the reset button by using a ball- point pen or a similar tool. » Preset adjustments such as preset channels and sound adjustments are erased. -
Page 23: Additional Information
Replace the fuse. Note • If the new fuse gets damaged again, there may be an internal malfunction. Consult your Philips dealer. Remove the unit You can remove the unit from the dashboard. Detach the front panel. Pull out the unit by using the disassembly... -
Page 24: Product Information
10 Product information Note • Product information is subject to change without prior notice. Power supply 12 V DC (11 V - 16 V), negative ground Fuse 15 A Suitable speaker 4 - 8 impedance Maximum power 45 W x 4 channels output Continuous power 22 W x 4 RMS (4... -
Page 25: Troubleshooting
If you encounter problems when using this apparatus, check the following points before requesting service. If the problem remains unsolved, go to the Philips web site (www. philips.com/support). When you contact Philips, ensure that your apparatus is nearby and the model number and serial number are available. - Page 26 © 2011 Koninklijke Philips Electronics N.V. All rights reserved. CEM2000_00_UM_V3.1...
Need help?
Do you have a question about the CEM2000/00 and is the answer not in the manual?
Questions and answers