Table of Contents
Advertisement
Available languages
Available languages
02
06
BRA
Saeco
International Group S.p.A.
Via Torretta, 240
I-40041 Gaggio Montano, Bologna
Tel: + 39 0534 771111
Fax: + 39 0534 31025
www.saeco.com
The manufacturer reserves the right to change the features of the product without prior notice.
O fabricante reserva-se o direito de efectuar qualquer alteração sem aviso prévio.
© Saeco International Group S.p.A.
Advertisement
Table of Contents

Related Manuals for Saeco RI9837/43


Summary of Contents for Saeco RI9837/43
- Page 1 Saeco International Group S.p.A. Via Torretta, 240 I-40041 Gaggio Montano, Bologna Tel: + 39 0534 771111 Fax: + 39 0534 31025 www.saeco.com The manufacturer reserves the right to change the features of the product without prior notice. O fabricante reserva-se o direito de efectuar qualquer alteração sem aviso prévio. ©...
-
Page 2: Operating Instructions
OPERATING INSTRUCTIONS INSTRUÇÕES DE UTILIZAÇÃO Type Sup 037DR READ THESE OPERATING INSTRUCTIONS CAREFULLY BEFORE USING THE MACHINE. LEIA ATENTAMENTE ESTAS INSTRUÇÕES DE UTILIZAÇÃO ANTES DE UTILIZAR A MAQUINA. -
Page 3: General Information
GENERAL INFORMATION The coff ee machine is suitable for preparing espresso coff ee using either coff ee beans or ground coff ee and is equipped with a device to dispense steam and hot water. Keep these operating instructions in a safe place and make them available to anyone who may use the coff ee machine. -
Page 4: Servicing & Maintenance
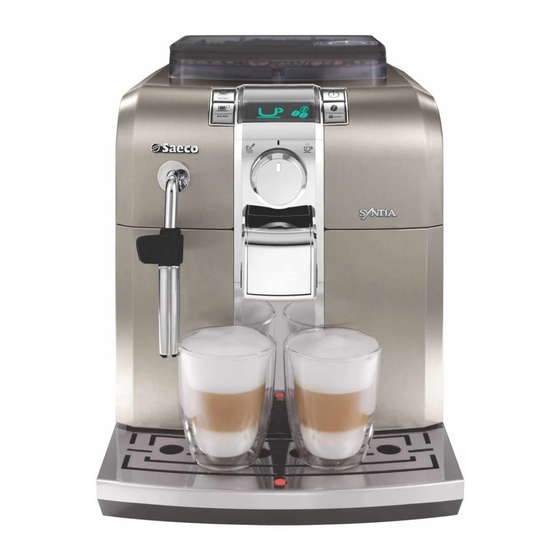
Machine Location - Suitable Location for Operation and Maintenance For best use, it is recommended to: • Choose a safe, level surface, where there will be no danger of overturning it or being inju- red. • Choose a location that is suffi ciently well-lit, clean and near an easily reachable socket. •... - Page 5 Grinder adjustment knob Dispensing head Pre-ground bypass doser Full drip tray indicator Water tank Brew group lubricant Power cord Strong coff ee brew button Long coff ee brew button • 4 • Coff ee bean hopper lid Coff ee bean hopper Control panel Drip tray Dregdrawer...
-
Page 6: Preliminary Operations
INSTALLATION For your own and for other people’s safety, carefully follow the instruc- tions provided in the “Safety Regula- tions” section. Machine Packaging The original packaging has been designed and constructed to protect the machine during transport. We recommend keep- ing the packaging material for possible future transport. -
Page 7: Priming The Water Circuit
• Turn the machine ON by pressing the power switch to “I”. • The display shows the ON/OFF icon. Black • Make sure the ON/OFF button is set to the “ ” position; if this is not the case, set it to that position. •... -
Page 8: Using The Machine For The First Time Or After A Long Period Of Inactivity
Using the machine for the first time or after a long period of inactivity. These simple operations will make it pos- sible to always brew excellent coff ee. 1 Place a large container under the dispensing spout. 2 Before starting the procedure, check that the following icon is displayed. -
Page 9: Water Hardness Measurement
Water hardness measurement The water hardness measurement is very important in order to correctly manage the “Intenza” fi lter and the frequency with which the machine must be descaled. Immerse the water hardness test strip provided with the machine in water for 1 second. -
Page 10: Saeco Adapting System
When the icon appears, press the “ button to access the machine program- ming menu. Black Press the “ “ button until the follow- ing page is displayed. Orange Press the “ “ button to select “ON” and press the “ “button to confi rm. -
Page 11: Coffee Brewing
bean hopper. Do not pour coff ee beans when the coff ee grinder is working. The machine allows slight adjustments to the coff ee grinder to adapt it to the kind of coff ee used. To make any adjustment, press and turn the knob inside the coff ee bean hopper. -
Page 12: Using Coff Ee Beans
Dispensing Head Adjust- ment Most cups on the market can be used with this coff ee machine. The height of the dispensing head may be adjusted to better fi t the dimensions of the cups that you wish to use. Manually move the dispensing head up or down to adjust its height by placing your fi ngers as shown in the fi gure. -
Page 13: Using Pre-Ground Coff Ee
The machine is adjusted to brew a true Italian espresso coffee. This feature may slightly lengthen the brewing time, allowing the intense flavor of the coffee to develop fully. Using Pre-Ground Coff ee This function allows using pre-ground and decaffein- ated coff ee. -
Page 14: Steam Dispensing / Cappuccino Brew Ing
• Turn the selector dial clockwise to the “ ” position. • The following icon will be displayed: Green • Fill the cup with hot water to the desired level; to stop hot water dis- pensing, turn selector dial counter- clockwise back to the “... -
Page 15: Cleaning And Maintenance
• Immerse the steam/hot water wand (Pannarello, if supplied) in the milk to be heated. • Turn the selector dial counter-clockwise to set it to the “ ” position. Froth the milk by gently swirling the cup. • After dispensing steam for the desired time, turn the selector dial clockwise and set it back to the “... -
Page 16: Brew Group
• It is recommended to clean the water tank daily. - Remove the small white fi lter in the water tank and wash it under running drinking water. - Reposition the small white fi lter in its housing by gently pressing and turning it at the same time. - Page 17 DESCALING Limescale build-up is normal with the use of this appliance. The display informs you when descaling is necessary: Orange Only use the Saeco descaling solution. It has been spe- cifi cally developed to preserve perfor- mance and functionality throughout the lifetime of the machine and to ensure, with regular use, a high quality delivered product.
- Page 18 • When the solution in the tank is fi nished dispensing, the icon on the side is displayed to indicate that the selector dial must be brought back to the “ ” position. • The icon indicates that the tank must be rinsed and fi lled.
-
Page 19: Programming Commands
PROGRAMMING The user can change some of the ma- chine operating parameters to suit his/ her needs. Enter the “menu” The programming menu can only be ac- cessed when the machine is in “stand-by” mode. To change the machine status to stand-by mode, press the ON/OFF button. -
Page 20: Programming Example
Functions COFFEE TEMPERATURE This function allows you to adjust the cof- fee brewing temperature. Orange TIMER (STAND-BY) This function allows you to adjust the time the machine will go into stand-by mode after the last brewing. Orange CONTRAST This function allows you to adjust the contrast of the display to better view the messages. -
Page 21: Control Panel Display
CONTROL PANEL DISPLAY Ready Signals • The machine is ready for whole bean coff ee brewing and hot water dispensing. Green • The machine is ready for pre-ground coff ee brewing. Green • The machine is in the steam dispensing phase. -
Page 22: Alarm Signals
Alarm Signals • Return the hot water / steam knob to its proper position. • Close the service door. • Refi ll the coff ee bean hopper. • Turn the machine off . After 30-seconds, turn it back on. Try 2 or 3 times. If the machine does NOT start, contact an authorized service center. -
Page 23: Troubleshooting
TROUBLESHOOTING Machine Actions Causes The machine does not turn on. The machine is not connected to the power source. The coff ee is not hot enough. The cups are cold. No hot water or steam is dispensed. The hole of the steam wand is clogged. Pannarello is dirty (if supplied). -
Page 24: Technical Specifications
TECHNICAL SPECIFICATIONS The manufacturer reserves the right to make changes to the technical specifi cations of the product. Nominal Voltage - Power Rating - Power Supply ............See label on the inside of the service door Housing material . -
Page 25: Normas De Segurança
GERAL A máquina de café é indicada para a preparação de café expresso, utilizando café em grãos; encontra-se equipada com um dispositivo para a distribuição de vapor e água quente. Guarde estas instruções de utilização num local seguro e coloque junto à máquina de café... - Page 26 Perigo de queimaduras Evite dirigir contra si mesmo e/ou outras pessoas o jacto de vapor e/ou água quente: perigo de queimaduras! Utilize sempre as adequadas pegas ou botões. Colocação - Espaço para a utilização e manutenção Para uma correcta gestão aconselha-se: •...
- Page 27 Botão de ajuste da moagem Painel de comando Distribuidor de café Compartimento de café pré-moído Grelha de apoio para chávenas Indicador de bandeja de limpeza cheia Reservatório de água Graxa para o Grupo Café Cabo de alimentação Tecla de distribuição de café...
-
Page 28: Operações Preliminares
INSTALAÇÃO Para a sua própria segurança e para a segurança de terceiros, tenha muita atenção às instruções indicadas no capítulo “Normas de segurança”. Embalagem A embalagem original foi concebida e re- alizada para proteger a máquina durante o transporte. Recomenda-se conservar a mesma para uma eventual necessidade de transporte no futuro. -
Page 29: Carregamento Do Circuito
• Coloque o interruptor geral sobre “I” para poder ligar a máquina. • O visor visualiza assim o ícone ON/ OFF. Preto • Assegure-se que o selector está na posição “ ”; se necessário vire-o até fi car na posição indicada. •... - Page 30 Primeira utilização ou após um longo período de inuti- lização. Estas simples operações sempre lhe per- mitirá distribuir um óptimo café. 1 Introduza um recipiente grande debai- xo do distribuidor. 2 Antes de iniciar o procedimento veri- fi que que o visor visualiza o seguinte símbolo.
-
Page 31: Medição Da Dureza Da Água
Medição da dureza da água A medição da dureza da água é muito im- portante para a gestão correcta do fi ltro “Intenza” e para a frequência de descalci- fi cação da máquina. Mergulhe na água, durante 1 segundo, o papel para o teste de dureza da água, fornecido com a máquina. -
Page 32: Ajuste Do Moinho De Café
Quando aparece o ícone pressione a tecla “ “ para ter acesso à programação da máquina. Preto Pressione a tecla “ “ até visualizar a presente página. Laranja Pressione a tecla “ “ para seleccionar a opção “ON” e a tecla “ fi rmar. -
Page 33: Distribuição De Café
a máquina e desprenda a ficha da tomada de corrente. Não coloque café em grãos quando o moinho de café estiver em funcionamento. A máquina permite efectuar um ligeiro ajuste do grau de moagem do café para o adaptar ao tipo de café utilizado. O ajuste deve ser realizado movendo o interruptor presente no interior do reci- piente de café;... - Page 34 Ajuste do grupo de distri- buição Com a máquina de café é possível utilizar a maior parte de chávenas existentes no comércio. O grupo de distribuição de café pode ser ajustado na altura para se adaptar melhor às dimensões das chávenas que pretende utilizar.
-
Page 35: Distribuição De Água Quente
A máquina encontra-se re- gulada para preparar um verdadeiro expresso à italiana. Esta característica poderia alongar ligei- ramente a duração de distribuição, tirando partido do gosto intenso do café. Com café pré-moído Esta função permite utilizar café pré-moído e descafei- nado. - Page 36 • Vire o selector no sentido dos ponteiros do relógio até ao ponto “ • No visor será visualizado o seguinte símbolo. Verde • Retire a quantidade desejada de água quente; para parar a distribuição de água quente rode o selector no sentido contrário aos ponteiros do relógio até...
-
Page 37: Limpeza E Manutenção
• Mergulhe no tubo de vapor (pannarello, se existente) o leite a aquecer. • Rode o selector no sentido contrário aos ponteiros do relógio até ao ponto “ vá rodando o recipiente lentamente de baixo para cima para que a formação de espuma seja uniforme. - Page 38 completamente inserida). Monte novamente a parte externa do pannarello. • Aconselha-se a limpar quotidianamen- te o reservatório de água: - Retire o filtro branco colocado no interior do reservatório e limpe-o com água fria potável. - Reposicione o filtro branco no seu compartimento, exercendo uma ligeira pressão combinada com uma leve rotação.
- Page 39 DESCALCIFICAÇÃO A formação de calcário é uma consequên- cia natural da utilização do aparelho. A necessidade de efectuar a descalcifi ca- ção é evidenciada pelo visor: Laranja Utilize unicamente o produto descalcifi cante Saeco. Foi con- cebido especifi camente para manter da melhor forma o desempenho e o funcionamento da máquina durante toda a sua vida, assim como para...
- Page 40 • Quando a solução no interior do reserva- tório terminar aparece o símbolo situado ao lado; isto indica que deve voltar a colocar o selector na posição “ ”. Vermelho • O símbolo indica que deverá enxaguar e encher o reservatório. Enxagúe bem o reservatório e encha-o com água fresca potável.
-
Page 41: Comandos De Programação
PROGRAMAÇÃO O utilizador pode modifi car alguns parâ- metros de funcionamento da máquina segundo suas próprias exigências. Entrar no “menu” O acesso ao menu de programação so- mente é possível quando a máquina está em “Stand-by”. Pressione a tecla ON/OFF para colocar a máquina em Stand-by. - Page 42 Funções TEMPERATURA DO CAFÉ Esta função permite ajustar a temperatura de distribuição do café. Laranja TEMPORIZADOR (STAND-BY) Esta função permite ajustar o tempo de passagem à Stand-by depois da última distribuição. Laranja CONTRASTE Esta função permite ajustar o contraste do visor para melhor visualizar as men- sagens.
-
Page 43: Sinais De Aviso
VISOR DO PAINEL DE COMANDO Sinais de máquina pronta • Máquina pronta para a distribuição de café com café em grãos e de água quente. Verde • Máquina pronta para a distribuição de café com café pré-moído. Verde • Máquina em fase de distribuição de vapor. Verde •... -
Page 44: Sinais De Alarme
Sinais de alarme • Coloque o botão da torneira de água quente / vapor na posição correcta. Vermelho • Feche a portinhola de serviço. Vermelho • Ausência de grãos no interior do recipiente de café. Depois de encher o recipiente, é possível reiniciar o ciclo. -
Page 45: Resolução De Problemas
RESOLUÇÃO DE PROBLEMAS Comportamentos Causas A máquina não se liga. A máquina não está ligada à rede eléctrica. O café não está sufi cientemente quente As chávenas estão frias. Não sai água quente ou vapor. O furo do tubo de vapor está obstruído. Pannarello sujo (se existente). -
Page 46: Dados Técnicos
DADOS TÉCNICOS O fabricante reserva o direito de modifi car as características técnicas do produto. Tensão nominal – Potência nominal - Alimentação ......... . Veja a plaqueta posicionada no interior da portinhola Material do corpo . - Page 47 • 46 •...
- Page 48 • 47 •...
Need help?
Do you have a question about the RI9837/43 and is the answer not in the manual?
Questions and answers