
Related Manuals for Hitachi E590


Summary of Contents for Hitachi E590
- Page 1 Hitachi Virtual Storage Platform E590, E790 93-03-2x Installation Guide This guide provides information and instructions for installing and setting up your Hitachi Virtual Storage Platform storage system. MK-97HM85051-00 December 2020...
- Page 2 Materials. “Materials” mean text, data, photographs, graphics, audio, video and documents. Hitachi reserves the right to make changes to this Material at any time without notice and assumes no responsibility for its use. The Materials contain the most current information available at the time of publication.
- Page 3 Make sure your data center meets all site preparation requirements before you install the storage system. If you are not using a Hitachi Universal V2 or Universal V2B rack, make sure the electrical specifications of your rack meet the power requirements of the storage system.
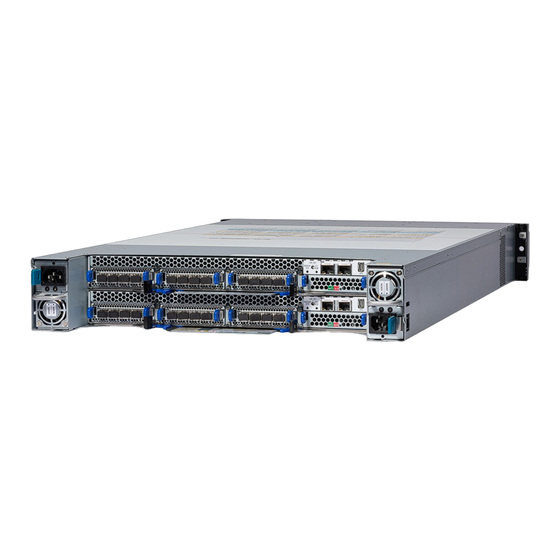
- Page 4 Step 2: Install the storage system into a rack The following instructions describe how to install the controller into a Hitachi Universal V2B rack. For information about installing the controller in a third-party rack, see the documentation for that rack.
- Page 5 Repeat step for both sides. 3. Install the rear side of the rail with a washer and binding screw. Repeat step for both sides. Installing your VSP E590 and VSP E790 storage system Hitachi Virtual Storage System E590, E790 Installation Guide...
- Page 6 Item Stopper 5. On the front of the controller chassis, attach the two bind screws and washers to each side of the rack. Installing your VSP E590 and VSP E790 storage system Hitachi Virtual Storage System E590, E790 Installation Guide...
- Page 7 Note: To prevent the storage system from being turned off by accident, make sure the external power sources are not controlled by a wall switch. Installing your VSP E590 and VSP E790 storage system Hitachi Virtual Storage System E590, E790 Installation Guide...
- Page 8 Internet Explore version 11 or later, Chrome, or Firefox. Procedure 1. Connect one end of the Ethernet cable to the management port on the rear of either controller. Installing your VSP E590 and VSP E790 storage system Hitachi Virtual Storage System E590, E790 Installation Guide...
-
Page 9: Step 5: Power On The Storage System
4. On the lower left front side of the controller, press and hold the POWER ON/OFF button until the POWER LED changes to green (about 3 seconds), and then release the button. Installing your VSP E590 and VSP E790 storage system Hitachi Virtual Storage System E590, E790 Installation Guide... -
Page 10: Step 6: Perform The Initial Setup
IP address: 192.168.0.16 2. Enter the default user name and the default password, and then press the Enter key to log in to Hitachi Storage Advisor Embedded. Contact customer support for the default user name and password. Installing your VSP E590 and VSP E790 storage system... - Page 11 3. In the top-right corner, click the gear icon, and then select User Administration. 4. Click Support Personnel Group. Installing your VSP E590 and VSP E790 storage system Hitachi Virtual Storage System E590, E790 Installation Guide...
- Page 12 Important: This password is required for storage system maintenance and for running the Initial Setup wizard. Record the new password for the maintenance user and keep it in a safe location. Installing your VSP E590 and VSP E790 storage system Hitachi Virtual Storage System E590, E790 Installation Guide...
- Page 13 Tip: Initial Setup Wizard is near the bottom of the navigation tree. If you do not see this selection, scroll down the tree. Installing your VSP E590 and VSP E790 storage system Hitachi Virtual Storage System E590, E790 Installation Guide...
- Page 14 3. In the Set Up Network Settings screen, enter the IPv4 or IPv6 configuration settings for the production network to which the storage system will be connected. For example: Setting Description Installing your VSP E590 and VSP E790 storage system Hitachi Virtual Storage System E590, E790 Installation Guide...
- Page 15 The default setting (Auto-Negotiation) connects the storage system at the highest speed and appropriate duplex setting supported by itself and the connected device. Installing your VSP E590 and VSP E790 storage system Hitachi Virtual Storage System E590, E790 Installation Guide...
- Page 16 10. In the maintenance utility navigation tree, under Menu, click Initial Setup Wizard. 11. Enter the system information, and then click Apply and Next. Installing your VSP E590 and VSP E790 storage system Hitachi Virtual Storage System E590, E790 Installation Guide...
- Page 17 Name of the contact person associated with the storage system. Location Location of the storage system. 12. Enter the date and time settings, and then click Apply and Next. Installing your VSP E590 and VSP E790 storage system Hitachi Virtual Storage System E590, E790 Installation Guide...
- Page 18 Saving Time system is located follows Daylight Saving Time, check this box to have the storage system automatically adjust its time twice a year. Installing your VSP E590 and VSP E790 storage system Hitachi Virtual Storage System E590, E790 Installation Guide...
- Page 19 13. Confirm or change the network settings that you entered earlier in this procedure, and then click Apply. 14. When prompted that initial settings are complete, click Close. Installing your VSP E590 and VSP E790 storage system Hitachi Virtual Storage System E590, E790 Installation Guide...
- Page 20 Notifications. Then click Set Up in the Alert Notifications pane on the right. Note: Although a tab is provided for configuring email notifications, we recommend that you set up email notifications using Hitachi Remote Ops monitoring system. 2. To configure the storage system to send notifications in syslog format, complete the settings in the Syslog tab.
- Page 21 Each controller supports 10-gigabit Ethernet copper (RJ-45) or optical (fiber) iSCSI connectivity to your data network. Important: For important information and instructions about connecting to hosts, refer to the Open-Systems Host Attachment Guide. Installing your VSP E590 and VSP E790 storage system Hitachi Virtual Storage System E590, E790 Installation Guide...
- Page 22 If you do not already have an account on the Support Website, you will need to register. Otherwise, you will not be able to download and install the Hitachi Remote Ops monitoring system, and you will encounter delays in getting your storage system running and supported.
-
Page 23: Where To Go From Here
2. Open the Hitachi Remote Ops Installation Guide, and follow the installation instructions. 3. After you configure Hitachi Remote Ops with the appropriate Site ID, open a case on the Support Website to let us know that your system is installed and that the Hitachi Remote Ops monitoring system is enabled. - Page 24 Support The following resources provide additional information about the storage system: Support Connect home page ■ Product interoperability ■ Hitachi Vantara Community ■ Installing your VSP E590 and VSP E790 storage system Hitachi Virtual Storage System E590, E790 Installation Guide...
- Page 25 Hitachi Vantara Corporate Headquarters Contact Information 2535 Augustine Drive USA: 1-800-446-0744 Santa Clara, CA 95054 USA Global: 1-858-547-4526 HitachiVantara.com | community.HitachiVantara.com HitachiVantara.com/contact...
Need help?
Do you have a question about the E590 and is the answer not in the manual?
Questions and answers