Table of Contents
Advertisement
Available languages
Available languages
Quick Links
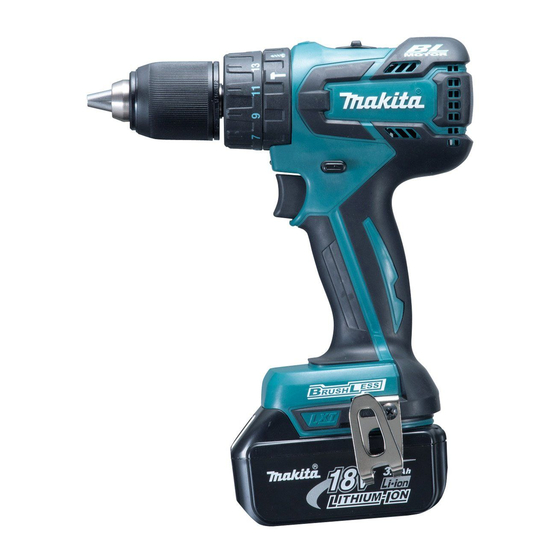
GB Cordless Hammer Driver Drill
Perceuse Percussion-Visseuse
F
sans Fil
D
Akku-Schlagbohrschrauber
Trapano avvitatore a percussione
I
a batteria
NL Snoerloze slagboor-schroevendraaier Gebruiksaanwijzing
E
Rotomartillo Atornillador Inalámbrico Manual de instrucciones
Furadeira de Impacto /
P
Parafusadeira a Bateria
DK Akku-slagskruetrækkerbor
GR Κρουστικό δραπανοκατσάβιδο μπαταρίας Οδηγίες χρήσεως
TR Akülü Darbeli Matkap Tornavida
BHP459
Instruction Manual
Manuel d'instructions
Betriebsanleitung
Istruzioni per l'uso
Manual de instruções
Brugsanvisning
Kullanma kılavuzu
Advertisement
Table of Contents

Summary of Contents for Makita BHP459ZJ
- Page 1 GB Cordless Hammer Driver Drill Instruction Manual Perceuse Percussion-Visseuse Manuel d’instructions sans Fil Akku-Schlagbohrschrauber Betriebsanleitung Trapano avvitatore a percussione Istruzioni per l’uso a batteria NL Snoerloze slagboor-schroevendraaier Gebruiksaanwijzing Rotomartillo Atornillador Inalámbrico Manual de instrucciones Furadeira de Impacto / Manual de instruções Parafusadeira a Bateria DK Akku-slagskruetrækkerbor Brugsanvisning...
- Page 2 012790 012128 012792 012791 012793 012794 012795 012796...
- Page 3 012797 012798 012846 002449 012799...
-
Page 4: Specifications
ENGLISH (Original instructions) Explanation of general view Red indicator Speed change lever 15 Hook Button Action mode changing ring 16 Screw Battery cartridge 10 Adjusting ring 17 Bit holder Star marking 11 Graduation 18 Bit Switch trigger 12 Arrow 19 Vent Lamp 13 Sleeve 20 Blow-out bulb... -
Page 5: Functional Description
FUNCTIONAL DESCRIPTION Do not touch the bit or the workpiece immedi- ately after operation; they may be extremely hot CAUTION: and could burn your skin. • Always be sure that the tool is switched off and the bat- 10. Some material contains chemicals which may be tery cartridge is removed before adjusting or checking toxic. -
Page 6: Operation
Lighting up the lamp (Fig. 4) Adjusting the fastening torque (Fig. 7) The fastening torque can be adjusted in 16 steps by turn- CAUTION: ing the adjusting ring so that the graduations are aligned • Do not look in the light or see the source of light with the arrow on the tool body. -
Page 7: Maintenance
• These accessories or attachments are recommended Then proceed as follows. for use with your Makita tool specified in this manual. Place the point of the driver bit in the screw head and The use of any other accessories or attachments might apply pressure to the tool. - Page 8 For European countries only EC Declaration of Conformity Makita Corporation responsible manufacturer declare that the following Makita machine(s): Designation of Machine: Cordless Hammer Driver Drill Model No./ Type: BHP459 are of series production and Conforms to the following European Directives:...
-
Page 9: Technische Gegevens
NEDERLANDS (Originele instructies) Verklaring van algemene gegevens Rode indicator Snelheidskeuzeknop 15 Ophanghaak Knop Functiekeuzering 16 Schroef Accu 10 Koppelinstelring 17 Bithouder Stermarkering 11 Koppelaanduiding 18 Schroefbit Trekkerschakelaar 12 Pijlteken 19 Ventilatiesleuven Lamp 13 Klembus 20 Blaasbalgje Omkeerschakelaar 14 Groef TECHNISCHE GEGEVENS Model BHP459 Beton... -
Page 10: Beschrijving Van De Functies
Zorg ook altijd dat u stevig op een solide bodem Gebruik nooit een beschadigde accu. staat. BEWAAR DEZE VOORSCHRIFTEN. Let bij het werken op hoge plaatsen op dat er zich niemand recht onder u bevindt. Tips voor een maximale levensduur van de accu Houd het gereedschap stevig vast. - Page 11 Snelheid kiezen (Fig. 6) In dit geval laat u de trekkerschakelaar van het gereedschap los en verhelpt u de oorzaak van de LET OP: overbelasting nadat het werktuig gestopt is. Vervolgens • Zet de snelheidskeuzeknop altijd volledig naar de juiste drukt u de trekkerschakelaar opnieuw in om weer te stand.
- Page 12 Om de ophanghaak te bevestigen, steekt u die in één Plaats de punt van het schroefbit in de schroefkop en groeven weerszijden oefen wat druk uit op het gereedschap. Start het gereedschapshuis en zet u de haak met een schroef gereedschap langzaam en verhoog dan geleidelijk de vast.
-
Page 13: Optionele Accessoires
LET OP: ENH101-15 • Deze accessoires of hulpstukken worden aanbevolen Alleen voor Europese landen voor gebruik met het Makita gereedschap dat in deze gebruiksaanwijzing is beschreven. Bij gebruik van EU-Verklaring van Conformiteit andere accessoires of hulpstukken bestaat er gevaar Wij, Makita Corporation, als de verantwoordelijke voor persoonlijke verwonding.


Need help?
Do you have a question about the BHP459ZJ and is the answer not in the manual?
Questions and answers