Table of Contents
Advertisement
Quick Links
Advertisement
Table of Contents

Related Manuals for Philips MAGNAVOX TP3675C99


Summary of Contents for Philips MAGNAVOX TP3675C99
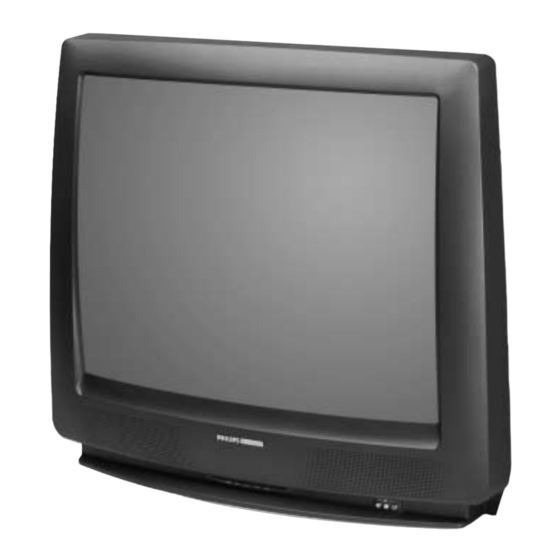
- Page 1 Color Television TP3675...
- Page 2 Once your PHILIPS MAGNAVOX purchase is registered, you’re eligible to receive all the privileges of owning a PHILIPS MAGNAVOX product. So complete and return the Warranty Registration Card enclosed with your purchase at once, and take advantage of these important benefits.
- Page 3 As a member of the PHILIPS MAGNAVOX “family,” you’re entitled to protection by one of the most comprehensive warranties and outstand- ing service networks in the industry.
-
Page 4: Table Of Contents
That makes good economic sense and it’s good for our environment. ® s an NERGY artner, Philips Magnavox has determined that this product meets ® ® U.S. NERGY guidelines for energy efficiency. - Page 5 pres page 5.5x8.5/JM3 4/26/00 8:38 AM Page 4 SAFETY INSTRUCTIONS Read before operating equipment. This product was designed and manufactured to meet strict quality and safety standards. There are, however, some installation and operation precautions which you should be particularly aware of. Read Instructions - All the safety and operating instructions should be read before the appliance is operated.
- Page 6 pres page 5.5x8.5/JM3 4/26/00 8:38 AM Page 5 Section 810 of the National EXAMPLE OF ANTENNA GROUNDING AS PER NATIONAL ELECTRICAL CODE (NEC) Electrical Code, ANSI/NFPA No. 70-1984, provides information with GROUND CLAMP ANTENNA LEAD IN WIRE respect to proper grounding of the mast and supporting structure grounding of the lead-in wire to an ANTENNA DISCHARGE UNIT...
-
Page 7: Supplied Accessories
Supplied Accessories Infrared Remote Control Size AA Part Number : 4835-218-37294 Dry Batteries Before Operating Your Television WARNING - FCC Regulations state that any unauthorized changes or modifications to this equipment not expressly approved by the manufacturer could void the user’s authority to operate this equipment. - Page 8 Cable TV Line (not supplied) Cable TV converter/ NOTE: descrambler • Consult your Philips Dealer or Service Center (not supplied) for the type of splitter, RF switch, or combiner that might be required. 07-09 TP3675C 6/9/00, 9:34 AM...
-
Page 9: Quick Reference Control Operation
Quick Reference Control Operation L Location of Controls Front Panel POWER Press → On. Press again → Off. VOLUME UP/DOWN (+) Increases sound. (–) Decreases sound. SENSOR AREA FOR REMOTE CONTROL CHANNEL UP/DOWN (8) Selects next higher channel. (9) Selects next lower channel. •... -
Page 10: Auto Preset During First Power On
AUTO PRESET during First Power On L When you turn on the TV for the first time, it will automatically INPUT STATUS memorize the broadcasting channels. POWER Please perform the following instructions before you press the VOLUME power button. (+)/(–) (1) Insert the batteries into the remote control. -
Page 11: Accessing The Main Menu Screen Without Remote Control
DOWN ( 9 ) on the TV set. • Some features of your TV set will not be accessible without the Remote Control. If you lost your Remote Control, contact a Philips Magnavox Authorized Servicer for a replacement. Language L The language for the ON SCREEN DISPLAY can be set to ENGLISH, SPANISH or FRENCH. -
Page 12: Sleep Timer
Sleep Timer L You can set the number of minutes for your TV to automatically turn off. Press MENU to access MAIN MENU screen. Press VOL (+) or (–) to access TIMER SET mode. → (MAIN MENU screen) Press VOL (+) or (–) to set a sleep time of 30, 60, 90 or 120 minutes. Press MENU to exit. -
Page 13: Audio Select
Video Adjust (Continued) Press VOL (+) or (–) to adjust the setting. VOL UP (+) increase contrast VOL DOWN (–) decrease contrast Repeat steps 4 - 5 to adjust other settings. Press MENU to exit. Audio Select L MTS (MULTICHANNEL TV SOUND) This circuit allows reception of stereo or bilingual TV sound. -
Page 14: Closed Caption
Audio Select (Continued) Example: Actual screen indicating ON AIR when receiving STEREO broadcasts. Actual channel number “← ON AIR” will appear next to STEREO or SAP when receiving STEREO or SAP broadcasts. (Channel call on screen) L You can enjoy Hi-Fi stereo sound or SAP broadcasts where available. •... -
Page 15: Parent Control
Closed Caption (Continued) Press CH UP ( 8 ) or DOWN ( 9 ) to move the “ ” mark to either “MODE” or “DATA”. Press VOL (+) or (–) to change the CLOSED CAPTION setting. MODE : DATA : Press MENU to exit. - Page 16 Parent Control (SmartLock V-CHIP Operation Continued) • MPAA RATING (Example) Example 1. “PG-13” in the age-based rating is blocked. This will automatically block the high ratings “R”, “NC- 17” and “X” also. Example 2. “R” in the age-based rating is blocked. This will automatically block the high ratings “NC-17”...
- Page 17 Parent Control (SmartLock V-CHIP Operation Continued) Example 1.2 : Age-Based setting For “TV-G” select “BLOCK” for “AGE”. This will automatically AGE D L S V FV TV-Y – – – – – : VIEW block the higher age ratings “TV-PG”, “TV-14”, “TV-MA” and TV-Y7 –...
- Page 18 Parent Control (SmartLock V-CHIP Operation Continued) L HOW TO SET SmartLock V-CHIP REMOTE KEYPAD VOLUME A/CH (+)/(–) CHANNEL UP (8)/ DOWN (9) MENU [1] MPAA RATING Press MENU to access MAIN MENU screen. T I ME R V I D E O A D J U S T A U D I O S E L E C T C L O S E D...
- Page 19 Parent Control (SmartLock V-CHIP Operation Continued) [2] TV GUIDELINES Repeat steps 1 - 3 of [1] MPAA RATING. Press CH UP ( 8 ) or DOWN ( 9 ) to move the “ ” mark to “TV GUIDELINES”. Press VOL (+) or (–) to access TV GUIDELINES mode. AGE D L S V FV TV-Y –...
-
Page 20: Smartlock V-Chip Block
Parent Control (SmartLock V-CHIP Operation Continued) [3] ACTIVATE TO TURN ON SmartLock V-CHIP BLOCK Press CH UP ( 8 ) or DOWN ( 9 ) to move the “ ” mark to “STATUS”, then press VOL (+) or (–) to activate the SmartLock V-CHIP BLOCK. - Page 21 Parent Control (SmartLock V-CHIP Operation Continued) L To change the SmartLock V-CHIP BLOCK setting. (Secret No. is registered.) Repeat steps 1 - 3 of [1] MPAA RATING, then “INPUT SECRET No.” will be displayed. Enter the 4-digit SECRET No. using the REMOTE KEYPAD and the V-CHIP select mode will be displayed.
- Page 22 Parent Control (SmartLock V-CHIP Operation Continued) L DOWNLOAD SmartLock V-CHIP DATA REMOTE KEYPAD VOLUME A/CH (+)/(–) CHANNEL UP (8)/ DOWN (9) MENU If you watch the program with “New Rating System Data”, DOWNLOAD screen will be displayed. (DOWNLOAD screen) DOWNLOAD screen will disappear, if DOWNLOAD is finished. NOTE: •...
- Page 23 Parent Control (VIEW TIMER) L VIEW TIMER This function allows you to restrict TV viewing time and also allows you to control TV usage. This function is to prevent your children from watching too much TV. VIEWING TIME (an accumulative timer: counts only the time duration acquired while the TV is on.) •...
-
Page 24: View Timer
Parent Control (VIEW TIMER Continued) Enter the 4-digit SECRET No. using the REMOTE KEYPAD . Press MENU , and SECRET No. is registered. → Example: • To restrict anybody from watching the TV for 5 hours, after watching the TV for 2 hours, your settings would look like this: •... -
Page 25: Energy Save
Parent Control (VIEW TIMER Continued) (On the set) Press and hold both VOL (+) and CH DOWN ( 9 ) on the TV set simultaneously until the VIEW TIMER access screen is displayed. Now you can cancel the VIEW TIMER settings or can change the SECRET No. -
Page 26: Set Up
AUTO PRESET REMOTE AUTO PRESET KEYPAD By operating the channel presetting functions, you can preset your TV to the desired channels for viewing. VOLUME A/CH (+)/(–) CHANNEL UP (8)/ DOWN (9) MENU Press MENU to access MAIN MENU screen. Press CH UP ( 8 ) or DOWN ( 9 ) to move the “ ”... -
Page 27: Channel Setting
AUTO PRESET (Continued) L CHANNEL SETTING If AUTO PRESET does not memorize all the channels in your region, follow the instructions below to manually memorize the channel. Press MENU to access MAIN MENU screen. Press CH UP ( 8 ) or DOWN ( 9 ) to move the “ ” mark to “SET UP”. - Page 28 AUTO PRESET (Continued) Saving broadcast TV channels into memory. Press MENU to access MAIN MENU → screen, then press CH UP ( 8 ) or DOWN ( 9 ) to move the “ ” mark to “SET UP”. → Press VOL (+) or (–) to access SET UP mode, then press CH UP ( 8 ) or (CH SETTING mode) DOWN ( 9 ) to move the “...
- Page 29 AUTO PRESET (Continued) Press VOL (+) or (–) to access CH MEMORY. Use CH UP ( 8 ) or DOWN ( 9 ) or REMOTE KEYPAD to select each desired channel to add or erase. Press VOL (+) to add a channel to the TV’s memory or press VOL (–) to erase a channel from the TV’s memory.
-
Page 30: Blue Screen
AUTO PRESET (Continued) Press MENU to exit. NOTE: • Poor reception due to weak signals, or too much noise might activate the BLUE SCREEN function despite the presence of a broadcast signal. To continue watching TV under these conditions, switch the BLUE SCREEN “OFF”. -
Page 31: Universal Plus Function
AUTO PRESET (Continued) Press MENU to exit. L To select the PERSONAL PREFERENCE channel. If the channels are memorized as shown to the right, press the Remote’s “A” button to select the Channels below. L UNIVERSAL PLUS FUNCTION VOLUME (+)/(–) VCR input mode will be selected automatically by pressing VCR PLAY button on UNIVERSAL REMOTE CONTROL. -
Page 32: Smart Window
Smart Window PIP (Picture In Picture) L With the VIDEO inputs, you can watch two pictures at the same time: one from the antenna or cable TV input and the other from the VIDEO input. SWAP FREEZE POSITION SELECT SWAP SELECT FREEZE POSITION... - Page 33 Smart Window PIP (Picture In Picture) (Continued) L To Move the Inset Picture. Press POSITION . (Press the button again to move the Inset Picture to another position.) L Freeze-Frame Inset Pictures • When the Inset Picture is on the screen, press FREEZE to freeze the Inset Picture.
-
Page 34: Using The Video And Audio Input Jacks
Using the Video and Audio Input Jacks L Connecting video equipment for playback of video material. • When the television is connected to video equipment as shown below, the material being played back on the video equipment can be seen on the television screen. Connecting video device equipped with video output terminal. -
Page 35: Using The Audio Output Jacks
Using the Video and Audio Input Jacks (Continued) • It is the intent of Philips that this product be used in full compliance with the copyright law and that prior permission be obtained from copyright owners whenever necessary. • For detailed information on the connection and use of auxiliary equipment, refer to the instruction manuals of the equipment being used. -
Page 36: Operation Of Remote Control
Operation of Remote Control L Universal Remote Control L “Identifying” Remote VCR and Cable TV Converters With the purchase of your television set you Your Remote Control has been set at the also have received the latest innovation in factory to operate your TV and many remote remote control technology. - Page 37 Operation of Remote Control (Continued) POWER INPUT STATUS REMOTE KEYPAD CHANNEL UP (8)/ DOWN (9) TV-CATV L HOW TO IDENTIFY A VCR Some brands have more than one remote The remote control may already be set to code listed due to changes in the remote operate your VCR.
- Page 38 Be careful not to let the VCR scan more than five Philips ______________ 01, 02, 03 channels when the indicator starts to move up. Philips Magnavox _____ 01, 02, 03 If you continue holding down the INPUT STATUS Quasar _____________...
- Page 39 07, 08, 19, 26, 28, 29, L To Identify Your Cable Converter – Search 32, 33, 40, 41 Method. Philips Magnavox _____ 07, 08, 19, 25, 26, 28, 29, 32, 33, 40, 41 (1) Slide TV-CATV switch on the remote to CATV.
- Page 40 Before Calling for Service Check these items and see if you can correct trouble with a slight adjustment of the controls. QUICK SERVICE CHECK LIST POSSIBLE REMEDY Try a new channel, if OK, then possible X X X X X X X X station trouble.
- Page 41 RENEWED 90 DAY LIMITED WARRANTY...
- Page 42 Printed in U.S.A. IB8231E001 43-48 TP3675C 6/9/00, 9:37 AM...
Need help?
Do you have a question about the MAGNAVOX TP3675C99 and is the answer not in the manual?
Questions and answers