Table of Contents
Advertisement
Quick Links
Advertisement
Table of Contents
Troubleshooting

Related Manuals for HP XW9600


Summary of Contents for HP XW9600
- Page 1 HP xw Series Workstations Setup and Troubleshooting Guide...
- Page 2 Warranty Trademark Credits © 2006 Copyright Hewlett-Packard Hewlett-Packard Company shall not be liable The HP Invent logo is a trademark of Hewlett- Development Company, L.P. for technical or editorial errors or omissions Packard Company in the U.S. and other contained herein or for incidental or countries.
-
Page 3: Table Of Contents
Installing and Customizing Linux–Preinstalled Workstations ..........8 Starting the Linux Operating System ..............8 Restoring the Linux Operating System ............... 8 Downloading the Latest HP Driver CD ..........9 Installing with the HP Driver CD ............9 Installing and Customizing Linux–Enabled Workstations ............ 9 Verifying Hardware Compatibility ................ - Page 4 Power-On Self Test (POST) Error Messages ..................14 Basic Troubleshooting ........................14 General Problems ......................14 Hardware Installation Problems ..................16 Diagnostic Lights and Audible (Beep) Codes ..............17 Calling Technical Support ......................... 20 ENWW...
-
Page 5: Locating Hp Resources
● Click the HP Cool Tools icon on the desktop, or: ● Open the HP Cool Tools folder by selecting Start > All Programs > HP Cool Tools To learn more about these applications, click HP Cool Tools—Learn More. To install or launch the applications, click the appropriate application. - Page 6 Where to Find It? Signing up for product notifications. Subscriber's Choice is an HP program that allows you to sign up to receive driver and software alerts, proactive change notifications (PCNs), the HP newsletter, customer advisories, and more. Sign up today at http://www.hp.com/go/...
-
Page 7: Hardware Setup
Hardware Setup Quick Setup After unpacking your HP Workstation, locate an accessible workspace to set up the system and connect the mouse, keyboard, and power cables to your workstation. Connect the power cable from the workstation to a power outlet. -
Page 8: Ventilation, Coa Label, And Serial Number Label Information
Never restrict the incoming or outgoing airflow of the computer by blocking any vents or air intakes. Each HP Workstation has two unique serial number labels 1 and a Certificate of Authentication (COA) label 2 (for Windows-preinstalled systems only) as shown in the pictures above. In general, the serial number labels can be found on the top panel or on the side of the unit and at the rear of the unit. -
Page 9: Front And Back Panel Components
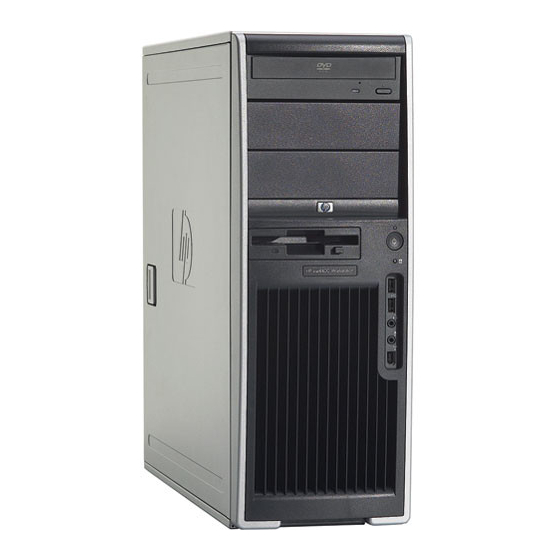
Front and Back Panel Components Front Panel Components The figures below are for reference only. Your HP workstation may look different. xw4000 Series xw6000 Series xw8000/xw9000 Series Table 2-1 Front Panel Components Item Symbol Description Item Symbol Description Optical Drive Headphone Connector 5.25-inch Drive Bay... -
Page 10: Rear Panel Components
Rear Panel Components The figures below are for reference only. Your HP workstation may look different. xw4000 Series xw6000 Series xw8000/xw9000 Series Table 2-2 Rear Panel Components Item Symbol Description Item Symbol Description Power Cord Connector Graphics Adapter Built In Self Test (BIST) LED... -
Page 11: Operating System Setup Software
Operating System Setup Software CAUTION Do not add optional hardware or third-party devices to the HP Workstation until the operating system is successfully installed. Adding hardware might cause errors and prevent the operating system from installing correctly. This section presents instructions to set up your OS and software, and to verify your system has the latest BIOS and drivers. -
Page 12: Software Setup For Linux
For additional information about HP and Linux, visit http://www.hp.com/linux. Starting the Linux Operating System The first time the HP Workstation is booted, the Red Hat First Boot utility displays. This program allows you to enter your password, network, graphics, time, and keyboard settings for your workstation. CAUTION Once the automatic installation has begun, DO NOT TURN OFF THE WORKSTATION UNTIL THE PROCESS IS COMPLETE. -
Page 13: Downloading The Latest Hp Driver Cd
Downloading the Latest HP Driver CD To obtain the latest HP Driver CD, refer to “Obtaining the HP Installer Kit for Linux from the HP Support Website” in the HP Workstations User Manual for Linux. Installing with the HP Driver CD To install with the HP Driver CD, refer to “Installing with the HP Installer Kit for Linux”... -
Page 14: Upgrading The Bios
BIOS version under File > System Information. Note this number so that you can compare it with what is on the HP website. To locate the latest BIOS available, go to http://www.hp.com/go/workstationsupport. Select Download Drivers and Software from the left-hand menu and follow the instructions to locate the latest BIOS available for your workstation. -
Page 15: Troubleshooting
This section provides some self-help tools and troubleshooting tables that you can use to troubleshoot your system. HP Insight Diagnostics HP Insight Diagnostics is an offline diagnostic utility that allows you to perform system testing. With this utility, you can test your system hardware and view the hardware configuration information for your system. -
Page 16: Troubleshoot A Problem
Active Chat enables you to electronically submit a support ticket to HP over the Web. When you submit a support ticket, Active Chat will collect information about the computer and pass it to an online support specialist. -
Page 17: Helpful Hints
● If you have installed an operating system other than the factory-installed operating system, check to be sure that it is supported on your system by visiting http://www.hp.com/products/quickspecs. ● Check to see that the monitor is turned on and the green monitor light is on. -
Page 18: Customizing The Monitor Display
Cables (front/rear panels, audio, USB ports) You can also find additional information about POST error messages in the Service and Technical Reference Guide, which is available at http://www.hp.com/support/workstation_manuals. Basic Troubleshooting This section concentrates on problems that you might encounter during the initial setup process. - Page 19 HP customer care center, or you can contact an authorized dealer or reseller. For a list of support telephone numbers for your region, visit http://www.hp.com/support, select your region, and click Contact HP in the upper-left corner.
-
Page 20: Hardware Installation Problems
● If the power supply fan does not spin or the BIST* LED does not light, the problem may be in the power supply. Contact HP for assistance. * Refer to your workstation's Service and Technical Reference Guide for BIST information. -
Page 21: Diagnostic Lights And Audible (Beep) Codes
For more information about using Computer Setup, refer to the Service and Technical Reference Guide, which is available through a link on the Documentation and Diagnostics CD (http://www.hp.com/support/ workstation_manuals. Diagnostic Lights and Audible (Beep) Codes This section covers the front panel light (LED) error and operation codes as well as the audible codes that may occur before or during the Power-On Self-Test (POST). - Page 22 Contact HP for assistance. Verify that the fan assembly is properly attached. If problems persist, there may be a problem with the processor heatsink. Contact HP for assistance. Red Power LED blinks three Processor not installed (not Check to see that the processor is present.
- Page 23 Contact HP for assistance. ● If the power supply fan does not spin or the BIST* LED does not light, the problem may be in the power supply. Contact HP for assistance. Red Power LED blinks five Pre-video memory error...
-
Page 24: Calling Technical Support
● If the power supply fan does not spin or the BIST* LED does not light, the problem may be in the power supply. Contact HP for assistance. * Refer to your workstation's Service and Technical Reference Guide for BIST information. - Page 25 Serial Number label on your workstation. In general, the Serial Number and Product Number label are located at the rear of the workstation. For a listing of all worldwide technical support phone numbers, visit http://www.hp.com/support, select your region and click Contact HP in the upper-left corner.
Need help?
Do you have a question about the XW9600 and is the answer not in the manual?
Questions and answers