Table of Contents
Advertisement
Quick Links
Advertisement
Table of Contents

Related Manuals for AEG L7FBG862O


Summary of Contents for AEG L7FBG862O
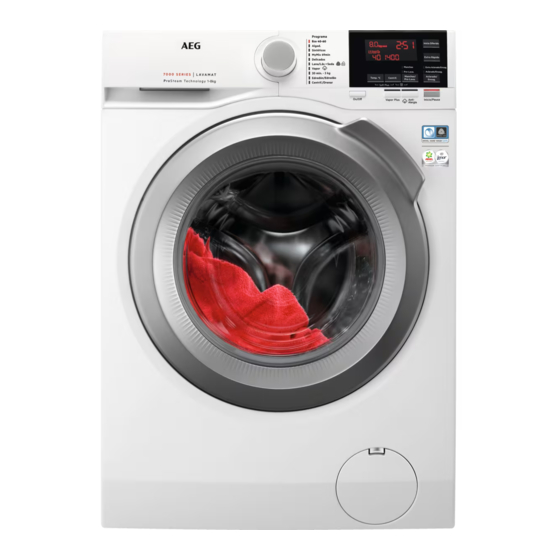
- Page 1 L7FBG862O User Manual Washing Machine USER MANUAL...
-
Page 2: Table Of Contents
18. ENVIRONMENTAL CONCERNS..............39 FOR PERFECT RESULTS Thank you for choosing this AEG product. We have created it to give you impeccable performance for many years, with innovative technologies that help make life simpler – features you might not find on ordinary appliances. Please spend a few minutes reading to get the very best from it. -
Page 3: Safety Information
ENGLISH SAFETY INFORMATION Before the installation and use of the appliance, carefully read the supplied instructions. The manufacturer is not responsible for any injuries or damage that are the result of incorrect installation or usage. Always keep the instructions in a safe and accessible location for future reference. - Page 4 If a tumble dryer is stacked on the top of the washing • machine, make sure to use the correct stacking kit approved by AEG (see more details in chapter "Accessories - Stacking kit").
-
Page 5: Safety Instructions
ENGLISH 2. SAFETY INSTRUCTIONS 2.1 Installation 2.2 Electrical connection The installation must comply WARNING! with relevant national Risk of fire and electric regulations. shock. • Remove all the packaging and the • WARNING: This appliance is transit bolts including rubber bush designed to be installed / connected with plastic spacer. - Page 6 • When unpacking the appliance, It is motor and drum, pumps, shock possible to see water flowing from the absorbers and springs, washing drum, drain hose. This is due to the testing drum spider and related ball bearings, of the appliance with the use of water heaters and heating elements, in the factory.
-
Page 7: Product Description
If you install the appliance on a plinth without consuming more time, energy that is not an accessory supplied by and water than necessary. AEG, secure the appliance in the fixing • The steam has a quick and easy way plates. to refresh the clothes. The gentle... -
Page 8: Technical Data
The rating plate reports the model name (A), product number (B), electrical ratings (C) and serial number (D). Mod. xxxxxxxxx Prod.No. 910000000 00 000V ~ 00Hz 0000 W 00000000 4. TECHNICAL DATA Dimension Width/ Height/ Total depth 59,6 cm /84,7 cm /60,2 cm... - Page 9 ENGLISH CAUTION! Do not lay washing machine on its front. 3. Put the appliance back into an upright position. Remove the power supply cable and the drain hose from the hose holders. 5.2 Positioning and levelling 1. Install the appliance on a flat hard floor.
- Page 10 When the appliance is installed on a plinth or a tumble dryer is stacked on the washing machine, use the accessories described in chapter 'Accessories'. Read carefully the instructions supplied with the appliance and with the accessory. WARNING! The inlet water shall not exceed 25 °C.
- Page 11 ENGLISH Make sure that the plastic guide cannot move when the appliance drains. 5. Without the plastic hose guide, to a sink spigot - Put the drain hose in the spigot and tighten it with a clamp. Refer to the illustration. Make sure that the drain hose end is not immersed in the water.
-
Page 12: Accessories
Read carefully the instructions supplied with the accessory. Only appropriate accessories approved by AEG ensure the safety standards of the appliance. If unapproved parts are used, any claims will be invalidated. 6.2 Stacking kit The tumble dryer can be stacked on the... -
Page 13: Control Panel
ENGLISH 7. CONTROL PANEL 7.1 Control panel description 11 10 Programme dial • Manchas option Display • Pre-Lava. option Inicio Diferido touch button Anti-Alergia touch button Extra Rápido touch button Vapor Plus touch button Aclarado/Enxag. skipping touch Centrif. reduction touch button button Temp.ºC touch button •... -
Page 14: Dial And Buttons
The indicator flashes during the laundry load estimation. Maximum laundry indicator. It flashes when the laundry load exceeds the maximum declared load of the selected programme. Door locked indicator. Delay start indicator. The digital indicator can show: • Programme duration (e. g. - Page 15 ENGLISH the energy consumption in a few cases, The display shows the indicator you may need to activate the appliance The door stays locked and the drum again. turns regularly to reduce creasing. You must drain the water to unlock For more details, refer to Stand-by the door.
- Page 16 This option is not indicator is steady on and the available with a indicator starts flashing. Inicio/Pausa temperature lower than button is lit as well. At the end of the 40 °C. anticrease phase the drum definitely • Pre-Lava.
-
Page 17: Programmes
ENGLISH the washing programme. Touch this Touch the button repeatedly to set the button once to decrease the duration. required delay. The time increases by • In case of smaller load, touch this steps of 30 minutes up to 90' and from 2 button twice to set an extra quick hours up to 20 h. - Page 18 Programme Programme description Cotton, synthetics and mixed items. Special steam cycle Vapor without washing that can be used to prepare your dried laundry for ironing or refreshing garments worn once . This pro‐ gramme reduces creases and odours and relaxes the fibres.
- Page 19 ENGLISH Default tempera‐ Maximum load Reference spin ture Programme speed Temperature Spin speed range range 1 kg Vapor 30 °C 1200 rpm 20 min. - 3 kg 3 kg 40 °C - 30 °C 1200 rpm - 400 rpm 40 °C 800 rpm Edredón/Edredão 3 kg...
- Page 20 OPTIONS ■ ■ ■ ■ ■ ■ ■ ■ Aclarado/Enxag. ■ ■ ■ Vapor Plus ■ Anti-Alergia ■ ■ ■ ■ ■ Extra Rápido ■ ■ ■ ■ ■ ■ ■ ■ ■ ■ Inicio Diferido Soft Plus ■...
-
Page 21: Settings
ENGLISH 9.2 Woolmark Wool Care - Blue The wool wash cycle of this machine has been approved by The Woolmark Company for the washing of wool garments labelled as «hand wash» provided that the products are washed according to the instructions on the garment label and those issued by the manu‐... -
Page 22: Daily Use
12. DAILY USE 4. Close the door firmly. WARNING! Refer to Safety chapters. 12.1 Activating the appliance 1. Connect the mains plug to the mains socket. 2. Open the water tap. 3. Press the On/Off button for a few seconds to activate the appliance. - Page 23 ENGLISH After a washing cycle, if necessary, remove any detergent residue from the detergent dispenser. 12.4 Check the position of the detergent flap 1. Pull out the detergent dispenser until it stops. Make sure that the flap does not cause a blockage when you close the drawer.
- Page 24 The appliance starts the countdown of After touching the Inicio/Pausa button, the delay start. the maximum declared load indicator When the countdown is completed, the goes off, the indicator flashes, the programme starts. ProSense starts the laundry load detection:...
- Page 25 ENGLISH 2. Press the button On/Off again to The ProSense is not activate the appliance. available with some Now, you can set a new washing programmes, such as programme. Lana/Lãs + Seda, programmes with short If the ProSense phase is cycles and without washing already carried out and the phase.
- Page 26 • The door stays locked. option and than press Inicio/Pausa • You must drain the water to open the button. door: 1. If necessary, touch the Centrif. button 12.13 End of the programme to decrease the spin speed proposed by the appliance.
-
Page 27: Hints And Tips
ENGLISH 13. HINTS AND TIPS WARNING! Refer to Safety chapters. 13.1 The laundry load • Divide the laundry into: white, coloured, synthetics, delicates and wool. • Follow the washing instructions on the • Empty pockets and unfold the items. laundry care labels. •... -
Page 28: Care And Cleaning
• The choice and quantity of detergent save detergent, water and time (the will depend on: type of fabric environment is protected too!). (delicates, woollens, cottons, etc), the • Loading the appliance to the colour of clothes, size of the load,... - Page 29 ENGLISH 14.4 Descaling Clean drum Every two months If the water hardness in your Clean detergent dis‐ Every two months area is high or moderate, we recommend that you use a penser water descaling product for Clean drain pump Twice a year washing machines.
- Page 30 Clean it when needed, using ammonia water, to remove any traces of cream cleanser agent without scratching accumulated detergent. After the seal surface. cleaning, put the top part back into position. Always obey the instructions that you find on the packaging of the product.
- Page 31 ENGLISH 14.9 Cleaning the drain pump WARNING! Disconnect the mains plug from the mains socket. Regularly check the drain pump filter and make sure that it is clean. Clean the drain pump if: • The appliance does not drain the water.
- Page 32 14.10 Cleaning the inlet hose and the valve filter It is recommended to clean both the filters of the inlet hose and valve occasionally to remove any deposit, collected over the time: 1. Remove the inlet hose from the tap and clean the filter.
-
Page 33: Troubleshooting
ENGLISH values around 0° C or drop below, remove the remaining water from the inlet hose and the drain pump. 1. Disconnect the mains plug from the mains socket. 2. Close the water tap. 3. Put the two ends of the inlet hose in a container and let the water flow out of the hose. - Page 34 • Make sure that the sink spigot is not clogged. • Make sure that the drain hose has no kinks or bends. The appliance does • Make sure that the drain filter is not clogged. Clean the filter, if not drain the water.
- Page 35 ENGLISH Problem Possible solution • Set the spin programme. The spin phase does • Make sure that the drain filter is not clogged. Clean the filter, if not operate or the necessary. Refer to "Care and cleaning". washing cycle lasts •...
-
Page 36: Consumption Values
16. CONSUMPTION VALUES 16.1 Introduction See the web link www.theenergylabel.eu for detailed information about Energy Label. The QR code on the energy label supplied with the appliance provides a web link to the information related to the performance of the appliance in the EU EPREL database. - Page 37 ENGLISH Eco 40-60 pro‐ Litres h:mm °C gramme Quarter load 0.150 2:45 1600 1) Maximum spin speed. Power consumption in different modes Off (W) Stand-by (W) Delay start (W) 0.50 0.50 4.00 Time to Off/Standby mode is 15 minutes maximum. 16.4 Common programmes These values are indicative only.
-
Page 38: Quick Guide
17. QUICK GUIDE 17.1 Daily use Connect the mains plug to the mains 2. Set the desired options (1) by means socket. of the corresponding touch buttons. To start the programme, touch the Open the water tap. Inicio/Pausa (2) button. -
Page 39: Environmental Concerns
ENGLISH Programmes Load Product description 3 kg Synthetic items or mixed fabric items. Sintéticos Cotton and synthetic items. This programme en‐ 5 kg sures a good washing performance in a short MyMix 69min time. Delicate fabrics such as acrylics, viscose, poly‐ 2 kg Delicados ester items. - Page 40 www.aeg.com/shop...
Need help?
Do you have a question about the L7FBG862O and is the answer not in the manual?
Questions and answers