Advertisement
Quick Links
Philips Consumer Lifestyle
Service Manual
PRODUCT INFORMATION
Safety
• This product meets the requirements regarding
interference suppression on radio and TV.
• After the product has been repaired, it should function
properly and has to meet the safety requirements as
officially laid down at this moment.
Published by Philips Consumer Lifestyle
15/01
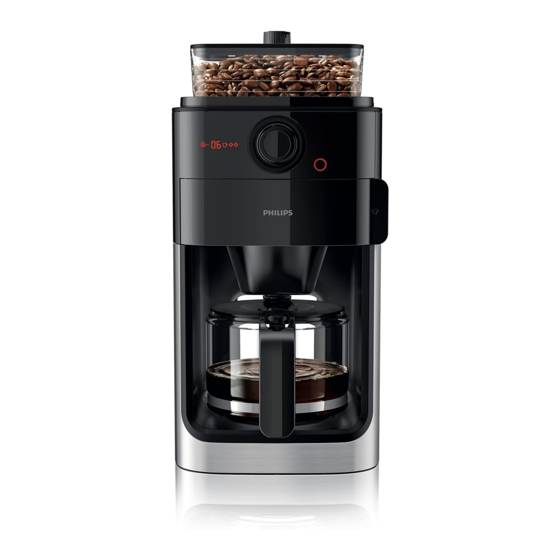
Coffeemaker Grind & Brew
TECHNICAL INFORMATION
• Voltage
• Frequency
• Power consumption
• Color setting
• Dimensions
• Cord length
• Filter size
• Contents
• Materials
• Brew time (max.)
• Temperature (full jug)
• Keep warm time
• Auto Shut-off time
= changed
Printed in the Netherlands
HD7761/00
HD7761/00/C
Appliance H x W x D
F-Box L x W x H
Jug (max.)
Water container (min.)
Water container (max.)
Avg. water loss during brew process : 10%
Appliance
Metal wrap
Jug
Hoses
© Copyright reserved
: 220-240V
: 50 Hz
: 1000W
: Black / Metal
: 440 x 210 x 310 mm
: 320 x 280 x 505 mm
: 0,8 m
: 1x4
: 1320 mL
: 264 mL (2 cups)
: 1320 mL (10 cups)
: PP
: Stainless steel
: Glass
: Silicon
: 10 min
: > 80 °C
: 120 minutes
: 30 mins
(/C version only)
Subject to modification
Advertisement

Summary of Contents for Philips HD7761/00/C
- Page 1 • Temperature (full jug) : > 80 °C • Keep warm time : 120 minutes • Auto Shut-off time : 30 mins (/C version only) = changed Published by Philips Consumer Lifestyle Printed in the Netherlands © Copyright reserved Subject to modification 15/01...
- Page 2 HD7761/00 /C TECHNICAL INFORMATION De-scaling When the appliance indicates it needs to be descaled, operate the coffeemaker a few times with vinegar or with a 10-15% solution of either vinegar (acetic acid), citric acid or tartar acid, into cold tap water. Use a paper fi lter to catch any particles coming out.
- Page 3 HD7761/00 /C TECHNICAL INFORMATION Self-Check mode The appliance is equipped with a self-check mode, this enables you to quickly check the function of the main components of the unit. Keep the On/Off button pressed while Left side display plugging the mains cord into the socket. Hardware version Press any other button Software version...
- Page 4 HD7761/00 /C REPAIR INSTRUCTION Repair of this appliance should be carried out on part and or assembly level, most repairs can be allocated to a couple of main components: • Bean container Disassembly instructions until Step 1. • User interface assy Disassembly instructions until Step 4.
- Page 5 HD7761/00 /C DISASSEMBLY INSTRUCTIONS Remove all removable and detachable items like the Bean container lid, jug, fi lter holder and brush. The fi lter door can be removed for convenience by undoing both latches on the top and bottom side of the hinge. Please note the cable connecting to the Inspection window detection switch.
- Page 6 HD7761/00 /C DISASSEMBLY INSTRUCTIONS Step 4: Bottom cover & Main PCBA Step 5: Heater assy To be able to replace the components in the top side of To replace the heater assy disconnect the leads from the the appliance (like the Grinder and Synchro motor), their main PCBA and the Silicon hoses from the pinions on the leads need to be disconnected from the main PCBA.
- Page 7 HD7761/00 /C REASSEMBLY INSTRUCTIONS Basically the reassembly needs to take place tracing the Gasket for the wires entering the UI panel steps needed to disassemble the appliance. There are some critical attention points: All the gaskets in the appliance must be reinstalled properly Gasket on top of the grinder Gasket for the valve / Synchro motor Gasket under the UI panel...
- Page 8 HD7761/00 /C REASSEMBLY INSTRUCTIONS All the liquid seals, when broken, need to be replaced. This Bottom Cover includes cleaning the mating surfaces and applying suffi cient Upon reinstallation of the bottom cover, please mind that new liquid sealing. the notch on the PCBA holder fi ts into the recess of the bottom cover.
- Page 9 HD7761/00 /C PARTS LIST Service code Description Service code Description Door assembly 9965 100 64754 Steam vent seal 9965 100 64722 Filterholder assy 9965 100 64759 UI assy seal 9965 100 64767 Filterdoor assy 9965 100 71806 PCB assembly in box 9965 100 64772 Jug assy 9965 100 64749...
- Page 10 HD7761/00 /C EXPLODED VIEW 10-15...
- Page 11 HD7761/00 /C EXPLODED VIEW 11-15...
- Page 12 HD7761/00 /C EXPLODED VIEW 12-15...
- Page 13 HD7761/00 /C EXPLODED VIEW 1210 1317 1211 1310 1311 1312 1313 1314 1315 1316 1410 1411 1412 13-15...
- Page 14 HD7761/00 /C EXPLODED VIEW 1510 1511 1512 1513 1514 1515 1610 1611 1612 1613 1614 1710 1711 1712 1810 1811 1812 14-15...
- Page 15 HD7761/00 /C EXPLODED VIEW 2110 2111 2112 2210 2211 2212 2213 2310 2311 15-15...


Need help?
Do you have a question about the HD7761/00/C and is the answer not in the manual?
Questions and answers