Makita DC18RA Instructions Manual
Fast charger, cordless impact driver, cordless hammer driver drill
Hide thumbs
Also See for DC18RA:
- Manual (121 pages) ,
- User manual (37 pages) ,
- Instruction manual (16 pages)
Table of Contents
Advertisement
Available languages
Available languages
Quick Links
Fast Charger
Chargeur rapide
Cargador rápido
Symbols
The followings show the symbols used for the charger and battery. Be sure that you understand their meaning before
use.
Symboles
Nous donnons ci-dessous les symboles utilisés pour le chargeur et la batterie. Assurez-vous que vous en avez bien
compris la signification avant d'utiliser l'outil.
Símbolos
A continuación se muestran los símbolos utilizados con el cargador y la batería. Asegúrese de que entiende su signifi-
cado antes de usarla.
• Ready to charge
• Prêt à recharger
• Preparación para la carga
• Charging
• En charge
• Cargando
• Charging complete
• Recharge terminée
• Completada la carga
• Delay charge (Battery cooling or too cold battery)
• Charge différée (Batterie en cours de refroidissement ou batterie trop froide)
• Retraso de la carga (La batería se está enfriando o está muy fría)
• Defective battery
• Batterie défectueuse
• Batería defectuosa
• Conditioning
• Recharge normale
• Acondicionamiento
• Cooling abnormality
• Problème de refroidissement
• Anormalidad en la carga
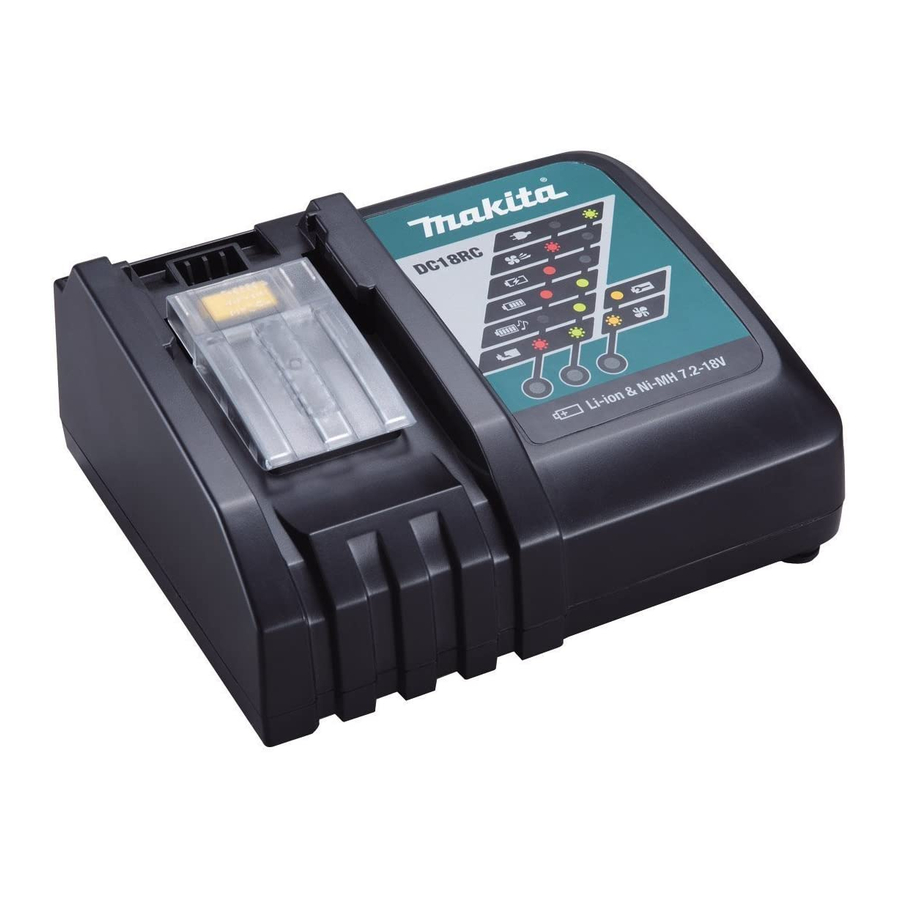
DC18RA
DC18RC
Advertisement
Table of Contents

Related Manuals for Makita DC18RA


Summary of Contents for Makita DC18RA
- Page 1 DC18RA DC18RC Fast Charger Chargeur rapide Cargador rápido Symbols The followings show the symbols used for the charger and battery. Be sure that you understand their meaning before use. Symboles Nous donnons ci-dessous les symboles utilisés pour le chargeur et la batterie. Assurez-vous que vous en avez bien compris la signification avant d’utiliser l’outil.
- Page 2 • Do not short batteries. • Ne jamais court-circuiter les bornes d’une batterie. • No provoque un cortocircuito en las baterías. IMPORTANT: Read Before Using. IMPORTANT : Lire ce qui suit avant d’utiliser cet outil. IMPORTANTE: Leer antes de usar.
-
Page 3: Important Safety Instructions
10. Make sure cord is located so that it will not be stepped on, tripped over, or otherwise subjected to damage or stress. 11. Do not operate charger with damaged cord or plug. If the cord or plug is damaged, ask Makita authorized service center to replace it in order to avoid a hazard. -
Page 4: Cooling System
6. Preset melody sound remains stored even when the charger is unplugged. NOTE: • The battery charger is for charging Makita-battery cartridge. Never use it for other purposes or for other manufacturer’s batteries. • When you charge a battery cartridge which is new or has not been used for a long period of time, it may not accept a full charge until after discharging it completely and recharging a couple of times. -
Page 5: Spécifications
(1) le chargeur de batterie, sur (2) la batterie et sur (3) le produit utilisant la batterie. ATTENTION — Pour réduire le risque de blessure, ne chargez que les batteries rechargeables MAKITA qui figurent sur l’étiquette du chargeur. Les autres types de batteries peuvent causer des blessures et entraî- ner des dommages en explosant. -
Page 6: Système De Refroidissement
6. La mélodie préréglée demeure en mémoire même lorsque vous débranchez le chargeur. NOTE : • Le chargeur de batterie est conçu pour les batteries Makita. Ne jamais l’utiliser à d’autres fins ou avec les batteries d’autres fabricants. • Lorsque vous chargez une cartouche de batterie neuve ou restée inutilisée pendant une période prolongée, il se peut que vous deviez la recharger et la décharger à... - Page 7 Tension 9,6 V 12 V 14,4 V Capacité (Ah) Temps de charge (en minutes) Nombre de cellules — — — BH9020A — — — BH1220/C BH1420 Cartouche de batterie au Ni-MH — — — BH9033A — — — BH1233/C BH1433 Tension 14,4 V 18 V...
- Page 8 (1) el cargador de baterías, (2) la batería, y (3) el producto con el que se utilice la batería. PRECAUCION — Para reducir el riesgo de sufrir heridas, cargue solamente las baterías recargables MAKITA marcadas en la etiqueta de cargador. Otros tipos de baterías podrán explotar y ocasionar heridas personales y daños.
-
Page 9: Sistema De Enfriamiento
6. El sonido de melodía permanecerá almacenado aunque desenchufe el cargador. NOTAS: • El cargador de baterías es sólo para cargar cartuchos de batería Makita. No lo utilice nunca con otros fines ni para baterías de otros fabricantes. • Cuando cargue un cartucho de batería que sea nuevo o que no haya sido utilizado durante un largo periodo de tiempo, es posible que no acepte una carga completa hasta después de haberlo descargado completamente y... - Page 10 Tensión 9,6 V cc 12 V cc 14,4 V cc Capacidad (Ah) Tiempo de carga (minutos) Número de celdas — — — 1,7 Ah 20 min BH9020A — — 2,0 Ah 20 min — BH1220/C BH1420 2,0 Ah 15 min Cartucho de batería Ni-MH —...
- Page 12 Makita Corporation 3-11-8, Sumiyoshi-cho, Anjo, Aichi 446-8502 Japan 884676H946 www.makita.com...
- Page 13 INSTRUCTION MANUAL MANUAL DE INSTRUCCIONES Cordless Impact Driver Atornillador de Impacto Inalámbrico XDT13 IMPORTANT: Read Before Using. IMPORTANTE: Lea antes de usar.
-
Page 14: Specifications
ENGLISH (Original instructions) SPECIFICATIONS Model: XDT13 Fastening capacities Machine screw 4 mm - 8 mm (5/32" - 5/16") Standard bolt 5 mm - 16 mm (3/16" - 5/8") High tensile bolt 5 mm - 14 mm (3/16" - 9/16") No load speed (RPM) 0 - 3,400 /min Impacts per minute 0 - 3,600 /min... - Page 15 Do not overreach. Keep proper footing and Service balance at all times. This enables better control Have your power tool serviced by a qualified of the power tool in unexpected situations. repair person using only identical replacement Dress properly. Do not wear loose clothing or parts. This will ensure that the safety of the power jewellery.
-
Page 16: Functional Description
CAUTION: Always install the battery cartridge also void the Makita warranty for the Makita tool and fully until the red indicator cannot be seen. If not, charger. it may accidentally fall out of the tool, causing injury to you or someone around you. -
Page 17: Overheat Protection
This tool is equipped with an electric brake. If the tool consistently fails to quickly stop after the switch trigger When the battery is operated in a manner that causes is released, have the tool serviced at a Makita service it to draw an abnormally high current, the tool automat- center. ically stops without any indication. In this situation, turn the tool off and stop the application that caused the tool to become overloaded. Then turn the tool on to restart. - Page 18 Lighting up the front lamp ASSEMBLY CAUTION: Always be sure that the tool is switched off and the battery cartridge is removed before carrying out any work on the tool. Installing or removing driver bit/ socket bit 12 mm 9 mm ► 1 .
-
Page 19: Installing Hook
Proper fastening torque for standard bolt NOTE: If the driver bit is not inserted deep enough into the sleeve, the sleeve will not return to its original N•m position and the driver bit will not be secured. In this (ft•lbs) case, try re-inserting the bit according to the instruc- tions above. -
Page 20: Maintenance
Operating the tool at low speed will cause a reduc- workmanship or material, Makita will repair (or at our tion in the fastening torque. option, replace) without charge. This Warranty does not apply where: •... -
Page 21: Especificaciones
ESPAÑOL (Instrucciones originales) ESPECIFICACIONES Modelo: XDT13 Capacidades de apriete Tornillo de máquina 4 mm - 8 mm (5/32" - 5/16") Tornillo estándar 5 mm - 16 mm (3/16" - 5/8") Tornillo de alta resistencia 5 mm - 14 mm (3/16" - 9/16") Velocidad sin carga (rpm) 0 - 3 400 r/min Impactos por minuto 0 - 3 600 ipm... - Page 22 Seguridad personal Realice el mantenimiento a las herramientas eléctricas. Compruebe que no haya partes móvi- Manténgase alerta, preste atención a lo que les desalineadas o estancadas, piezas rotas y está haciendo y utilice su sentido común cualquier otra condición que pueda afectar al cuando opere una herramienta eléctrica.
- Page 23 PRECAUCIÓN: Utilice únicamente baterías número de percusiones originales de Makita. El uso de baterías no origina- les de Makita, o de baterías alteradas, puede ocasio- nar que las baterías exploten causando un incendio, lesiones personales y daños. Asimismo, esto inva- Instrucciones importantes de lidará la garantía de Makita para la herramienta y el seguridad para el cartucho de cargador Makita.
-
Page 24: Descripción Del Funcionamiento
Indicación de la capacidad restante DESCRIPCIÓN DEL de la batería FUNCIONAMIENTO Sólo para cartuchos de batería con una “B” al final del número de modelo PRECAUCIÓN: Asegúrese siempre de que la herramienta esté apagada y el cartucho de batería haya sido extraído antes de realizar cualquier ajuste o comprobación en la herramienta. -
Page 25: Protección Contra Sobrecarga
Si de manera consistente la herramienta no logra dete- caso, permita que la batería se enfríe antes de volver a nerse rápidamente después de soltar el gatillo interrup- encender la herramienta. tor, lleve la herramienta a un centro de servicio Makita para que le den mantenimiento. Protección en caso de Iluminación de la luz delantera sobredescarga Cuando la capacidad de la batería no es suficiente, la... -
Page 26: Montaje
Accionamiento del conmutador de Instalación o extracción de la punta inversión de giro de destornillador/punta de atornillar 12 mm 9 mm (15/32”) (3/8”) ► 1 . Palanca del interruptor de inversión Utilice únicamente la punta de destornillador/punta de atornillar que se muestra en la figura. No utilice ninguna otra punta de destornillador/punta de atornillar. PRECAUCIÓN: Confirme siempre la direc- ción de rotación antes de la operación. -
Page 27: Operación
Torsión de apriete apropiada para un tornillo NOTA: Si la punta de destornillador no se encuentra estándar insertada hasta el fondo en el mandril, éste no regre- sará a su posición original y la punta de destornillador N•m no quedará asegurada. En este caso, procure inser- (ft•lbs) tar la broca de nuevo siguiendo las instrucciones de 140 N•m arriba. -
Page 28: Mantenimiento
DE MAKITA Perno • Incluso si el coeficiente de torsión y la clase de tornillo son los mismos, la adecuada Ésta Garantía no aplica para México torsión de apriete variará en función del Política de garantía diámetro del tornillo. Cada herramienta Makita es inspeccionada y probada • Incluso si el diámetro del tornillo o perno exhaustivamente antes de salir de la fábrica. Se garan- es el mismo, la torsión de apriete correcta tiza que está libre de defectos de mano de obra y mate- variará de acuerdo con el coeficiente de riales por el período de UN AÑO a partir de la fecha ori- torsión, la clase y la longitud del perno o ginal de compra. Si durante este período de un año se tornillo. - Page 29 EN NINGÚN CASO MAKITA SE HARÁ RESPONSABLE DE NINGÚN DAÑO INDIRECTO, INCIDENTAL, O DERIVADO DE LA VENTA O USO DEL PRODUCTO. ESTE DESCARGO DE RESPONSABILIDAD APLICA DURANTE Y DESPUÉS DEL PLAZO DE ESTA GARANTÍA. MAKITA RENUNCIA A LA RESPONSABILIDAD POR CUALQUIER GARANTÍA IMPLÍCITA, INCLUYENDO GARANTÍAS DE “COMERCIABILIDAD” Y “ADECUACIÓN PARA UN PROPÓSITO ESPECÍFICO”, DESPUÉS DEL PLAZO DE UN AÑO DE ESTA GARANTÍA. Esta garantía le concede derechos legales específicos y usted podrá tener también otros derechos que varían de un estado a otro. Algunos estados no permiten la exclusión o limitación de daños incidentales o con- secuentes, por lo que la limitación o exclusión arriba mencionada podría no aplicar para usted. Algunos estados no permiten la limitación sobre la duración de una garantía implícita, por lo que la limitación arriba mencionada podría no aplicar para usted. 17 ESPAÑOL...
- Page 32 Para reducir la exposición a estos productos químicos: trabaje en un área bien ventilada y póngase el equipo de seguridad indicado, tal como las máscaras contra polvo que están especialmente diseñadas para filtrar partículas microscópicas. Makita Corporation 3-11-8, Sumiyoshi-cho, Anjo, Aichi 446-8502 Japan 885505-946...
- Page 33 INSTRUCTION MANUAL MANUAL DE INSTRUCCIONES Cordless Hammer Driver Drill Rotomartillo Atornillador Inalámbrico XPH14 IMPORTANT: Read Before Using. IMPORTANTE: Lea antes de usar.
- Page 34 ENGLISH (Original instructions) SPECIFICATIONS Model: XPH14 Drilling capacities Masonry 16 mm (5/8") Steel 13 mm (1/2") Wood Auger bit: 50 mm (2") Self-feed bit: 76 mm (3”) Hole saw: 152 mm (6”) Fastening capacities Wood screw 10 mm x 90 mm (3/8" x 3-1/2") Machine screw M6 (1/4") No load speed (RPM)
- Page 35 If operating a power tool in a damp location is Disconnect the plug from the power source unavoidable, use a ground fault circuit inter- and/or remove the battery pack, if detachable, rupter (GFCI) protected supply. Use of a GFCI from the power tool before making any adjust- ments, changing accessories, or storing power reduces the risk of electric shock.
- Page 36 Service WARNING: DO NOT let comfort or familiarity Have your power tool serviced by a qualified repair with product (gained from repeated use) replace person using only identical replacement parts. This strict adherence to safety rules for the subject will ensure that the safety of the power tool is maintained. product.
- Page 37 It will with a little click. If you can see the red indicator on the also void the Makita warranty for the Makita tool and upper side of the button, it is not locked completely.
-
Page 38: Electric Brake
This tool is equipped with an electric brake. If the tool consistently fails to quickly stop after the switch trigger is released, have the tool serviced at a Makita service center. NOTE: Depending on the conditions of use and the... -
Page 39: Speed Change
Pull the switch trigger to light up the lamp. The lamp keeps on lighting while the switch trigger is being pulled. The lamp goes out approximately 10 seconds after releasing the switch trigger. NOTE: When the tool is overheated, the tool stops automatically and the lamp starts flashing. - Page 40 NOTICE: Always set the ring correctly to your desired mode mark. If you operate the tool with the ring positioned halfway between the mode marks, the tool may be damaged. NOTICE: Do not change the action mode while tool is rotating. NOTICE: When you change the position from “1”...
- Page 41 Turn the sleeve counterclockwise to open the chuck Installing hook jaws. Place the driver bit/drill bit in the chuck as far as it will go. Turn the sleeve clockwise to tighten the CAUTION: chuck. To remove the driver bit/drill bit, turn the sleeve When installing the hook, always counterclockwise.
-
Page 42: Drilling Operation
Hammer drilling operation OPERATION CAUTION: There is a tremendous and sudden Hold the tool firmly with one hand on the grip and the twisting force exerted on the tool/drill bit at the other hand on the handle to control the twisting action. time of hole breakthrough, when the hole becomes clogged with chips and particles, or when striking reinforcing rods embedded in the concrete. -
Page 43: Drilling In Metal
Discoloration, deformation or cracks may result. To maintain product SAFETY and RELIABILITY, repairs, any other maintenance or adjustment should be performed by Makita Authorized or Factory Service Centers, always using Makita replacement parts. OPTIONAL ACCESSORIES CAUTION:... - Page 44 ESPAÑOL (Instrucciones originales) ESPECIFICACIONES Modelo: XPH14 Capacidades de taladrado Mampostería 16 mm (5/8") Acero 13 mm (1/2") Madera Broca de barrena: 50 mm (2″) Broca de autoalimentación: 76 mm (3″) Sierra perforadora: 152 mm (6″) Capacidades de fijación Tornillo para madera 10 mm x 90 mm (3/8"...
- Page 45 Seguridad eléctrica Retire cualquier llave de ajuste o llave de apriete antes de encender la herramienta. Una Las clavijas de conexión de las herramientas llave de ajuste o llave de apriete que haya sido eléctricas deberán encajar perfectamente en la dejada puesta en una parte giratoria de la herra- toma de corriente.
- Page 46 Mantenga las herramientas de corte limpias Servicio y filosas. Si recibe un mantenimiento adecuado Haga que una persona calificada repare la y tiene los bordes afilados, es probable que la herramienta eléctrica utilizando sólo piezas de herramienta se atasque menos y sea más fácil repuesto idénticas.
- Page 47 12. Utilice las baterías únicamente con los pro- Instrucciones importantes de ductos especificados por Makita. Instalar las baterías en productos que no cumplan con los seguridad para el cartucho de requisitos podría ocasionar un incendio, un calen- batería...
- Page 48 Asimismo, esto inva- lidará la garantía de Makita para la herramienta y el cargador Makita. Consejos para alargar al máximo la vida útil de la batería Cargue el cartucho de batería antes de que...
- Page 49 La herramienta se deten- nimiento a un centro de servicio Makita. drá automáticamente durante la operación si la herra- mienta o la batería se someten a una de las siguientes condiciones: 17 ESPAÑOL...
-
Page 50: Cambio De Velocidad
Esta herramienta tiene un conmutador de inversión Iluminación de la luz delantera para cambiar la dirección de rotación. Presione la palanca del conmutador de inversión desde el lado A PRECAUCIÓN: No mire a la luz ni vea a la para una rotación en sentido de las manecillas del reloj o desde el lado B, para una rotación en sentido inverso fuente de luz directamente. - Page 51 Esta herramienta cuenta con tres modos de Anillo de ajuste accionamiento. Usted puede seleccionar el modo de accionamiento y Modo de taladrado (rotación ajustar la torsión de apriete mediante el anillo de ajuste. solamente) Modo de taladrado y martilleo Selección del modo de accionamiento (rotación con percusión) 1 - 21 Modo de atornillado (rotación...
- Page 52 Tope de profundidad ajustable MONTAJE PRECAUCIÓN: Asegúrese siempre de que la herramienta esté apagada y el cartucho de batería haya sido extraído antes de realizar cualquier trabajo en la misma. Instalación o extracción de la punta de destornillador/broca de taladro Accesorio opcional ►...
- Page 53 Instalación del portabrocas Accesorio opcional ► 1. Aberturas de ventilación Operación de atornillado ► 1. Portabrocas 2. Punta de destornillador PRECAUCIÓN: Coloque el anillo de ajuste en Coloque el portabrocas en la protuberancia en la base el nivel de torsión apropiado para su trabajo. de la herramienta o ya sea del lado derecho o izquierdo PRECAUCIÓN: Asegúrese de que la punta...
- Page 54 PRECAUCIÓN: Ejercer una presión excesiva de servicio autorizados o de fábrica Makita, empleando sobre la herramienta no hará que consiga taladrar siempre repuestos Makita. más rápido. De hecho, una presión excesiva sólo logrará...
- Page 55 GARANTÍA LIMITADA DE MAKITA Ésta Garantía no aplica para México Consulte la hoja de la garantía anexa para ver los términos más vigentes de la garantía aplicable a este producto. En caso de no disponer de esta hoja de garantía anexa, consulte los detalles sobre la garantía descritos en el sitio web de su país respectivo indicado...
- Page 56 Para reducir la exposición a estos productos químicos: trabaje en un área bien ventilada y póngase el equipo de seguridad indicado, tal como las máscaras contra polvo que están especialmente diseñadas para filtrar partículas microscópicas. Makita Corporation 3-11-8, Sumiyoshi-cho, Anjo, Aichi 446-8502 Japan 885826A946...
Need help?
Do you have a question about the DC18RA and is the answer not in the manual?
Questions and answers