Table of Contents
Advertisement
Available languages
Available languages
Quick Links
Advertisement
Table of Contents

Related Manuals for Philips HD7751


Summary of Contents for Philips HD7751
- Page 1 HD7751 User manual 사용 설명서 CN-S 用户手册...
-
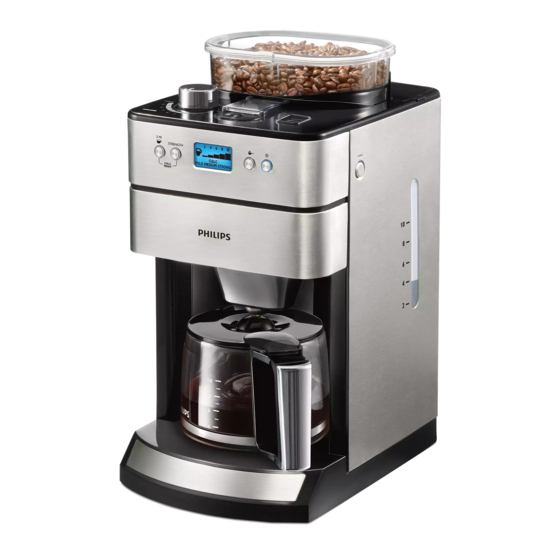
Page 5: General Description (Fig. 1)
3 Important Congratulations on your purchase and welcome Read this user manual carefully before you use to Philips! To fully benefit from the support the appliance and save it for future reference. that Philips offers, register your product at 3.1 Danger www.philips.com/welcome. -
Page 6: Electromagnetic Fields (Emf)
Consumer Care Centre in your country. If the problem cannot be solved, take the appliance 4.1 Flushing the appliance to a service centre authorised by Philips for examination or repair. Do not attempt to You need to flush the coffeemaker once before repair the appliance yourself, otherwise your first use. -
Page 7: Using The Appliance
5.2 Using coffee beans Note: When you switch off the grinder, the number of cups and the strength setting are not Warning: Do not put espresso coffee beans in the coffee shown on the display. bean container. Only use regular coffee beans. Press the start/standby button to start the brewing process (Fig. -
Page 8: Using Pre-Ground Coffee
To select the number of cups, press the Wait until the coffeemaker has stopped 2-10 cups button as many times as the beeping before you remove the jug from desired number of cups (Fig. 13). the hotplate. • The 2-10 cups button lights up when you press it. -
Page 9: Cleaning And Maintenance
6.2 Cleaning the coffee bean Note: chute When you switch off the grinder, the number of cups and the strength setting are not You have to clean the coffee bean chute every shown on the display. 1 to 2 weeks, depending on the frequency of use. Put pre-ground coffee in the paper filter or in Put the mains plug in the wall socket. -
Page 10: Ordering Accessories
To buy accessories or spare parts, visit appliance every time the ‘CALC’ message appears www.shop.philips.com/service or go to your on the display. Philips dealer. You can also contact the Philips Consumer Care Centre in your country (see the worldwide guarantee leaflet for contact details). Note: To remove the ‘CALC’... - Page 11 The appliance does not work. The appliance continues to drip long after the • Make sure that the voltage indicated on brewing process has ended. the appliance corresponds to the local • The dripping is caused by condensation mains voltage. of steam.
- Page 12 제품을 물 또는 다른 액체에 절대 담그거나 헹구지 마십시오. 필립스 제품을 구입해 주셔서 감사합니다! 3.2 경고 필립스가 드리는 지원 혜택을 받으실 수 • 있도록 www.philips.co.kr에서 제품을 제품을 벽면 콘센트에 연결하기 전에 등록하십시오. 제품 바닥에 표시되어 있는 전압이 사용 지역의 전압과 일치하는지 확인하십시오.
-
Page 13: 최초 사용 전
3.3 주의 참고: • 제품을 뜨거운 곳에 놓지 마시고 전원 5분 내에 버튼을 누르지 않으면 코드가 뜨거운 표면과 접촉하지 않도록 제품은 대기 모드가 됩니다. 이 경우 주의하십시오. 디스플레이는 꺼지고 시작/대기 버튼만 • 재료를 갈거나 끓이는 도중에 문제가 제품이 켜져 있다는 것을 알려줍니다. 발생한... - Page 14 보 온 상태를 중단하려면 시작/대기 원두 커피 용기 뚜껑을 분리하고 버튼을 누릅니다. (그림 5) (1) 용기에 원두 커피를 채웁니다(2). 용기를 비웁니다. 끓이려는 커피의 양만큼 용기에 충분한 원두 커피가 있는지 확인합니다 (그림 11). 5 제품 사용 참고: 항상 원두 용기에 적어도 절반 가량 채워져 있는지 확인합니다. 5.1 급수통 채우기 급수통 뚜껑을 열고 급수통에 필요한 경고: 만큼의 찬 물을 채웁니다 (그림 3). 원두 커피 용기의 최대 용량은 250g 표시선이 수위 표시창 및 용기에 2컵에서 입니다. 분쇄기에 끼임 현상을 10컵(275ml에서...
-
Page 15: 분쇄 커피 사용
• STRENGTH(농도) 버튼을 누를 때 참고: 버튼의 불이 켜집니다. 제품을 대기 모드로 놓고 시작/대기 • 디스플레이에 선택된 커피 농도가 버튼을 누르지 않으면 제품은 120분 후 나타납니다. 자동으로 대기 모드가 됩니다. 시작/ 추출 과정을 시작하려면 시작/대기 대기 버튼이 켜져 있으면 제품이 본체에 버튼을 누릅니다 (그림 15). 연결되어 있다는 표시입니다. 경고: 참고: 배출구를... -
Page 16: 커피메이커의 석회질 제거
5.4 드립 중지 기능 세척용 브러시를 사용하여 투입구의 누수 방지 기능이 있어 추출 과정이 끝나기 하단부에 분쇄 커피 찌꺼기를 털어 전에 커피메이커에서 용기를 꺼낼 수 냅니다 (그림 21). 있습니다. 용기를 꺼낼 때 누수 방지기가 커피가 용기로 내려가지 않도록 막아줍니다. 도움말: 분쇄 커피를 모으려면 필터 용기에 종이 필터 또는 영구 필터를 놓습니다. 참고: •... -
Page 17: 보증 및 지원
재활용 수거 장소에 버리시면 환경 식초 혼합 용액의 절반이 용기에 들어갈 보호에 동참하실 수 있습니다 (그림 24). 때까지 기다립니다. 그 후 시작/대기 버튼을 눌러서 추출 과정을 멈추고 용액을 적어도 15분 동안 불립니다. 9 보증 및 지원 시작/대기 버튼을 눌러서 커피메이커를 다시 켜고 남은 용액이 용기에 들어갈 때까지 기다립니다. 그 후 시작/대기 보다 자세한 정보나 지원이 필요한 경우에는 버튼을 눌러 제품을 대기 모드로 필립스 웹사이트(www.philips.com/ 둡니다. support)를 방문하시거나 제품 보증서를 용기를 비우고 종이 필터를 버립니다. 참조하십시오. 급수통에 찬물을 채우고 시작/ 대기 버튼을 눌러 추출 과정을 다시 시작합니다. 커피메이커가 추출 과정을 끝까지 완료하면 용기를 비웁니다. 물에서 식초 맛이나 향이 느껴지지지 않을 때까지 12단계를 반복합니다. 소량의 세제를 푼 따뜻한 물에 필터... - Page 18 일반적으로 경험하게 되는 문제와 그 해결 전에는 용기를 분리하여 커피를 따라내지 방법을 제시합니다. 아래의 정보로도 문제를 않는 것이 좋습니다. 해결할 수 없는 경우 www.philips.com/ support를 방문하여 자주 묻는 질문(FAQ) 추출 과정이 끝난 후에도 오랫동안 제품에서 목록을 참조하거나 필립스 고객 상담실로...
- Page 19 简介 3 注意事项 感谢您的惠顾,欢迎光临飞利 使用本产品之前,请仔细阅读本 浦!为了您能充分享受飞利浦提 使用说明书,并妥善保管以备日 供的支持,请在 后参考。 www.philips.com/welcome 3.1 危险 上注册您的产品。 • 不要将本产品浸入水或其它液 体中,也不要在水龙头下冲 洗。 2 基本说明 (图 1) 3.2 警告 1 永久性过滤网 • 在将产品接通电源以前,首先 2 滤框 确认产品底部所标示的电压是 3 防滴漏功能 否与当地的电压相符。 4 锁定咖啡豆斜槽 • 如果电源软线损坏,为避免危 5 研磨选择旋钮...
- Page 20 • 如果插头、电源线或产品本身 3.4 电磁场 (EMF) 这款飞利浦产品符合关于电磁场 受损,请勿使用本产品。 • 如果出现无法根据本用户手 (EMF) 的相关标准。据目前的科 册解决的问题,请与您所在 学证明,如果正确使用并按照本 国家/地区的客户服务中心联 用户手册中的说明进行操作, 系。如果问题不能得到解决, 本产品是安全的。 请将本产品送往飞利浦授权的 服务中心进行检修。切勿尝试 4 首次使用之前 自行修理本产品,否则您的保 修将失效。 4.1 冲洗产品 3.3 注意 • 切勿将本产品放在热的表面 首次使用之前,需要冲洗一次咖 啡机。 上,并防止电源线与热的表面 将电源插头插入插座。 接触。 • 启动/待机按钮亮起。 • 如果在研磨或冲煮咖啡期间出 按启动/待机按钮。 (图 2) 现问题,以及在清洁之前,请 • 显示屏亮起,产品会发出 拔下产品的电源插头。 • 在冲煮期间或冲煮后,咖啡壶 哔声。...
- Page 21 关闭水箱盖。 5 使用本产品 将玻璃壶放在加热盘上。 (图 4) 5.1 给盛水箱注水 D 注意: 打开水箱盖,在水箱中注入所 确保盖子在玻璃壶上且已将 需数量的冷水。 (图 3) 玻璃壶正确放置在加热盘上。 水位窗和咖啡壶上具有 2 至 壶口必须朝向产品。如果盖子 10 杯量(275 毫升到 1375 毫 未在玻璃壶上或未将玻璃壶正 升)指示。您可以使用这些指 确放置,防滴漏功能将自动激 示来确定水箱中所注入的水 活(请参阅“使用本产品”一 量。请记住,冲煮的咖啡量将 章的“防滴漏功能”部分)。 略有减少,因为研磨咖啡会吸 按启动/待机按钮。 (图 5) 收水分。 • 本产品发出哔声,并且新 E 提示: 鲜度指示灯将出现在显示 使用咖啡壶为水箱注入所需数 屏上。 量的水。 按预研磨咖啡按钮可关闭研磨 机。 (图 6) D 注意: (图 8) •...
- Page 22 按产品右侧的打开按钮打开滤 D 注意: 框支架。 (图 9) 本产品会用完水箱中所有的 将滤纸(4 号)或永久性滤网 水。请确保使用 2-10 杯按钮 放入滤框中收集研磨咖啡。 所选的杯数与水箱中注入水量 (图 10) 的杯数一致。如果您选择的杯 取下咖啡豆容器盖 (1),将咖 数少于水量的杯数,则咖啡味 啡豆装入容器 (2)。确保容器 道会比预想的要淡。 中具有能够冲煮所需咖啡量的 按一次或数次浓度按钮,直至 足量咖啡豆。 (图 11) 选中所需的咖啡浓度(轻度、 中度和重度)。 (图 14) D 注意: • 按下时,浓度按钮将亮起。 始终确保咖啡豆容器至少半 • 显示屏将显示选定的咖啡 满。 浓度。 按启动/待机按钮开始冲煮过 B 警告: 程。 (图 15) 咖啡豆容器的最大容量为 250 克。为防止研磨机堵塞, B 警告: 请不要超出此容量。 冲煮咖啡时,请远离蒸汽孔, 因为会有蒸汽冒出。 B 警告: • 研磨机将研磨所需数量的咖 为防止研磨机堵塞,请不要使 啡豆。...
- Page 23 按预研磨咖啡按钮可关闭研磨 D 注意: 机。 (图 6) 冲煮完成后,咖啡会从滤框中 • 按下时,该按钮将亮起。 滴出几秒钟。 • 冲煮完成后,显示屏上的新 D 注意: 鲜度指示灯将缓慢闪烁 120 关闭研磨机后,显示屏上将不 分钟,表示咖啡是新鲜的。 会显示杯数和浓度设置。 如果无需加热盘保持咖啡温 将预磨咖啡放入滤纸或永久性 热,请按启动/待机按钮将产 滤网中。 品置于待机模式。 (图 17) • 产品会发出较长的哔声,然 D 注意: 后启动/待机按钮将持续亮 放多少预研磨咖啡取决于您的 起,表示产品仍然开启。 个人口味。冲煮中等浓度的咖 啡时,使用一量匙(约 6 克) D 注意: 可以冲煮一杯(125 毫升)。 如果未按启动/待机按钮将产 关闭滤框支架,将咖啡壶置于 品置于待机模式,产品将在 加热盘上。 120 分钟后自动进入待机模 遵循“使用咖啡豆”部分中的 式。启动/待机按钮将持续亮 步骤 7、8 和 9 进行操作。 起,表示产品电源是接通的。 5.4 防滴漏功能 D 注意: 防滴漏功能让您可以在冲煮过程...
- Page 24 6 清洁和保养 关闭咖啡豆斜槽的盖子, 然后将锁转到“锁定” 位置。 (图 22) 6.1 每次使用后进行清洁 取下并丢弃带有研磨咖啡残渣 的滤纸。 B 警告: 不要将本产品浸入水或其它液体 6.3 为咖啡机除垢 中,也不要在水龙头下冲洗。 显示屏上出现“除垢”消息时 将插头从电源插座中拔下: (约 60 次冲煮过程后),需要 用湿布擦拭咖啡机和加热盘的 为咖啡机除垢,因为水垢会堵塞 外部。 咖啡机。 用热水和少许清洁液清洗滤 定期去除垢既可延长产品的使用 框、永久性过滤网和玻璃壶, 寿命,又可保证长时间获得最佳 或将其在洗碗机中清洗。 的冲煮效果和恒定的冲煮时间。 为产品除垢: 6.2 清洁咖啡豆斜槽 • 如果使用软水(18dH 或以 必须每隔 1 到 2 周清洁一次咖啡 下),则应每 120 个冲煮周 豆斜槽,具体取决于使用频率。 期除垢一次。 将电源插头插入插座。 •...
- Page 25 或 请联系飞利浦经销商。您也可 将空壶放在加热盘上。 (图 4) 以联系您所在国家/地区的飞利浦 将电源插头插入插座。 客户服务中心(联系详情,请参 按启动/待机按钮。 阅全球保修卡)。 按“预研磨咖啡”按钮关闭研 磨机。然后按启动/待机按钮 开始冲煮过程。 8 环保 一直等到一半醋水溶液流入壶 • 弃置产品时,请不要将其与一 内,然后按启动/待机按钮停 止冲煮过程,使溶液浸泡至少 般生活垃圾堆放在一起;应将 15 分钟。 其交给官方指定的回收点。 按启动/待机按钮重新打开咖 这样做有利于环保。 (图 24) 啡机,一直等到其余溶液流入 壶内,然后按启动/待机按钮 9 保修和支持 将产品置于待机模式。 倒空咖啡壶并丢弃滤纸。 如果您需要信息或支持,请访问 在盛水箱中注入冷水,然 www.philips.com/support 或阅 后按启动/待机按钮开始另一次 读单独的全球保修卡。 冲煮流程。让咖啡机完成整个 冲煮过程,然后倒空咖啡壶。 重复步骤 12,直至水里不 再有醋味。 用热水和少许清洗液清洁 滤框和咖啡壶。...
- Page 26 使用预磨咖啡时,咖啡太淡。 10 故障种类和处理方法 • 确保滤网中预磨咖啡的量与水 箱中的水量一致。请记住, 本章归纳了使用本产品时最常见 产品会用完水箱中所有的水。 的一些问题。如果您无法根据以 • 使用更浓的混合或口味的预磨 下信息解决问题,请访问 咖啡。 www.philips.com/support 查阅 • 要增加咖啡浓度,请增加预磨 常见问题列表,或联系您所在国 咖啡的量或减少水量。 家/地区的客户服务中心。 冲煮咖啡的过程中取出玻璃壶时 产品不能工作。 • 确保产品上标示的电压与当地 过滤网溢出。 如果您在冲煮过程中将玻璃壶移 的电源电压相符。 • 将水注入盛水箱。 开 20 秒以上,则滴漏盘会导致 滤框溢出。另请注意,在冲煮过 程结束之前,咖啡将无法释放其 最浓的香味。因此建议您在冲煮 使用研磨机时,咖啡太淡。 • 确保使用 2-10 杯按钮所选的杯 过程结束之前,请不要取出玻璃...
- Page 27 咖啡不够热。 • 确保将玻璃壶正确放置在加热 盘上。 • 确保加热盘和玻璃壶的底部洁 净。 • 使用壁薄的杯子,因为与壁厚 的杯子相比,它们从咖啡吸收 的热量更少。 • 请勿使用直接从冰箱拿出来的 牛奶。 • 为产品除垢。请参阅“清洁和 保养”一章的“除垢”部分。 保留备用 15/12/2015...
- Page 32 © 2015 Koninklijke Philips Electronics N.V. All rights reserved / 版权所有. Document order number / 文档顺序代码 : 4222.200.0557.4...
Need help?
Do you have a question about the HD7751 and is the answer not in the manual?
Questions and answers