
Related Manuals for Philips EVNIA 42M2N8900/94


Summary of Contents for Philips EVNIA 42M2N8900/94
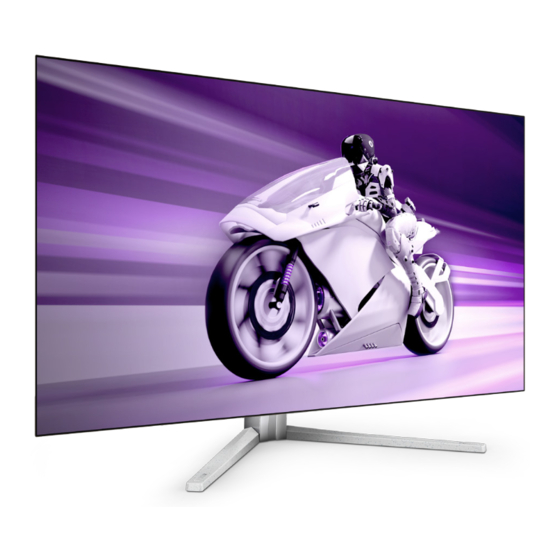
- Page 1 42M2N8900 User manual Customer care and warranty Troubleshooting and FAQs Register your product and get support at www.philips.com/welcome...
-
Page 2: Table Of Contents
Table of Contents 1. Important ........1 12.1 Philips’ Flat Panel Monitors Pixel Defect Policy ........ 32 1.1 Safety precautions and 12.2 Customer Care & Warranty ... 35 maintenance ........1 1.2 Notational Descriptions ....3 1.3 Disposal of product and packing 13. -
Page 3: Important
Keep the display away from oil. Oil may damage the plastic cover of the display and void the warranty. This electronic user’s guide is intended for anyone who uses the Philips • Remove any object that could fall monitor. Take time to read this user into ventilation holes or prevent manual before you use your monitor. - Page 4 damage will not be covered under • Oil-based cleaning solutions may warranty. damage the plastic parts and void the warranty. • Do not knock or drop the monitor during operation and/or • Unplug the monitor if you are not transportation. going to use it for an extensive period.
-
Page 5: Notational Descriptions
1.2 Notational Descriptions • “Burn-in”, “after-imaging”, or “ghost imaging” is a well-known The following subsections describe the phenomenon in OLED panel notational conventions used in this technology. In most cases, the document. “burn-in”, “after-imaging” or “ghost imaging” will disappear gradually Notes, Cautions, and Warnings over some time after the power has Throughout this guide, blocks of text... -
Page 6: Disposal Of Product And Packing Material
From the planning, design, and production stages, Philips emphasizes the importance of making products that can easily be recycled. At Philips, end-of-life management primarily This marking on the product or its entails participation in national take-... -
Page 7: Setting Up The Monitor
Quick start (4) Use your fingers to tighten the 42M2N8900 screw located at the bottom of Register your product and get support at www.philips.com/welcome the base, and secure the base to the stand tightly. *Remote control VESA Bracket Batteries AAA R03 1.5V... - Page 8 Connecting to your PC Kensington anti-theft lock Connect to PC 1. Connect the power cord to the back 7 10 4 6 9 of the monitor firmly. 8 11 Fast Charger 2. Turn off your computer and unplug its power cable. 3.
-
Page 9: Operating The Monitor
2.2 Operating the monitor Some selected Philips displays may not Power or Charge your device when it Description of the control buttons enters “Sleep/Standby” mode (White power LED blinking). In that case, please enter to OSD Menu and select “USB Standby Mode”, then, turn the function... - Page 10 Description of the On-Screen Display What is On-Screen Display (OSD)? On-Screen Display (OSD) is a feature in all Philips OLED monitors. It allows an end user to adjust screen performance or select functions of the monitors directly through an on-screen instruction window. A user-friendly OSD interface is shown below:...
- Page 11 Main menu Sub menu SmartImage Console Mode( Xbox Mode/ Brightness 0~100 Switch Mode/PS5 Mode ), Contrast 0~100 Standard, FPS, Racing, RTS, Movie, LowBlue Mode, EasyRead, Economy, SmartContrast On, Off Game1, Game2 Gamma 1.8, 2.0, 2.2, 2.4, 2.6 Sharpness 0~100 On, Off sRGB Color Temperature Native, Preset, 5000K, 6500K, 7500K, 8200K, 9300K, 11500K...
- Page 12 Maintenance for details of OLED In addition, it is important to note that Panel Care. the firmware upgrades must be done • This Philips monitor is certified with through the SmartControl software. AMD FreeSync™ Premium. The It is necessary to be connected to a...
-
Page 13: Remove The Base Assembly For Vesa Mounting
2.3 Remove the Base Assembly Height adjustment for VESA Mounting Before you start disassembling the Display base, please follow the instructions below to avoid any possible damage or injury. 120mm 1. Place the monitor face down on a smooth surface. Pay attention not to scratch or damage the screen. -
Page 14: Multiclient Integrated Kvm
PCs with one monitor-keyboard-mouse set up. How to enable MultiClient Integrated With the built-in MultiClient Integrated KVM, Philips monitor allows to quickly switch your peripherals back and forth 0° 90° between in two devices through the OSD -5°... - Page 15 3. Enter to OSD menu. Go to KVM 3. Enter to OSD menu. Go to KVM layer and select “Auto”, “USB C” layer and select “Auto”, “USB C” or “USB Up” to switch the control or “USB Up” to switch the control of peripherals from one device to of peripherals from one device to another.
-
Page 16: Multiview
MultiView in OSD menu Why do I need it? • PIP / PBP Mode: There are two modes for MultiView: [PIP] and With the ultra-high-resolution Philips [PBP]. MultiView display, you can comfortably experience a world of connectivity in the [PIP]: Picture in Picture office or at home. - Page 17 Top-Left Top-Right When the sub source is not detected. (main) (main) (main) Note Bottom-Left Bottom-Right The black strip located on the top and the bottom of the screen is for measuring the correct aspect ratio when in the PBP mode. If you expect to see full- (main) (main) screen, adjust your device's resolutions...
-
Page 18: Image Optimization
Whether you're working SmartImage GAME with text applications, displaying images, Console Mode or watching a video, Philips SmartImage Standard delivers great monitor performance. Why do I need it? Racing It is ideal to have a monitor that delivers... - Page 19 LED displays can cause eye for playing video games. With damage and affect vision over time. brighter white and darker black, the Developed for well-being, the Philips gaming scene is vivid and reveals LowBlue Mode setting uses smart more details, easily spotting enemies...
-
Page 20: Smartcontrast
3.2 SmartContrast What is it? It is a unique technology that dynamically analyzes displayed content and automatically optimizes a monitor's contrast ratio for maximum visual clarity and viewing enjoyment. Why do I need it? Because SmartContrast offers the best visual clarity and viewing comfort for every type of content. -
Page 21: Power Delivery And Smart Power
What is it? brightness value of the monitor. You may adjust the brightness value Smart Power is an exclusive Philips manually to increase power delivery technology that provides flexible power from this monitor. delivery options for various devices. -
Page 22: Amd Freesync Tm Premium
5. AMD FreeSync AMD Radeon R9 290 • AMD Radeon R9 285 Premium • AMD Radeon R7 260X • AMD Radeon R7 260 • ■ Processor A-Series Desktop and Mobility APUs AMD A10-7890K • AMD A10-7870K • PC gaming has long had an imperfect AMD A10-7850K experience because GPUs and monitors •... -
Page 23: Ambiglow
3-step brightness settings allow you to adjust the ambiance to your liking and available wall surface. Whether you are playing games or watching movies, Philips Ambiglow offers you a unique and immersive viewing experience. How does it work? It is recommended that you dim the lighting conditions in your room for maximum effect. -
Page 24: Hdr
7. HDR HDR Settings in Windows11/10 system. Steps 1. Right-click on the desktop, and enter Display settings. 2. Select the display/monitor. 3. Select an HDR-capable display under Rearrange your displays. 4. Select Windows HD Color settings. 5. Adjust Brightness for SDR content. Note Windows 10 edition is required. -
Page 25: Screen Maintenance
8. Screen maintenance Before self-activating Pixel Refresh, a pop-up message will appear after the 4 hour time limit and the user can Following the characteristics of choose to activate or skip the refreshing OLED displays, there are automatic process. If the user chooses to skip the mechanisms used to protect the screen initial Pixel refresh, then a reminder and reduce image sticking which may... - Page 26 A reminder message that pops up after 4 hours of Compulsory execution message continuous use, and will then appear every 2 hours To maintain the panel quality, Pixel Refresh will automatically after. run after in use for a periods of time. Pixel Refresh will take few minutes and Power LED will blink until it is �nished.
-
Page 27: Designs To Prevent Computer Vision Syndrome (Cvs)
4. Choose a Philips monitor for viewing that is easy on the eyes: Follow the below instructions and use a Philips monitor to efficiently • Anti-glare screen: This feature... -
Page 28: Technical Specifications
10. Technical Specifications Picture/Display Monitor Panel Type OLED Panel Size 41.54" W (105.5 cm) Aspect Ratio 16:9 Pixel Pitch 0.2395 (H) mm x 0.2395 (V) mm Contrast Ratio (typ.) 1.5M:1 Recommended 3840 x 2160 @ 60 Hz Resolution Maximum Resolution 3840 x 2160 @ 138 Hz Viewing Angle 178°... - Page 29 Convenience Built-in Speakers 10 W x 2 with DTS sound MultiView PIP/PBP mode, 2×devices English, German, Spanish, Greek, French, Italian, Hungarian, Dutch, Portuguese, Brasil Portuguese, Polish, Russian, OSD Languages Swedish, Finnish, Turkish, Czech, Ukranian, Simplified Chinese, Traditional Chinese, Japanese, Korean Other Convenience VESA mount (100 x 100 mm), Kensington Lock Plug &...
- Page 30 2. In order to update the monitor’s firmware to the latest version, Please download the SmartControl software from Philips website. It is necessary to be connected to a network when updating the firmware on SmartControl over-the-air (OTA).
-
Page 31: Resolution & Preset Modes
Please note that your display works best at the native resolution of 3840 x 2160. For best output performance, please always ensure that your graphic card is capable of achieving the maximum resolution and refresh rate of this Philips display. - Page 32 Display Input Format 422/420 444/RGB 422/420 444/RGB 422/420 444/RGB USBC@ USBC@ USBC@ USBC@ (HDMI2.1) (HDMI2.1) (DP1.4) (DP1.4) USB3.2 USB2.0 USB3.2 USB2.0 UHD 138Hz 10bits Lower resolution 8bits/10 bits Note In order for the monitor to function properly, your PC’s graphics card must support the following: HDMI 2.1 FRL with a bandwidth of up to 48 Gbps (Fixed Rate Link), DisplayPort 1.4 with Display Stream Compression (DSC), and USB-C HBR3 (DisplayPort High Bit Rate 3, 8.10 Gbps).
-
Page 33: Power Management
11. Power Management If you have a VESA DPM compliance display card or software installed on your PC, the monitor can automatically reduce its power consumption when not in use. If an input from a keyboard, mouse, or other input device is detected, the monitor will 'wake up' automatically. -
Page 34: Customer Care And Warranty
Other Pixel Defect Policy combinations of lit and dark sub-pixels appear as single pixels of other colors. Philips strives to deliver the highest quality products. We use some of the Types of Pixel Defects industry's most advanced manufacturing... - Page 35 To qualify for repair or replacement due to pixel defects during the warranty Black Dot Defects period, a TFT Monitor panel in a Philips Black dot defects appear as pixels or flat panel monitor must have pixel sub-pixels that are always dark or 'off'.
- Page 36 BRIGHT DOT DEFECTS ACCEPTABLE LEVEL 1 lit subpixel 2 adjacent lit subpixels 3 adjacent lit subpixels (one white pixel) Distance between two bright dot defects* Total bright dot defects of all types BLACK DOT DEFECTS ACCEPTABLE LEVEL 1 dark subpixel 35 or fewer 2 adjacent dark subpixels 15 or fewer...
-
Page 37: Customer Care & Warranty
Please contact our Philips Customer Service Representative or local contact center (by Consumer care number) for more details. Philips Customer Care Center number listed below. -
Page 38: Troubleshooting & Faqs
OSD be corrected by a user. If the problem menu. persists after you have tried these Note solutions, contact a Philips customer The Auto Function is not applicable in service representative. DVI-Digital mode as it is not necessary. Common Problems... - Page 39 Service contact information listed in period may cause "burn-in", also the Important information manual known as "after-imaging" or "ghost and contact a Philips customer service imaging", on your screen. "Burn-in ", representative. "after-imaging", or "ghost imaging" * Functionality is different according to is a well-known phenomenon in display.
-
Page 40: General Faqs
• Shut down your computer, and is protected from sharp or disconnect your old monitor, blunt objects. When handling the and reconnect your Philips OLED monitor, make sure that there is monitor. no pressure or force applied to • Turn on your monitor and then turn the panel surface side. - Page 41 Can I connect my OLED monitor sharp text, and is displaying to any PC, workstation, or Mac? jagged characters? Ans.: Yes. All Philips OLED monitors are Ans.: Your OLED monitor works best fully compatible with standard at its native resolution of 3840 x PCs, Macs, and workstations.
-
Page 42: Multiview Faqs
OSD menu. Select in EDFU? your preferred [Audio Source] option from the [Audio] main Ans.: Important information manual can be downloaded on the Philips menu. website support page. Please note that the next time you turn on your display, the display will by default select the audio source you chose last time. - Page 43 This product has been manufactured by and is sold under the responsibility of Top Victory Investments Ltd., and Top Victory Investments Ltd. is the warrantor in relation to this product. Philips and the Philips Shield Emblem are registered trademarks of Koninklijke Philips N.V.
Need help?
Do you have a question about the EVNIA 42M2N8900/94 and is the answer not in the manual?
Questions and answers