Table of Contents
Advertisement
Quick Links
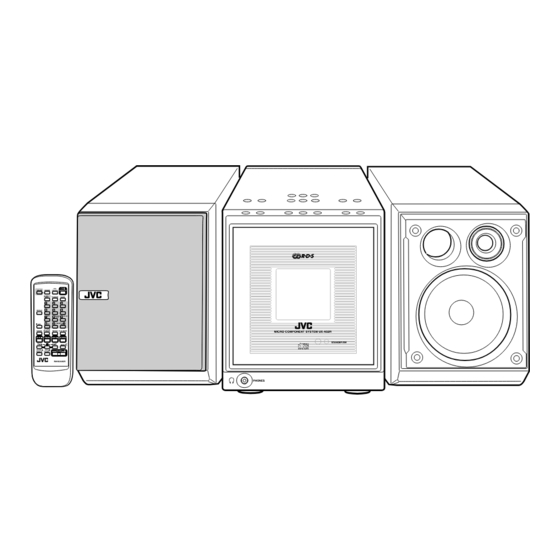
MICRO COMPONENT SYSTEM
UX-A52R
- RDS -
COLOR
DIMMER
CONTROL
STANDBY/ON
CLOCK
/TIMER
FM MODE
SLEEP
1
2
3
DISPLAY
4
5
6
7
PTY
8
TA/NEWS
9
DISPLAY
/INFO
10
0
–
SELECT
+
SET
+
10
CANCEL
REV.MODE
REPEAT
PLAY MODE
CD
FM/AM
TAPE
AUX/MD
BEEP
SOUND
AHB
MODE
PRO
VOLUME
RM-SUXA52R
— Consists of CA-UXA52R and SP-UXA52
MICRO COMPONENT SYSTEM UX-A52R
STANDBY/ON
COMPACT
DIGITAL AUDIO
PHONES
INSTRUCTIONS
For Customer Use:
Enter below the Model No. and Serial
No. which are located either on the rear,
bottom or side of the cabinet. Retain this
information for future reference.
Model No.
Serial No.
GVT0071-008A
[B]
Advertisement
Table of Contents

Related Manuals for JVC CA-UXA52R


Summary of Contents for JVC CA-UXA52R
- Page 1 MICRO COMPONENT SYSTEM UX-A52R — Consists of CA-UXA52R and SP-UXA52 - RDS - COLOR DIMMER CONTROL STANDBY/ON CLOCK /TIMER FM MODE SLEEP DISPLAY TA/NEWS DISPLAY /INFO – SELECT CANCEL REV.MODE REPEAT PLAY MODE MICRO COMPONENT SYSTEM UX-A52R FM/AM TAPE AUX/MD...
- Page 2 Warnings, Cautions and Others IMPORTANT for the U.K. DO NOT cut off the mains plug from this equipment. If the plug fitted is not suitable for the power points in your home or the cable is too short to reach a power point, then obtain an appropriate safety approved extension lead or consult your dealer.
- Page 3 CAUTION • Do not block the ventilation openings or holes. (If the ventilation openings or holes are blocked by a newspaper or cloth, etc., the heat may not be able to get out.) • Do not place any naked flame sources, such as lighted candles, on the apparatus.
- Page 4 IMPORTANT FOR LASER PRODUCTS REPRODUCTION OF LABELS 1 CLASSIFICATION LABEL, PLACED ON EXTERIOR SURFACE CLASS LASER PRODUCT 1. CLASS 1 LASER PRODUCT 2. DANGER: Invisible laser radiation when open and interlock failed or defeated. Avoid direct exposure to beam. 3. CAUTION: Do not open the top cover. There are no user serviceable parts inside the Unit;...
- Page 5 SAFETY INSTRUCTIONS “SOME DOS AND DON’TS ON THE SAFE USE OF EQUIPMENT” This equipment has been designed and manufactured to meet international safety standards but, like any electrical equipment, care must be taken if you are to obtain the best results and safety is to be assured. ✮✮✮✮✮✮✮✮✮✮✮✮✮✮✮✮✮✮✮✮✮✮✮✮✮✮✮✮✮✮✮✮✮✮✮✮✮✮✮✮✮✮✮✮✮✮✮...
- Page 6 Introduction We would like to thank you for purchasing one of our JVC products. Before operating this unit, read this manual carefully and thoroughly to obtain the best possible performance from your unit, and retain this manual for future reference.
-
Page 7: Table Of Contents
Contents Location of the Buttons ........3 Playing Back a CD ........20 Main Unit ............... 3 Precautions on CD Playback ........ 21 Remote Control ............5 Playing Back the Entire CD—Normal Play ..21 Basic CD Operations ........... 22 Getting Started.......... -
Page 8: Location Of The Buttons
Location of the Buttons Become familiar with the buttons on your unit. Main Unit Top view F M / A M A U X / M D AHB PRO VOLUME COLOR STANDBY/ON MODE select SLEEP start open/close T A P E open/close Front view Display—indicators... - Page 9 Continued See pages in the parentheses for details. Main unit Display—indicators 1 FM/AM button (11, 15) o Timer mode indicators (34 – 37) • Pressing this button also turns on the unit. • (Timer), DAILY (Daily Timer), and REC 2 COLOR button (9, 13) (Recording Timer) ;...
-
Page 10: Remote Control
Remote Control Remote control 1 DIMMER button (13, 34) 2 COLOR button (9, 13) 3 CLOCK/TIMER button (34 – 36) 4 DISPLAY button (16, 22, 26, 31, 32) 5 SET button (13, 15, 34 – 37) 6 REV. (reverse) MODE button (26) 7 CANCEL button (23, 34, 35) 8 FM/AM button (11, 15, 16) - RDS -... -
Page 11: Getting Started
Getting Started Continued Unpacking Putting the Batteries into the Remote Control Make sure that you have all the following items. The number in parentheses indicates the quantity of the Insert the batteries—R6P(SUM-3)/AA(15F)—into the pieces supplied. remote control, by matching the polarity (+ and –) on the batteries with the + and –... -
Page 12: Connecting Antennas
Connecting Antennas AM (MW/LW) antenna FM antenna FM antenna (supplied) Vinyl-covered wire (not supplied) Attach the FM antenna to the FM (75 Ω) COAXIAL terminal. Extend the FM antenna. Fasten it up in the position which gives you the best reception. -
Page 13: Connecting Speakers
Continued Connecting Speakers To remove the speaker grilles The speaker grilles are removable. To connect speakers You can connect the speakers by following the procedure Holes Projections below: Speaker terminals Speaker grille To remove the speaker grille, insert your fingers at the top of the speaker grille, then pull towards you. -
Page 14: Connecting Other Equipment
Connecting Other Equipment To connect audio equipment with an optical digital input terminal You can connect both of the analog and digital equipment. You can record CD sound onto the connected digital When you connect and use the equipment, refer also to its equipment. -
Page 15: Basic And Common Operations
Basic and Common Operations Continued The buttons emphasized in the illustration below are used and explained in this section (pages 11 to 13.) Remote control COLOR DIMMER STANDBY/ON - RDS - COLOR DIMMER CONTROL STANDBY/ON CLOCK FM MODE SLEEP /TIMER DISPLAY –... -
Page 16: Turning On The Power
Turning On the Power Selecting the Sources and Starting Play When you press the play buttons (CD 3 / 8, TAPE 2 3) To select the tuner, press FM/AM. for a particular source or FM/AM and AUX/MD, the unit The unit automatically turns on (when the unit is on automatically turns on (and starts playback if the source is standby) and the last selected station is tuned in. -
Page 17: Adjusting The Volume
Continued Adjusting the Volume Reinforcing the Bass Sound You can adjust the volume level while the unit is turned on. The richness and fullness of the bass sound is clearly The volume level has no effect on recording. maintained regardless of how low you set the volume— Active Hyper Bass PRO. -
Page 18: Setting The Display Illumination
Setting the Display Illumination To adjust and register the color You can adjust the color by changing the tone, whiteness, brightness, and register into COLOR 1 to 7. You can change the color and brightness of the display • There is a time limit in doing the following steps. If the illumination. -
Page 19: Listening To Fm And Am (Mw/Lw) Broadcasts
Listening to FM and AM (MW/LW) Broadcasts The buttons emphasized in the illustration below are used and explained in this section (pages 15 to 19.) Remote control - RDS - FM MODE CONTROL - RDS - COLOR DIMMER CONTROL STANDBY/ON CLOCK SLEEP /TIMER... -
Page 20: Tuning In A Station
Tuning in a Station Presetting Stations You can preset 30 FM and 15 AM (MW/LW) stations Press FM/AM repeatedly to select “FM” or “AM manually. (MW/LW).” The unit automatically turns on with the last selected In some cases, test frequencies have been already memorized for the tuner since the factory examined the tuner preset station. -
Page 21: Tuning In A Preset Station
Continued Tuning in a Preset Station More about RDS On the remote control ONLY: • Some FM stations do not provide RDS signals. • RDS services vary among FM RDS stations. For details on RDS Press FM/AM repeatedly to select “FM” or “AM services in your area, check with local radio stations. -
Page 22: Switching To A Program Type Of Your Choice Temporarily
Switching to a Program Type of Your Choice On the remote control ONLY: Temporarily Press and hold RDS CONTROL until you finish the following procedure. The Enhanced Other Networks function allows the unit to switch temporarily to a broadcast program of your choice (TA, News, or Info) from a different station. -
Page 23: How The Enhanced Other Networks Function Actually Works
Continued How the Enhanced Other Networks Alarm function function actually works: If an “Alarm!” (Emergency) signal is received from a station while listening to the radio, the unit CASE 1 automatically switches to the station broadcasting the If there is no station broadcasting the program you “Alarm!”... -
Page 24: Description Of The Pty Codes
Description of the PTY codes: News: News. Finance: Stock market reports, commerce, trading etc. Affairs: Topical program expanding or enlarging upon the news—debate, or analysis. Children: Programs targeted at a young audience. Info: Program the purpose of which is to Social: Programs about sociology, history, impart advice in the widest sense. -
Page 25: Playing Back A Cd
Playing Back a CD Continued The buttons emphasized in the illustration below are used and explained in this section (pages 21 to 24.) Remote control - RDS - COLOR DIMMER CONTROL STANDBY/ON CLOCK DISPLAY FM MODE SLEEP /TIMER TA/NEWS DISPLAY /INFO DISPLAY CANCEL... -
Page 26: Precautions On Cd Playback
Precautions on CD Playback Playing Back the Entire CD—Normal Play This unit has been designed to play back discs bearing the You can play a CD. following logos: Press CD open/close 0 on the unit. The unit automatically turns on, the electronic swing CD ReWritable (CD-RW) panel slides upward, and the disc tray comes out. -
Page 27: Basic Cd Operations
Continued To stop during play, press 7. Basic CD Operations The following information appears. While playing a CD, you can do the following operations. CD indicator To stop playback for a moment Press CD 3 / 8. The elapsed playing time starts flashing on the display. To resume playback, press CD 3 / 8 again. -
Page 28: Programing The Playing Order Of The Tracks -Program Play
Programing the Playing Order of the Tracks To check the program contents Before playing, you can check the program contents by —Program Play pressing 4 or ¢. • 4 : Shows the programed tracks in the reverse order. You can arrange the order in which the tracks play before •... -
Page 29: Playing At Random-Random Play
Playing at Random—Random Play Repeating Tracks—Repeat Play The tracks of a loaded CD will play at random. You can repeat all tracks (regardless of play mode), or also a single track as many times as you like. On the remote control ONLY: On the remote control ONLY: Load a CD. -
Page 30: Playing Back A Tape
Playing Back a Tape The buttons emphasized in the illustration below are used and explained in this section (page 26.) Remote control - RDS - COLOR DIMMER CONTROL STANDBY/ON CLOCK FM MODE SLEEP /TIMER DISPLAY DISPLAY REV.MODE TA/NEWS DISPLAY /INFO –... -
Page 31: Playing Back A Tape
To stop during play, press 7. Playing Back a Tape To fast-wind or rewind the tape, press ¢ or 4. You can play back type I, II, and IV tapes. • When the tape direction is ¢ : Fast-winds the tape. Press TAPE open/close 0 on the unit. -
Page 32: Using External Equipment
Using External Equipment The buttons emphasized in the illustration below are used and explained in this section (page 28.) Remote control - RDS - COLOR DIMMER CONTROL STANDBY/ON CLOCK FM MODE SLEEP /TIMER DISPLAY DISPLAY TA/NEWS /INFO – SELECT CANCEL REV.MODE REPEAT PLAY MODE... -
Page 33: Listening To External Equipment
Listening to External Equipment Recording from This Unit to External Equipment You can listen to external equipment such as an MD recorder. You can record from this unit to external equipment • First make sure that the external equipment is properly connected to the OPTICAL DIGITAL OUT terminal of this connected as follows: unit, such as an MD recorder. -
Page 34: Recording On Tapes
Recording on Tapes The buttons emphasized in the illustration below are used and explained in this section (pages 31 to 32.) For recording operations, mainly use the buttons on the unit. Main unit (Top view) F M / A M A U X / M D AHB PRO VOLUME... -
Page 35: Before You Start Recording
Continued Before You Start Recording • It should be noted that it may be unlawful to re-record pre-recorded tapes, records, or discs without the consent of the owner of copyright in the sound or video recording, broadcast or cable programme and in any literary, dramatic, musical, or artistic embodied therein. •... -
Page 36: Recording Fm/Am (Mw/Lw) Broadcasts
To check the clock time while recording from the What’s a Recording Mode and Reverse Mode ? broadcast onto a tape You have two methods (MODE 1/2 and 2/2) to record On the remote control ONLY: from some sources onto a tape. Press DISPLAY (not on number buttons.) Recording •... -
Page 37: Recording External Equipment
Recording External Equipment To record a single track during play or pause While playing back you want to record, perform steps 3 and 4 . You can record from external equipment onto a tape. The playback of the track is stopped, and then starts from The external equipment needs to be connected to LINE IN the beginning again. -
Page 38: Using The Timers
Using the Timers The buttons emphasized in the illustration below are used and explained in this section (pages 34 to 37.) Remote control STANDBY/ON DIMMER - RDS - COLOR DIMMER CONTROL STANDBY/ON CLOCK CLOCK /TIMER FM MODE SLEEP /TIMER SLEEP DISPLAY TA/NEWS DISPLAY... -
Page 39: Setting The Clock
Continued There are three timers available—Recording Timer, Daily When you unplug the AC power cord or if a power Timer, and Sleep Timer. failure occurs You need to set the built-in clock to use these timers. The clock setting will be reset to “0:00.” If this happen, you need to set the clock again. -
Page 40: Using Daily Timer
Press 4 to select “ON,” then press SET. To turn off the Recording Timer after its setting is done, 1 Press CLOCK/TIMER repeatedly until “REC TIMER” appears on the display. Select the source to record. 2 Press ¢ to select “OFF,” then press SET. 1) Press ¢... - Page 41 Continued 2) Press ¢ or 4 repeatedly to select the minute On the remote control ONLY: of the timer-on time, then press SET. Press CLOCK/TIMER repeatedly until “DAILY The hour digit of timer-off time starts flashing on TIMER” appears on the display. the display.
-
Page 42: Using Sleep Timer
Using Sleep Timer To sleep with the Sleep Timer and wake up with the Daily Timer With Sleep Timer, you can fall asleep to your favorite The unit turns off when the shut-off time comes (set by the music. Sleep Timer), and turns on when the timer-on time comes •... -
Page 43: Maintenance
Maintenance To get the best performance of the unit, keep your discs, tapes, and mechanism clean. General Notes Handling cassette tapes In general, you will have the best performance by keeping • If the tape is loose in its cassette, your discs and the mechanism clean. -
Page 44: Troubleshooting
Specifications UX-A52R (CA-UXA52R and SP-UXA52) Amplifier General Output Power (IEC 268-3/DIN): Power requirement: AC 230 V , 50 Hz 40 W (20 W + 20 W) at 4 Ω (10 % THD) Power consumption: 45 W (at operation) Audio input sensitivity/Impedance (at 1 kHz) 1.2 W (on standby) - Page 45 VICTOR COMPANY OF JAPAN, LIMITED 1101MWMMDWJEM...
Need help?
Do you have a question about the CA-UXA52R and is the answer not in the manual?
Questions and answers