
Related Manuals for Philips 60P834199


Summary of Contents for Philips 60P834199
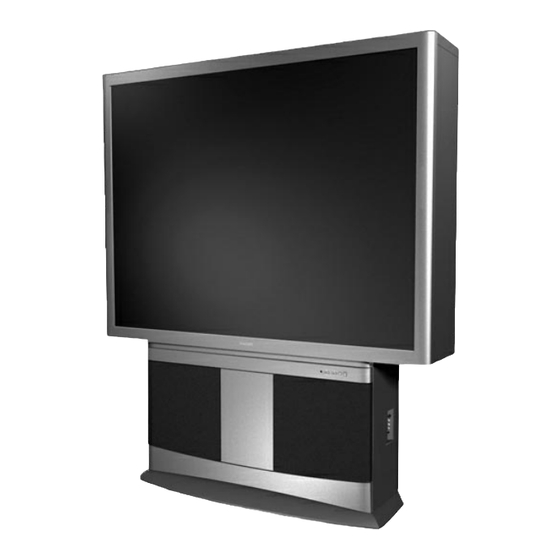
- Page 1 50P8341 55P8341 60P8341 64P8341 50P8342 55P8342 60P8342 64P8342 3135 035 20243 Projection Projection Television Television...
-
Page 2: Etting Tarted Welcome/Product Registration
And we’ll do everything in our power to keep you happy with your purchase for many years to come. As a member of the PHILIPS “family,” you’re entitled to protection by one of the most comprehensive warranties and outstanding service networks in the industry. -
Page 3: Safety Precautions
IMPORTANT SAFETY INSTRUCTIONS Read before operating equipment Read these instructions. Keep these instructions. Heed all warnings. Follow all instructions. Do not use this apparatus near water. Clean only with a dry cloth. Do not block any of the ventilation openings. Install in accordance with the manufacturers instructions. -
Page 4: Table Of Contents
How to Use the Installation Features ..5–7 Television and Remote Control Operation . . .2–3 Connection Options for Accessory Devices . .7–8 AutoChron, AutoPicture, AutoSound, and Incredible Surround are trademarks of Philips Consumer Electronics Company. Copyright © 2001 Philips Consumer Electronics Company. All rights reserved. ASIC... -
Page 5: Features
Audio/Video Jack Panel allows direct connections with VCRs, DVDs, or other accessory devices, providing quality TV picture and sound playback. Audio Volume Leveler (AVL) Control keeps the TV sound at an even level. Peaks and valleys that occur during program changes or commercial breaks are reduced, making for a more consistent, comfortable sound. -
Page 6: Picture Menu
Picture Menu • Adjusting the Picture o adjust your TV picture controls, select a channel and follow these steps. BEGIN Press the MENU/SELECT button on the remote control to show the on- screen menu. Press the CURSOR RING RIGHT. BRIGHTNESS will be highlighted and an adjustment bar will be shown to the right. -
Page 7: Turning On The Dynamic Noise
URNING ON THE YNAMIC ecause of poor cable reception or other difficulties, the picture can sometimes appear slightly “speckled” (an indication of signal noise in the picture). The DNR (Dynamic Noise Reduction) control can help eliminate this type of interference and improve the quality of the picture. -
Page 8: Turning On The Imagemax Control
Picture Menu • The ImageMax Control mageMax helps you sharpen the picture quality by making dark por- tions of the picture darker and light portions of the picture brighter. Follow these steps to turn ImageMax BEGIN Press the MENU/SELECT but- ton on the remote control to show the on-screen menu. -
Page 9: Converge Red/Blue
he influence of magnetic fields and changes in the position of the TV may cause screen colors not to line up properly. The result on your TV screen will be red or blue colors appearing around the edges of images. If various images on the entire picture have red outlines, adjust the CON- VERGE RED control. -
Page 10: Converge Multipoint Red/Blue
Picture Menu • The Convergence Control f various images on the entire pic- ture have red outlines, adjust the CONVERGE RED control. Then if any red outlines remain, adjust the MULTIPOINT RED control. Likewise, if various images on the entire picture have blue outlines, adjust the CONVERGE BLUE con- trol. - Page 11 ONVERGE Press the STATUS/EXIT button to enter the ADJUST mode. Press the CURSOR RING LEFT, RIGHT, UP, or DOWN to adjust the cross image until the color outline is gone. Press the STATUS/EXIT button to return to NAVIGATE mode. Repeat steps 7–10 until all misaligned crosses have been adjusted.
-
Page 12: Undo Multipoint
Picture Menu • The Convergence Control he UNDO MULTIPOINT control allows you to restore the TV’s pic- ture screen to the way it was before you made Multipoint adjustments. BEGIN Press the MENU/SELECT but- ton on the remote control to show the on-screen menu. -
Page 13: Features Menu The Timer Control
our television comes with an on- screen clock. During normal opera- tion, the clock appears on the screen when the STATUS/EXIT button is pressed or if the TIMER DISPLAY control is turned ON. BEGIN Press the MENU/SELECT button on the remote control to show the on- screen menu. -
Page 14: Setting The Start Time
Features Menu • The Timer Control ou can set the TV to turn itself on at a specific time, just as you would an alarm clock. Follow these steps to set the Start Time. BEGIN Press the MENU/SELECT but- ton on the remote control to show the on-screen menu. -
Page 15: Setting The Stop Time
se the START TIME control to set the TV to turn itself on at a specific time (see the previous page). The following steps will guide you in setting the TV to turn itself off. BEGIN Press the MENU/SELECT but- ton on the remote control to show the on-screen menu. -
Page 16: Selecting The Channel
Features Menu • The Timer Control ou can select a specific channel that the television will tune to when the timer turns the set on. Follow these steps to select the chan- nel. BEGIN Press the MENU/SELECT but- ton on the remote control to show the on-screen menu. -
Page 17: Selecting The Tuner
sing the START TIME feature, you can select either TUNER A (ANT[enna] “A”) or TUNER B (PIP ANT[enna] “B”) to be the main sig- nal source when the TV is powered BEGIN Press the MENU/SELECT but- ton on the remote control to show the on-screen menu. -
Page 18: Setting The Activate Control
Features Menu • The Timer Control fter you have set the Time, Start Time, Stop Time, and Start Channel, you must activate the Timer for it to operate. Your options are to set the Timer to work ONCE or DAILY. Set ACTIVATE to OFF if you don’t want to use the Timer. -
Page 19: Constantly Displaying The Time On Screen
ONSTANTLY fter you have set the TV’s clock, you can use your TV to keep up with the time. The TIMER DISPLAY control allows you to permanently dis- play the time in the upper right corner of the screen. BEGIN Press the MENU/SELECT but- ton on the remote control to show the on-screen menu. -
Page 20: Understanding Autolock
Features Menu • The AutoLock Control he AutoLock feature can help par- ents censor what their children watch on TV. AutoLock receives con- tent advisories sent by broadcasters or other program providers. After you program AutoLock, it can respond to the content advisories and block pro- grams that contain content which you may consider objectionable—offensive... -
Page 21: Setting Up The Access Code
ETTING UP THE utoLock allows parents to block channels they think children should not watch. A channel blocked by the AUTOLOCK control cannot be viewed until a correct access code is used to unlock the channel for view- ing. Follow these steps to set up your Access Code. -
Page 22: Blocking Channels
Features Menu • The AutoLock Control fter you have set your personal access code (see the previous page), you are ready to select the channels or program sources you want to block. BEGIN Press the MENU/SELECT but- ton on the remote control to show the on-screen menu. -
Page 23: Blocking By Movie Rating
LOCKING BY fter you have set your personal access code (see page 21), you can block programs by specific movie ratings. BEGIN Press the MENU/SELECT but- ton on the remote control to show the on-screen menu. Press the CURSOR RING DOWN twice to highlight FEA- TURES. -
Page 24: Blocking By Tv Rating
Features Menu • The AutoLock Control ou also can block programs by specific TV ratings. Follow these simple steps. BEGIN Press the MENU/SELECT but- ton on the remote control to show the on-screen menu. Press the CURSOR RING DOWN twice to highlight FEA- TURES. -
Page 25: On Or Off
URNING THE he BLOCKING control can be thought of as the “master switch” for AutoLock. Use it to turn on or off all of the settings you have chosen to block programming. BEGIN Press the MENU/SELECT but- ton on the remote control to show the on-screen menu. -
Page 26: Blocking Unrated Broadcasts
Features Menu • The AutoLock Control n addition to blocking rated pro- grams or channels, you may also choose to block all programming that is unrated. BEGIN Press the MENU/SELECT but- ton on the remote control to show the on-screen menu. Press the CURSOR RING DOWN twice to highlight FEA- TURES. -
Page 27: Blocking Broadcasts That Have No Rating
LOCKING ome programs contain no content advisories from the Motion Picture Association of America or the television broadcasters (see page 20 for more on content advisories and ratings). To block such programs, fol- low these steps. BEGIN Press the MENU/SELECT but- ton on the remote control to show the on-screen menu. -
Page 28: Reviewing Your Settings
Features Menu • The AutoLock Control ou can access a screen that shows your AutoLock settings. BEGIN Press the STATUS/EXIT but- ton on your remote twice. Your AutoLock settings will appear on the screen. NOTE: If you have blocked specific subratings, such as V for Violence in the TV-PG category, these blocked subratings will not appear in the... -
Page 29: Clearing All Blocked Channels
LEARING he CLEAR ALL control will allow you to remove all channel blocks that have been turned on through the BLOCK CHANNEL control. To clear all channel blocks, follow the simple steps below. BEGIN Press the MENU/SELECT but- ton on the remote control to show the on-screen menu. -
Page 30: Using The Closed Captioning Control
Features Menu • The Closed Captioning Control SING THE losed Captioning (CC) allows you to read the voice content of television programs on the TV screen. Designed to help the hearing impaired, this feature uses on-screen text boxes to show dialogue and con- versations while the TV program is in progress. -
Page 31: Sound Menu
DJUSTING THE esides the normal volume level control, your TV also has individ- ual sound-adjustment controls. You can use TREBLE (high frequency), BASS (low frequency), and Speaker BALANCE to further adjust the sound playback of TV programs. BEGIN Press the MENU/SELECT but- ton on the remote control to show the on-screen menu. -
Page 32: Using The Avl (Audio Volume Leveler)
Sound Menu • AVL (Audio Volume Leveler) SING THE ou may have noticed the peaks and valleys of sound that occur between program changes or at com- mercial breaks. The volume levels often vary considerably. By turning ON the AVL (Audio Volume Leveler) control, you can make your TV pro- duce a more consistent volume level. -
Page 33: Using Incredible Surround
SING he Incredible Surround feature will boost the TV’s sound by mak- ing it broader and fuller. Set the INCREDIBLE SURROUND control to INCREDIBLE SURROUND to enhance stereo programs. Or set the INCREDIBLE SURROUND control to SPATIAL to give a “surround” effect to mono programs. -
Page 34: Setting The Tv For Stereo And Sap
Sound Menu • Stereo and SAP (Second Audio Program) ETTING THE TEREO ou can enjoy stereo programs on your TV. It has both an amplifier and twin speakers through which stereo sound can be heard. Follow these steps to select the STEREO mode. -
Page 35: Setting The Audio Out Control
ETTING THE f you have connected the TV’s AUDIO OUTPUT jacks to the AUDIO INPUT jacks on a stereo receiver, set AUDIO OUT to either VARIABLE or FIXED to determine whether you adjust the volume at the at the TV or at the stereo. If you select VARIABLE, change the volume at the TV using the TV’s remote control. -
Page 36: Using The Tv Speaker Control And Audio Outputs
Sound Menu • The TV Speaker Control and Audio Outputs SING THE ould you like to hear TV pro- grams through your audio hi- fi system? The TV’s Audio Outputs and SPEAKERS ON/OFF control work together to offer you this TV sound option. -
Page 37: Using The Bass Boost Control
SING THE he BASS BOOST control allows you to increase the low-frequency range of the TV’s sound. This creates a deeper, fuller sound. Follow these steps to turn BASS BOOST ON. BEGIN Press MENU/SELECT button on the remote control to show the on- screen menu. -
Page 38: Remote Control
Remote Control • AutoPicture hether you’re watching a movie or playing a video game, your TV has automatic video control set- tings that will match with your current program source or content. AutoPicture quickly resets your TV’s video controls for a number of differ- ent types of programs and viewing conditions that you may have in your home. -
Page 39: Using Autosound
utoSound allows you to select from three factory-set controls and a personal control that you set according to your own preferences through the on-screen Sound menu. The three factory-set controls (Voice, Music, and Theatre) enable you to tailor the TV sound so as to enhance the particular program you are watching. -
Page 40: Using Surf, Alternate Channel, And Program List
Remote Control • Surf, Alternate Channel, and Program List SING list of previously viewed channels can be selected with the SURF button on your remote control. With SURF, you can easily switch between different TV channels that currently interest you. The SURF control allows you to set up to ten channels in its quick viewing list. -
Page 41: Using The Sleep Timer Control
SING THE ave you ever fallen asleep in front of the TV, only to be awak- ened in the middle of the night by the screeching sound that accompanies the on-screen test pattern of a station that’s signed off? Your TV can enable you to avoid that discomfort by auto- matically turning itself off. -
Page 42: Using The Volume Buttons
Remote Control • The Volume Buttons ress the VOL(ume) (+, –) buttons on the remote and the volume adjustment bar will appear on screen and move to illustrate the adjustments you make. BEGIN Press the VOL(ume) (+,–) but- tons on the remote control to show the VOLUME bar display on the screen. -
Page 43: Using The Av Button
he AV button on your remote con- trol allows you to choose from among the signal sources you have connected to your TV. The possibili- ties are TUNER-A (the ANT[enna] “A” input), TUNER-B (the PIP ANT[enna] “B” input), AV 1, CVI, AV 2, and AV 3 (your TV’s side inputs). - Page 44 Remote Control • Working Accessory Devices ETTING THE our TV remote is capable of work- ing not only your TV but also infrared remote (IR) controlled devices such as VCRs, cable TV con- verter boxes, satellite receivers, DVD players, and laser disc players. If you want to use your TV remote to operate a VCR or other accessory device, you will need to perform this...
-
Page 45: Setting The Tv Remote To Work Accessory Devices
TV R ETTING THE DIRECT ACCESS METHOD ow that you have looked up the three-digit Remote Control Direct Entry Code for your brand of acces- sory device, you are ready to follow the simple steps shown below. Please read through all the steps before beginning. - Page 46 TV R ETTING THE SEARCH METHOD our TV remote can be set to work various accessory devices (VCRs, cable converters, and satellite receivers, for example) by what is called the Search Method. NOTE: The Search Method works only with devices equipped with Channel Display Indicators or that capability.
- Page 47 Philco ..... .062, 236, 506 Philips ..108, 062, 089, 137, 830, 831 Pilot .
- Page 48 Panasonic ......859 Philips ......866, 860 Pioneer .
-
Page 49: Picture
SING icture-In-Picture (PIP) is the show- ing of two pictures on the TV screen at the same time (one main screen pic- ture and one small picture, or PIP). This TV has two separate inputs (ANT[enna] “A” and PIP ANT[enna] “B”) for your home’s Antenna and/or Cable TV system signals. -
Page 50: Selecting The Pip Signal Source
Picture-in-Picture (PIP) • Selecting the Signal Source ow that you have completed at least a basic connection (as shown on the previous page), you are ready to use PIP. Plug in the TV and turn it on. Press the PIP button on the remote control. -
Page 51: Using The Pip Remote Control Buttons
SING THE ollow these steps to practice using the PIP buttons. You can change the size of the PIP window, reposition it, freeze its image, or swap its picture with the main picture. BEGIN Press the PIP ON/OFF button to show the PIP window. -
Page 52: Adjusting The Pip Color And Tint Controls
Picture-in-Picture (PIP) • The Color and Tint Controls DJUSTING THE he Picture-in-Picture (PIP) COLOR and TINT controls allow you to make fine-tune adjustments to the PIP picture settings. BEGIN Press the MENU/SELECT but- ton on the remote control to show the on-screen menu. -
Page 53: General Information
SING Cable Box/DBS • VCR • TV ere is an example of how you can make a cable box • VCR • TV connection. . BEGIN Connect a cable TV signal to a two-way signal splitter. Connect an RF coaxial cable to each of the two output plugs on the two-way signal splitter. -
Page 54: Using Connection Options
General Information • Using Connection Options Cable Box • VCR • DVD he example presented here includes the connection of a DVD or other accessory device to the Component Video inputs (labeled Y, Pb, Pr) on the back of the TV. Component Video provides you with the best possible color and picture resolution. -
Page 55: Helpful Hints
If you are having difficulties with your product, check this list of difficulties and possible solutions before requesting service. You may be able to solve the problem yourself. Charges for TV installation and adjustment of customer controls are not covered under your warranty. -
Page 56: Glossary Of Television Terms
General Information • Glossary Audio/Video Inputs ¥ Connectors (RCA phono-type plug), located on the back of the TV, used for the input of audio and video signals. These inputs are designed for use with VCRs (or other accessories) to receive higher picture resolution and offer sound-connection options. -
Page 57: Index
alternate channel ........40 antenna hookup ......*S-1, 49 audio out control . -
Page 58: Limited Warranty
RENEWED 90 DAY LIMITED WARRANTY...
Need help?
Do you have a question about the 60P834199 and is the answer not in the manual?
Questions and answers