Samsung LN-R268WH Service Manual
Tft-lcd tv/monitor chassis grt26ku, grt32ku
Hide thumbs
Also See for LN-R268WH:
- Owner's instructions manual (89 pages) ,
- Owner's instructions manual (258 pages) ,
- Manual de instrucciones (88 pages)
Advertisement
Quick Links
SERVICE
TFT-LCD TV/MONITOR
TFT-LCD TV/MONITOR
Chassis
GRT26KU
GRT32KU
Manual
1. Precautions
2. Product Specifications
3. Disassembly & Reassembly
4. Alignment & Adjustments
5. Troubleshooting
6. Exploded View & Parts List
7. Parts List
8. Block Diagram
9. Wiring Diagram
10. PCB Layout
11. Schematic Diagrams
12. Panel Description
Model
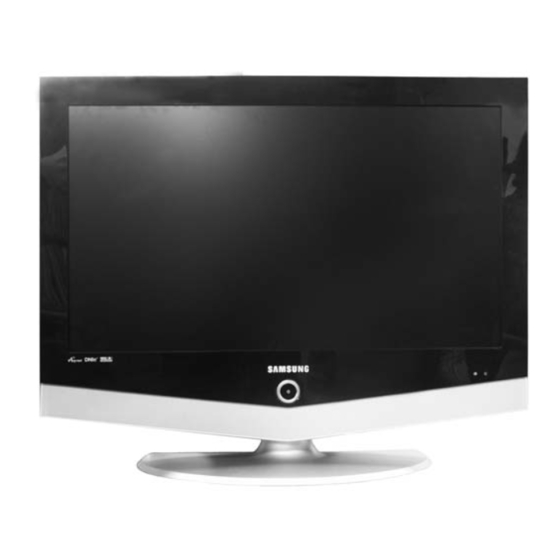
LN-R268WH
LN-R328WH
LN-32R51BH
CONTENTS
Advertisement

Related Manuals for Samsung LN-R268WH


Summary of Contents for Samsung LN-R268WH
- Page 1 TFT-LCD TV/MONITOR Chassis Model GRT26KU LN-R268WH GRT32KU LN-R328WH LN-32R51BH SERVICE Manual TFT-LCD TV/MONITOR CONTENTS 1. Precautions 2. Product Specifications 3. Disassembly & Reassembly 4. Alignment & Adjustments 5. Troubleshooting 6. Exploded View & Parts List 7. Parts List 8. Block Diagram 9.
- Page 2 Samsung Electronics Co.,Ltd. - This Service Manual is a property of 416, Maetan-3Dong, Yeongtong-Gu, Suwon City, Gyeonggi-Do, Samsung Electronics Co., Ltd. Korea, 443-742 Any unauthorized use of Manual can be Printed in Korea punished under applicable International P/N : BN82-00128G-00 and/or domestic law.
- Page 3 4 Alignments and Adjustments 4 Alignments and Adjustments 4-1 General Alignment Instuction 1. Usually, a color LCD-TV needs only slight touch-up adjustment upon installation. Check the basic characteristics such as height, horizontal and vertical sync. 2. Use the specified test equipment or its equivalent. 3.
- Page 4 4 Alignments and Adjustments 4-2 Factory Mode Adjustments 4-2-1 Entering Factory Mode 1. To enter Service Mode Press the remote -control keys in this sequence : - If you do not have Factory remote - control 4-2-2 PANEL CHECK LCD Panel Mark Specially for LNR328WHX, You have to check Panel Maker Because of different adjustments as follows.
- Page 5 4 Alignments and Adjustments 4-2-3 Factory Mode Tree...
- Page 6 4 Alignments and Adjustments...
- Page 7 4 Alignments and Adjustments...
- Page 8 4 Alignments and Adjustments...
- Page 9 4 Alignments and Adjustments 4-3 White Balance - Calibration 4-3-1 White Balance - Adjustment...
- Page 10 4 Alignments and Adjustments 4-3-2 Conditions for Measurement 1. On the basis of toshiba ABL pattern : High Light level (57 IRE) - INPUT SIGNAL GENERATOR : MSPG-925LTH * Mode NO 1 : 744X484@60 Hz 6 : 1280X720@60 Hz NO 21 : 1024X768@60 Hz * Pattern NO 36 : 16 Color Pattern NO 16 : Toshiba ABL Pattern 2.
- Page 11 4 Alignments and Adjustments c) Adjust the low light. (Refer to table 1, 2 in adjustment position by mode) - Adjust sub - Brightness to set the ’Y’ value. - Adjust red offset (’x’) and blue offset (’y’) to the color coordinates. * Do not adjust green offset data.
- Page 12 4 Alignments and Adjustments 4-4 Flash ROM Update 1. Installthe Flash Downloader ConnectSet(Service Jack)and Jig Cable to execute Program Update. 2. Flash Downloader program update -Before Turning on the set,Click "connect"which is under of OSD Screen! -Turn on the Set. 3.Open the New Update File and Click the Program and Verify.
- Page 13 8 Block Diagrams 8 Block Diagram - This Document can not be used without Samsung s authorization.
- Page 14 8 Block Diagrams Memo...
- Page 15 3 Disassembly and Reassembly 3 Disassembly and Reassembly This section of the service manual describes the disassembly and reassembly procedures for the LN-R268WH/ LN-R328WH/LN32R51BH LCD TV. WARNING: This monitor contains electrostatically sensitive devices. Use caution when handling these components. (ONLY LNR328WHX)Check the connector of POWER BOARD which are CNI 801, 802.
- Page 16 3 Disassembly and Reassembly 5. Lift up the main board. Remove 6 screws. 6. lift up the stand BRKT. 7. Remove 9 screws from the shield and lift up the shield panel. 8. Remove 4 screws from the shield and lift up the BRKT.
- Page 17 3 Disassembly and Reassembly 3-2 LN-R328WH / LN32R51BH Disassembly 1. Place LCD TV face down on cushioned table. Remove 14 screws from the rear cover. Lift up the rear cover. 2. Remove 3 screws from the Jack cover. Remove 12 screws from The board. Disconnect speaker cable, function cable LVDS cable and lift up the main board and power board.
- Page 18 3 Disassembly and Reassembly 3-3 Reassembly Reassembly procedures are in the reverse order of dissasembly procedures.
- Page 19 7 Electrical Parts List 7 Electrical Parts List -You can search for updated part codes through ITSELF web site. URL : http://itself.sec.samsung.co.kr/ 7-1 LNR238WHX/XAA Parts list Level Loc. No. Code No. Description & Specification SA/SNA LNR238WHX/XAA LN-R238WH,A21G/23A80-GRE,23,LCD-TV,UNITE M0002 BN90-00695A ASSY COVER REAR;RE23UO S.N.A...
- Page 20 7 Electrical Parts List Level Loc. No. Code No. Description & Specification SA/SNA M0081 6003-001003 SCREW-TAPTITE;BH,+,B,M4,L12,ZPC(BLK),SWR S.N.A M0081 6003-001003 SCREW-TAPTITE;BH,+,B,M4,L12,ZPC(BLK),SWR S.N.A M0081 6003-001003 SCREW-TAPTITE;BH,+,B,M4,L12,ZPC(BLK),SWR S.N.A T0562 6046-001013 STAND OFF;M3,L5,Ni PLT,SUM24L,#4-40 S.N.A M2893 BN39-00588C LEAD CONNECTOR;SO40UO,UL20276#30,30P,200 M2893 BN39-00603D LEAD CONNECTOR;RE26**,UL1007#26,14P,100m M2893 BN39-00616A LEAD CONNECTOR;RE26*,UL2835#28,12/15P,30 BN61-01523A...
- Page 21 7 Electrical Parts List Level Loc. No. Code No. Description & Specification SA/SNA ..4 D950 0401-001056 DIODE-SWITCHING;MMBD4148SE,100V,200MA,SO ..4 D951 0401-001056 DIODE-SWITCHING;MMBD4148SE,100V,200MA,SO ..4 D952 0401-001056 DIODE-SWITCHING;MMBD4148SE,100V,200MA,SO ..4 D953 0401-001056 DIODE-SWITCHING;MMBD4148SE,100V,200MA,SO ..4 D954 0401-001056 DIODE-SWITCHING;MMBD4148SE,100V,200MA,SO ..4 D955 0401-001056 DIODE-SWITCHING;MMBD4148SE,100V,200MA,SO ..4 D956 0401-001056 DIODE-SWITCHING;MMBD4148SE,100V,200MA,SO ..4 D957...
- Page 22 7 Electrical Parts List 7-2 Others Level Loc. No. Code No. Description & Specification SA/SNA ..4 D752 0403-001052 DIODE-ZENER;RD8.2MB,7.7-8.7V,200MW,SOT-2 ..4 D7551 0403-001052 DIODE-ZENER;RD8.2MB,7.7-8.7V,200MW,SOT-2 ..4 D7552 0403-001052 DIODE-ZENER;RD8.2MB,7.7-8.7V,200MW,SOT-2 ..4 D7553 0403-001052 DIODE-ZENER;RD8.2MB,7.7-8.7V,200MW,SOT-2 ..4 D756 0403-001052 DIODE-ZENER;RD8.2MB,7.7-8.7V,200MW,SOT-2 ..4 D758 0403-001052 DIODE-ZENER;RD8.2MB,7.7-8.7V,200MW,SOT-2 ..4 D759 0403-001052 DIODE-ZENER;RD8.2MB,7.7-8.7V,200MW,SOT-2...
- Page 23 7 Electrical Parts List Level Loc. No. Code No. Description & Specification SA/SNA ..4 Q216 0501-002080 TR-SMALL SIGNAL;2SC2412K,NPN,200mW,SC-59 ..4 Q610 0501-002080 TR-SMALL SIGNAL;2SC2412K,NPN,200mW,SC-59 ..4 Q620 0501-002080 TR-SMALL SIGNAL;2SC2412K,NPN,200mW,SC-59 ..4 Q801 0501-002080 TR-SMALL SIGNAL;2SC2412K,NPN,200mW,SC-59 ..4 Q802 0501-002080 TR-SMALL SIGNAL;2SC2412K,NPN,200mW,SC-59 ..4 Q803 0501-002080 TR-SMALL SIGNAL;2SC2412K,NPN,200mW,SC-59 ..4...
- Page 24 7 Electrical Parts List Level Loc. No. Code No. Description & Specification SA/SNA ..4 R965 2007-000052 R-CHIP;10Kohm,1%,1/10W,TP,1608 ..4 R966 2007-000052 R-CHIP;10Kohm,1%,1/10W,TP,1608 ..4 R9661 2007-000052 R-CHIP;10Kohm,1%,1/10W,TP,1608 ..4 R9662 2007-000052 R-CHIP;10Kohm,1%,1/10W,TP,1608 ..4 R121 2007-000060 R-CHIP;100Kohm,1%,1/10W,TP,1608 ..4 2007-000070 R-CHIP;0ohm,5%,1/10W,TP,1608 ..4 HOTEL 2007-000070 R-CHIP;0ohm,5%,1/10W,TP,1608 ..4 R2008_OP 2007-000070...
- Page 25 7 Electrical Parts List Level Loc. No. Code No. Description & Specification SA/SNA ..4 R9207 2007-000070 R-CHIP;0ohm,5%,1/10W,TP,1608 ..4 R9208_NT 2007-000070 R-CHIP;0ohm,5%,1/10W,TP,1608 ..4 R9209 2007-000070 R-CHIP;0ohm,5%,1/10W,TP,1608 ..4 R9215 2007-000070 R-CHIP;0ohm,5%,1/10W,TP,1608 ..4 R9217 2007-000070 R-CHIP;0ohm,5%,1/10W,TP,1608 ..4 R9218 2007-000070 R-CHIP;0ohm,5%,1/10W,TP,1608 ..4 R923 2007-000070 R-CHIP;0ohm,5%,1/10W,TP,1608 ..4 R9330...
- Page 26 7 Electrical Parts List Level Loc. No. Code No. Description & Specification SA/SNA ..4 R270 2007-000074 R-CHIP;100ohm,5%,1/10W,TP,1608 ..4 R271 2007-000074 R-CHIP;100ohm,5%,1/10W,TP,1608 ..4 R272 2007-000074 R-CHIP;100ohm,5%,1/10W,TP,1608 ..4 R273 2007-000074 R-CHIP;100ohm,5%,1/10W,TP,1608 ..4 R334 2007-000074 R-CHIP;100ohm,5%,1/10W,TP,1608 ..4 R613 2007-000074 R-CHIP;100ohm,5%,1/10W,TP,1608 ..4 R614 2007-000074 R-CHIP;100ohm,5%,1/10W,TP,1608 ..4 R618...
- Page 27 7 Electrical Parts List Level Loc. No. Code No. Description & Specification SA/SNA ..4 R7130_NT 2007-000077 R-CHIP;470ohm,5%,1/10W,TP,1608 ..4 R7131_NT 2007-000077 R-CHIP;470ohm,5%,1/10W,TP,1608 ..4 R729_NT 2007-000077 R-CHIP;470ohm,5%,1/10W,TP,1608 ..4 R730_NT 2007-000077 R-CHIP;470ohm,5%,1/10W,TP,1608 ..4 R7582 2007-000077 R-CHIP;470ohm,5%,1/10W,TP,1608 ..4 R7588 2007-000077 R-CHIP;470ohm,5%,1/10W,TP,1608 ..4 R7620_NT 2007-000077 R-CHIP;470ohm,5%,1/10W,TP,1608 ..4 R7621_NT...
- Page 28 7 Electrical Parts List Level Loc. No. Code No. Description & Specification SA/SNA ..4 R657 2007-000084 R-CHIP;4.7Kohm,5%,1/10W,TP,1608 ..4 R810 2007-000084 R-CHIP;4.7Kohm,5%,1/10W,TP,1608 ..4 R9109_EU 2007-000084 R-CHIP;4.7Kohm,5%,1/10W,TP,1608 ..4 R9118 2007-000084 R-CHIP;4.7Kohm,5%,1/10W,TP,1608 ..4 R9132 2007-000084 R-CHIP;4.7Kohm,5%,1/10W,TP,1608 ..4 R917 2007-000084 R-CHIP;4.7Kohm,5%,1/10W,TP,1608 ..4 R9187 2007-000084 R-CHIP;4.7Kohm,5%,1/10W,TP,1608 ..4 R9213...
- Page 29 7 Electrical Parts List Level Loc. No. Code No. Description & Specification SA/SNA ..4 R621 2007-000093 R-CHIP;20Kohm,5%,1/10W,TP,1608 ..4 R622 2007-000093 R-CHIP;20Kohm,5%,1/10W,TP,1608 ..4 R191 2007-000094 R-CHIP;22Kohm,5%,1/10W,TP,1608 ..4 R9337 2007-000094 R-CHIP;22Kohm,5%,1/10W,TP,1608 ..4 R110 2007-000097 R-CHIP;47Kohm,5%,1/10W,TP,1608 ..4 R111 2007-000097 R-CHIP;47Kohm,5%,1/10W,TP,1608 ..4 R633 2007-000097 R-CHIP;47Kohm,5%,1/10W,TP,1608 ..4 R634...
- Page 30 7 Electrical Parts List Level Loc. No. Code No. Description & Specification SA/SNA ..4 R7133 2007-000293 R-CHIP;100ohm,5%,1/4W,TP,3216 ..4 R7134 2007-000293 R-CHIP;100ohm,5%,1/4W,TP,3216 ..4 R721 2007-000293 R-CHIP;100ohm,5%,1/4W,TP,3216 ..4 R722 2007-000293 R-CHIP;100ohm,5%,1/4W,TP,3216 ..4 R726_NT 2007-000293 R-CHIP;100ohm,5%,1/4W,TP,3216 ..4 R728_NT 2007-000293 R-CHIP;100ohm,5%,1/4W,TP,3216 ..4 R731_NT 2007-000293 R-CHIP;100ohm,5%,1/4W,TP,3216 ..4 R3111...
- Page 31 7 Electrical Parts List Level Loc. No. Code No. Description & Specification SA/SNA ..4 R7592 2007-001164 R-CHIP;75ohm,1%,1/10W,TP,1608 ..4 R770 2007-001164 R-CHIP;75ohm,1%,1/10W,TP,1608 ..4 R771 2007-001164 R-CHIP;75ohm,1%,1/10W,TP,1608 ..4 R7788 2007-001164 R-CHIP;75ohm,1%,1/10W,TP,1608 ..4 R7789 2007-001164 R-CHIP;75ohm,1%,1/10W,TP,1608 ..4 R352 2007-001167 R-CHIP;75ohm,5%,1/10W,TP,1608 ..4 R353 2007-001167 R-CHIP;75ohm,5%,1/10W,TP,1608 ..4 R354...
- Page 32 7 Electrical Parts List Level Loc. No. Code No. Description & Specification SA/SNA ..4 C105 2203-000189 C-CER,CHIP;100nF,+80-20%,25V,Y5V,1608 ..4 C120 2203-000189 C-CER,CHIP;100nF,+80-20%,25V,Y5V,1608 ..4 C2061 2203-000189 C-CER,CHIP;100nF,+80-20%,25V,Y5V,1608 ..4 C2065 2203-000189 C-CER,CHIP;100nF,+80-20%,25V,Y5V,1608 ..4 C2102 2203-000189 C-CER,CHIP;100nF,+80-20%,25V,Y5V,1608 ..4 C2104 2203-000189 C-CER,CHIP;100nF,+80-20%,25V,Y5V,1608 ..4 C2106 2203-000189 C-CER,CHIP;100nF,+80-20%,25V,Y5V,1608 ..4 C224...
- Page 33 7 Electrical Parts List Level Loc. No. Code No. Description & Specification SA/SNA ..4 C357 2203-000189 C-CER,CHIP;100nF,+80-20%,25V,Y5V,1608 ..4 C359 2203-000189 C-CER,CHIP;100nF,+80-20%,25V,Y5V,1608 ..4 C380 2203-000189 C-CER,CHIP;100nF,+80-20%,25V,Y5V,1608 ..4 C383 2203-000189 C-CER,CHIP;100nF,+80-20%,25V,Y5V,1608 ..4 C385 2203-000189 C-CER,CHIP;100nF,+80-20%,25V,Y5V,1608 ..4 C389 2203-000189 C-CER,CHIP;100nF,+80-20%,25V,Y5V,1608 ..4 C630 2203-000189 C-CER,CHIP;100nF,+80-20%,25V,Y5V,1608 ..4 C649...
- Page 34 7 Electrical Parts List Level Loc. No. Code No. Description & Specification SA/SNA ..4 C803 2203-000257 C-CER,CHIP;10nF,10%,50V,X7R,1608 ..4 C806 2203-000257 C-CER,CHIP;10nF,10%,50V,X7R,1608 ..4 C809 2203-000257 C-CER,CHIP;10nF,10%,50V,X7R,1608 ..4 C812 2203-000257 C-CER,CHIP;10nF,10%,50V,X7R,1608 ..4 C819 2203-000257 C-CER,CHIP;10nF,10%,50V,X7R,1608 ..4 C838 2203-000257 C-CER,CHIP;10nF,10%,50V,X7R,1608 ..4 C854 2203-000257 C-CER,CHIP;10nF,10%,50V,X7R,1608 ..4 C869...
- Page 35 7 Electrical Parts List Level Loc. No. Code No. Description & Specification SA/SNA ..4 C110 2203-000888 C-CER,CHIP;4.7nF,10%,50V,X7R,1608 ..4 C218 2203-000888 C-CER,CHIP;4.7nF,10%,50V,X7R,1608 ..4 C219 2203-000888 C-CER,CHIP;4.7nF,10%,50V,X7R,1608 ..4 C324 2203-000888 C-CER,CHIP;4.7nF,10%,50V,X7R,1608 ..4 C335 2203-000888 C-CER,CHIP;4.7nF,10%,50V,X7R,1608 ..4 C633 2203-000888 C-CER,CHIP;4.7nF,10%,50V,X7R,1608 ..4 C634 2203-000888 C-CER,CHIP;4.7nF,10%,50V,X7R,1608 ..4 C107...
- Page 36 7 Electrical Parts List 7-2 Others Level Loc. No. Code No. Description & Specification SA/SNA ..4 C394 2203-005005 C-CER,CHIP;100nF,10%,16V,X7R,1608 ..4 C609 2203-005005 C-CER,CHIP;100nF,10%,16V,X7R,1608 ..4 C632 2203-005005 C-CER,CHIP;100nF,10%,16V,X7R,1608 ..4 C647 2203-005005 C-CER,CHIP;100nF,10%,16V,X7R,1608 ..4 C679 2203-005005 C-CER,CHIP;100nF,10%,16V,X7R,1608 ..4 C816 2203-005005 C-CER,CHIP;100nF,10%,16V,X7R,1608 ..4 C823 2203-005005 C-CER,CHIP;100nF,10%,16V,X7R,1608...
- Page 37 7 Electrical Parts List Level Loc. No. Code No. Description & Specification SA/SNA ..4 C674 2203-006036 C-CER,CHIP;680NF,+80-20%,16V,Y5V,TP,1608 ..4 C678 2203-006036 C-CER,CHIP;680NF,+80-20%,16V,Y5V,TP,1608 ..4 C738 2402-000108 C-AL,SMD;10uF,20%,16V,WT,TP,4.3x4.3x5.2m ..4 C670 2402-001081 C-AL,SMD;100uF,20%,25V,WT,TP,8.3x8.3x10 ..4 C688 2402-001081 C-AL,SMD;100uF,20%,25V,WT,TP,8.3x8.3x10 ..4 C801 2402-001081 C-AL,SMD;100uF,20%,25V,WT,TP,8.3x8.3x10 ..4 C817 2402-001081 C-AL,SMD;100uF,20%,25V,WT,TP,8.3x8.3x10 ..4 C836...
- Page 38 7 Electrical Parts List Level Loc. No. Code No. Description & Specification SA/SNA ..4 C631 2402-001178 C-AL,SMD;10uF,20%,16V,WT,TP,4.3x4.3x5.8m ..4 C645 2402-001178 C-AL,SMD;10uF,20%,16V,WT,TP,4.3x4.3x5.8m ..4 C650 2402-001178 C-AL,SMD;10uF,20%,16V,WT,TP,4.3x4.3x5.8m ..4 C651 2402-001178 C-AL,SMD;10uF,20%,16V,WT,TP,4.3x4.3x5.8m ..4 C652 2402-001178 C-AL,SMD;10uF,20%,16V,WT,TP,4.3x4.3x5.8m ..4 C653 2402-001178 C-AL,SMD;10uF,20%,16V,WT,TP,4.3x4.3x5.8m ..4 C7766 2402-001178 C-AL,SMD;10uF,20%,16V,WT,TP,4.3x4.3x5.8m ..4 C839...
- Page 39 7 Electrical Parts List Level Loc. No. Code No. Description & Specification SA/SNA ..4 C7767 2402-001257 C-AL,SMD;470uF,20%,16V,-,TP,8.3*10 ..4 C847 2409-001029 C-ORGANIC;120uF,20%,6.3V,WT,TP,10.3x10.3 ..4 CA392 2503-001018 C-NETWORK;15PFX4,10%,50V,- ..4 CA393 2503-001018 C-NETWORK;15PFX4,10%,50V,- ..4 CA394 2503-001018 C-NETWORK;15PFX4,10%,50V,- ..4 CA395 2503-001018 C-NETWORK;15PFX4,10%,50V,- ..4 CA396 2503-001018 C-NETWORK;15PFX4,10%,50V,- ..4 CA397...
- Page 40 7 Electrical Parts List Level Loc. No. Code No. Description & Specification SA/SNA ..4 T0568 3301-001145 BEAD-SMD;60OHM,4516,6000,TP,70OHM/45MHZ, S.N.A ..4 T0568 3301-001145 BEAD-SMD;60OHM,4516,6000,TP,70OHM/45MHZ, S.N.A ..4 T0568 3301-001145 BEAD-SMD;60OHM,4516,6000,TP,70OHM/45MHZ, S.N.A ..4 T0568 3301-001145 BEAD-SMD;60OHM,4516,6000,TP,70OHM/45MHZ, S.N.A ..4 T0568 3301-001145 BEAD-SMD;60OHM,4516,6000,TP,70OHM/45MHZ, S.N.A ..4 T0568 3301-001145 BEAD-SMD;60OHM,4516,6000,TP,70OHM/45MHZ, S.N.A...
- Page 41 7 Electrical Parts List Level Loc. No. Code No. Description & Specification SA/SNA T0376 6902-000379 BAG AIR;LDPE,T0.2,W1000,L1800,TRP,-,-- 0.004 S.N.A T0524 6902-000520 BAG PE;HDPE/NITRON(DOUBLE),T0.015/T0.5(D S.N.A 6902-000604 BAG WRAPPING;LDPE,T0.02,W500,L10000,TRP, S.N.A M0003 BN92-01296V ASSY BOX;LNR238WHX/XAA S.N.A BN69-00955A BOX-01,SET;RE23UO,SW4,A,YEL,A1,668,567,2 1.02 S.N.A M0045 BN92-01498C ASSY ACCESSORY;LNR328WHX/XAA S.N.A M0045 BN96-02327A...
- Page 42 6 Exploded View & Parts List 6 Exploded View and Parts List - You can search for updated part codes through ITSELF web site. URL : http://itself.sec.samsung.co.kr/ 6-1 LN-R268WH...
- Page 43 6 Exploded View & Parts List...
- Page 44 6 Exploded View & Parts List 6-2 LN-R328W / LN32R51BH...
- Page 45 6 Exploded View & Parts List...
- Page 46 12 Panel Description 12 Panel Description Maker VENDOR P/N PANEL_CODE PANEL_ABB STICKER_CODE Remarks LT140X1-002 BN07-00004A BN68-00239H LT150XS-L01 BN07-00009A LT150XS-L01-B BN07-00022A LTM150XS-L02 BN07-00005A LT181E2-132 BN07-00001A LT150XS-T01 BN07-00010A LTM181E3-132 BN07-00019A LT170E2-131 BN07-10001D LT181E2-131 BN07-10001E LTM170E4-L01 BN07-00018A LTM240W1-L01 BN07-00015A LTM213U3-L01 BN07-00016A LTM150XH-L01 BN07-00026A LTM150XH-L03 BN07-00027A LTM150XS-L01...
- Page 47 12 Panel Description Maker VENDOR P/N PANEL_CODE PANEL_ABB STICKER_CODE Remarks LTM150XH-L06 BN07-00117A "ZPD Panel code" LTM153W1-L01 BN07-00118A "ZPD Panel code" LTM170WP-L01 BN07-00119A "PVA Panel for NIKE" LTM213U4-L01 BN07-00039A 21.3" NARROW LTA260W1-L01 BN07-00121A VENUS LTA220W1-L01 BN07-00074B "Panel B-level panel code for 22"" TV Panel " LTA320W1-L01 BN07-00108A "Panel for AMLCD 32""...
- Page 48 12 Panel Description Maker VENDOR P/N PANEL_CODE PANEL_ABB STICKER_CODE Remarks CLAA170EA07 BN07-00174A "CPT 17"" PSWG panel code derivation? CLAA170EA07 BN07-00174B CPT 17"""" PSWG type new Panel code""" CLAA170EA07 BN07-00174B CPT 17" PSWG type new Panel code TOSHIBA LTM15C419(A) BN07-00002A TOSHIBA LTM15C423(B) BN07-00006A TOSHIBA...
- Page 49 12 Panel Description Maker VENDOR P/N PANEL_CODE PANEL_ABB STICKER_CODE Remarks HYUNDAI HT17E11-200 BN07-00049A TN MODE HYUNDAI HT17E11-300 BN07-00093A HT17E11-300 ZPD panel HYUNDAI HT17E11-400 BN07-00094A HT17E11-400 normal panel HYUNDAI HT17E11-400 BN07-00095A HT17E11-400 ZPD panel code HYUNDAI HT17E12 BN07-00096A HT17E12 ( Narow & slim Design ) HYUNDAI HT17E12 BN07-00105A...
- Page 50 10 PCB Layout 10 PCB Layout 10-1 Main PCB Layout 10-1...
- Page 51 10 PCB Layout Loc. No. Description Loc. No. Description Loc. No. Description Loc. No. Description Loc. No. Description DIODE Q1212_EU TR-SMALL SIGNAL 186.8 123.6 D723 DIODE-ZENER 106.4 24.0 D772 DIODE-ZENER 129.2 93.6 D990 DIODE-ZENER 44.8 Q211 TR-SMALL SIGNAL 50.8 185.6 D724 DIODE-ZENER 117.6...
- Page 52 1 Precautions 1 Precautions Follow these safety, servicing and ESD precautions to prevent damage and to protect against potential hazards such as electrical shock. 1-1 Safety Precautions 1-1-1 Warnings For continued safety, do not attempt to modify the circuit board. Disconnect the AC power and DC power jack before servicing.
- Page 53 1 Precautions 1-2 Servicing Precautions WARNING: An electrolytic capacitor installed with the wrong polarity might explode. Caution: Before servicing units covered by this service manual, read and follow the Safety Precautions section of this manual. Note: If unforeseen circumstances create conflict between the following servicing precautions and any of the safety precautions, always follow the safety precautions.
- Page 54 1 Precautions 1-4 Installation Precautions 1. For safety reasons, more than two people are 6. Keep the antenna far away from any high-voltage required for carrying the product. cables and install it firmly. Contact with the highvoltage cable or the antenna falling over may 2.
- Page 55 1 Precautions Memo...
- Page 56 2 Product Specifications 2 Product Specifications 2-1 LN-R268WH Specifications Item Description LCD Panel TFT-LCD panel, RGB vertical stripe, normaly white, 26-Inch viewable, 0.4215 (H) x 0.4215(V)mm pixel pitch Scanning Frequency Horizontal : 30 kHz ~ 61 kHz (Automatic) Vertical : 60 Hz ~ 75 Hz (Automatic) Display Colors 16.7 Million colors...
- Page 57 2 Product Specifications 2-2 LN-R328WH / LN32R51BH Specifications Description Item LCD Panel TFT-LCD panel, RGB vertical stripe, normaly white, 32-Inch viewable, 0.511 (H) x 0.511(V)mm pixel pitch Scanning Frequency Horizontal : 30 kHz ~ 61 kHz (Automatic) Vertical : 60 Hz ~ 75 Hz (Automatic) Display Colors 16.7 Million colors Maximum Resolution...
- Page 58 2 Product Specifications 2-3 Pin Assignments 2-3-1 HDMI Type A pin Singnal Name Wire TMDS Data2+ TMDS Signal wire TMDS Data2 Shield TMDS Shield TMDS Data2- TMDS Signal wire TMDS Data1+ TMDS Signal wire TMDS Data2 Shield TMDS Shield TMDS Data1- TMDS Signal wire TMDS Data0+ TMDS Signal wire...
- Page 59 2 Product Specifications 2-3-2 Component 1, 2 2-3-3 S-Video Separate RCA Green Pb (Cb) RCA Blue Pr (Cr) RCA Red Audio L RCA White Audio R RCA Red 2-3-4 A/V RCA Yellow CVBS Audio L RCA White Audio R RCA Red...
- Page 60 2 Product Specifications 2-4 Timing Chart This section of the service manual describes the timing that the computer industry recognizes as standard for computer-generated video signals. 2-4-1 LCD Panel Mode1 mode...
- Page 61 2 Product Specifications 2-4-2 Supported Modes (1)
- Page 62 2 Product Specifications 2-4-3 Supported Modes (2)
- Page 63 2 Product Specifications 2-4-4 Supported Modes (3)
- Page 64 11 Schematic Diagrams 11 Schematic Diagrams - This Document can not be used without Samsung s authorization. 11-1 Power_Sound Schematic Diagram R,G,B Output Signal of IC312 > Signal of HDMI(Data) The Signal are Inputed to IC610 > Output WaveForm 11-1...
- Page 65 11 Schematic Diagrams - This Document can not be used without Samsung s authorization. 11-2 In_Out_Jack Schematic Diagram i f i l 11-2...
- Page 66 11 Schematic Diagrams - This Document can not be used without Samsung s authorization. 11-3 MICOM Schematic Diagram R,G,B Output Signal of IC906 i g i k l i ) - / - / ( ( I - y ’...
- Page 67 11 Schematic Diagrams - This Document can not be used without Samsung s authorization. 11-4 SVP_EX Schematic Diagram Digital Output Data of IC201 Tuner_CVBS Output Signal Analog Signal(Y,C) to IC201 11-4...
- Page 68 11 Schematic Diagrams - This Document can not be used without Samsung s authorization. 11-5 MAIN POWER 1_INVERTER Schematic Diagram 11-5...
- Page 69 11 Schematic Diagrams - This Document can not be used without Samsung s authorization. 11-6 MAIN POWER 2_PFC Schematic Diagram 11-6...
- Page 70 11 Schematic Diagrams - This Document can not be used without Samsung s authorization. 11-7 MAIN POWER 3_MULTI Schematic Diagram 11-7...
- Page 71 11 Schematic Diagrams - This Document can not be used without Samsung s authorization. 11-8 SUB POWER Schematic Diagram 11-8...
- Page 72 11 Schematic Diagrams - This Document can not be used without Samsung s authorization. 11-9 LCD23FAX Schematic Diagram ROME PJT 23” 11-9...
- Page 73 11 Schematic Diagrams Memo 11-10...
- Page 74 5 Troubleshooting 5 Troubleshooting 5-1 No Power LAMP off, power indicator Check a connection a power cable. LED red color? Does proper DC 12V Change a Assy PCB Power. appear at C801, C807? Does proper DC A3.3V, Check a IC812, IC801. A5V appear at Change a main PCB ass'y.
- Page 75 Change a main PCB ass'y. DIN(0:23)of IC312? Does the digital data appear at Check a IC201. output of Change a main PCB ass'y. LVDS TX(FT250~253)? Check a LVDS cable? Please, Call to Samsung Co. LTD. Replace a lcd panel?
- Page 76 5 Troubleshooting WAVEFORMS R,G,B Output Signal of IC906 R,G,B Output Signal of IC312 Digital Output Data of IC201...
- Page 77 DIN(0:23), Change a main PCB ass’y. HDMI(Data, Clk +/-)? Does the digital data Check a IC201. appear at output of IC201 Change a main PCB ass'y. LVDS(FX250~253)? Check a LVDS cable? Please, Call to Samsung Co. LTD. Replacea lcd panel?
- Page 78 5 Troubleshooting WAVEFORMS Digital Output Data of IC201 Signal of HDMI(Data)
- Page 79 Check a IC203. #13 of IC203? Change a main PCB ass'y. Does the digital data appear at Check a IC201. output of FT250~FT253 ? Change a main PCB ass'y. Check a LVDS cable? Please, Call to Samsung Co. LTD. Replacea lcd panel?
- Page 80 5 Troubleshooting WAVEFORMS Digital Output Data of IC201 Tuner_CVBS Output Signal...
- Page 81 Check a IC203. #13 of IC203? Change a main PCB ass'y. Does the digital data appear at Check a IC515. output of FT250~FT253? Change a main PCB ass'y. Check a LVDS cable? Please, Call to Samsung Co. LTD. Replacea lcd panel?
- Page 82 5 Troubleshooting WAVEFORMS Digital Output Data of IC515 Tuner_CVBS Output Signal...
- Page 83 Dose the signal appear at Check a connection harness. R722, R721 of IC201? Does the digital data appear at Check a IC201. Output of FT250~FT253? Change a main PCB ass'y. Check a LVDS cable? Please, Call to Samsung Co. LTD. Replacea lcd panel? 5-10...
- Page 84 5 Troubleshooting WAVEFORMS Digital Output Data of IC201 Analog Signal(Y,C) to IC201 5-11...
- Page 85 5 Troubleshooting 5-7 No Sound Connect a sound cable. Picture is display, no sound. control a volume. Does the signal appear at Pin 51, 50(CH1_L, R Sound) Check a connection harness and and Pin 57, 58 headphone jack. (CH2_L, R Sound) of IC610 (MSP4410K)? Check the DC 8V Check a IC813.
- Page 86 5 Troubleshooting WAVEFORMS The Signal are Inputed to IC610 DC +8V Output WaveForm 5-13...
- Page 87 5 Troubleshooting Memo 5-14...
- Page 88 9 Wiring Diagrams 9 Wiring Diagram 9-1 LN-R268WH / LN-R328WH / LN32R51BH Wiring Diagram...
- Page 89 9 Wiring Diagrams 9-2 Main Board Layout...
- Page 90 9 Wiring Diagrams 9-3 PIN characteristic...
- Page 91 9 Wiring Diagrams...
- Page 92 9 Wiring Diagrams...
- Page 93 9 Wiring Diagrams 9-4 Power Board Layout...
- Page 94 9 Wiring Diagrams...
- Page 95 9 Wiring Diagrams...
Need help?
Do you have a question about the LN-R268WH and is the answer not in the manual?
Questions and answers