Sharp CD-BA300 Operation Manual
Cdba300 operation manual
Hide thumbs
Also See for CD-BA300:
- Quick manual (4 pages) ,
- Service manual (64 pages) ,
- Service manual (64 pages)
Table of Contents
Advertisement
Quick Links
Thank you for purchasing this SHARP product.
To obtain the best performance from this product, please read this
MINI COMPONENT SYSTEM
manual carefully. It will guide you in operating your SHARP product.
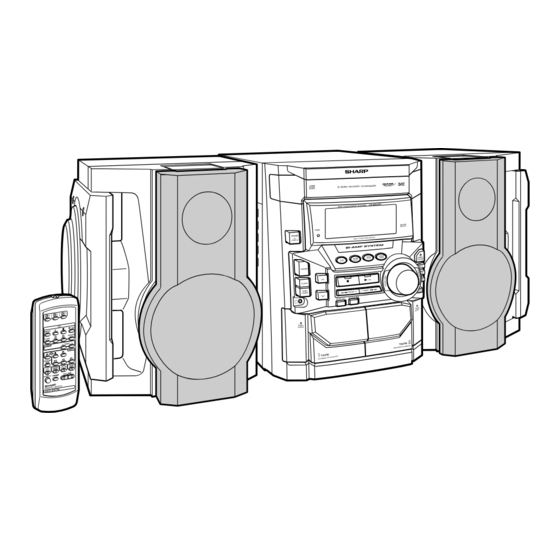
CD-BA300 Mini Component System consisting of CD-BA300 (main
MODEL
unit) and CP-BA300 (speaker system).
CD-BA300
OPERATION MANUAL
*BA300_P01
2
00.11.16, 2:46 PM
Advertisement
Table of Contents

Related Manuals for Sharp CD-BA300


Summary of Contents for Sharp CD-BA300
- Page 1 Thank you for purchasing this SHARP product. To obtain the best performance from this product, please read this MINI COMPONENT SYSTEM manual carefully. It will guide you in operating your SHARP product. CD-BA300 Mini Component System consisting of CD-BA300 (main MODEL unit) and CP-BA300 (speaker system).
- Page 2 NOTE intended to alert the user to the presence of important It is the intent of Sharp that this product be used in full compliance with the copyright operating and maintenance (servicing) instructions in laws of the United States and that prior permission be obtained from copyright owners the literature accompanying the appliance.
- Page 3 G R O U N D CLAMP Carts and Stands - The appliance should be used only with a cart or stand that is ANTENNA DISCHARGE UNIT recommended by the manufacturer.
-
Page 4: Table Of Contents
Listening to the memorized station ..........21 Controls and Indicators ..............6 - 9 Tape Playback Preparation for Use Listening to a Cassette Tape (TAPE 1 or TAPE 2) ......22 System Connections ..............10, 11 Tape Recording Remote Control ................. 12 Recording from the Radio .............. -
Page 5: Precautions
Do not remove the outer cover, as this may result in electric shock. Refer internal service to your lo- cal SHARP service facility. This unit should only be used within the range of 41 F - 95 F (5 C - 35 C). *BA300_P04_09 00.11.16, 2:47 PM... -
Page 6: Controls And Indicators
Clock Button ................15, 26 Timer/Sleep Button ..............26, 27 Headphone Jack ................28 CD Play or Repeat, Tape Play Button (with Indicator) ..17, 18, 22 CD Fast Forward, Tape 2 Fast Forward or Tuner Preset Up Button ..........17, 21, 22 Tuning and Time Down Button .......... - Page 7 FM Stereo Receiving Indicator Timer Recording Indicator Timer Play Indicator Rear panel Reference page FM/AM Loop Antenna Jack ............10, 11 Video/Auxiliary (Audio Signal) Input Jacks ........28 Speaker Terminals ..............10, 11 AC Power Cord ................10, 11 *BA300_P04_09...
- Page 8 Tape (1 V 2) Button ..............22, 25 Volume Up or Down Buttons ............. 14 Buttons with “ ” mark in the illustration can be operated with the remote control only. Other buttons can be operated on the main unit and the remote control.
- Page 9 Bi-amp system: Right speaker Each speaker unit has a built-in subwoofer (low frequency range) which is driven separately from the woofer and tweeter (mid-to-high frequency range). Two indepen- dent amplifiers which have individual frequency characteristics are used. By amplifying separately the two frequency bands, clearer sound is achieved.
-
Page 10: System Connections
System Connections AM loop antenna FM antenna Left speaker Right speaker VCR, DVD, etc. not supplied AC outlet AC 120 V, 60 Hz *BA300_P10_12 00.11.16, 2:48 PM... - Page 11 After checking all the connections have been made correctly, plug the AC Do not stand or sit on the speakers. You may be injured. power cord of this unit into the AC outlet. If you plug in the unit first, the unit will enter the demonstration mode (see page 13).
-
Page 12: Remote Control
Replace all old batteries with new ones at the same time. Do not mix old and new batteries. Remove the batteries if the unit will not be used for long periods of time. This will prevent potential damage due to battery leakage. -
Page 13: General Control
General Control Demonstration mode The first time the unit is plugged, the unit will enter the demonstration mode. You will see words scroll. To cancel the demonstration mode: When the unit is in the power stand-by mode (demonstration mode), press the X- BASS/DEMO button. -
Page 14: Sound Control
29 30 MAXIMUM Bass control When the power is first turned on, the unit will enter the extra bass mode which empha- sizes the bass frequencies, and “X-BASS” will appear. To cancel the extra bass mode, press the X-BASS/DEMO (X-BASS) button. -
Page 15: Setting The Clock
Setting the Clock Press the TUNING/TIME (X X X X X or W W W W W ) button to adjust the hour and then press the MEMORY/SET button. Press the TUNING/TIME (X or W) button once to advance the time by 1 hour. -
Page 16: Listening To A Cd (Cds)
If the CD contains more than 15 tracks, “ C ” will appear. To select the CD you want to listen to first, press one of s s s s s 1 - s s s s s 3 buttons. -
Page 17: Advanced Cd Playback
Press the 5 3 PRESET X button for less than 0.5 seconds during When there is no CD in one of the disc 1 - 3 positions, that position will be playback. skipped and the next CD will be played. -
Page 18: Starting Playback With A Desired Track
Repeat Play While in the stop mode, press one of the s s s s s 1 - s s s s s 3 buttons or All tracks on up to 3 discs, or a programmed sequence can be continuously repeated. -
Page 19: Programmed Play
1 - s s s s s 3 Then follow steps 1 - 3 to add tracks. The new tracks will be stored after the last track of buttons to select the de- the original program. -
Page 20: Listening To The Radio
Press the TUNER (BAND) button repeatedly to select the desired frequency band (FM or AM). Press the TUNING/TIME (X X X X X or W W W W W ) button to tune in to the desired station. Manual tuning: Press the TUNING/TIME button as many times as required to tune in to the desired station. -
Page 21: Listening To The Memorized Station
Memorizing a station To recall a memorized station You can store 40 AM and FM stations in memory and recall them at the push of a Press the 5 3 PRESET X X X X X or W W W W W PRESET 2 4 button for less button. -
Page 22: Listening To A Cassette Tape (Tape 1 Or Tape 2)
Before changing from one tape operation to another, press the (TAPE ) button. If a power failure occurs during tape operation, the tape head will remain engaged with the tape and the cassette door will not open. Wait until the power is restored. Sound Control (See page 14) *BA300_P22... -
Page 23: Recording From The Radio
I6) button. Recording will be paused. Press the 0/R 0/R button on the main unit or the TAPE 2 0 0 0 0 0 button on the remote control to start recording. To interrupt recording: Press the REC PAUSE I6 (I6) button. -
Page 24: Recording From A Cd (Cds)
Wind past the leader of the tape, on which recording cannot be performed. Press the CD button and load the desired disc. Press one of the s s s s s 1 - s s s s s 3 buttons to select the disc to be re- corded first. -
Page 25: Dubbing From Tape To Tape
I6) button. Recording will be paused. Press the 0 0 0 0 0 / R R R R R button on the main unit or the TAPE 2 0 0 0 0 0 button on the remote control to start dubbing. -
Page 26: Timer And Sleep Operation
For timer playback For timer recording Press the TUNING/TIME (X X X X X or W W W W W ) button to specify the hour to start, then press the MEMORY/SET button. The illustrations show the timer playback setting. - Page 27 Timer and Sleep Operation (continued) Sleep operation Press the TUNING/TIME (W W W W W or X X X X X ) button to specify the minute, then press the MEMORY/SET button. Play back the desired sound source. Press the TIMER/SLEEP button repeatedly until “SLEEP” is dis- played.
-
Page 28: Enhancing Your System
Headphones Before plugging in or unplugging the headphones, reduce the volume. Be sure your headphones have a 1/8" (3.5 mm) diameter plug and are between 16 ohms and 50 ohms impedance. The recommended impedance is 32 ohms. Plugging in the headphones disconnects the speakers automatically. Adjust the volume using the VOLUME control. -
Page 29: Troubleshooting Chart
Troubleshooting Chart Many potential “problems” can be resolved by the owner without calling a service tech- Cassette deck nician. If something is wrong with this product, check the following before calling your Symptom Possible cause authorized SHARP dealer or service center. -
Page 30: Maintenance
If such a problem occurs, do the following: voltages. . Set the unit to the stand-by mode and turn the power on again. . If the unit is not restored in step 1, unplug and plug in the unit, and then turn TAPE 1 the power on. -
Page 31: Specifications
Specifications As part of our policy of continuous improvement, SHARP reserves the right to make design and specification changes for product improvement without prior notice. The performance specification figures indicated are nominal values of production units. There may be some deviations from these values in individual units. -
Page 32: Consumer Limited Warranty
This warranty does not apply to any appearance items of the Product nor to the additional excluded item(s) set forth below nor to any Product the exterior of which has been damaged or defaced, which has been subjected to improper voltage or other misuse, abnormal service or handling, or which has been altered or modified in design or construction.
Need help?
Do you have a question about the CD-BA300 and is the answer not in the manual?
Questions and answers