Sharp AR-M256 Operation Manual
Digital multifunctional system
Hide thumbs
Also See for AR-M256:
- Service manual (159 pages) ,
- Operation manual (48 pages) ,
- Key operator's manual (24 pages)
Table of Contents
Advertisement
Quick Links
Advertisement
Table of Contents
Troubleshooting

Related Manuals for Sharp AR-M256


Summary of Contents for Sharp AR-M256
- Page 1 MODEL AR-M256 AR-M316 DIGITAL MULTIFUNCTIONAL SYSTEM OPERATION MANUAL (for copier) Page • BEFORE USING THE MACHINE • COPY FUNCTIONS • CONVENIENT COPY FUNCTIONS • USER SETTINGS • TROUBLESHOOTING AND MAINTENANCE • PERIPHERAL DEVICES AND SUPPLIES • APPENDIX With the RSPF installed...
- Page 2 Each instruction also covers the optional units used with these products. Do not make copies of anything which is prohibited from copying by law. The following items are normally prohibited from copying by national law. Other items may be prohibited by local law. ●...
-
Page 3: Table Of Contents
CONTENTS CAUTIONS..............................3 ● CAUTIONS ON USING THE MACHINE ......................3 ● IMPORTANT POINTS WHEN SELECTING AN INSTALLATION SITE ............3 ● CAUTIONS ON HANDLING THE MACHINE....................4 ● LASER INFORMATION ............................ 4 ● ENVIRONMENTAL INFORMATION......................... 5 USING THE MANUAL ..........................5 ●... - Page 4 TROUBLESHOOTING AND MAINTENANCE DISPLAY MESSAGES........59 TROUBLESHOOTING ........61 MISFEED REMOVAL........65 ● MISFEED REMOVAL GUIDANCE ....65 ● MISFEED IN THE RSPF.........66 ● MISFEED IN THE BYPASS TRAY ....67 ● MISFEED IN THE MACHINE......67 ● MISFEED IN THE CENTRE TRAY....69 ●...
-
Page 5: Cautions
CAUTIONS Follow the cautions below when using this machine. CAUTIONS ON USING THE MACHINE Warning: • The fusing area is hot. Exercise care in this area when removing misfed paper. • Do not look directly at the light source. Doing so may damage your eyes. Caution: •... -
Page 6: Cautions On Handling The Machine
Be sure to connect the power cord only to a power outlet that meets the specified voltage and current requirements. Also make certain the outlet is properly grounded. Connect the machine to a power outlet which is not used for other electric appliances. If a lighting fixture is Note connected to the same outlet, the light may flicker. -
Page 7: Environmental Information
ENVIRONMENTAL INFORMATION ® Products that have earned the ENERGY STAR are designed to protect the environment through superior energy efficiency. USING THE MANUAL This machine has been designed to provide convenient copying features in a minimum amount of office space and with maximum operational ease. -
Page 8: The Meaning Of "R" In Original And Paper Size Indications
THE MEANING OF "R" IN ORIGINAL AND PAPER SIZE INDICATIONS An "R" appearing at the end of an original or paper size (A4R, A5R, 5-1/2" x 8-1/2"R, 8-1/2" x 11"R, etc.) indicates that the original or paper is oriented horizontally as shown below. <Horizontal (Landscape) orientation>... -
Page 9: Main Features
Erase copy Margin shift copy 2in1 copy 4in1 copy SHARP Pamphlet copy Dual page copy Cover copy Card shot • Key operator programs allow the setting or modification of functions to meet your specific needs. The key operator programs can also be used to enable audit mode, which allows the machine administrator to control use of the machine. -
Page 10: Part Names And Functions
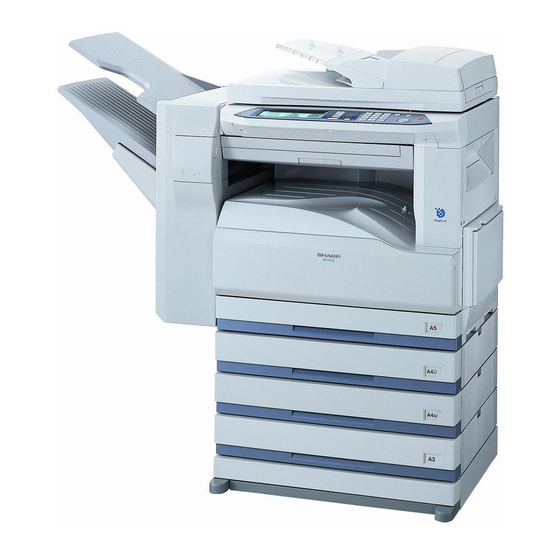
Chapter 1 BEFORE USING THE MACHINE This chapter contains basic information that should be read before using the machine. PART NAMES AND FUNCTIONS Exterior Reversing single pass feeder (RSPF) (optional) Centre tray Place the original(s) that you wish to scan face up Finished copies are delivered to the centre tray. - Page 11 BEFORE USING THE MACHINE Interior Bypass tray Fusing unit paper guide Regular paper and special paper (such as Open to remove misfed paper. (p.68) transparency film) can be fed from the bypass tray. (p.18) The model name is on the front cover of the Note machine.
-
Page 12: Operation Panel
BEFORE USING THE MACHINE OPERATION PANEL COPY ON LINE PRINT DATA SCAN DATA LINE DATA JOB STATUS CUSTOM SETTINGS ACC.#-C Touch panel [JOB STATUS] key The machine status, messages and touch keys are Press to display the current job status. (p.12) displayed on the panel. -
Page 13: Touch Panel
BEFORE USING THE MACHINE TOUCH PANEL Using the touch panel Selecting a function [Example 1] [Example 1] Items on the touch panel Items which are CANCEL JOB QUEUE SETS / PRO are selected by touching highlighted at the time a 003 / 00 the key associated with screen appears are... - Page 14 BEFORE USING THE MACHINE Job status screen (common to copy, print, network scan and fax) This screen appears when the [JOB STATUS] key on the operation panel is pressed. A job list showing the current job and the stored jobs or a list showing completed jobs can be displayed. The contents of jobs can be viewed and jobs can be deleted from the queue.
-
Page 15: Power On And Off
POWER ON AND OFF The power switch is located on the left side of the machine. When the power switch is turned on, the machine starts up in the previously used mode. The following Note explanations assume that the previously used mode was copy mode. POWER ON POWER OFF When the machine is not used for a long time, be sure... -
Page 16: Initial Settings
BEFORE USING THE MACHINE INITIAL SETTINGS The machine reverts to the initial settings when it is first turned on, when the [CLEAR ALL] key ( ) is pressed, or the preset "auto clear time" elapses after the last copy is made in any mode. When the machine reverts to the initial settings, all settings and functions selected to that point are cancelled. -
Page 17: Loading Paper
100% OUTPUT COPY RATIO PAPER The specifications for the types and sizes of paper that can be loaded in the paper trays are shown below. For best results, use only SHARP recommended paper. Tray Paper tray type Paper type Size... -
Page 18: Special Papers
Do not use the following envelopes (Misfeeds will recommended paper may result in misfeeds or occur.). smudges on the output. If other than SHARP • Envelopes with metal tabs, clasps, strings, holes, or recommended media must be used, feed each windows. -
Page 19: Loading Paper
BEFORE USING THE MACHINE LOADING PAPER Make sure that the machine is not copying, printing, or printing a received fax, and then follow these steps to load paper. Loading the paper in the paper tray Pull out the paper tray until it stops. Load paper in the tray. -
Page 20: Loading Paper In The Bypass Tray
BEFORE USING THE MACHINE Loading paper in the bypass tray Unfold the bypass tray. Insert the copy paper (print side down) all the way into the bypass tray. To enable correct detection of the paper size, be sure to pull out the bypass tray extension. -
Page 21: Changing A Tray's Paper Type And Paper Size Settings
BEFORE USING THE MACHINE CHANGING A TRAY’S PAPER TYPE AND PAPER SIZE SETTINGS When you change the paper in a tray, follow the steps below to change the tray’s paper type and paper size settings. The settings cannot be changed when operation has stopped because the paper ran out or a misfeed occurred, or when an interrupt copy job is being performed. -
Page 22: Setting The Paper Type In The Bypass Tray
BEFORE USING THE MACHINE Setting the paper type in the bypass tray Use either of the following two methods to set the bypass tray's paper type setting. From the [CUSTOM SETTINGS] key From the [PAPER SELECT] key Load paper in the bypass tray as Load paper in the bypass tray as explained in "Loading paper in the explained in "Loading paper in the... -
Page 23: Copy Functions
Chapter 2 COPY FUNCTIONS This chapter explains basic copying functions such as normal copying, reduction or enlargement, and exposure adjustment. MAIN SCREEN OF COPY MODE The main screen of copy mode shows messages, keys, and settings that are used for copying. Touch a key to make a selection. -
Page 24: Normal Copying
NORMAL COPYING COPYING FROM THE DOCUMENT GLASS Note If "AUDITING MODE" (p.57) has been enabled, enter your 5-digit account number. • To load paper, see "LOADING PAPER" Open the document cover/RSPF and Note (p.15). If you change the paper size in the place the original face down on the tray, you will also need to change the tray's document glass. -
Page 25: Copying From The Rspf
COPY FUNCTIONS COPYING FROM THE RSPF • If "AUDITING MODE" (p.57) is enabled, enter your 5-digit account number. Note • If the RSPF is disabled in the key operator programs, the RSPF cannot be used. See the "Key operator's guide". •... -
Page 26: Points To Note When Making Copies
COPY FUNCTIONS POINTS TO NOTE WHEN MAKING COPIES Document glass and RSPF • Paper in a different orientation from the original can be selected if the auto paper select or auto image function has been selected. In this case, the image of the original will be rotated. •... -
Page 27: Original Size] Key
COPY FUNCTIONS Copying originals of mixed length (Mixed feeding) When using the RSPF, originals of mixed length can be fed together as long as the width of the originals is the same. To copy originals of mixed length, follow these steps: Touch the [SPECIAL MODES] key. -
Page 28: Bypass Feed (Special Paper)
COPY FUNCTIONS BYPASS FEED (special paper) The bypass tray must be used to feed special papers such as transparency film and labels. The bypass tray can also be used to feed standard copy paper. Place the original(s). (p.22, p.23) Select the number of copies and any other desired copy settings, and then press the [START] key ( Insert the paper (print face down) all... -
Page 29: Automatic Two-Sided Copying
AUTOMATIC TWO-SIDED COPYING Two originals can be automatically copied onto both sides of a single sheet of paper. When the RSPF is used, two-sided copies of two-sided originals can easily be made. Original → Paper → One-sided original Two sides ( Document glass One-sided original Two-sided original... -
Page 30: Using The Rspf
COPY FUNCTIONS Make sure that a suitable paper size is Remove the first original and then place automatically selected, or select the original for the back side on the another size using the [PAPER document glass. Close the document SELECT] key. cover/RSPF and then press the [START] key ( EXPOSURE... -
Page 31: Exposure Adjustment
EXPOSURE ADJUSTMENT SELECTING THE ORIGINAL IMAGE TYPE AND MANUALLY ADJUSTING THE EXPOSURE [AUTO] is selected by default for automatic adjustment of the image according to the original. If you wish to specify the original image type or manually adjust the exposure, place the original in the RSPF or on the document glass, check the paper size, and then perform the following steps. -
Page 32: Reduction/Enlargement/Zoom
REDUCTION/ENLARGEMENT/ZOOM There are three ways to enlarge and reduce copies: ● Automatic ratio selection according to the paper size ......AUTOMATIC RATIO SELECTION (below) ● Specifying a ratio with the reduce key, enlarge key, or zoom key ....MANUAL RATIO SELECTION (p.31) ●... -
Page 33: Manual Ratio Selection
COPY FUNCTIONS MANUAL RATIO SELECTION There are five (four) preset reduction ratios and five (four) preset enlargement ratios. In addition, the [ZOOM] keys ( ) can be pressed to select the ratio in increments of 1%. Place the original(s). (p.22, p.23) Use the enlargement key or reduction key, or the [ZOOM] key ( ) to set... -
Page 34: (Xy Zoom Copying)
COPY FUNCTIONS Make sure that a suitable paper size is Select the number of copies and any automatically selected, or select other desired copy settings, and then another size using the [PAPER press the [START] key ( SELECT] key. If AUTO PAPER EXPOSURE SELECT is enabled, the appropriate copy paper... - Page 35 COPY FUNCTIONS Touch the [X] key. Use the reduction, enlargement, and [ZOOM] keys ( ) to change the The [X] key is selected copy ratio in the vertical (Y) direction. (highlighted) by default, A fixed ratio key will not so there is normally no become highlighted need to perform this step when touched.
-
Page 36: Interrupting A Copy Run
INTERRUPTING A COPY RUN A copy run can be temporarily interrupted to allow another copy job to be performed. When the other job is finished, the copy run will resume using the original copy settings. Automatic two-sided copying, sort/group copying, staple sort, pamphlet copy, mix feeding, job build, cover copy, Note job programs, card shot, card shot, or multi shot copying cannot be used for interrupt copying. -
Page 37: Copy Finishing Functions
Chapter 3 CONVENIENT COPY FUNCTIONS This chapter explains special finishing functions and other convenient functions. COPY FINISHING FUNCTIONS This section explains the sort, group, and offset functions, as well as the staple sort function which is used to staple output collated with the sort function when a finisher is installed. SORT COPY GROUP COPY This function is used to collate sets of copies. - Page 38 CONVENIENT COPY FUNCTIONS Place the originals in the RSPF or on Touch the [OK] key. the document glass. (p.22, p.23) If originals are placed in the RSPF, the sort function is automatically selected. (To disable this function, see the "Key operator’s guide".) OFFSET Select the number of copies and any...
-
Page 39: (Ar-Fn5A) Is Installed)
Note the front or to the right as shown in the diagram. SHARP • Different sized originals cannot be copied on the corresponding sizes of paper. • The staple sort function cannot be used if disabled in the key operator programs. (See the "Key operator’s guide".) - Page 40 CONVENIENT COPY FUNCTIONS Place the original(s). (p.22, p.23) [When using the RSPF:] Copying will start after all originals have been scanned. Touch the [OUTPUT] key. [When using the document glass:] Replace the original with the next original and press the [START] key ( ).
-
Page 41: Special Modes
SPECIAL MODES When the [SPECIAL MODES] key in the main screen of copy mode is touched, the special modes screen will appear. This screen contains the following special function keys. Touch the [SPECIAL MODES] key in the main screen READY TO COPY. ORIGINAL AUTO SPECIAL MODES... -
Page 42: Special Functions
CONVENIENT COPY FUNCTIONS GENERAL PROCEDURE FOR USING THE SPECIAL FUNCTIONS Touch the [SPECIAL MODES] key. SPECIAL MODES 2-SIDED COPY Touch the key of the desired special mode. Example: Selecting the margin shift MARGIN SHIFT function PAMPHLET COPY Procedures for modes that require further settings are explained starting on the next page. -
Page 43: Margin Shift Copy
CONVENIENT COPY FUNCTIONS MARGIN SHIFT COPY The margin shift function is used to automatically shift the text or image on the copy paper approximately 10 mm (1/2") in its initial setting. • Right, left or down can be Image shifted Image shifted Image shifted One-sided copying... -
Page 44: Erase Copy
CONVENIENT COPY FUNCTIONS ERASE COPY The erase function is used to erase the shadow lines on copies that are produced when copying thick originals or books. The erase modes that can be selected are shown below. The erase width is initially set to 10 mm (1/2"). EDGE ERASE Eliminates shadow lines around the edges of copies caused when heavy paper or a book is copied. -
Page 45: Dual
CONVENIENT COPY FUNCTIONS DUAL PAGE COPY The dual page copy function produces separate copies of two adjoining pages on the document glass. It is especially useful when copying books and other bound documents. [Example] Copying the right and left pages of a book •... -
Page 46: Pamphlet Copy
CONVENIENT COPY FUNCTIONS PAMPHLET COPY The pamphlet copy function is used to arrange copies in the proper order for centre-stapling and folding into a booklet. Two original pages are copied onto each side of the copy paper, such that a total of four pages are copied onto each sheet. -
Page 47: Job Build Mode
CONVENIENT COPY FUNCTIONS JOB BUILD MODE Use this function when you need to copy more originals than can be placed in the RSPF at once. (The maximum number of originals that can be placed in the RSPF at once is 100.) •... -
Page 48: Multi Shot Copy
CONVENIENT COPY FUNCTIONS MULTI SHOT COPY The multi shot copy function is used to copy two or four originals onto one sheet of copy paper in a specified order. Example: Copying four originals onto one sheet of paper (Page number: 4 in 1 ( ), layout: ( •... -
Page 49: Original Size
CONVENIENT COPY FUNCTIONS ORIGINAL SIZE If you wish to use the paper other than the automatically selected original size, original size setting is specified by the special modes. The mix feeding setting (p.25) is also selected here. Touch the key and then touch the Touch the [OK] key in the special [ORIGINAL SIZE] key in the special modes menu screen. -
Page 50: Cover Copy
One-sided copies One-sided originals One-sided copies (copying onto a cover) (not copying onto a cover) Back cover Back cover (no copying) SHARP Cover original SHARP Front cover (can copy onto front side) Two-sided originals Front cover Two-sided originals (not copying onto a cover) - Page 51 CONVENIENT COPY FUNCTIONS Touch the key and then touch the Load the cover paper to be used into [COVER] key in the special modes the bypass tray. menu screen. Load the same size of paper as the paper to The cover setting screen be used for the copy will appear.
-
Page 52: Card Shot
CONVENIENT COPY FUNCTIONS CARD SHOT The front and back of a card can be copied onto one sheet of paper. This function is convenient for making copies for certification purposes and helps save paper. • Copying is only possible on standard size paper. •... - Page 53 CONVENIENT COPY FUNCTIONS Place the original on the document glass. Place the front side of the original face down and close the document cover/RSPF. Select the number of copies and any other desired copy settings, and then press the [START] key ( The front side of the card is scanned.
-
Page 54: Custom Settings
Chapter 4 USER SETTINGS CUSTOM SETTINGS The custom settings let you adjust certain features of the machine to better suit your needs. The custom settings include the following settings: ●TOTAL COUNT ......This displays the number of pages output by the machine. (p.54) ●DISPLAY CONTRAST .... -
Page 55: Settings
USER SETTINGS GENERAL PROCEDURE FOR CUSTOM SETTINGS Press the [CUSTOM SETTINGS] key. Touch the [OK] key in the setting screen to close it. LINE When you are ready to exit the custom DATA settings, touch the [EXIT] key. CUSTOM SETTINGS B STATUS CUSTOM SETTINGS EXIT... -
Page 56: Total Count
USER SETTINGS SETTINGS Total count Keyboard select The total page count display shows the following When using the fax or network scanner function, you counts: can change the layout of the keyboard that appears in • The total count shows the combined output total of the letter entry screen. -
Page 57: Storing A Job Program
JOB PROGRAM MEMORY If you frequently use the same settings for copy jobs, you can store in the settings in a job program. Up to 10 job programs can be stored, and the programs are retained even when the power is turned off. By storing frequently used copy settings in a program, you can eliminate the bother of selecting the settings each time you use them for a copy job. -
Page 58: Executing A Job Program
USER SETTINGS EXECUTING A JOB PROGRAM Press the [ ] key. Place the original, check the original size, and then set the number of copies and any other desired copy settings not stored in the program. When finished, press the [START] key ACC.#-C Touch the program number key of the ACC.#-C... -
Page 59: Auditing Mode
AUDITING MODE When auditing mode is enabled, a count is kept of the number of pages printed or copied by each account (maximum of 100 accounts). The counts can be viewed whenever necessary. • Auditing mode can be enabled for all modes (copy mode, fax mode, network scanner mode, and printer mode) Note in the key operator programs. -
Page 60: Troubleshooting And Maintenance
Chapter 5 TROUBLESHOOTING AND MAINTENANCE This chapter describes troubleshooting and maintenance such as misfeed removal, replacing the toner cartridge and cleaning the machine. DISPLAY MESSAGES........................59 TROUBLESHOOTING ........................61 Trouble Page Problems related to machine operation The machine does not operate. The power is on but copying is not possible. -
Page 61: Display Messages
DISPLAY MESSAGES If one of the following messages appears in the display, take prompt action as instructed by the message. Message Cause and solution Page ENTER YOUR ACCOUNT Auditing mode is enabled. Enter your account number. NUMBER. A MISFEED HAS OCCURRED. Remove the misfeed as explained in "MISFEED REMOVAL". - Page 62 TROUBLESHOOTING AND MAINTENANCE Message Cause and solution Page SELECTED PAPER TRAY IS OUT Contact your authorised service representative. OF SERVICE. CHECK STAPLER POSITION OR Staples are jammed in the finisher or the staple case is not STAPLE JAM. attached correctly. Check the staple case. If the message still appears after removing the jammed staples, disable the stapler using "DISABLING OF STAPLER"...
-
Page 63: Troubleshooting
TROUBLESHOOTING If you experience difficulty using the machine, check the following troubleshooting guide before calling for service. Many problems can be easily resolved by the user. If you are unable to solve the problem using the troubleshooting guide, turn off the power switch, unplug the machine, and contact your authorised service representative. The following problems are related to the general operation of the machine and copying. - Page 64 TROUBLESHOOTING AND MAINTENANCE Problem Cause and solution Page The document cover/RSPF was not opened completely when the original was placed on the document glass. → Open the document cover/RSPF completely, place the original on the document glass, and close the RSPF. The original contains large black solid areas.
-
Page 65: Paper Feeding Problems
TROUBLESHOOTING AND MAINTENANCE Paper feeding problems Problem Cause and solution Page The number of sheets placed on the bypass tray exceeds the maximum number. When using paper fed from the → Do not place more than the maximum number of sheets. bypass tray, the copied image is The bypass guide is not adjusted to the size of the skewed. -
Page 66: Image Quality Problems
TROUBLESHOOTING AND MAINTENANCE Image quality problems Problem Cause and solution Page The image of the original is too light or too dark. → Select the correct original image type in the exposure setting and adjust the copying exposure. The copying exposure is set to "AUTO". →... -
Page 67: Misfeed Removal
MISFEED REMOVAL When a misfeed occurs during copying, the message "MISFEED HAS OCCURRED." will appear in the touch panel and printing will stop. ● If the misfed paper tears during removal, remove the torn pieces. Take care not to touch the photoconductive drum while removing the pieces. -
Page 68: Misfeed In The Rspf
TROUBLESHOOTING AND MAINTENANCE MISFEED IN THE RSPF Section C Remove the misfed original. Carefully remove the misfed original from the Check sections A, B, and exit area. C in the illustration at left and remove the misfed original. If the misfed original cannot be easily removed from the exit area, open the moveable part of the document feeder tray and remove the reversing tray, and then Section A... -
Page 69: Misfeed In The Bypass Tray
TROUBLESHOOTING AND MAINTENANCE MISFEED IN THE BYPASS TRAY Carefully pull the misfed paper out. Open and close the side cover. Make sure that the misfeed message is cleared. The message can also be cleared by opening and closing the front cover. - Page 70 TROUBLESHOOTING AND MAINTENANCE Close the front cover and side cover. Make sure that the misfeed message is cleared. B: Misfeed in the fusing area Open the bypass tray and the side If you were unable to remove the cover. misfeed in step 4, press down on the fusing unit paper guide knob to open the paper guide, and carefully remove the misfed paper.
-
Page 71: Misfeed In The Centre Tray
TROUBLESHOOTING AND MAINTENANCE MISFEED IN THE CENTRE TRAY Remove the paper by pulling it into the centre tray. MISFEED IN THE UPPER PAPER TRAY Make sure that there is no misfed paper in the machine before pulling the tray out. (p.67) Lift and pull out the upper paper tray and then remove the misfed paper. -
Page 72: Misfeed In The Lower Paper Tray
TROUBLESHOOTING AND MAINTENANCE MISFEED IN THE LOWER PAPER TRAY ● Make sure that there is no misfed paper in the machine before pulling the tray out. (p.67) ● Use the following procedure to remove misfeeds that occur in the 500-sheet paper feed unit or 2 x 500-sheet paper feed unit. -
Page 73: Misfeed In The Upper Exit Area (When A Job Separator Tray Kit Or Finisher (Ar-Fn5A) Is Installed)
TROUBLESHOOTING AND MAINTENANCE MISFEED IN THE UPPER EXIT AREA (when a job separator tray kit or finisher (AR-FN5A) is installed) If a job separator tray kit or a finisher is installed, a misfeed may occur in the upper exit area. Open the upper right side cover. - Page 74 TROUBLESHOOTING AND MAINTENANCE If staple sort copying is being performed, open the paper guide and remove any misfed paper from the stapler compiler. Close the stapler compiler cover. If the offset tray is being used, remove any misfed paper from the offset tray. If the top tray is being used, open the top cover, remove any misfed paper, and close the top cover.
-
Page 75: Replacing The Toner Cartridge
REPLACING THE TONER CARTRIDGE To check how much toner remains in the toner cartridge (p.75), hold down the [COPY] key. The amount of toner remaining will appear in the display. When less than 25% of the toner remains, obtain a new toner cartridge as soon as possible. -
Page 76: Staple Cartridge Replacement
STAPLE CARTRIDGE REPLACEMENT (when the finisher (AR-FN5A) is installed) When the message "ADD STAPLES." appears, replace the staple cartridge as follows: Open the stapler cover. Remove the tape from the cartridge. Grasp the green portion of the staple Insert the staple box into the stapler box and remove the staple box from unit until it clicks into place. -
Page 77: Staple Jam Removal
TROUBLESHOOTING AND MAINTENANCE STAPLE JAM REMOVAL If staples become jammed in the stapler, the message "CHECK STAPLER POSITION OR STAPLE JAM." will appear. Follow these steps to remove the jammed staples. Open the stapler cover. Return the lever to its original position. -
Page 78: Cleaning The Machine
CLEANING THE MACHINE DOCUMENT GLASS AND DOCUMENT COVER/RSPF If the document glass, document cover/RSPF, or scanning glass for originals fed from the RSPF (the long narrow glass surface on the right side of the document glass) become dirty, the dirt may appear on copies. Always keep these parts clean. -
Page 79: Peripheral Devices And Supplies
Chapter 6 PERIPHERAL DEVICES AND SUPPLIES Optional equipments and supplies are explained in this chapter. To purchase optional equipment and supplies contact your authorised service representative. PERIPHERAL DEVICES FINISHER (AR-FN5A) See page 78. 500-SHEET PAPER FEED UNIT (AR-D30) See page 79. 2 x 500-SHEET PAPER FEED UNIT (AR-D31) See page 79. -
Page 80: Finisher (Ar-Fn5A)
Stapler compiler (22-9/64" (W) x 17-31/64" (D) x 4-19/64" (H)) As a part of our policy of continuous improvement, SHARP reserves the right to make design and specification Note changes for product improvement without prior notice. The performance specification figures indicated are... -
Page 81: 500-Sheet Paper Feed Unit/ 2 X 500-Sheet Paper Feed Unit
(23-15/32" (W) x 19-39/64" (D) x 7-53/64" (H)) Power supply Drawn from the machine As a part of our policy of continuous improvement, SHARP reserves the right to make design and specification Note changes for product improvement without prior notice. The performance specification figures indicated are... -
Page 82: Reversing Single Pass Feeder
Dimensions (22-61/64" (W) x 17-9/64" (D) x 5-1/4" (H)) As a part of our policy of continuous improvement, SHARP reserves the right to make design and specification Note changes for product improvement without prior notice. The performance specification figures indicated are nominal values of production units and there may be some deviations from these values in individual units. -
Page 83: Appendix
Chapter 7 APPENDIX SPECIFICATIONS Model AR-M256 AR-M316 Type Digital Multifunction System, Desktop Photoconductive type OPC drum Document glass type Fixed Copy system Dry, electrostatic transfer Originals Sheets, bound documents Originals size Max. A3 (11" x 17") Max. A3 (11" x 17") Min. - Page 84 *2 The warm-up time may vary depending on the power-supply voltage, ambient temperature, and other operating conditions. As a part of our policy of continuous improvement, SHARP reserves the right to make design and specification Note changes for product improvement without prior notice.
-
Page 85: Material Safety Data Sheet
Sharp Electronics of Canada Ltd. Telephone number for information : 905-890-2100 Emergency telephone number : 1-800-255-3924 Australia Sharp Corporation of Australia PTY. Ltd. Oceania No1 Huntingwood Drive Huntingwood Blacktown N.S.W. Telephone number for information : 1300-13-50-22 Germany Sharp Electronics (Europe) GMBH... - Page 86 MATERIAL SAFETY DATA SHEET Page: 2/4 Data Issued: Feb. 1, 2007 MSDS No. F-01481 3. HAZARDS IDENTIFICATION Most Important Hazards and Effects of the Products Human Health Effects : There are no anticipated carcinogenic effects from exposure based on animal tests performed using toner.
- Page 87 MATERIAL SAFETY DATA SHEET Page: 3/4 Data Issued: Feb. 1, 2007 MSDS No. F-01481 Exposure Limit Values OSHA-PEL (USA) : 15mg/m (Total Dust) , 5mg/m (Respirable Dust) ACGIH-TLV (USA) : 10mg/m (Total Dust) , 3mg/m (Respirable Dust) Personal Protective Equipment Respiratory Protection : Not required under intended use.
- Page 88 MATERIAL SAFETY DATA SHEET Page: 4/4 Data Issued: Feb. 1, 2007 MSDS No. F-01481 Chronic Effect : In a study in rats of chronic inhalation exposure to a typical toner, a mild to moderate degree of lung fibrosis was observed in 92% of the rats in the high concentration (16mg/m ) exposure group, and a minimal to mild degree of fibrosis was noted in 22% of the animals in the middle (4mg/m...
- Page 89 Sharp Electronics of Canada Ltd. Telephone number for information : 905-890-2100 Emergency telephone number : 1-800-255-3924 Australia Sharp Corporation of Australia PTY. Ltd. Oceania No1 Huntingwood Drive Huntingwood Blacktown N.S.W. Telephone number for information : 1300-13-50-22 Germany Sharp Electronics (Europe) GMBH...
- Page 90 MATERIAL SAFETY DATA SHEET Page: 2/4 Data Issued: Aug. 1. 2003 MSDS No. F-31201 3. HAZARDS IDENTIFICATION Most Important Hazards and Effects of the Products Human Health Effects : There are no anticipated carcinogenic effects from exposure based on animal tests performed using toner.
- Page 91 MATERIAL SAFETY DATA SHEET Page: 3/4 Data Issued: Aug. 1. 2003 MSDS No. F-31201 Exposure limit values OSHA-PEL (USA) : 15mg/m (Total Dust) , 5mg/m (Respirable Dust) ACGIH-TLV (USA) : 10mg/m (Total Dust) , 3mg/m (Respirable Dust) Personal Protective Equipment Respiratory Protection : Not required under intended use.
- Page 92 MATERIAL SAFETY DATA SHEET Page: 4/4 Data Issued: Aug. 1. 2003 MSDS No. F-31201 Chronic Effect : In a study in rats of chronic inhalation exposure to a typical toner, a mild to moderate degree of lung fibrosis was observed in 92% of the rats in the high concentration (16mg/m ) exposure group, and a minimal to mild degree of fibrosis was noted in 22% of the animals in the middle (4mg/m...
-
Page 93: Index
INDEX Symbols Copy finishing functions [#/P] key ............10, 55, 56 - Group copy............35 - Offset function ..........35 2 - 8 - Sort copy ............35 2 x 500-sheet paper feed unit ..... 70, 77, 79 - Staple sort ............37 256MB expansion memory board ...... - Page 94 Misfeed in the upper paper tray ......69 Greyed out .............. 11 Misfeed removal Group copy.............. 35 - Bypass tray ............. 67 [GROUP] key ............36 - Centre tray ............69 - Lower paper tray ..........70 - Machine............67 Handles ..............
- Page 95 Paper tray.......... 9, 15, 17, 19, 69 - Original size ............ 47 Paper type........... 15, 19, 20 - Pamphlet copy ..........44 Paper weight ............15 [SPECIAL MODES] key ......21, 39, 40 Part names and functions Special papers - Operation panel ..........10 - Envelope ............
-
Page 96: Index By Purpose
INDEX BY PURPOSE Preparations Special modes, using Bypass tray, loading paper in........18 - Card shot copy ..........50 Documet cover, removing ........24 - Cover copy ............48 Initial settings, returning to ........14 - Dual page copy ..........43 Paper size, changing..........19 - Erase copy ............ -
Page 97: Trademark Acknowledgments
• PCL is a registered trademark of the Hewlett-Packard Company. • IBM, PC/AT, and PowerPC are trademarks of International Business Machines Corporation. • Sharpdesk is a trademark of Sharp Corporation. • All other trademarks and copyrights are the property of their respective owners. - Page 98 Connectors Caution: This connector is only intended for service purposes. Any connection to this terminal may cause malfunctions of the copy machine. Instruction for service technician: The cable length for the service terminal has to be less than 3 m (10 feet). RSPF connector Finisher connector LUOKAN 1 LASERLAITE...
- Page 99 If the product is used for business purposes and you want to discard it: Please contact your SHARP dealer who will inform you about the take-back of the product. You might be charged for the costs arising from take-back and recycling. Small products (and small amounts) might be taken back by your local collection facilities.
- Page 100 This manual has been printed using a vegetable-based soy oil ink to help protect the environment. PRINTED IN CHINA Printed on 100% post-consumer recycled paper 2007C TINSE1765QSZZ...
Need help?
Do you have a question about the AR-M256 and is the answer not in the manual?
Questions and answers