
Related Manuals for Honeywell Tuxedo Touch Series Home Automation System


Summary of Contents for Honeywell Tuxedo Touch Series Home Automation System
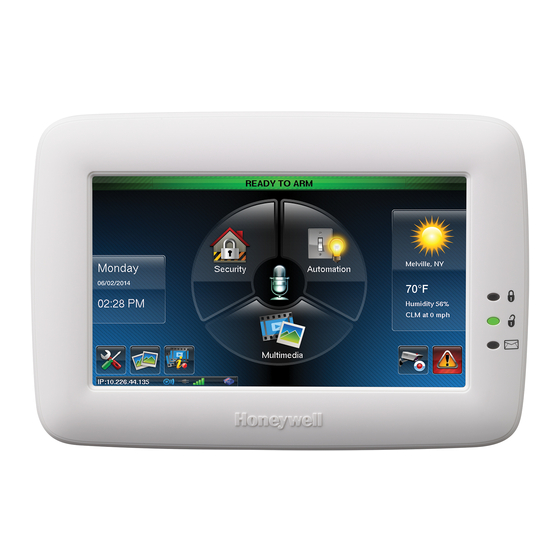
- Page 1 User Guide 800-08091V3 4/13 Rev. A...
-
Page 2: Table Of Contents
Table of Contents ABOUT THE SYSTEM ....................................5 Introduction ......................................5 System Interface ..................................5 Navigating through the Tuxedo Touch Keypad ..........................5 About Your Home Screen................................6 Multi-Media Application ................................6 Weather Forecast ..................................6 System Troubles ..................................8 User Codes .................................... - Page 3 Table of Contents How to Clear/Hide a Control Panel Message ..........................16 Advanced System Features ............................... 16 Console Emulation Mode ................................16 How to View the Event Log ................................ 17 How to Send Emergency Messages ............................17 SETUP ........................................18 Brightness and Volume Control ..............................
- Page 4 Enroll/Add Z-Wave Devices ................................33 Editing Z-Wave Device Names ..............................35 Remove/Delete Z-Wave Devices ............................... 35 Remove/Delete a Door Lock ..............................35 Remove/Delete a Honeywell Thermostat ........................... 36 Remove All Z-Wave Devices ..............................36 Abort a Z-Wave Action ................................36 Scene Setup ....................................37 Create a Room ...................................
-
Page 5: About The System
About the System Introduction Congratulations on your ownership of a Honeywell Tuxedo Touch™ Home Automation System which combines home automation and home security. With clear, simple controls on a touch-screen interface, Tuxedo Touch™ is both easy to learn and easy to use. -
Page 6: About Your Home Screen
In some extreme cases, the keypad may need to be reset. NOTE: Honeywell is not responsible for any loss of personal information (files, videos, photos, etc.) The background and icons shown on the “Home” screen in this manual are for example only. Your system installer may have changed the actual background and icons shown on your “Home”... -
Page 7: Navigation Icon Descriptions
About the System (cont'd) Navigation Icon Descriptions To aid in the navigation of the Tuxedo Touch, a set of user-friendly icons has been provided. The appearance and function of these icons are described below. ICON ICON TITLE FUNCTION ICON ICON TITLE FUNCTION “Product / Accesses Product Introduction... -
Page 8: System Troubles
About the System (cont'd) System Troubles The “Security” screen also displays an Icon(s) if a system trouble(s) occurs. If a Trouble Icon is shown, contact your alarm company. The following Icons may be shown as applicable to your system: ICON FUNCTION AC Loss –... -
Page 9: User Codes
About the System (cont'd) User Codes Each user must be assigned a name with a corresponding 4-digit user code in order to gain access to authorized features and functions. Users for the system are programmed in a central user setup location that provides the specific questions for authorization level, partition assignment, and RF zone assignment. -
Page 10: Security
Security Introduction to Security System Operation You can arm the system in one of three arming modes: Away, Stay, and Night. The following table lists the three different arming modes and the results of each. FEATURES FOR EACH ARMING MODE Arming FUNCTION Exit... -
Page 11: How To Arm The System
Security (cont'd) How to Arm the System Arming the system in any mode is performed in the same way, as described below. Note: Close all perimeter windows and doors before arming. Arm the system as follows: ICON ACTION NOTES 1. From the “Home” screen, press the Note: If Quick Arm is Not enabled in your system, a message to enter your SECURITY icon. -
Page 12: How To Display Faults
Security (cont'd) How to Display Faults The Display Faults function is used when you see a “Not Ready Fault” message and want to determine where the fault is and what type of fault it is. To display faults do the following: ICON ACTION NOTES... -
Page 13: How To Clear Bypassed Zones
Security (cont'd) ICON ACTION NOTES 6. Press the BACK icon to return to the The "More Choices" screen is displayed showing the system status as Ready- “Arming” screen. Bypass. How to Clear Bypassed Zones A bypassed zone is automatically unbypassed when you disarm the system. If a zone is bypassed, you can remove the bypass as follows: ICON ACTION... -
Page 14: To Disarm Multi-Partitions Do The Following
Security (cont'd) To disarm Multi-Partitions do the following: ICON ACTION NOTES 1. From the “Home” screen, press the Security The keypad displays “Multi-Partition Arming”. icon. 2. Press the Arm Multi-Partition icon. 3. Press the Disarm icon. 4. Enter your 4-digit user code. 5. -
Page 15: In Case Of Fire Alarm
Security (cont'd) CO annunciation has not been investigated by UL and may not be used for UL installations. In Case of Fire Alarm A FIRE message appears at your keypad and remains on until you silence the alarm. Should you become aware of a fire emergency before your detectors sense the problem, go to your nearest keypad and manually initiate an alarm by pressing the panic key assigned as FIRE emergency (if programmed by the installer) and hold down for at least 2 seconds. -
Page 16: More Choices
Security (cont'd) More Choices How to Clear/Hide a Control Panel Message The Control Panel Message icon alerts the user to a control panel message. When a Control Panel Message is displayed, the user has two options. User can clear the Control Panel Message immediately, or minimize the window and clear it at a later time. To Clear/Hide the Control Panel Message, do the following: ICON ACTION... -
Page 17: How To View The Event Log
Security (cont'd) How to View the Event Log Your system has the ability to record various events in a history log wherein each event is recorded with the time and date of its occurrence. The control panel must be programmed to record various system events in the installer programming mode. To view the Event Log, perform the following: ICON ACTION... -
Page 18: Setup
Setup Setup allows you to make changes to the way your keypad is operating. You may access the Brightness and Volume, Display & Audio Setup, IP Setup and System Setup from the "Setup" screen. Brightness and Volume Control ccess the "Setup" screen as follows: From the "Home"... -
Page 19: Adjust The Screen Timeouts
Setup (cont'd) Note: If using a Z-Wave thermostat with Celsius as your degree preference, the temperature can be adjusted by 0.5 degree increments. Adjust the Screen Timeouts When the keypad is left idle, it automatically: • turns the “Backlight Off After” the selected backlight off time has expired (unless “Never” option is selected). •... -
Page 20: Web Server/Hosting
Setup (cont’d) Web Server/Hosting The Tuxedo Touch keypad offers web-hosting capability allowing you to access your Security and Home Automation System via any web enabled device. The Tuxedo Touch Keypad’s ‘IP Address’ is used on a standard web browser to control user functions such as, Security, Z-Wave operation, and camera viewing. - Page 21 Setup (cont'd) Fixed IP Addresses If the IP Address is not displayed in the lower left-hand corner on the Tuxedo Touch Keypad “Home” screen, you may require a “Static” (Fixed) IP Address that can be found by accessing your router. Refer to your router instructions for further information. To access “IP Setup”, do the following: ICON ACTION...
-
Page 22: Multi-Media
Multi-Media The Multi-Media feature allows you access voice messages, play video files, display a slide show of personal photos, and view up to four cameras at once from your keypad. Multi-Media functionality is supplementary only and has not been evaluated by UL. Voice Messages The Tuxedo Touch Keypad can record voice messages for others on the premises. -
Page 23: Video (Audio) Setup
Multi-Media (cont'd) Video (Audio) Setup To access the Video and Audio feature, do the following: ICON ACTION NOTES 1. Insert your personal media (SD/SDHC) card A Video Converter is required to convert videos for proper playback on the (with stored video files). Tuxedo Touch Keypad. -
Page 24: Camera Setup
Multi-Media (cont’d) ICON ACTION NOTES 6. To remove an image from the slide show, select Press the TOP button to move up one level in the directory. the image, and press the Deselect Image icon. Press the OPEN button to view larger images and/or open directories, To set a picture as wallpaper: select from the list of stored images. - Page 25 Multi-Media (cont'd) ICON ACTION NOTES 5. Press the Add icon (if the camera information is Use the Data Entry Keyboard to enter the required information. not automatically obtained), to manually enter • Use the Shift key for capital letters information. •...
-
Page 26: User Setup
User Setup User Setup allows you to Add a User, Delete a User, and Edit a User. You may access User Setup from the System Setup screen. Each user must be assigned a name with a corresponding 4-digit user code in order to gain access to various features and functions. -
Page 27: How To Add An Existing User To A Second Keypad
User Setup (cont'd) ICON ACTION NOTES 7. Press the box next to User Number and enter The authorized code for adding users is dependent upon the alarm an “available” (3-digit) user number; press the panel you are interfacing with. Check your alarm panel Installation and Setup Guide to determine who can add users. -
Page 28: Safe Mode
User Setup (cont'd) Safe Mode The Safe Mode may be automatically entered by the program on a communication failure or may be entered manually on command. To Exit the Safe Mode: 1. Press the ! SAFE MODE ! bar. 2. Select “Yes” to return to the Normal Mode of operation. The keypad resets and normal operation returns as long as the original conditions that caused the entry into Safe Mode do not still exist. -
Page 29: Time/Date Setup
User Setup (cont'd) Time/Date Setup You can set the time and date from the Set Time & Date screen. • When the time is set it is stored in the keypad and sent to the control panel when you press the Apply icon and answer Yes to the following prompt. -
Page 30: User System Setup
User System Setup Advanced Setup Advanced Setup allows access to the System Information, Keypad Reset, Keypad Test, Night Setup and Output Setup menus. System Information To view the latest software version installed on your system, do the following: ICON ACTION NOTES . - Page 31 User System Setup (cont'd) LED Test ICON ACTION NOTES 1. Press the LED Test icon; "Testing.." is displayed At the conclusion of the test, a pop-up "Confirmation Window" displays: while the 3 LEDs light sequentially, top to "Did you see chasing LED pattern?" If you press Yes, "Passed"...
- Page 32 User System Setup (cont'd) ICON ACTION NOTES 7. Select the Z-Wave Basic Command Set On icon to turn On all lamp Note: This command does not control door modules, dimmer On/Off switches and receptacles. locks or any other security enabled devices. 8.
-
Page 33: Automation
Automation The Tuxedo Touch Home Automation System with web hosting capability is equipped with Z-Wave technology and is designed to automate devices in a home control network. The keypad allows you to easily add and control multiple devices with the press of a button. - Page 34 Door Lock User Guide. Enroll a Honeywell Thermostat Install Honeywell Thermostat according to the manufactures instructions. Device should be mounted in the final location and tested before adding it to the system. Note: Honeywell is not responsible for property damages due to improper setting of the thermostat modes.
-
Page 35: Editing Z-Wave Device Names
Automation (cont'd) Editing Z-Wave Device Names Edit a Device Module Name To edit a device name, do the following: ICON ACTION NOTES 1. At the Tuxedo Touch Keypad: a) Press the Automation icon from the “Home” screen Enter the new device name on the data entry keyboard. and press the Z-Wave Setup icon to display the “Z- Notes: •... -
Page 36: Remove/Delete A Honeywell Thermostat
Automation (cont'd) Remove/Delete a Honeywell Thermostat To remove a Honeywell Thermostat from the Z-Wave network, do the following: ICON ACTION NOTES 1. At the Tuxedo Touch Keypad: a) Press the Automation icon from the “Home” screen, IMPORTANT: Honeywell is not responsible for property damages and then press the Z-Wave Setup icon to display the due to improper setting of the thermostat modes. -
Page 37: Scene Setup
Automation (cont'd) Scene Setup The “Scene” feature is used to control the function of a single device, or multiple devices based on pre-set Conditions, Triggers, and Actions. When the trigger/condition occurs, the action is executed. Define a Scene as follows: ICON ACTION NOTES... -
Page 38: Scene Setup Options
Automation (cont'd) Scene Setup Options Options for adding a Condition (if needed) – After each selection press SAVE!!! In the “Condition” box, press the Add icon. To set the time, press the TIME button: “Set the occurrence” to Repeated, or Once. If “Repeated” was selected, choose the desired days of the week;... -
Page 39: Create A Room
Automation (cont'd) Notes: 1. Motorized door lock bolts physically lock and unlock the door when activated, but if the door lock installed is a non-motorized type, activation allows the door to be manually unlocked without a key. See “Compatible Devices” section for further information. 2. -
Page 40: Updating Controllers (Keypads) With New Or Removed Devices
Automation (cont'd) Updating Controllers (Keypads) with New or Removed devices When devices are added or removed from the Z-Wave network, the device information needs to be updated in the Controllers. To update this information you do not have to remove the device first. From the Primary controller, do the following: ICON ACTION NOTES... -
Page 41: Remote Services
Automation (cont'd) Remote Services The Tuxedo Touch™ supports Remote Services for controlling Z-Wave devices and scenes remotely from an associated Total Connect account. The following describes the related features: • Tuxedo Touch [automation] can be controlled from a smart phone, i-Pad , Android Tablet, Blackberry ®... -
Page 42: Total Connect Server Screen For Troubleshooting
Automation (cont'd) Controlling Automation (Z-Wave) Devices Remotely Use Total Connect to control Z-Wave devices: lamp modules (binary switch), dimmer modules (multilevel switch), thermostats, etc., from a smart phone, i-Pad , Android Tablet, Blackberry or PC. ® 1. Access the Total Connect account and navigate to the Automation section of the dashboard. 2. -
Page 43: Compatible Devices
Yale Real Living Touchscreen Deadbolt Lock Schalge Link Deadbolt Lock Schlage Link Lever Lock Kwikset Smartcode Lever Lock Kwikset Smartcode Deadbolt Lock Thermostats Honeywell ECC Wayne Dalton Zwave Thermostat Trane Zwave Thermostat Appliance HomeManageable Appliance Module Wayne Dalton Small Appliance Module... -
Page 44: Important Notes
Important Notes Wireless Range This device complies with the Z-Wave® standard of open-air, line of sight transmission distances of 100 feet. Actual performance in a home depends on the number of walls between the controller and the destination device, the type of construction and the number of Z- Wave enabled devices installed in the control network. -
Page 45: Glossary
Glossary The following terms are used throughout the guide. Arm/Disarm: “Armed” simply means that the burglary portion of your system is turned ON and is in a state of readiness. “Disarmed” means that the burglary system is turned OFF, and must be rearmed to become operational. However, even in a “disarmed”... - Page 46 FEDERAL COMMUNICATIONS COMMISSION STATEMENTS The user shall not make any changes or modifications to the equipment unless authorized by the Installation Instructions or User's Manual. Unauthorized changes or modifications could void the user's authority to operate the equipment. FCC CLASS B STATEMENT This equipment has been tested to FCC requirements and has been found acceptable for use.
- Page 47 TWO YEAR LIMITED WARRANTY Honeywell International Inc., acting through its Security & Communications business (“Seller”), 2 Corporate Center Drive, Melville, New York 11747 warrants its products to be free from defects in materials and workmanship under normal use and service, normal wear and tear excepted, for 24 months from the manufacture date code;...
- Page 48 2 Corporate Center Drive Ê800-08091V3RŠ Suite 100, P.O. Box 9040 Melville, NY 11747 Copyright © 2013 Honeywell International Inc. 800-08091V3 4/13 Rev. A www.honeywell.com/security...
Need help?
Do you have a question about the Tuxedo Touch Series Home Automation System and is the answer not in the manual?
Questions and answers