Table of Contents
Advertisement
Operator's
Manual
CRRFr MRN
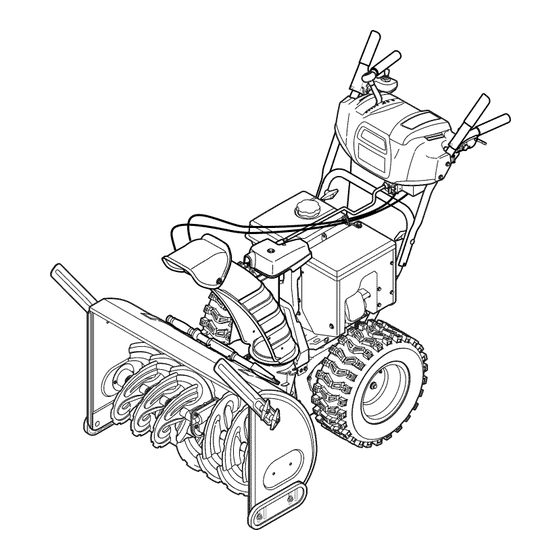
30" SNOW THROWER
Model No. 247.883961
CAUTION"
Before
using this
product,
read this manual
and
follow
all safety
rules and operating
instructions.
,, SAFETY
o ASSEMBLY
OPERATION
MAINTENANCE
PARTS LIST
o ESPANOL
Sears Brands
Management
Corporation,
Hoffman
Estates,
IL 60179, U.S.A.
Visit our website:
www.craftsman.com
FormI/o 769-08184C
(June21,2013)
Advertisement
Table of Contents

Related Manuals for Craftsman 247.883961


Summary of Contents for Craftsman 247.883961
- Page 1 Operator's Manual CRRFr MRN 30" SNOW THROWER Model No. 247.883961 ,, SAFETY o ASSEMBLY OPERATION MAINTENANCE CAUTION" Before using this PARTS LIST product, read this manual o ESPANOL follow all safety rules and operating instructions. Sears Brands Management Corporation, Hoffman Estates, IL 60179, U.S.A.
- Page 2 Sears a uthorized service provider. With proofofpurchase, youwill receive a new chute freeofcharge. Y ou areresponsible for thelaborcostofinstallation andanycostincurred to verifythedefect. Forwarrantycoverage d etails to obtainrepair or replacement, visitthewebsite:www.craftsman.com This warrantycovers ONLY d efects in material a ndworkmanship. Warranty coverage d oesNOT include: •...
- Page 3 Thissymbolpointsout importantsafety instructionswhich, if not Thismachinewasbuilt to beoperatedaccordingto the safeoperation followed, could endangerthe personalsafetyand/or property of practicesin this manual.Aswith anytype of powerequipment, yourself and others.Readandfollow all instructions in this manual carelessness o r error on the part of the operatorcanresultin seriousinjury. beforeattempting to operatethis machine.Failureto complywith these Thismachineiscapableof amputating fingers, hands,toesandfeet and instructions m ay resultin personalinjury.Whenyou seethis symbol, HEED...
- Page 4 To r educe fire hazards, keep machine free o fgrass, leaves, or other debris Use onlyattachments andaccessories approved bythe manufacturer ( e.g. build-up. Clean up oil o r fuel spillage and r emove any f uel soaked debris. wheelweights,tire chains,cabs etc.). Never store the machine or fuel container...
- Page 5 Check fuelline,tank,cap,andfittings frequentlyfor cracks or leaks. R eplace if necessary. Donot crankenginewith sparkplug removed. According to the Consumer Products S afetyCommission ( CPSC) andthe U.S. E nvironmental Protection Agency (EPA), thisproducthasan Average Useful Life of seven (7)years, o r 60 hoursofoperation. A tthe endof the Average Useful Life havethe machine inspected annuallybyan authorized service dealerto ensure that all mechanical andsafetysystems areworkingproperly andnotwornexcessively.
- Page 6 SAFETY SYMBOLS Thispage depicts and describes safety symbols that may appear on this product. Read, understand, and follow all instructions on the machine before attempting to assemble and operate. READ THE OPERATOR'S MANUAL(S) Read, understand, and follow all instructions in the manual(s) before attempting to assemble operate WARNING--...
- Page 7 This page left intentionally blank.
- Page 8 NOTE: References to rightor left sideofthe snowthroweraredetermined from behindthe unit in theoperatingposition(standing directlybehindthe snow thrower,facingthe handlepanel). Removing FromCarton Cutthe corners of the cartonandlaythe sides flat on theground.Remove anddiscard all packinginserts. Movethe snowthrowerout of the carton. Makecertainthe cartonhasbeencompletely emptiedbefore discarding it. Assembly Observe t he lowerrearareaof the snowthrowerto besurebothcables are alignedwith rollerguidesbeforepivotingthe handleupward.
- Page 9 Insertthe roundendofthe chutecontrolrodinto inputofchutecontrol head.Push rodasfar intothe chutecontrolheadaspossible, k eeping the holesinthe rodpointingupward.SeeFigure 4. Place chuteontochutebaseandensure chutecontrolrodispositioned under handlepanel.Secure chutecontrol h eadto chutesupportbracketwithclevis pinandbow-tiecotterpinremoved instep 1.SeeFigure 5. Finishsecuring chutecontrolheadbyinstallinghexbolt andwing nut.See Figure 6. Insertthe otherendof thechutecontrolrodinto the inputshaftbelowthe handlepanel.Makesureto lineupthe flat endof the rodandthe flat end ofthe inputshaft.Youmayneedto rotatethe rodarounduntil thesetwo surfaces l ineup.SeeFigure 7.
- Page 10 Push the chutecontrolrodtowardthe controlpane[until the holeinthe rod linesupwith the middleholeinthe chutecontrol i nputandinsertthe cotter pin. See Figure& NOTE: Thereisareference holeprovided at rearendof control r odto help knowwhenholesarevertical NOTE: Theholefurthestfrom the chutecontrol h eadisusedto achieve furtherengagement o fthe chutecontrolrodintothe inputshaftif required. Referto the Maintenance &...
- Page 11 ChuteClean-Out Tool Achuteclean-out t ool isfastened to the top ofthe augerhousing with amounting clip.SeeFigure 11.Thetool isdesigned to cleara chuteassembly o f iceandsnow. Thisitem isfastened with acabletieat the factory.Cutthe cabletie before operatingthe snowthrower. Neveruseyour handsto clearacloggedchute assembly. S hutoff engine and remainbehind handlesuntil all moving parts havestoppedbefore using the clean-outtool to clearthe chute assembly.
- Page 12 Adjustments Skid Shoes Thesnowthrowerskidshoes areadjustedupwardat the factoryfor shipping Smooth Surface purposes. Adjustthemdownward, i f desired, p riorto operatingthe snowthrower. it isnotrecommended t hat youoperate this snowthrower on gravelas it caneasilypickup andthrowloose gravel, c ausingpersonalinjuryor damageto thesnowthrowerandsurroundingproperty. Forclose snowremoval o n asmoothsurface, r aiseskidshoes higheronthe augerhousing.Refer t o Figure 14.
- Page 13 Thedrift cuttersaredesigned for useindeepsnow. T heiruseisoptional f or normal snowconditions. M aneuver the snowthrowersothatthe cutterspenetrate a high standingsnowdrift to assist s nowfalling into the augers forthrowing. Meets ANSi S afetyStandards Craftsman SnowThrowers c onformtothe safetystandard of the American National S tandards I nstitute(ANSI).
- Page 14 Throttlecontrol DriveControl/Auger ControlLock DRIVE CONTROL Thethrottle control islocated on the rear ofthe engine. Itregulates the speedof the engine engine position. and willshut offthe when moved into the STOP Depressing the primerforces fueldirectlyintothe engine's carburetor t o aidin cold-weather s tarting. Recoil Starter Handle Thishandleisusedto manuallystartthe engine.
- Page 15 Manual ChuteControl Clean-OutTool Proceed a sfollowsto utilizethe manual c hutecontrol: Remove t he cotterpin fromeitherof the holesfurthestfromthe chute Neveruseyour handsto cleara cloggedchuteassembly.Shutoff engine assembly o n the chutecontrol h ead. andremainbehindhandlesuntil all moving parts havestopped before Pushinthe chutecontrol r oduntil the holein it linesupwith the third hole using the clean-outtool to clearthe chuteassembly.
- Page 16 Gasoline Electrk Starter Use automotivegasoline (unleaded or low leadedto minimizecombustion chamber deposits) w itha minimumof87 octane.Gasoline w ith up to 10%ethanolor 15% MTBE (Methyl T ertiaryButylEther) canbeused. N everuseanoil/gasoline mixture Theelectric starter isequippedwith a groundedthree-wire power plug, or dirty gasoline. A void getting dirt, dust,or waterinthe fuel tank.DO NOT useE85 andisdesignedto operate on 120voltAChousehold current.
- Page 17 Recoil Starter NOTE: W henselectinga Drive Speed, u setheslowerspeeds untilyouare comfortable andfamiliarwith theoperationof the snowthrower. Squeeze the drivecontrol a gainstthe handle andthe snowthrowerwill move.Release i t anddrivemotionwill stop. Donot pullthe starter handle while the enginerunning. flOTE: N EVER reposition theshift lever(change speeds or directionof travel) Movethrottle control t o FAST ( rabbit)_J_ position.
- Page 18 MAINTENANCE SCHEDULE Followthe maintenance s chedule givenbelow.Thischartdescribes s ervice guidelines only.Use the Service Logcolumn to keeptrackofcompleted maintenance t asks.Tolocatethe nearest S ears Service C enter o r to schedule service, Beforeperforming any type of maintenance/service, d isengageall controls andstop the engine.Wait until all moving parts havecometo a complete simplycontactSears at 1-800-4-MY-HOME ®.
- Page 19 Refillwith the recommended o il andcheck the oil level. S eeRecommended OilUsage chart.Theengine's oil capacityis37ounces. (oF)-40o-20 o 0o 200 400 Oil Drain (oc) -30° -20° -10 ° 0° Plug DO NOT use nondetergentoil or 2-strokeengine oil. It couldshorten the engine'sservicelife. Reinstall the oil filler cap/dipstick securely.
- Page 20 Lubrication "I GearShaft Thegear(hex)shaftshouldbelubricated at leastonceaseason or after every25 hoursof operation. Topreventspillage, r emove all fuel fromtank byrunningengineuntil it stops. Carefully pivotthe snowthrowerupandforwardsothat it restsonthe auger housing. Remove t he lowerframecoverfrom the underside of the snowthrowerby removing the self-tapping screws whichsecure it. Applya lightcoatingof engineoil (or3-in-1oil) to the hexshaft.SeeFigure NOTE: Whenlubricating the hexshaft,becareful n ot to get anyoil onthe aluminum driveplateor rubberfrictionwheel.Doing sowill hinderthe snowthrower'sdrive...
- Page 21 Adjustments Shift Cable If the full rangeof speeds (forwardandreverse) c annotbeachieved, referto the figureto the fight andadjusttheshift cableasfollows: Place the shift leverinthe fastestforwardspeed position(F6). Loosen the hex nut onthe shift cableindexbracket. S eeFigure 27. Pivotthe bracket d ownwardtotake upslackinthe cable. Retighten the hexnut.
- Page 22 Auger Control Referto theAssembly sectionforinstructions on adjustingtheaugercontrol c able. Skid Shoes Referto theAssembly sectionforinstructions on adjustingtheskidshoes. Belt Replacement Auger Belt Toremove andreplace yoursnowthrower'saugerbelt, proceed asfollows: Topreventspillage, r emove all fuel fromtank byrunningengineuntil it stops. Remove t he plasticbelt coveronthe front of the enginebyremoving thetwo self-tapping screws.
- Page 23 Loosen andremove the shoulder screw whichactsasabelt keeper. R efer t o Figure 33. Remove t he belt fromaroundthe augerpulley,andslipthe belt betweenthe supportbracket a ndtheaugerpulley.SeeFigure 34. NOTE: Engaging t he augercontrol w ill easeremoval a ndreinstallation of the belt. Reassemble augerbeltbyfollowing instructions inreverse order. flOTE: D oNOT forgetto reinstallthe shoulder s crewandreconnect t hespring to the frameafterinstallingareplacement augerbelt.
- Page 24 If the snowthrowerwill not beusedfor 30daysor longer, o r if it is theendof thesnowseason whenthe lastpossibility of snowisgone,the equipmentneeds to bestored properly.Follow storageinstructions belowto ensuretop performance f rom thesnowthrowerformanymoreyears. PreparingEngine PreparingSnowThrower Engines s toredover30daysneedto bedrained of fuel to prevent d eterioration and Whenstoringthe snowthrowerin anunventilated or metalstorage shed, gumfromforminginfuel system or on essential c arburetor p arts.If thegasoline in careshouldbetakento rustproof t he equipment.
- Page 26 Disconnect the sparkplug wireandgroundit againstthe engine to prevent unintended starting. Beforeperforming anytypeof maintenance/service, disengage all controls andstop the engine.Wait until aHmovingparts havecometo a completestop.Alwayswear safetyglasses duringoperation or while performing any adjustmentsor repairs. This section addresses minor service i ssues. Tolocate the nearest Sears Service Center o rto schedule service, simply contact Sears at 1-800-4-MY=HOMP. Engine fails to start Choke control not in CHOKE position.
- Page 27 Unit fails to discharge snow 1. Chute assembly clogged. 1. Stop engine immediately and disconnect spark plug wire. Clean chute assembly and inside of auger housing with clean-out tool or a stick. 2. Foreign object lodged in auger. 2. Stop engine immediately and disconnect spark plug wire.
- Page 28 Craftsman SnowThrower Model 247.883961 j& 23 12...
- Page 29 Craftsman Snow ThrowerModel 247.883961 731-2635 Snow Removal Tool Mount 684-04108-4044 Spiral Assembly, 684-04057A-0637 731-04870 Impeller Assembly, 12" Dia. Spacer, 1.25 OD x .75 ID x 1.00 710-0347 Hex Screw, 3/8-16, 1.75, Gr5 736-0188 Washer, Flat, .76 x 1.49 x .06...
- Page 30 Craftsman SnowThrower Model 247.883961...
- Page 31 Craftsman SnowThrowerModel 247.883961 738-04184A Shoulder Screw 735-04099 Plug, 3/8 ID 711-1268B Actuator Shaft 790-00316-0691 Frame Cover 946-05067 Drive Clutch Cable 656-04055 Friction Wheel Disc Assembly 918-06072 732-04345 Extension Spring Drive Shaft Assembly 684-04153C 790-00207C Drive Clutch Cable Guide Bracket Friction Wheel Assembly...
- Page 32 Craftsman SnowThrower Model247.883961 _\38 66/g...
- Page 33 Craftsman SnowThrower Model 247.883961 716-04036 684-04112C E-Ring Handle Engagement Ass'y RH 731-04894D Lock Plate 914-0145 Click Pin 684-04250 Pivot Rod 732-04677 Cable Guide 731-08947 Handle Panel Cover 935-0199A Rubber Bumper 925-06095 710-3069 Screw, 1/4-20 x .500 LED Light Socket 731-04896B...
- Page 34 Craftsman SnowThrower Model 247.883961...
- Page 35 Craftsman SnowThrowerModel 247.883961 712-04064 738-04367 Flange Lock Nut, 1/4-20 Flange Shoulder Screw 710-04373A Screw, #12-16 x .75 710-0627 Hex Screw, 5/16-24 x .750 731-06440A Lower Chute 911-05752 Shaft, Worm Drive 917-04973A 710-04071 Gear, Helical Carriage Bolt, 5/16-18 x 1.0 917-05019...
- Page 36 Craftsman Engine Model 483-SUBForSnow Model 247.883961 710-04915 Bolt M6x12 951-11339 Muffler Shield 710-04915 Bolt M6x12 951-10757 Throttle Control Knob 951-11595 Control Panel 731-05632 951-10637 Key Switch Assembly 951-11302 Choke Knob i 10 710-04914 Bolt M6xlO 951-11181 i 11 Exhaust Pipe Shield...
- Page 37 Craftsman Engine Model 483-SUBForSnow Model 247.883961 --134 135--_ 137138 __0--_ 147-Carburetor Rebuild Kit 139_ _139 ID - Throttle Shaft Cover 710-05392 Stud M6-8x100 Idle Jet Rivet 710-05056 Stud M6-8x118 951-11315 Carburetor Intake Gasket Idle Jet Assembly 951-11316 Carburetor Insulator Idle Speed Adjusting...
- Page 38 Craftsman Engine Model 483-SUB ForSnow Model 247.883961 144- GasketKit- CompJete 145- GasketKit- External 146- CompleteEngine...
- Page 39 Craftsman Engine Model 483-SUBForSnow Model 247.883961 710-06062 Bolt M8x45 951-11951 Connecting Rod Assembly Piston 710-06063 Bolt M8x35 951-11952 710-04968 Bolt M6x16 951-11953 Piston Pin Snap Ring Piston Pin 951-11320 951-11954 Oil Tube Support Bracket 710-05349 Bolt M6x8 951-12579 Piston Ring Set...
- Page 40 Craftsman Engine Model 483-SUBForSnow Model 247.883961 11o_ 116"--_) _11311s 1::4 120 119 144-Gasket K it-Co replete 145- Gasket Kit- I:xternal 146- Complete Engine...
- Page 41 Craftsman Engine Model 483-SUBForSnow Model 247.883%1 951-12081 951-11337 Valve Kit Exhaust Lash Cap 951-11337 Valve Kit 951-11965 Push Rod Guide 951-11962 951-11981 Tappet Rocker Arm Assembly 951-11335 Push Rod Kit 710-04962 Bolt, Pivot 951-11966 Rocker Arm 951-12555 Cylinder Head Kit (Inc.106,110-112,125)
- Page 42 Craftsman Engine Model 483-SUBForSnow Model 247.883961 710-04965 Screw M4 X 55 951-11313 Cooling 951-11196 Electric Starter 951-11314 Starter Cup 712-04220 710-04967 Bolt M8x55 Flywheel Nut, M14x1.5 710-04968 Bolt M6x16 951-11305 Ignition Coil Assembly 710-05350 710-04915 Bolt M6x12 Ignition Coil Bolt...
- Page 43 Craftsman Engine Model 483-SUBForSnow Model 247.883961 26 / 34 32 951-12533 951-11336 Fuel Line Kit Fuel Cap Assembly 951-I 1933 Fuel Level Indicator 951-11700 Fuel Hose Clamp 710-04921 Bolt M8x14 710-04970 Bolt M8x20 951-11182 750-05312 Fuel Tank Mounting Bracket Bushing,...
- Page 44 CraftsmanSnowThrowerModel 247.883961 777S32636 777125002 1001 lnO-NV:ZlO 7VnNVIN S,EIOLVEFIdO QV::IEI "g "8:IOV:IEInS I :IAVEIO NO8NIIVU:IciO N3HMNOIlrlV3 VEIIX3 :]Sfl 'S830NVLSA81V 39UVHOSIQ IO]UIO EI3A3N ' S]IHflPNl8103F80NMOEIHI Q IOAV 01 "I "3NIHOVW 9NIOIAEI3S 8 0 ONIOOOIONA ]H0:139(]3dd01S 3AVH SIUVd9NIAOW 11V111Nfl S 31QNVH ONIH::I8 NIVI/J3H Q NV'::INION3 d01S'SU_A31 H Oln10 39VON:ISIO 7 ":_11'1H3...
- Page 45 FEDERAL and/or CALIFORNIA EMISSION CONTROL W ARRANTY STATEMENT YOUR WARRANTY RIGHTS ANDOBLIGATIONS MTD Consumer Group Inc, the United States Environmental Protection Agency (EPA), and for those products certified for sale in the state of California, the California Air Resources Board (CARB) are pleased to explain the emission (evaporative and/or exhaust) control...
- Page 46 10. Add-on o rmodified parts t hatare not e xempted bythe AirResources Board m ay not b eused. The use ofany non-exempted add-on o r modified parts b ytheultimate purchaser willbegrounds fordisallowing awarranty claims. MTD Consumer Group I nc willnotbeliable t o warrant failures ofwarranted parts c aused bytheuse ofanon-exempted add-on o rmodified part.
- Page 47 Congratulations onmakingasmartpurchase. YournewCraftsman ®productisdesigned andmanufactured f or yearsof dependable operation. B utlikeall products, i t mayrequire repairfromtime to time.That'swhenhaving a Repair P rotection Agreement c ansave youmoneyandaggravation. Here'swhat the Repair ProtectionAgreement _ includes: 10,000 [] Expertservice byour professional repairspecialists [] Unlimitedservice and nocharge for partsandlaboronallcovered repairs [] Productreplacementupto $1500 if yourcovered productcan'tbefixed [] Discount o f 25%from regular priceof service andrelatedinstalled p artsnot covered bythe agreement;...
- Page 48 Your Home For troubleshooting, product manuals and expert advice: managernylife www.managemylife.com For repair - in your home - of all major brand appliances, lawn and garden equipment, or heating and cooling systems, no matter who made it, no matter who sold it! For the replacement parts, accessories owner's manuals that you need to do-it-yourself.
Need help?
Do you have a question about the 247.883961 and is the answer not in the manual?
Questions and answers