Philips DVDR3570H User Manual
Hdd & dvd player / recorder
Hide thumbs
Also See for DVDR3570H:
- User manual (95 pages) ,
- Specifications (3 pages) ,
- Quick start manual (2 pages)
Table of Contents
Advertisement
Quick Links
Advertisement
Table of Contents
Troubleshooting

Related Manuals for Philips DVDR3570H


Summary of Contents for Philips DVDR3570H
- Page 1 HDD & DVD Player / Recorder DVDR3570H / DVDR3590H User Manual Read your Quick Start Guide and/or User Manual first for quick tips that make using your Philips product more enjoyable. Register your product and get support at www.philips.com/welcome...
- Page 2 If we are unable to provide a solution, Philips will be pleased to pick-up your DVD Recorder from your home; and provide a service replacement set, within 7 days. That’s the Philips ‘Premium Home Service’ commitment to you. This service comes free-of-charge (except for Consumer Care Helpline) and applies to all Philips DVD Recorders during the Philips warranty period.
- Page 3 Important notes for users in U.K. Italia DICHIARAZIONE DI CONFORMITA’ Mains plug Si dichiara che l’apparecchio DVDR3570H, This apparatus is fi tted with an approved 13 DVDR3590H, Philips risponde alle prescrizioni Amp plug. To change a fuse in this type of plug dell’art.
- Page 4 CAUTION VISIBLE AND INVISIBLE LASER Advarsel: Usynlig laserstråling ved åbning RADIATION WHEN OPEN. AVOID når sikkerhedsafbrydere er ude af funktion. EXPOSURE TO BEAM Undgå utsættelse for stråling. ADVARSEL Bemærk: Netafbryderen er sekundært SYNLIG OG USYNLIG LASERSTRÅLING indkoblet og ofbryder ikke strømmen fra VED ÅBNING UNDGÅ...
- Page 5 Manufactured under license from Dolby Laboratories. “Dolby”, “Pro-Logic” and the GUIDE Plus+, S , VIDEO Plus+, double-D symbol are trademarks of Dolby G-LINK are (1) registered trademarks or Laboratories. trademarks of, (2) manufactured under license from and (3) subject to various international patents and patents applications owned by, or licensed to, Gemstar-TV Guide International, Inc.
-
Page 6: Table Of Contents
Table of Contents General Care and Safety Information ..................8 Setup precautions ..............................8 Cleaning discs ................................8 Hard Disk Drive (HDD) handling care......................8 Energy saving message ............................8 Product Information ....................... 9 Introduction ................................9 Accessories supplied ............................9 Region codes ................................9 Special features ............................10~11 Product Overview Remote Control ...................... - Page 7 Table of Contents Record from external devices ................48~50 Recording from an external device (Camcorder/VCR/DVD player) ..........48 Recording from a DV Camcorder ......................49~50 Copy TV programmes from HDD................51~52 About copying ..............................51 Copying recordings to recordable DVD......................51 Changing the screen display for recordable DVD ..................52 Copy Files Copy fi les between HDD, USB and DVD .............
-
Page 8: Care And Safety Information
Care and Safety Information IMPORTANT NOTE! Cleaning discs DO NOT disconnect the recorder from the power supply unless you are intending not to use this product for a CAUTION! long period of time. Power is needed to Risk of damage to discs! Never use enable the recorder to perform essential solvents such as benzene, thinner, tasks like timer recordings, downloading... -
Page 9: Product Information
Model Hard Disk Maximum supply ratings. Drive recording (HDD) hours DVDR3570H 160 GB Accessories supplied DVDR3590H 250 GB – Quick Start Guide On top of that, you can store the DivX – RF antenna cable movies, music fi les and digital camera –... -
Page 10: Special Features
Product Information (continued) Time Shift Buffer (TSB) Special features As soon as you turn on your recorder, the TV channel it is tuned to will be stored into the Time Shift Buffer. Think Pause Live TV of this as a temporary storage for TV Every TV programme is now under your programmes allowing you great fl exibility. - Page 11 Product Information (continued) SAT Recording This function enables you to record a programme from your Satellite Receiver or any other device. Make sure that the device is connected to the EXT2-TO VCR/SAT socket of this recorder, and the timer setting has been done on the connected device.
-
Page 12: Remote Control
Remote Control : Cursor buttons for moving to the left/right. In recorder’s Live TV mode, replay or skip the scene by a specifi ed length of time. : Cursor buttons for moving up/ down. – Confi rms an entry or selection. HOME –... - Page 13 30-minute increments. INFO – Displays on-screen information. TV VOL +- – Access the programme details in the – Adjusts the volume of the TV (for Philips GUIDE Plus+ system. TVs or compatible brands only). SELECT Alphanumeric keypad –...
-
Page 14: Using The Remote Control
Remote Control (continued) CAUTION! Using the remote control – Remove batteries if they are exhausted or if the remote control is not to be used for a long time. – Do not mix batteries (old and new or carbon and alkaline, etc.). –... -
Page 15: Main Unit
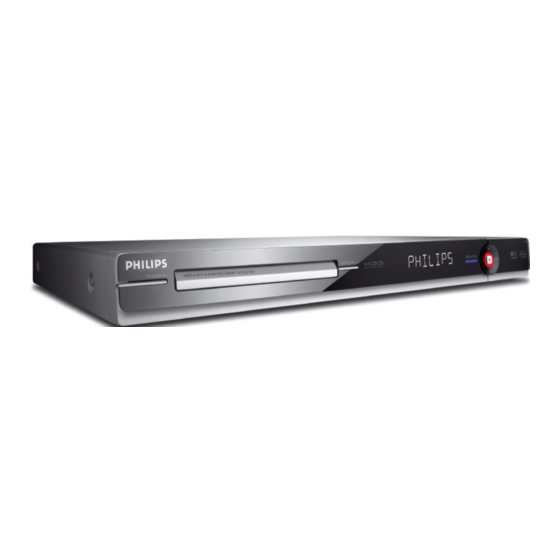
Main Unit STANDBY-ON Sockets behind the fl ap – Turns on this unit or turns off to normal Flip down the door as indicated by the standby mode. OPEN label at the right hand corner. Disc tray DV IN-CAM2 socket ç... -
Page 16: Step 1: Basic Recorder Connections
Step 1: Basic Recorder Connections CVBS OUT TO TV TO VCR/SAT TV-OUT ANTENNA-IN MAINS S-VIDEO OUT AUDIO COAXIAL VIDEO OUT AUDIO OUT DIGITAL OUT Connect the existing Antenna cable (it Connecting the antenna can be from the off-air wall socket or cables Cable Box) to the ANTENNA-IN socket on the recorder. -
Page 17: Connecting The Video Cable
Step 1: Basic Recorder Connections (continued) CVBS OUT TO TV TO VCR/SAT TV-OUT ANTENNA-IN MAINS S-VIDEO OUT AUDIO COAXIAL VIDEO OUT AUDIO OUT DIGITAL OUT Option 2 Option 3 Option 1 Option 1: Using the Scart socket Connecting the video cable Connect a scart cable (supplied) from the This connection enables you to view the EXT1 TO TV socket on the recorder... - Page 18 Step 1: Basic Recorder Connections (continued) CVBS OUT EXT 1 EXT 2 TO TV TO VCR/SAT TV-OUT ANTENNA-IN S-VIDEO OUT COAXIAL AUDIO VIDEO OUT AUDIO OUT DIGITAL OUT Option 4 Note: Option 4: Using Component To enable Y Pb Pr (YUV) connection, you video socket / Connecting to a must set the recorder’s video output Progressive Scan TV...
-
Page 19: Connecting The Audio Cables
Step 1: Basic Recorder Connections (continued) CVBS OUT TO TV TO VCR/SAT TV-OUT ANTENNA-IN S-VIDEO OUT AUDIO COAXIAL VIDEO OUT AUDIO OUT DIGITAL OUT AV amplifi er/receiver Option 2: Using the digital audio Connecting the audio cables socket You can connect the recorder to an AV This connection enables you to listen to amplifi er/receiver in order to enjoy the playback from this recorder. -
Page 20: Step 2: Optional Connections
Step 2: Optional Connections Cable Box / Satellite Receiver CVBS OUT EXT 1 TO TV EXT 2 TO VCR/SAT TV-OUT ANTENNA-IN MAINS S-VIDEO OUT AUDIO COAXIAL VIDEO OUT AUDIO OUT DIGITAL OUT Option 2 (as shown on the above illustration) Connecting to a Cable Box or If your Cable Box/Satellite Receiver Satellite Receiver... -
Page 21: Connecting To A Vcr Or Other Similar Device
Step 2: Optional Connections (continued) VCR (example only) VHF/UHF RF IN SCART IN SCART OUT VHF/UHF RF OUT CVBS OUT EXT 1 TO TV EXT 2 TO VCR/SAT TV-OUT ANTENNA-IN MAINS S-VIDEO OUT AUDIO COAXIAL VIDEO OUT AUDIO OUT DIGITAL OUT Connect a scart cable (supplied) from the Connecting to a VCR or EXT1 TO TV socket on the recorder... -
Page 22: Connecting To A Vcr And Cable Box/Satellite Receiver
Step 2: Optional Connections (continued) Back of a Satellite Box Back of a VCR (example only) (example only) CVBS OUT TO TV TO VCR/SAT TV-OUT ANTENNA-IN MAINS S-VIDEO OUT COAXIAL AUDIO VIDEO OUT AUDIO OUT DIGITAL OUT Connect another scart cable (not Connecting to a VCR and supplied) from the EXT2-TO VCR/ Cable Box/Satellite Receiver... -
Page 23: Connecting To A Camcorder
Step 2: Optional Connections (continued) Option 1 Option 2 Option 2: Using the VIDEO In Connecting to a camcorder socket Use the VIDEO connection if your You can use the front sockets to copy camcorder has only a single video output camcorder recordings. -
Page 24: Step 3: Installation And Set-Up
Step 3: Installation and Set-up The installation menu appears the very Country Selection fi rst time you turn on this recorder. A Austria Country selection is These settings help you set up the basic B Belgium important for TV channels search. -
Page 25: Step 3: Installation And Set-Up
Step 3: Installation and Set-up (continued) The Date entry screen appears. Use the Channel search alphanumeric keypad 0-9 or Start Auto search keys to enter the correct date, then press OK to confi rm or the Green button to continue. Previous Skip Date... -
Page 26: Set-Up The Guide Plus+ System
Set-up the GUIDE Plus+ system This recorder is equipped with the Follow the screen display to select or GUIDE Plus+ system. This system offers enter the required information. a free interactive programme guide that { Language } lists all the TV programmes available in Select the language for on-screen display. - Page 27 Set-up the GUIDE Plus+ system (continued) Visit www.europe.guideplus.com/En/ help/countries_hostchannels.html for more and latest information on the supporting host channels. Country/City Host Channel Host Channel (aerial / cable) (SAT) (Language) Austria Eurosport Eurosport ASTRA 1C, 1H HOT BIRD 7A Belgium RTL-TV1 France Canal + ATLANTIC BIRD3...
-
Page 28: Control Tv Programmes
Control TV Programmes Viewing live TV About Time Shift Buffer - temporary HDD storage The current TV programme will be stored in the temporary hard disk storage called ‘TSB’ (Time Shift Buffer) PAUSE LIVE TV once the recorder is turned on. It continuously stores up to 6 (six) hours of TV programmes. - Page 29 Control TV Programmes (continued) Marking the contents for recording Clearing the Time Shift Buffer You need to ‘mark’ the contents in the All the contents in the Time Shift Buffer Time Shift Buffer before it can be will be cleared when you switch the recorded to the hard disk.
-
Page 30: Pause Live Tv Function
Control TV Programmes (continued) Pause live TV function GUIDE Plus+ TV listings After the GUIDE Plus+ setup and data Before you start ... download is completed, you can start to Turn on the recorder to LIVE TV mode access the information of the TV to watch your favourite TV programmes. -
Page 31: Using Guide Plus+ Menu
Using GUIDE Plus+ menu ‘Grid’ screen GUIDE Plus+ menu bar The Grid screen is the main TV listings screen of the GUIDE Plus+ system. It The menu bar appears on the top panel provides you with 8 (eight) days of TV of the screen. - Page 32 Using GUIDE Plus+ menu (continued) ‘Schedule’ screen ‘Search’ screen The Schedule screen allows you to The Search screen allows you to locate review, delete and edit the scheduled the programme listings by category. It recordings. Additionally, you are able to enables you to quickly and easily fi nd set a recording here using ShowView/ something of interest to watch or record.
- Page 33 Using GUIDE Plus+ menu (continued) ‘Editor’ screen The Editor screen is the central location for you to manage your channels. Every change in the Editor leads to a change in the Grid. You can assign programme numbers to the TV channels, switch a channel On or Off and select a channel source (Tuner, External Receiver).
-
Page 34: Using The Home Menu
Using the Home menu { Hard Disk } About the Home menu To access the contents stored on the hard disk, such as your recordings, Home menu allows access to contents on photos, music or video fi les. your Hard Disk recording, media fi les on { Disc Tray } Hard Disk, and contents of disc and USB. -
Page 35: Viewing Media Information
Using the Home menu (continued) Viewing media information To view general information on the selected media such as size, remaining space, media type etc. Press HOME. The Home menu appears. Move the selection bar to a desired source. If the media information is available, a text label will be appeared next to the blue softkey. -
Page 36: Before Recording
Before Recording Recording media The recording media for this recorder DVD+R DL (DVD+R Double Layer) are internal hard disk drive and DVD±R/ – It contains the same usage as DVD+R, the ±RW/+R DL. only difference is the capacity of 8.5 GB. It offers two recordable layers on a single DVD disc. -
Page 37: Default Recording Settings
Before Recording (continued) keys to select the setting you Default recording settings wish to change and press to access its options. You can preset your recording settings in Instructions and explanations of the the recording setup menu. options are provided in the following pages. - Page 38 Recording settings (underlined options are the factory default settings) Record mode The recording mode defi nes the picture quality of recordings and the maximum recording time. DVDR3570H Record Mode (high quality) 1 hr 55 mins (standard play) 3 hrs 40 mins...
-
Page 39: Before Recording
Before Recording (continued) Recording settings (underlined options are the factory default settings) Chapters Automatically divides a recording (title) into chapters by inserting chapter markers at a specifi c interval. This enables you to access a specifi c point in the recording quickly. { Smart } –... -
Page 40: Record Tv Programmes
Record TV Programme CAUTION! If you wish to stop the recording before – Copy prohibited contents cannot be the scheduled time, press STOP x. recorded on this recorder. – When the hard disk is full, making a new recording automatically deletes the oldest unprotected title on the hard disk Record a specifi c section of to make space for the new recording. -
Page 41: Simultaneous Record And Play Function
Record TV Programme (continued) Playback from DVD Simultaneous record and play function ç Press OPEN CLOSE on the recorder’s front panel. While recording a TV programme to the Load in a disc to start playback. hard disk, you can play a previously recorded title from hard disk, playback a DVD video disc or you can also playback Playback from USB... -
Page 42: Automatic Recording From Satellite Receiver
Record TV Programme (continued) Automatic recording from Satellite Receiver The feature is only applicable to the Satellite Receiver (or any similar devices) that is connected to the EXT2-TO VCR/ SAT scart socket of this recorder. In addition, the Satellite Receiver must have a timer function that is able to control the recording function of this recorder. -
Page 43: About Timer Recording
Record TV Programme (continued) About timer recording Timer recording (GUIDE Plus+ system) Use the timer recording to automatically start and stop a recording at a later date/ To schedule a recording with the GUIDE time. This recorder tunes to the right Plus+ system, simply select the desired programme channel and begins recording programme from the channel list. -
Page 44: Timer Recording (Showview/Video Plus+ System)
Record TV Programme (continued) Press the Red button on the remote Timer recording (ShowView/ control for { VIDEO Plus+ } or Video Plus+ system) { ShowView } The entry menu appears. This is a simple timer programming system. To use it, enter the ShowView Please enter the PlusCode programming number and programme number / VIDEO Plus+ press OK to confirm. -
Page 45: Timer Recording (Manually)
Record TV Programme (continued) To change the default recording settings, Timer recording (manually) press the matching colour coded button on the remote control. Turn on the TV to the correct viewing Red button - { Frequency } channel for the recorder. Select the repeat recording setting Press TIMER (GUIDE Plus+) on the (Once, Weekly, Mon~Fri). - Page 46 Record TV Programme (continued) Follow the instructions on the screen to To change the default recording settings, enter the recording information (date, press the matching colour coded button start time, end time) and press the on the remote control. Green button to confi rm each entry. Red button - { Frequency } When ‘TUNER 01’...
-
Page 47: Changing/Deleting A Scheduled Recording
Record TV Programme (continued) To change the scheduled recording, press Changing/Deleting a the Green button on the remote control scheduled recording for { Edit }. The timer entry menu appears. Turn on the TV to the correct viewing channel for the recorder. Press TIMER (GUIDE Plus+) on the remote control. -
Page 48: Record From External Devices
Record from external devices Recording from an external Switching to camera mode will clear the Time Shift Buffer. device (Camcorder/VCR/ Select a media type to record. DVD player) Hard Disk Optical Disc Cancel When you connect your external device to this recorder, you can choose to make Select the destination for recording and a recording from the external device to press OK to confi rm. -
Page 49: Recording From A Dv Camcorder
Record from external devices (continued) Press CAM on the remote control. Recording from a DV A warning message appears. All the Camcorder contents in the Time Shift Buffer will be cleared, only the ‘marked’ contents will When you connect a DV camcorder to be stored onto the hard disk. -
Page 50: Record From External Devices
Record from external devices (continued) You can navigate to the respective control keys on the screen to control the playback of your DV camcorder. To stop the recording, press STOP x. Both the recorder and camcorder stop. To exit, press LIVE TV. Helpful Hints: –... -
Page 51: Copy Tv Programmes From Hdd
Copy TV programmes from HDD About copying Copying recordings to recordable DVD Content Sorting Recordings Video files Turn on the TV to the correct viewing Music Genre Protected Photo channel for the recorder. Delete order Last played Insert a recordable DVD into the recorder. -
Page 52: Changing The Screen Display For Recordable Dvd
Before you can make recording to this disc on this recorder, you must change the screen display of the disc to ‘Philips’ type. Load in a recordable DVD. Press HOME on the remote control. -
Page 53: Copy Fi Les Between Hdd, Usb And Dvd
Copy fi les between HDD, USB and DVD A part of this recorder’s hard disk drive Press the Green button for { Copy }. can be used as a Media Jukebox, allowing Media type selection screen appears. you to store and playback your videos, Target for copy. -
Page 54: Copying Fi Les From Usb To Hdd Or Recordable Dvd
Copy fi les between HDD, USB and DVD (continued) Copying fi les from USB to Copying fi les from CD/DVD HDD or recordable DVD to HDD or USB You can copy the data fi les (MP3, WMA, You can only copy the data fi les (MP3, DivX and JPEG) in your USB drive to this WMA, DivX and JPEG) from your disc to recorder’s hard disk drive or recordable... -
Page 55: Playback Playback From Hdd
Playback from Hard Disk Select a contents type and press Hard Disk navigation access its sorting display options. The Hard Disk drive serves as a media Content Sorting Recordings jukebox which allows you to store all Video files source of recordings (TV recordings, Music Genre Photo... -
Page 56: Basic Operation
Playback from Hard Disk (continued) PREV í / NEXTë Basic operation – Move to the beginning or previous/ next chapter. Each recording stored on the hard disk is displayed in the HDD list with an Index REW m / FFW M Picture. -
Page 57: Delete/Lock/Protect A Title In The Hdd
Playback from Hard Disk (continued) Delete/Lock/Protect a title in Repeat hard disk playback the HDD While playback the title in the hard disk, you can select to repeat playback the title These options are displayed at the or a specifi c segment within the title. bottom of the hard disk title content menu. -
Page 58: Playback From Usb Device
Playback from USB device You can view, copy or delete the To stop playback, press STOP x or contents of a USB fl ash drive/memory remove the USB fl ash drive/memory card card reader or digital camera through reader or digital camera from the USB this recorder. -
Page 59: Playback From Disc
Playback from Disc IMPORTANT! Playable discs – If the inhibit icon ‘X’ or appears on the TV screen when a Using this recorder, you can play and button is pressed, it means the record on the following discs: function is not available on the current disc or at the current time. - Page 60 Playback from Disc (continued) Playing a DVD video disc Playing a (Super) Video CDs Normally the DVD disc contains a disc (Super) Video CDs may feature ‘PBC’ menu. You may have to make your (Play Back Control). This allows you to selection (e.g.,, subtitle or audio language) play the video CDs interactively, within the disc menu.
- Page 61 Playback from Disc (continued) Playing an audio CD (MP3/WMA) Playing a DivX fi le MP3 (MPEG1 Audio Layer-3) fi les are See ‘System Menu Options - Setup Settings - { DivX VOD }’ for information highly compressed music fi les. The MP3 on purchasing or renting movies from format lets you store about ten times DivX VOD service.
-
Page 62: Additional Playback Features
Additional Playback Features Select a fi le and press u to start the Playing JPEG photo fi les slide show playback or press OK to (slide show) show the overview images. During playback, the available playback settings are displayed at the bottom of Press HOME. - Page 63 Additional Playback Features (continued) Helpful Hints: Playing musical slideshow – If both JPEG photos and MP3s are in the same disc, you can choose to playback the This is only possible if both the JPEG JPEG photos or MP3s by selecting { Photo } photo fi les and music are stored in the or { Music } in the menu.
- Page 64 Additional Playback Features (continued) keys to navigate and press Creating a photo playlist SELECT to select the photo. (album) A marking appears on the top right hand corner of the selected photo(s). You can customise the JPEG photos To delete a photo or the selected slideshow playback by storing your photo(s), press the Red button for selection in an album.
- Page 65 Additional Playback Features (continued) To change the photo(s) position in Editing the album the album Press the Yellow button on the remote You can re-arrange the photo position in control for { Move }. the album in order to create the desired A ‘navigator’...
- Page 66 Additional Playback Features (continued) Searching forwards/ backwards You can fast forward or fast reverse a PAUSE LIVE TV disc during playback and select a desired search speed. During playback, press m (reverse) or SUBTITLE AUDIO INFO SELECT EDIT SCART M (forward) until the search speed status bar (4X) appears on the TV.
-
Page 67: Repeat Play
Additional Playback Features (continued) During disc playback, press INFO on the Repeat play remote control to display the available playback options. These options are The repeat play options vary depending varied depending on the disc type and can on the disc type. be selected by pressing the matching colour coded buttons on the remote During playback, press the Yellow... -
Page 68: Using The Toolbar Options
Additional Playback Features (continued) Note: Using the Toolbar options Select { Settings } to access the system setup menu options. See ‘System Menu Options’ for details. Clearing the Time Shift Buffer This option is only available while in live PAUSE LIVE TV TV mode. -
Page 69: Additional Playback Features
Additional Playback Features (continued) Changing subtitle language Zooming in/out This option only available on DVDs and This operation works only on DVDs with recordable DVDs playback. It allows you multiple subtitle languages. You can to enlarge the picture on the TV screen change to the language you want while and to pan through the enlarged picture. -
Page 70: Edit Recordings - Hard Disk
Edit Recordings - Hard Disk Changing the title name Selecting the genre Some TV channels transmit the name of You may select the genre type provided the programme. In this case, the in the list for easy and fast searching of a programme name will automatically be recorded title. -
Page 71: Video Editing
Edit Recordings - Hard Disk (continued) Video editing This recorder allows you to edit the video content after a recording has been made. You can insert/delete chapter markers or hide unwanted scenes. 00:11:25 No Chapter Chapter Divide Hide When you play back a recording in video edit mode, the entire recording will be Video bar: played back including the hidden scenes. - Page 72 Edit Recordings - Hard Disk (continued) { Merge } Merge/split a specifi c chapter Merge the current chapter with the within a recording chapter before it. You can create a chapter by inserting Note: If the previous chapter was chapter marker (using the SPLIT option) selected to be hidden, then the joined or remove a chapter marker (using the chapter will also be hidden.
- Page 73 Edit Recordings - Hard Disk (continued) Dividing titles Hiding unwanted scenes You can divide a title into two or more You can choose to hide certain scenes titles. You can use this function to for playback (e.g., skipping a commercial separate and delete undesired portions of scene) or make the hidden scene visible a recording, such as commercials.
- Page 74 Edit Recordings - Hard Disk (continued) Showing the hidden scene Deleting all chapter markers During recording, the chapter marker is During hard disk recording playback, set automatically at a specifi c interval if press EDIT on the remote control. the function is active. You can choose to The hidden chapter will be played delete all the chapter markers when the back while in video editing mode...
-
Page 75: Edit Recordings - Recordable Dvd
Edit Recordings - Recordable DVD Index Picture screen About editing recordable The Index Picture screen shows your DVDs recordings on a recordable DVD. It appears on the TV once you load a This recorder offers various disc edit recordable DVD or when playback is options. -
Page 76: Changing The Disc/Title Name
Edit Recordings - Recordable DVD (continued) Changing the disc/title name Making the edited DVD±RW compatible The original disc/title name is generated automatically by the recorder. You can The edited DVD±RW may still display change the disc/title name by following the original titles or hidden scenes when the steps below. -
Page 77: Finalising The Dvd±R For Playback
Edit Recordings - Recordable DVD (continued) Finalising the DVD±R for Deleting a recording/title playback You can delete a specifi c title from the disc. However, for DVD±R discs, the It is necessary to fi nalise a DVD±R or deleted space cannot be used for further DVD±R (DL) disc before you can play it recordings. -
Page 78: Lock/Unlock The Disc For Playback
Edit Recordings - Recordable DVD (continued) Lock/Unlock the disc for Protecting the recorded titles playback (DVD±RW) You can choose to lock the recorded You can choose to protect the recorded disc from viewing. title on a DVD±RW in order to prevent the recordings from being accidentally Before you start ... -
Page 79: Video Editing
Edit Recordings - Recordable DVD (continued) Press the matching colour coded buttons Video editing on the remote control to access the options displayed at the bottom of the This recorder allows you to edit the video menu. content after a recording has been made. You can add/delete chapter marker or hide unwanted scenes. -
Page 80: Video Editing
Edit Recordings - Recordable DVD (continued) { Title } Yellow button – Access title editing menu. Title No Chapter Chapter Hide Divide Back Index Pic. { Divide } for DVD±RW only Create a new title from the current point of playback. The existing title will be divided into two titles. -
Page 81: System Menu Options
System Menu Options keys to move the selection System menu navigation bar up/down/left/right to cycle through the menu options. The system menu provides various setup Instructions and explanations of the options for your recorder. options are provided in the following pages. -
Page 82: Language Settings
System Menu Options (continued) Language settings (underlined options are the factory default settings) Audio language Select the preferred audio language for DVDs with multiple sound tracks, VCDs with multiple audio channels, or DVD±R/ ±RW recorded with 5.1 multi-channel. Subtitle language Select the preferred subtitle language for DVD playback. -
Page 83: Playback Settings
System Menu Options (continued) Playback settings (underlined options are the factory default settings) When this is selected, you will be prompted to enter the four- Access digit pin code. Notes: Access Control Enter PIN of your choice. – When doing this for the fi rst time, use the alphanumeric This will be used to access locked features keypad 0-9 on the remote control to enter any four-digit pin code you prefer. -
Page 84: Playback Settings
System Menu Options (continued) Playback settings (underlined options are the factory default settings) Play Back Control feature is only applicable to VCD/SVCD only. It allows you to play Video CDs (2.0) interactively, following the menu on the display. { Off } –... -
Page 85: Video Output Settings
System Menu Options (continued) Video Output settings (underlined options are the factory default settings) TV shape The picture shape can be adjusted to fi t your TV. { 4:3 Letterbox } –For a ‘wide-screen’ display with black bars on the top and bottom. { 4:3 Panscan } –... -
Page 86: Audio Settings
System Menu Options (continued) Audio settings (underlined options are the factory default settings) Audio output This setting is only required if you are using the recorder’s COAXIAL/OPTICAL OUT socket to connect other audio/video device. { All } – Select this if the connected device has a built-in multi-channel decoder that supports one of the multi-channel audio format (Dolby Digital, MPEG-2). -
Page 87: Analogue Tuner Settings
System Menu Options (continued) Analogue Tuner settings Auto search Press OK on the remote control to start the automatic TV channel search process and replace all previously stored analogue TV channels. This process may take several minutes. Follow TV This feature is only available if you have connected this recorder to your TV using the EXT1 TO TV scart socket. - Page 88 System Menu Options (continued) Analogue Tuner settings continued ... Manual install { Preset } – Use the alphanumeric keypad 0-9 to enter the preset number for the channel to store (e.g. ‘01’), press OK and the Green button for { Store }. { Preset name } –...
-
Page 89: Analogue Tuner Settings
System Menu Options (continued) Analogue Tuner settings Sort channels Change the order of the stored channels according to your preference. 01 BBC 01 BBC 01 RTL4 02 RTL4 02 RTL4 02 ARD 03 ARD 03 ARD 03 ORF2 04 ORF2 04 ORF2 01 BBC 04 BBC... -
Page 90: Setup Settings
Once complete, press OK. Remote control You only need to set this if you are using more than one Philips remote control in the same room. { DVD } – Enable control of this recorder using the Philips DVD player’s remote control (not... - Page 91 (for example, recorder is put to pause or stop state). DivX(R) VOD Philips provides you with the DivX¨ VOD (Video On Demand) registration code that allows you to rent or purchase videos from DivX¨ VOD service at www.divx.com/vod. All the downloaded videos from DivX®...
-
Page 92: Other Information
Other Information Move to { Video format } > Setting up Progressive Scan { Progressive } in the menu and press feature to confi rm. Read the notifi cation message on the TV (for Progressive Scan TV only) and confi rm your action by selecting the The progressive scan displays twice the in the menu and press OK. -
Page 93: Installing The Latest Software
Visit Philips website ‘www.philips.com/ Installing the latest software support’ to check the availability of the latest software upgrade and download Periodically Philips will issue software the software to a CD-R. upgrades to enhance the user experience. Insert the CD-R to the disc tray. -
Page 94: Frequently Asked Questions
Frequently Asked Questions What kind of disc should I use for What is DV? recording? Using DV, also known as i.LINK, you can You can only record on DVD±R, DVD±RW connect a DV-equipped camcorder to this or DVD+R DL discs. DVD±R/±RW is the recorder using a single DV cable for input most compatible recordable DVD format in and output of audio, video, data and control... - Page 95 VHS quality) on a recordable DVD. When playing a DivX movie, why the subtitle cannot be displayed properly? DVDR3570H – You have to make sure that the subtitle Record Mode fi le has the exact same fi le name as the movie fi le.
- Page 96 Frequently Asked Questions (continued) Why does the fi le name appear to be Why does it take so long to display the different from what was displayed on my contents on my USB device? computer (e.g. from ‘Good Bye. jpg’ to –...
-
Page 97: Troubleshooting
If a fault occurs, fi rst check the points listed below before taking the system for repair. If you are unable to solve a problem by following these hints, consult your dealer or Philips for help. Problem (General) Solution No power. - Page 98 Troubleshooting (continued) Problem (General) Solution – Turn on your TV and set it to the correct Video In No picture. channel for the recorder. You may go to Channel 1 on your TV, then press the channel down button on your TV’s remote control until you see the recorder’s built-in live TV.
- Page 99 Troubleshooting (continued) Problem (Playback) Solution Disc will not play. – Insert the disc with the label facing up. – The child lock is on. See ‘System Menu Options - Playback settings - Child lock’ for details. – Wrong region code. Check the rear or bottom of the DVD recorder for the supported region code.
- Page 100 Troubleshooting (continued) Problem (Recording) Solution – Either no disc was inserted or the disc that was inserted The message ‘Insert cannot be used for recordings. Insert a recordable DVD recordable disc’ appears. (DVD±R, DVD±RW, or DVD+R Double Layer). – The timer recording overlaps with another timer The message ‘Collision’...
-
Page 101: Troubleshooting
Troubleshooting (continued) Problem (Recording) Solution Picture is fuzzy and – This happens if you try to copy DVDs or video tapes brightness varies when that have been copy-protected. Even though the picture played back your recording. on the TV is fi ne, the recording on the recordable DVD is faulty. -
Page 102: Display Panel Symbols/Messages
Display panel symbols/messages The following symbols/messages may BLOCKED appear on your recorder display: The disc tray cannot be opened or closed due to some mechanical obstruction. BROWSER The recorder is currently in media browser mode. 00:00 CLOSING Multifunction display/text line Disc tray is closing. -
Page 103: Display Panel Symbols/Messages
Display panel symbols/messages (continued) FINALIZING DISC OPENING The DVD±R disc is being fi nalised. Disc tray is opening. INFO DVD PAL DISC Information on the inserted DVD is A disc with PAL recordings has been displayed on the TV. inserted and an attempt was made to record an NTSC signal. -
Page 104: Glossary
Glossary JPEG-EXIF: JPEG-Exchangeable Image File. Analogue audio: Sound that has not been A fi le format developed by Fuji Photo Film turned into numbers. Analogue sound is for digital still cameras. Digital cameras from available with you use the AUDIO LEFT/ various manufacturers use this compressed RIGHT. - Page 105 Glossary (continued) PBC: Playback Control. A system of navigating a Video CD/Super VCD through on-screen menus recorded onto the disc. You can enjoy interactive playback and searching. PCM: Pulse Code Modulation. A digital audio encoding system. Progressive Scan: The progressive scan displays twice the number of frames per seconds than ordinary TV system.
-
Page 106: Specifi Cations
Power supply: 220-240V, ~50 Hz Audio Playback • Power consumption: • Compression formats: Dolby Digital, MPEG2 DVDR3570H - 28 W Multichannel, PCM, MP3, WMA DVDR3590H - 32 W • MPEG1 bit rates: 64-384 kbps and VBR • Standby power consumption: < 3.7 W... -
Page 108: Tv System Guide
TV System Guide COUNTRY DVD REGIONS AFGHANISTAN PAL/SECAM B ALBANIA PAL B PAL G ALGERIA PAL B PAL G ANGOLA PAL I ARGENTINA PAL N PAL N AUSTRALIA PAL B PAL H AUSTRIA PAL B PAL G AZORES PAL B BAHAMAS NTSC M BAHRAIN... - Page 109 TV System Guide (continued) COUNTRY DVD REGIONS LIBYA SECAM B SECAM G LITHUANIA PAL D (was SECAM) PAL K LUXEMBOURG PAL B/SECAM L PAL G/SEC L MADAGASCAR SECAM K1 MADEIRA PAL B MALAGASY SECAM K1 MALAWI PAL B PAL G MALAYSIA PAL B MALI...
- Page 110 Meet Philips at the Internet http://www.philips.com http://www.philips.com/welcome DVDR3570H DVDR3590H CLASS 1 LASER PRODUCT 3139 245 27625 Philips Customer Care phone numbers: Austria 0810 000205 € 0.07/ min Belgium 078 250 145 € 0.06/ min Czech Republic 800 142840 free Denmark...
Need help?
Do you have a question about the DVDR3570H and is the answer not in the manual?
Questions and answers