Table of Contents
Advertisement
Advertisement
Table of Contents
Troubleshooting

Related Manuals for Toshiba SD5300KC


Summary of Contents for Toshiba SD5300KC
- Page 1 The model number and serial number are on the back of your DVD Player. Record these numbers in the spaces below Refer to these numbers whenever you communicate with your Toshiba dealer about this DVD Player. Model number: Serial number:...
-
Page 2: Introduction
- Connect the equipment into an outlet on a circuit different from that to which the receiver is connected. - Consult the dealer or an experienced radio/TV technician for help. Changes or modifications made to this equipment, not expressly approved by Toshiba, or parties authorized by Toshiba, could void the user' s authority to operate the equipment. - Page 3 Introduction Do not defeat the safety purpose of the polarized or grounding-type plug. A polarized plug has two blades with one wider than the other. A grounding type plug has two blades and a third grounding prong. The wide blade or the third prong are provided for your safety.
-
Page 4: Setup
WARNING may result in death or serious the optical unit (laser). Therefore, refrain from using injury. Refer all servicing not specified in this manual a cleaning CD. to a Toshiba Authorized Service Center. Moisture Condensation Setup Moisture condensation damages the DVD player. - Page 5 Introduction Region Discs that can be played U.S.A. and Canada regions U.K., Europe regions and Japan Asia Pacifi c, Taiwan, Korea Australia, New Zealand, Latin America Russia and India regions China, Calcos Islands, Walls and Futuna Islands This product incorporates copyright protection tech- nology that is protected by method claims of certain U.S.
-
Page 6: Table Of Contents
Introduction Table of Contents Introduction SAFETY PRECAUTIONS IMPORTANT SAFETY INSTRUCTIONS Setup Cleaning discs Moisture Condensation Region Codes Table of Contents Connections Connecting to television Connecting to a Stereo System Connecting to a Digital AV Receiver Connecting the power cord Product Overview Front and Rear panels Remote Control Getting Started... -
Page 7: Connections
Connections corresponding Component video input jacks (or labeled as Y, P ) on the TV (cable not supplied). Connecting to television Use the audio cables (white/red) to connect AUDIO OUT (L/R) jacks of the DVD player to the corresponding AUDIO IN jacks on the TV(cable not IMPORTANT! supplied). -
Page 8: Connecting To A Stereo System
Connections -If your TV only supports 1080i, 1080p will not be selected. Connecting to a Stereo System - Because HDMI is an evolving technology, it is possible that some devices with an HDMI input may not operate properly with this DVD player. - When connecting a HDMI cable and an AV cable at the same time, it is recommended to use a HDMI- certified (*) cable having a width of 20.5mm or below. -
Page 9: Connecting To A Digital Av Receiver
Connections Connecting to a Digital AV Receiver Connecting the power cord After everything is connected properly, plug in the AC power cord to the power outlet. Never make or change any connections with the power switched on. Receiver has a PCM, Dolby Digital or MPEG decoder Select one of the video connections (CVBS VIDEO IN, COMPONENT VIDEO IN or HDMI IN) -
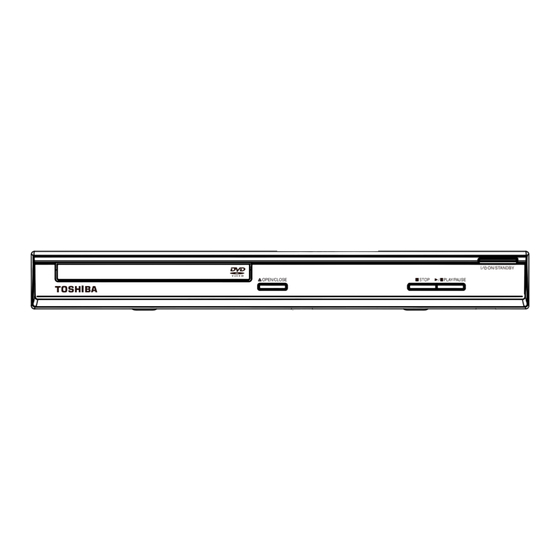
Page 10: Product Overview
Product Overview Front and Rear panels ON/STANDBY -Turns the player on or switches it to Disc tray standby mode - Place a disc here B/X PLAY/ PAUSE -Starts or pauses playback OPEN/CLOSE ç - Opens or closes the disc tray STOP ... -
Page 11: Remote Control
Product Overview Remote Control See the page in [ ] for details. REMOTE SIGNAL EMITTER DISPLAY [ 15 ] [ 11 ] -Displays information on -Point remote control to the sensor on TV screen during playback the front panel ON / STANDBY OPEN/CLOSE [ 11, 13 ] [ 13 ]... -
Page 12: Getting Started
Getting Started and highest channels and may be called FRONT, A/V IN or VIDEO. See your TV' s manual for more Inserting Batteries details. Or, you may go to channel 1 on your TV, then press the Channel down button repeatedly until you see the Video In channel. -
Page 13: Setting The Language
Getting Started/Playback from disc Video Out OSD language : English Language Subtitle : Off Confirm again to use new setting DivX Subtitle : Standard 14 Seconds Video Audio English Audio French DVD Menu Spanish Rating Press to highlight { Yes } and press OK to confirm. Misc ... -
Page 14: Starting Disc Playback
DVD and CD software and/or the manufacture Tips: of DVD and CD discs, Toshiba cannot assure that this – Maximum 100 sessions for CD and 10 multi border for DVD player will successfully play every disc bearing the DVD are supported. -
Page 15: Operations For Video Playback (Dvd/Vcd/Svcd)
Playback Feature preceding chapter/track. Press CLEAR or select ' Clear ' to delete one by one from last chosen track / title /chapter or select 'Clear All' Press DISPLAY to display the disc information for title/ to clear all the programmed tracks/titles/chapters. chapter/track. -
Page 16: Viewing The Disc Playback Information
Playback Feature For MP3, JPEG Angle -Repeat Single (currently playing file) -Repeat All (current folder) When {Angle} information appears on the screen, -Off (cancel) press ANGLE button on the remote control Tip: repeatedly to switch between different angles. -For VCD2.0/SVCD discs, repeat playback is not Playback will go to the selected angle. -
Page 17: Playing A Divx ® Disc
Playback Feature Playback Selection Playing a DivX ® Disc During playback, you can; Press PREV / NEXT to select the previous/next track/file in the current folder. This DVD player supports the DivX ® movie playback Press PLAY/PAUSE repeatedly to pause/ that you download from your computer onto a CD-R/ resume playback. -
Page 18: Using The Language Setup Menu
Playback Feature/DVD Menu Options Edit Mode: Program operation works only when Press / to select {Language }, then press . Edit Mode is selected. After finished storing the files/ Press / to select an item, then press to tracks you want into the Program View list, select “Edit access. - Page 19 DVD Menu Options Select this when you connect your DVD player to Press / to select an item, then press to your TV, which has component video inputs that access. supports progressive scan. Example: { Video Out } { HDMI } The options for the selected item appears.
-
Page 20: Using The Audio Setup Menu
DVD Menu Options preference. Digital Output Press / to select 'Close' and press OK to Select this if you connect to a multichannel decoder/ confirm. receiver. HD Resolution In 'Audio', press / to select { Digital Output }, then press . -
Page 21: Using The Rating Setup Menu
DVD Menu Options { 7. NC-17 } In 'Audio', press / to select { 3D Effects }, then No one under 17 admitted. press .You can set to { Off } or { On }. { 8. Adult } Use ... -
Page 22: Tray Lock
DVD Menu Options { Use Default Settings } will be highlighted, then press OK. Tray Lock The menu will appear. Use Default Settings Press SETUP button, then press the number button "2006" in sequence to lock the tray. Use Default Settings All functionality of the player and playback remain ... -
Page 23: Specifications
Specifications DVD Player/Outputs/Supplied Accessories DVD Player Power supply 120 V AC, 60 Hz Power Consumption 10W ( standby :<1W ) Net weight 1.27 kg External dismensions 330 X 43 X 209 mm (W/H/D) Signal System Standard NTSC Laser Semiconductor laser, wavelength 657/790 nm Frequency range DVD linear sound : 48 kHz sampling 4 Hz to 22 kHz 96 kHz sampling 4 Hz to 44 kHz... -
Page 24: Troubleshooting
Do not open the DVD player as there is a risk of electric shock. If a fault occurs, first check the points listed below before taking the DVD player for repair. If you are unable to remedy a problem by following these guides, consult your dealer or TOSHIBA for help. Problem... -
Page 25: Troubleshooting
Troubleshooting Problem Solution Player does not respond to some operating -Operations may not be permitted by the disc. commands during playback. Refer to the instructions of the disc jacket. DVD Player cannot read CDs /DVDs -Use a commonly available cleaning CD/DVD to clean the lens before sending the DVD Player for repair. -
Page 26: Glossary
Glossary Analog audio: PCM: ® DivX (Pulse Code Modulation) An electrical signal that directly DivX is a codec (compression/decom- ® represents sound. In contrast, pression) that can compress PCM is a format that converts audio digital audio can also be an electrical images to a very small amount of data. -
Page 27: Canadian Warranty Information
Canadian Warranty Information... - Page 28 Canadian Warranty Information...
Need help?
Do you have a question about the SD5300KC and is the answer not in the manual?
Questions and answers