
Related Manuals for Canon Vistura


Summary of Contents for Canon Vistura
-
Page 1: Instruction Manual
DIGITAL VIDEO CAMCORDER ENGLISH Instruction Manual CAMÉSCOPE ET LECTEUR VIDEO NUMÉRIQUES FRANÇAIS Mode d’emploi VIDEOCÁMARA Y GRABADORA DIGITAL ESPAÑOL Manual de Instrucciones Digital Mini Video Cassette A (NTSC) -
Page 2: Important Usage Instructions
Important Usage Instructions WARNING: TO REDUCE THE RISK OF FIRE OR ELECTRIC SHOCK, DO NOT EXPOSE THIS PRODUCT TO RAIN OR MOISTURE. WARNING: TO REDUCE THE RISK OF ELECTRIC SHOCK AND TO REDUCE ANNOYING INTERFERENCE, USE THE RECOMMENDED COPYRIGHT WARNING: Unauthorized recording of copyrighted materials may infringe on the rights of copyright owners and be contrary to copyright laws. -
Page 3: Important Safety Instructions
IMPORTANT SAFETY INSTRUCTIONS In these safety instructions the word “product” refers 11. Polarization — The CA-R300A Compact Power to the Canon 8mm Video Camcorder Adapter is equipped with a polarized 2-prong ES280A/ES180A and all its accessories. plug (a plug having one blade wider than the other). - Page 4 Canon or that have the same characteristics as lines or circuits. When installing an outside the original part. Unauthorized substitutions...
-
Page 5: Thank You For Choosing A Canon
Thank you for choosing a Canon First, we’d like to thank you for buying this Canon camcorder. Its advanced technology makes it very easy to use — you will soon be making high-quality home videos which will give you pleasure for years to come. -
Page 6: Introducing The Es280/Es180
Introducing the ES280/ES180 16× lens and 32× digital zoom Fade From wide-angle to 16× Add an atmospheric touch to telephoto — with your video productions with unparalleled optical quality. smooth fades, synchronised The digital zoom doubles this with the sound track. magnification for even more dramatic results. -
Page 7: Table Of Contents
Contents Introduction Important Usage Instructions ......................2 Important Safety Instructions ......................3 Thank you for choosing a Canon .......................5 Introducing the ES280/ES180 ......................6 Basic Operation Basic Recording..........................8 Power Sources ............................9 Cassettes ............................14 Preparing the Camera ........................15 Playback............................16 Playback Connection ........................18 Advanced Functions Zooming............................19... -
Page 8: Basic Recording
• To check that the camera is recording correctly, be sure to make a test recording first. • Before making important recordings, clean the video heads using Canon CC-8 Video Head Cleaning Cassette or a commercially available dry-type head cleaning cassette. -
Page 9: Power Sources
Power Sources Before operating your camera, you will need to use the power adapter to: provide power from an AC outlet charge a battery pack Notes: • The power adapter converts current from a household power outlet (100–240 V AC, 50–60 Hz) to the DC current used by your camera. - Page 10 Charging and attaching the battery pack You will have to charge the battery pack before you can use it. A brand new battery pack must be charged twice before use. 1. Slide the battery pack onto the adapter as shown. •...
- Page 11 Battery pack notes Charge the battery pack before you use it… • You should charge a brand new battery pack charge..then record..until discharged twice before using it for the first time — a single charge may not be enough. Charge it completely (until the adapter’s charge indicator glows steadily), then disconnect it and charge it again.
- Page 12 Remember, it may start to give you less recording time… • If you recharge it without first completely discharging it. • If you leave it attached to the camera (or a video light) for more than a week. • If you don’t use it for three months or more. …but you should be able to “refresh”...
- Page 13 Installing the backup battery You need to install the backup battery so the camera can remember the date and time. Its memory is powered by a CR2025 lithium battery with a life span of about a year. 1. Open the cover of the backup battery compartment. 2.
-
Page 14: Cassettes
Cassettes P U S P U S P U S Use videocassettes marked with an f . Loading and unloading Cassettes can be loaded and unloaded with the camera turned off, as long as a power source is attached. 1. Press the EJECT 5 button and wait for the cassette compartment to open. 2. -
Page 15: Preparing The Camera
Preparing the Camera You should already have attached a power source to the camera and loaded a cassette. When you have completed the following steps, you will be ready to start recording. Fasten the grip belt • Release the Velcro fastening and hold the camera with your right hand while you adjust the belt with your left. -
Page 16: Playback
• To wind the tape backwards, stop playback and press the ` (rewind) button. • If the playback picture is rough, clean the video heads using a Canon CC-8 Video Head Cleaning Cassette or a commercially available dry-type head cleaning cassette. - Page 17 Tape return Use the wireless controller’s TAPE RETURN button to quickly return to a scene you want to see again: 1. Press the COUNTER RESET button during playback if you come across a scene you want to watch again later. •...
-
Page 18: Playback Connection
Playback Connection You can connect the camera to a TV or VCR in order to play back your recordings. You will need to attach a power source to the camera (see p. 9). If you are going to use the TV as a monitor while you are shooting, remember to keep the TV volume turned down as long as the camera’s AUDIO terminal is connected. -
Page 19: Zooming
Zooming Zoom in Zoom out The camera’s 16× zoom lens allows you to choose the best picture angle for each scene: • Turn the zoom control towards W to zoom out to wide-angle. • Turn it towards T to zoom in to telephoto. You can also control the speed of zooming: •... -
Page 20: Using The Menus
Using the Menus The menus let you choose settings for a wide range of functions. There are two separate menus, for recording (camera menu) and playback (play menu). Camera menu While the camera is in record pause mode, press the MENU button. Screen 1 MENU 1 Custom key information .......p. - Page 21 1, 4, 5 2, 3 MENU MENU CUSTOM CUSTOM KEYS KEYS SELECT SELECT 1. Press the MENU button to open the menu at screen 1. 2. Use the SELECT button to move the cursor down the screen. • When the cursor reaches the bottom of the selections it returns to the top of the list. 3.
-
Page 22: Custom Keys
Custom Keys The Custom Keys let you choose the functions you want at your fingertips. MENU CUSTOM KEYS SELECT The two keys on the rear of the camera body can easily be set to operate a number of functions. When you buy the camcorder, they should be set as follows: CUSTOM KEY 1 CUSTOM KEY 2... -
Page 23: Image Stabilizer (Es280)
Displaying the Custom Key function in the viewfinder Choose to display the combination of functions set for the CUSTOM KEYS in the viewfinder. 1. Press down the lock button and turn the POWER switch to CAMERA. 2. Open the camera menu and select CUSTOM KEY INFO. 3. -
Page 24: Wireless Controller
KEYS The remote sensor may be turned off to prevent SELECT interference from other Canon wireless controllers being used nearby. 1. Open either the camera or play menu and move the cursor to SENSOR. 2. Select the OFF setting and close the menu. - Page 25 Turning off the tally lamp TALLY LAMP••••••OFF (see p. 20) The tally lamp lets you know the camera is recording. However, it may be reflected into the lens during close-up recording or when recording through glass. 1. Open the camera menu and move the cursor to TALLY LAMP. 2.
-
Page 26: Date And Time
Date and Time REC SEARCH MENU CUSTOM KEYS SELECT DATE DISPLAY•••CONT. (see p. 20) Choose whether to add the date and time to your recordings by selecting DATE DISPLAY at the camera menu, and choosing one of the three options: AUTO–10S: Adds the date and time to your recordings for the first 10 seconds of each scene you record. - Page 27 Choosing the display style You can choose between three different date/time displays at the camera menu. DATE SELECT••DATE&TIME (see p. 20) DATE&TIME DATE TIME...
-
Page 28: Titles
Titles REC SEARCH C.RESET MENU CUSTOM KEYS SELECT You can write your own titles and store them in the camera’s memory in order to add them to your recordings. Remember to install the backup battery first (see p. 13). TITLE••••••••AUTO–10S (see p. - Page 29 Writing a title These lines appear in the viewfinder while you are writing a title. • • • • • • • • • • • • • • • • • • • • • • • • • •...
- Page 30 Using the preset titles 1. Open the camera menu to screen 2 and choose the TITLE SELECT option. 2. Press the SELECT button to move through the list of preset titles until the title you wish to use is displayed. •...
-
Page 31: Fade
Fade Fade in FADE Fade out Fade in To make the scene gradually appear from a blank screen: 1. Make sure the camera is in record pause mode. 2. Press and hold the FADE button until the scene disappears completely from the viewfinder. -
Page 32: Choosing A Recording Program
Choosing a Recording Program The camera provides you with a choice of five recording programs. They use different combinations of camera settings in order to adjust the exposure and other functions to match the recording situation. Rotate the program selector to choose the appropriate program before you start recording. •... -
Page 33: Backlight Compensation
Spotlight SPOTLIGHT This program is designed for recording spotlit scenes, such as on a stage. The exposure is automatically adjusted for glare-free recordings of subjects lit by a concentrated light source. Sand & Snow SAND & SNOW Use this program in places where the background is so bright that the subject appears underexposed in the viewfinder —... -
Page 34: Focusing
Focusing AF/MF MENU CUSTOM KEYS SELECT Autofocus The camera can focus automatically. All you have to do is point it, and whatever is in the center of the viewfinder will usually be in sharp focus. You can rely on autofocus to give you good results in normal recording conditions. Manual focus Sometimes you will get better results by turning off autofocus and using manual focus instead. -
Page 35: Record Search And Record Review
Record Search and Record Review REC SEARCH Record search When the camera is in record pause mode, you can use record search to play the tape forwards or backwards to find the point where you want to start or restart recording. This is useful when you want to add a new scene to a previously used cassette. -
Page 36: Digital Effects
Digital Effects MENU CUSTOM KEYS SELECT The camera can manipulate the recorded image in a variety of ways. The sound track is not affected. Adds a paint-like effect, called solarization, to the image. Black & White Records the image in black and white. Sepia Records a monochrome image with a sepia tint. - Page 37 Using Digital Effects 1. Press down the lock button and turn the POWER switch to CAMERA. 2. Make sure that the CUSTOM KEYS are assigned to D. E. SELECT and D. E. OFF. (see p. 22). 3. Press CUSTOM KEY 1 (the SELECT button) to choose the effect you want. •...
-
Page 38: Editing To A Vcr
Editing to a VCR Record the scenes you Play back the tape on want on the VCR. the camcorder. AUDIO/ AUDIO IN VIDEO C-250 AV Cable VIDEO IN By connecting the camera to a VCR, you can edit your recordings in order to remove unwanted scenes — or combine different shots to create your own video production. -
Page 39: Making Better Videos
Making Better Videos Holding the camera For maximum stability, place your right hand through the grip belt and keep your right elbow pressed against your body. Rest your left hand lightly on the side of the camera. With practice, you will be able to operate the controls by touch, without taking your eye off the action. -
Page 40: Picture Angle
Picture angle Instead of zooming while recording, try to choose Long shot your picture angle before you begin. A good way to tell a story with video is to begin with a long shot that establishes the situation, and then move in with medium shots and close-ups to show the details. -
Page 41: Es280/Es180 Video System
ES280/ES180 Video System (Availability differs from area to area.) WL-69 Wireless Controller VL-20 Battery 8mm video cassette Video Light SS-500 Shoulder Strap SA-1 Adapter MM-100 Mixing Microphone Bracket WS-20 Wrist Strap DM-300 Super- CA-R300 directional Microphone Compact Power Adapter DC-100 DC Coupler CB-110 Car Battery Adapter... -
Page 42: Optional Accessories
Optional Accessories Battery Packs BP-711 BP-711 As well as the battery pack supplied with your BP-E77K BP-E77K camera, a whole range of optional battery packs is BP-714 BP-714 available. BP-E722 BP-E722 Recording times are as follows: BP-729 BP-729 BP-711/BP-E77K ..60 min. BP-714 ......70 min. - Page 43 FS-46 Filter Set FS-46 Three special effects filters to add a creative touch to your recordings: multiple-image, R-cross and zoom-spot. • Turn autofocus off when using special effects filters. • If you have a “professional-type” monitor, there may be some vignetting. FS-46U Filter Set FS-46U Ultraviolet, neutral density and circular polarizing...
- Page 44 HC-910 This solid, lockable case provides safe and stylish protection for the camera during transportation and storage. This mark identifies genuine Canon video accessories. When you use Canon video equipment, we recommend Canon-brand accessories or products bearing this same mark.
-
Page 45: Cautions And Maintenance
Cautions and Maintenance Cautions Avoid high temperatures and high humidity. • Do not leave the camera inside a car in hot weather, for example. • Be careful of heat radiating from video lighting equipment. • Do not take the camera into a humid room. Avoid sudden changes in temperature. - Page 46 • Use a soft, dry cloth to clean the camera body or lens. Never use chemically treated cloth or volatile solvents such as paint thinner. Video heads • Clean the video heads only when necessary, preferably using Canon’s CC-8 Video Head Cleaning Cassette. • Do not use a wet-type cleaning cassette as this can cause damage.
-
Page 47: Using The Camera Abroad
• You can use the compact power adapter to operate your camera and charge battery packs in any country where the electricity supply is between 100 and 240 V AC, 50–60 Hz. Contact your Canon dealer for information about plug adapters for overseas use. -
Page 48: Troubleshooting
Troubleshooting Refer to this checklist first if you have any problems with your camera. Possible explanations are given below each problem on the list — turn to the page numbers in brackets for more information. Make sure that the camera is properly connected if you are using it with a TV or VCR. Consult your dealer or service outlet if problems persist. - Page 49 ? The e (PLAY) button doesn’t work. • The POWER switch is not set to PLAY (p. 16). • You haven’t loaded a cassette (p. 14). • The tape has reached the end. ? There’s a bright stripe on • When you are recording in dark places, a bright the screen.
-
Page 50: Viewfinder Displays
Viewfinder Displays Use the wireless controller’s ON SCREEN button to choose whether or not the viewfinder displays appear on the TV screen. They are not recorded to the tape if you start recording with the camera. SCREEN indicates a flashing display. Date and time display (p. -
Page 51: Tape Counter
Optical zoom (p. 19) Custom key settings (ES280 only) Digital zoom (p. 19) D . Z OOM I MAGE S T AB I L D . E . S E L E C T Image stabilizer (ES280 D . E . ON / O F F only) (p. -
Page 52: Nomenclature
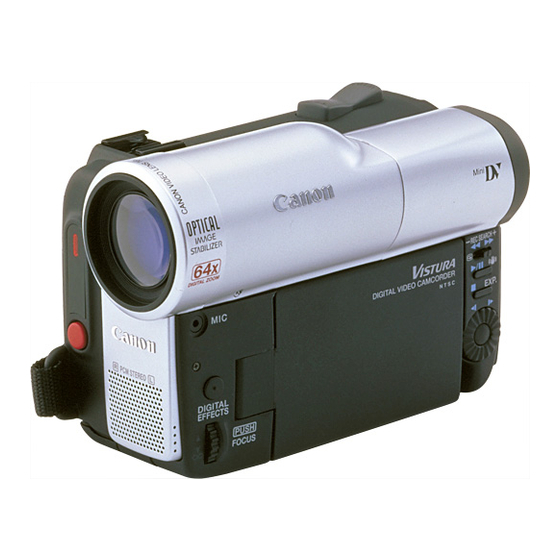
Nomenclature C. (counter) RESET button (p. 17) (fast forward) button (p. 16) REC SEARCH + button (p. 35) (rewind) button (p. 16) REC SEARCH – and (record review) button (p. 35) (play) button (p. 16) AF/MF button (p. 34) (stop) button (p. 16) BLC button (p. - Page 53 Viewfinder (p. 15, 46) Viewfinder focusing switch (p. 15) Tripod socket (p. 39) Strap attachment bar (p. 15) Program selector (p. 8, 32) MENU button (p. 20) Start/stop button (p. 8) Lock button (p. 8) POWER switch (p. 8) BATTERY EJECT button (p.
-
Page 54: Specifications
Specifications ES280/ES180 Power supply (rated): 6V DC Power consumption: 5.4 W Television System: EIA standard (525 lines, 60 fields) NTSC color signal Video recording system: 2 rotary heads, helical scanning system Luminance signal: FM azimuth recording Chrominance signal: Converted subcarrier phase shift recording (8mm video standard) Audio recording system: Frequency multiplexing with the video signal by 2 rotary heads, 1... -
Page 55: Index
Index Å Ò ¨ Abroad, Using the Camera, 47 Lithium Battery, 13 ES280/ES180 Video System, 41 Accessories, 5, 42 Loading Cassettes, 14 ◊ Adapter, AC, 9, 10, 12 Â AE programs, 32, 33 Videocassettes, 14 ART, 36 Maintenance, 46 Viewfinder, 15, 46 Audio/Video Terminal, 18 Making Better Videos, 39 Viewfinder Displays, 50... - Page 56 CANON U.S.A., INC. LOS ANGELES OFFICE 15955 Alton Parkway, Irvine, CA 92718 USA CANON U.S.A., INC. HONOLULU OFFICE 1020 Auahi Street, Bldg. #8, Honolulu, HI 96814 USA If you have any questions, call the Canon U.S.A. Information Center toll-free on 1-800-828-4040 (U.S.A. only). CANADA CANON CANADA INC.
Need help?
Do you have a question about the Vistura and is the answer not in the manual?
Questions and answers