Brother MFC-490CW Quick Setup Manual
Hide thumbs
Also See for MFC-490CW:
- Guía del usuario (221 pages) ,
- User manual (216 pages) ,
- Connection manual (6 pages)
Table of Contents
Advertisement
Quick Links
Quick Setup Guide
Start Here
Before you can use the machine, read this Quick Setup Guide for the correct setup and installation.
WARNING
Important
DO NOT connect the USB cable yet (if you are using a USB
cable).
1
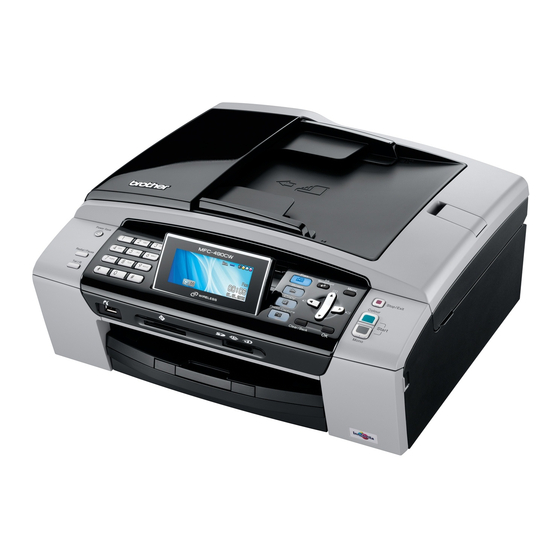
Unpack the machine and check the components
User's Guide
The supplied mains plug is a grounded three
Power Cord
pin plug.
Make sure that the AC socket will accept the supplied grounded pin plug. This machine must be grounded, If in doubt, call a
qualified electrician.
WARNING
Plastic bags are used in the packaging of your machine. To avoid danger of suffocation, please keep
these bags away from babies and children.
a
Remove the protective tape and film covering the scanner glass.
b
Remove the green protective packing
pulling down on the packing part.
c
Remove the plastic bag
d
Make sure you have all components.
Warnings tell you what to do to prevent possible personal injury.
2
Inbox Ink Cartridges
CD-ROM
Telephone Line Cord
Australia &
Hong Kong, Malaysia
New Zealand
& Singapore
by lifting the front of the machine and then
a
containing the ink cartridges from on top of the paper tray.
b
Black
Yellow
Cyan
Magenta
(Approx. 65% yield of the
replacement cartridge)
[x4]
For details, see
Consumable items in the
User's Guide.
Telephone Line Cord
Adapter (Australia only)
Philippines & Thailand
The supplied mains plug is a side grounded two
pin plug.
MFC-490CW
Quick Setup Guide
USB Interface Cable
1
ARL/ASA/NZ Version 0
1
Advertisement
Table of Contents

Related Manuals for Brother MFC-490CW


Summary of Contents for Brother MFC-490CW
- Page 1 Quick Setup Guide Start Here MFC-490CW Before you can use the machine, read this Quick Setup Guide for the correct setup and installation. Warnings tell you what to do to prevent possible personal injury. WARNING Important DO NOT connect the USB cable yet (if you are using a USB cable).
- Page 2 With both hands, gently press and slide the Note paper side guides and then the paper length • The components included in the box may differ guide to fit the paper size. depending on your country. Make sure that the triangular marks on the •...
- Page 3 Close the paper tray cover a. Connect the power cord and telephone line Important DO NOT connect the USB cable yet (if you are using a USB cable). Connect the power cord. Slowly push the paper tray completely into the machine.
-
Page 4: Set Your Country (For Australia / New Zealand Customer Only)
Note Set Your Country (For If you are sharing one telephone line with an Australia / New Zealand external telephone, connect it as shown below. Customer Only) You must set your country so that the machine works correctly on local telecommunication lines in each country. -
Page 5: Install The Ink Cartridges
Unpack the ink cartridge. Install the ink cartridges Turn the green knob on the protective yellow cap clockwise until it clicks to release the vacuum seal, then remove the cap a. WARNING If ink gets in your eyes, wash them out with water at once, and if irritation occurs consult a doctor. - Page 6 Brother branded ink cartridges. Brother cannot guarantee this optimum performance if ink or ink cartridges of other specifications are used. Brother does not therefore recommend the use of cartridges other than genuine Brother branded cartridges with this machine or the refilling of empty cartridges with ink from other sources.
-
Page 7: Check The Print Quality
If all lines are clear and visible, press 1 (Yes) Check the print quality on the dial pad to finish the quality check. When the preparation process has finished, the LCD shows this message Set Paper and Press If you can see missing short lines, press 2 (No) Start on the dial pad and go to d. -
Page 8: External Tad
Choose a Receive Mode Set the LCD contrast (If needed) There are four possible receive modes: Fax Only, If you are having difficulty reading the LCD, try Fax/Tel, Manual and External TAD. changing the contrast setting. Do you want to use the telephone features of your Press Menu. -
Page 9: Set The Date And Time
Set the date and time Enter personal information (station ID) The machine displays the date and time, and if you You should store your name and fax number to be set up the station ID, the date and time displayed on printed on all fax pages that you send. -
Page 10: New Zealand
Set tone or pulse dialling mode (Not available for New Zealand) Your machine comes set for Tone dialling service. If you have Pulse dialling service (rotary), you need to change the dialling mode. Press Menu. Press a or b to choose Initial Setup. Press OK. - Page 11 Choose your connection type For USB interface cable ® Windows , go to page 12 ® Macintosh , go to page 16 For Wired Network ® Windows , go to page 19 ® Macintosh , go to page 24 For Wireless Network ®...
-
Page 12: Before You Install
. This software supports Note ® Windows 2000 (SP4 or greater), XP (SP2 or If the Brother screen does not appear greater), XP Professional x64 Edition and automatically, go to My Computer (Computer), ® Windows Vista . Update to the latest double-click the CD-ROM icon, and then ®... - Page 13 Yes if you agree to the Software License Agreement. The installation of ScanSoft™ PaperPort™ 11SE will automatically start and is followed by the installation of MFL-Pro Suite. When the Brother MFL-Pro Suite Software License Agreement window appears, click Yes if you agree to the Software License Agreement.
-
Page 14: Connect The Usb Cable
® Windows Carefully guide the USB cable through the Connect the USB cable trench as shown below, following the trench around and toward the back of the machine. Then connect the cable to your computer. Important • DO NOT connect the machine to a USB port on a keyboard or a non-powered USB hub. -
Page 15: Connect The Power Cord
Note If an error message appears during the software installation, run the Installation Diagnostics Important located in Start/All Programs/Brother/ MFC-XXXX (where MFC-XXXX is your model DO NOT cancel any of the screens during the name). installation. It may take a few seconds for all screens to appear. -
Page 16: Before Install
X 10.2.4 or greater. (For ® the latest information for Mac OS X, visit http://solutions.brother.com/) • Make sure there are no memory cards or a USB Flash memory drive inserted. Carefully guide the USB cable through the Connect the USB cable trench as shown below, following the trench around and toward the back of the machine. - Page 17 After the installation, click Click Print Center, then Quit Print Center. Restart to finish installing the software. The Brother software will search for the Brother device. During this time the following screen will appear. The installation of MFL-Pro Suite is now complete.
- Page 18 Presto! PageManager ® ® When Presto! PageManager is installed OCR capability is added to Brother ControlCenter2. You can easily scan, share and organize photos and ® ® documents using Presto! PageManager Double-click the Presto! PageManager icon and follow the on-screen instructions.
-
Page 19: Connect The Network Cable
Wired Network ® Windows For Wired Network Interface Users ® (For Windows 2000 Professional/XP/XP Professional x64 Edition/ ® Windows Vista Before you install Connect the network cable Make sure that your computer is ON and you Using both hands, use the plastic tabs on both are logged on with Administrator rights. - Page 20 Wired Network ® Windows Carefully guide the network cable to the trench Connect the power cord as shown below, following the trench around and toward the back of the machine. Then, connect the cable to your network. Connect the power cord. Note If both USB and LAN cables are being used, guide both cables through the trench with one on...
- Page 21 • For Windows Vista , when the User Account Control screen appears, click Allow. Note If the Brother screen does not appear automatically, go to My Computer (Computer), double-click the CD-ROM icon, and then double-click start.exe. The CD-ROM main menu will appear. Click Install MFL-Pro Suite.
- Page 22 Enter an IP address for your machine that is suitable for your network by following the on-screen instructions. The installation of the Brother drivers will automatically start. The installation screens See the instructions provided with your firewall appear one after another.
- Page 23 If you want to use more than 2 PCs with ScanSoft™ PaperPort™ 11SE installed, please buy the Brother NL-5 pack which is a multiple PC license agreement pack for up to 5 additional users. To buy the NL-5 pack, contact your Brother dealer.
- Page 24 X 10.2.4 or greater. (For ® the latest information for Mac OS X, visit http://solutions.brother.com/) • Make sure there are no memory cards or a USB Flash memory drive inserted. • If you have previously set up your machine Carefully guide the network cable to the trench...
- Page 25 Network Scanning in the Restart to finish installing the software. Software User’s Guide on the CD-ROM.) The Brother software will search for the Brother When this screen appears, click OK. device. During this time the following screen will appear.
- Page 26 Wired Network ® Macintosh ® For Mac OS X 10.2.4 to 10.2.8 users, click Add. Make the selection shown below. Choose XXX-XXXX (where XXX-XXXX is your model name), and then click Add. Click Print Center, then Quit Print Center. The installation of MFL-Pro Suite is now complete.
- Page 27 Presto! PageManager ® ® When Presto! PageManager is installed OCR capability is added to Brother ControlCenter2. You can easily scan, share and organize photos and ® ® documents using Presto! PageManager Double-click the Presto! PageManager icon and follow the on-screen instructions.
-
Page 28: For Wireless Network Interface Users
Although the Brother MFC-490CW can be used in a both wired and wireless network, only one of the connection methods can be used at a time. - Page 29 For Wireless Network Users Confirm your network environment (Infrastructure Mode) The following instructions will offer two methods for installing your Brother machine in a wireless network environment. Both methods are for infrastructure mode, using a wireless router or access point that uses DHCP to assign IP addresses.
-
Page 30: Connecting The Brother Machine To The Wireless Network
For Wireless Network Users Connecting the Brother machine to the wireless network Use the a, b and OK keys to choose one of the Configure the wireless options below: If your network is configured for settings (Typical Authentication and Encryption you must match the settings used for your network. -
Page 31: For Windows Users
For Wireless Network Users You can use the d and c keys to move the cursor left and right. For example, to enter the letter a, press the 2 key on the dial pad once. To enter the number 3, press the 3 key on the dial pad seven times. - Page 32 For resetting, see Restore the network settings to factory default on page 45. If the LCD shows Setting WLAN, then Place the Brother machine within range of a Connection Failed or Incorrect Mode, SecureEasySetup™, Wi-Fi Protected Setup™...
- Page 33 For Wireless Network Users Wireless setup is now complete. To install MFL-Pro Suite, continue to step 16. ® For Windows Users: Now go to Page 34 ® For Mac OS Users: Now go to Page 38...
-
Page 34: Wireless Network
. This software supports ® Windows 2000 (SP4 or greater), XP (SP2 or Note greater), XP Professional x64 Edition and If the Brother screen does not appear ® Windows Vista . Update to the latest automatically, go to My Computer (Computer), ®... - Page 35 The installation of ScanSoft™ PaperPort™ 11SE will automatically start and is followed by the installation of MFL-Pro Suite. When the Brother MFL-Pro Suite Software License Agreement window appears, click See the instructions provided with your firewall Yes if you agree to the Software License software for information on how to add the Agreement.
- Page 36 Wireless Network ® Windows The installation of the Brother drivers will Note automatically start. The installation screens • If the machine is configured for your network, appear one after another. choose the machine from the list, and then click Next.
- Page 37 If you want to use more than 2 PCs with ScanSoft™ PaperPort™ 11SE installed, please buy the Brother NL-5 pack which is a multiple PC license agreement pack for up to 5 additional users. To buy the NL-5 pack, contact your Brother dealer.
-
Page 38: Install The Drivers & Software
Please wait, it will take a few seconds for the software to install. After the installation, click Restart to finish installing the software. The Brother software will search for the Brother device. During this time the following screen will appear. - Page 39 Wireless Network ® Macintosh When this screen appears, click OK. Note • If the machine is configured for your network, choose the machine from the list, and then click This window will not appear if there is only one ® machine connected on the network, it will be For Mac OS X 10.3.x or greater, the...
- Page 40 Presto! PageManager ® ® When Presto! PageManager is installed OCR capability is added to Brother ControlCenter2. You can easily scan, share and organize photos and ® ® documents using Presto! PageManager Double-click the Presto! PageManager icon and follow the on-screen instructions.
-
Page 41: Install Optional Applications
Install Optional Applications ® Windows Install FaceFilter Studio Install FaceFilter Studio supported by Help (For Hong Kong Reallusion, Inc users, CD-ROM includes FaceFilter Studio Help) FaceFilter Studio is an easy-to-use borderless photo printing application. FaceFilter Studio also lets you edit your photo data and add photo effects such as To get instructions on how to use FaceFilter Studio, red eye reduction or skin tone enhancement. - Page 42 Install Optional Applications ® Windows Install BookScan&Whiteboard Suite supported by Reallusion, Inc You can install BookScan&Whiteboard Suite. The BookScan Enhancer software can correct your scanned book images automatically. The Whiteboard Enhancer software cleans up and enhances text and images from photos taken of your whiteboard.
-
Page 43: For Network Users
BRAdmin Light utility (For Windows users) BRAdmin Light is a utility for initial setup of Brother network connected devices. It also can search for Brother products on your network, view the status and configure basic network settings, such as IP address. - Page 44 BRAdmin Light utility (For Mac OS X users) BRAdmin Light is a utility for initial setup of Brother network connected devices. It also can search for Brother products on your network, view the status and configure basic network settings, such as IP address from a ®...
-
Page 45: Restore The Network Settings To Factory Default
For Wireless Network Users Restore the network settings to factory default To restore all network settings of the internal Print/Scan server to factory default, please follow the steps below. Make sure the machine is not operating, then disconnect all the cables from the machine (except the power cord). -
Page 46: Replacement Consumables
The contents of this manual and the specifications of this product are subject to change without notice. Brother reserves the right to make changes without notice in the specifications and materials contained herein and shall not be responsible for any damages (including consequential) caused by reliance on the materials presented, including but not limited to typographical and other errors relating to the publication.
Need help?
Do you have a question about the MFC-490CW and is the answer not in the manual?
Questions and answers