Philips CEM3000B User Manual
Philips car stereo system user manual
Hide thumbs
Also See for CEM3000B:
- Service manual (71 pages) ,
- Quick start and installation manual (2 pages) ,
- User manual (27 pages)

Related Manuals for Philips CEM3000B


Summary of Contents for Philips CEM3000B
- Page 1 Register your product and get support at www.philips.com/welcome CEM3000B EN User manual...
-
Page 2: Table Of Contents
Contents 1 Important Safety Notice 2 Your car audio system Introduction What’s in the box Overview of the main unit Overview of the remote control 3 Get started Install the car audio Attach the front panel Place the DAB antenna Install remote control battery Turn on Set clock... -
Page 3: Important
1 Important Safety • Read and understand all instructions before you use your apparatus. If damage is caused by failure to follow instructions, the warranty does not apply. • This apparatus is designed for negative ground (earth) 12 V DC operation only. •... - Page 4 Any changes or modifications made to this device that are not expressly approved by Philips Consumer Lifestyle may void the user’s authority to operate the equipment. 2010 © Koninklijke Philips Electronics N.V. All rights reserved.
-
Page 5: Your Car Audio System
2 Your car audio system Congratulations on your purchase, and welcome to Philips! To fully benefit from the support that Philips offers, register your product at www.philips.com/welcome. Introduction With the in-car audio system, you can enjoy your drive while listening to: •... -
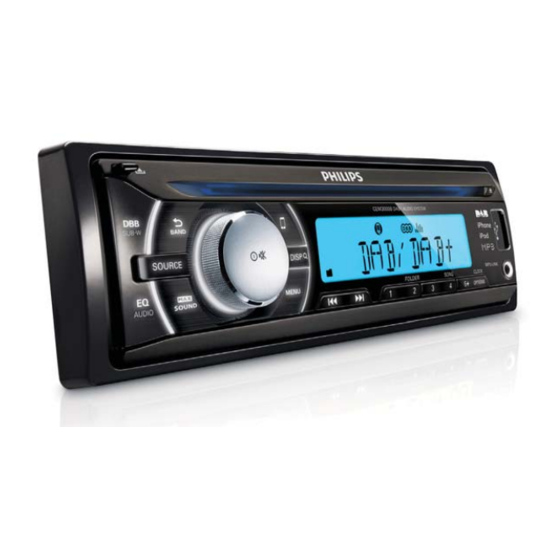
Page 6: Overview Of The Main Unit
Overview of the main unit a DBB/SUB-W • Switch on or off Dynamic Bass Boost (DBB) sound. • Switch on or off subwoofer. • Unlock the panel. c BAND/ • Select tuner band. • Return to previous menu. • Turn the unit on or off. •... -
Page 7: Overview Of The Remote Control
• Enter iPod/iPhone control mode. • Eject disc. • Connector for USB and iPod/iPhone. h MP3 LINK • Connect external audio device. i OPTIONS/CLOCK • Access option menu. • Display the DAB related information. • View clock. j 5+ • Select or store preset radio stations 1 to 10. - Page 8 • Start play. • Pause or resume play. d AUDIO • Access audio setting menu. • Tune to radio/DAB station. • Skip track. • Fast backward/forward play. f OK • Confirm selection. g MENU • Access system menu. /PWR/ • Turn the unit on or off.
-
Page 9: Get Started
Always follow the instructions in this chapter in sequence. If you contact Philips, you will be asked for the model and serial number of your apparatus. The model number and serial number are on the bottom of your apparatus. Write the numbers here: Model No. -
Page 10: Install Remote Control Battery
Find a location as flat as possible on the outside of your car. For example, the roof near the windshield, or rear window. Note: The magnetic base of the antenna will remain secure at normal vehicle speeds in non-windy conditions. Antennae installed on curved surfaces may become detached in windy conditions. -
Page 11: Listen To Radio
View clock Press and hold CLOCK until the clock is displayed. 4 Listen to radio Tune to a radio station Press SOURCE repeatedly to select radio mode. Press BAND/ to select band: [FM1], [FM2], [FM3], [AW1] or [AW2]. Press to tune to a radio station manually. -
Page 12: Store Radio Stations In Memory
• [LOCAL SEEK OFF]: Stations with strong and weak signals can be broadcast. Store radio stations in memory You can store up to 10 stations in each band. Store stations automatically Press OPTIONS repeatedly until [AUTO-STORE] displays. Press to confirm. »... -
Page 13: Select Alternate Frequencies
Item Program type Description NEWS News services AFFAIRS Politics and current affairs INFO Special information programs SPORT Sports EDUCATE Education and advanced training DRAMA Radio plays and literature CULTURE Culture, religion and society SCIENCE Science VARIED Entertainment programs POP M Pop music ROCK M Rock music... -
Page 14: Listen To Digital Audio Broadcasts (Dab)
Set RDS clock You can use time signal that is broadcast together with the RDS signal to set the clock of the unit automatically. Press MENU. Press repeatedly until [CT] displays. Rotate to select a setting: • [CT ON]: Turn on the RDS clock. Time shown on the unit synchronizes with that on the RDS station. -
Page 15: Scan For New Dab Stations
Scan for new DAB stations Under DAB mode, press MENU repeatedly until [DAB SCAN] is displayed. Press to confirm. » The system scans for all available DAB radio stations and broadcasts the first station. • New stations and services will be added in the DAB broadcast. -
Page 16: Weak Dab Signal
• Multiplex name: Displays the name of the DAB multiplex in which the current station is broadcast. • Multiplex info: Displays the channel and frequency of the current DAB multiplex. • Program type: Describes the content of the current DAB station. •... -
Page 17: Dab Sorting
• [ANTENNA OFF]: Select when using the DAB aerial without the booster. • [ANTENNA 12V]: Select when using the DAB aerial with the booster (12V). DAB sorting With this option, you can select the way that the station list is arranged. In DAB mode, press MENU to enter the menu options. -
Page 18: Play From Usb
Play from USB Note • Ensure that the USB device contains playable music. Insert the USB device Slide the USB connector cover marked to the left. Insert the USB storage device into the USB connector. » The unit starts playing from the USB storage device automatically. -
Page 19: Shuffle Play
• [REPEAT ALL]: Play all tracks repeatedly. • [REPEAT TRK]: Play current track repeatedly. • [REPEAT FLD]: Play all tracks in the current folder repeatedly. Shuffle play You can play the tracks in random order: During play, press OPTIONS repeatedly until [RANDOM] displays. -
Page 20: Control Music Playback On Ipod/Iphone
Control music playback on iPod/ iPhone Make sure that the iPod/iPhone is connected correctly. Press SOURCE to select iPod USB mode. Press repeatedly to toggle between the two control modes: • iPod control mode: Use the buttons/ touch screen on iPod/iPhone to control the music. -
Page 21: Adjust Sound
7 Adjust sound Adjust volume Rotate clockwise/anticlockwise to increase/decrease volume. Mute You can turn off the sound of your audio. During play, press • To resume sound, press Turn DBB and subwoofer on/off Press DBB, then the current setting is displayed: »... -
Page 22: Adjust System Settings
8 Adjust system settings Turn beep sound on/off Each time you press a button, the unit beeps. You can turn on or off this beep sound. Press MENU. Press repeatedly until [BEEP] is displayed. Rotate to select a setting: • [BEEP ON]: Turn on the beep sound. -
Page 23: Dimmer
Dimmer Press MENU Press repeatedly until [DIMMER] is displayed. Rotate to toggle between the settings • [DIMMER Hi] • [DIMMER Lo] Reset You can reset the unit to its default setting. Detach the front panel. Press the reset button by using a ball- point pen or a similar tool. -
Page 24: Remove The Unit
Note • If the new fuse gets damaged again, there may be an internal malfunction. Consult your Philips dealer. Remove the unit You can remove the unit from the dashboard. Detach the front panel. Pull out the unit by using the disassembly tools. -
Page 25: 11 Troubleshooting
Compatible USB storage devices: • USB flash memory: USB 1.1 host with interface reading all speed support (1.1, 2.0) • USB flash players: USB 1.1 host with interface reading all speed support (1.1, 2.0) Supported formats: • USB or memory file format: FAT16, FAT32 •... -
Page 26: 12 Glossary
Disc cannot be ejected • Press and hold Preset stations lost. • Battery cable is not correctly connected. Connect the battery cable to the terminal that is always live. Display show ERR-12 • USB data error. Check the USB storage device. - Page 27 © 2011 Koninklijke Philips Electronics N.V. All rights reserved. CEM3000B_05_UM_V3.1...
Need help?
Do you have a question about the CEM3000B and is the answer not in the manual?
Questions and answers