Philips MCD129 User Manual
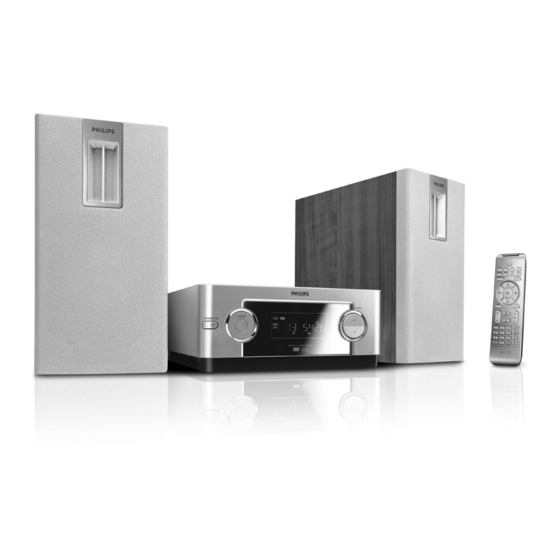
Dvd micro theatre
Hide thumbs
Also See for MCD129:
- Service manual (42 pages) ,
- User manual (32 pages) ,
- Quick start manual (4 pages)
Table of Contents
Advertisement
Advertisement
Table of Contents

Related Manuals for Philips MCD129


Summary of Contents for Philips MCD129
- Page 1 MCD109 DVD Micro Theatre...
- Page 2 Manufactured under license from Dolby Laboratories. “Dolby”, “Pro-logic” and the double-D symbol are trade- marks of Dolby Laboratories. This product incorporates copyright protection technol- ogy that is protected by method claims of certain U.S. patents and other intellectual property rights owned by Macrovision Corporation and other rights owners.
- Page 3 Index English ------------------------------------------------ 4 -------------------------------------------------------- 31...
-
Page 4: Table Of Contents
Contents General Information Features ... 5 Supplied accessories ... 5 Environment information ... 5 Installation ... 5 Maintenance of disc and disc lens ... 5 Connections Connecting the right speaker ... 6 Connecting a TV set ... 7 Connecting the power cord ... 7 Connecting additional equippments...8 Functional Overview... -
Page 5: General Information
– Composite video cable (yellow) – User Manual and Quick Start Guide If any item is damaged or missing, contact your retailer or Philips. Environmental information All unnecessary packaging has been omitted. We have tried to make the packaging easy to... -
Page 6: Connections
Fully insert the stripped portion of the speaker wire into the terminal as shown. Speaker wires Left speaker Video cable DIN cable DVD player Voltage selector AC power cord Notes: – Ensure that the speaker wires are correctly connected. Improper connections may damage the system due to short-circuit. -
Page 7: Connecting A Tv Set
DVD player Left speaker AC power cord Voltage selector Connect the supplied DIN cable to DVD player’s DIN jack and the left speaker’s DIN jack. Connect the supplied AC power cord to the left speaker’s AC MAINS and the wall socket. -
Page 8: Connecting Additional Equippments
Connections Connecting additional equippments IMPORTANT! – Some discs are copy-protected. You cannot record the disc through a VCR or digital recording device. – When making connections, make sure the colour of the cable plugs matches the colour of jacks. – Always refer to the owner’s manual of the other equipment for complete connection and usage details. -
Page 9: Functional Overview
For VCD/CD only: program the favourite tracks MODE – selects various repeat play modes (For VCD with PBC feature, PBC must be turned off.) VOLUME +/- – adjusts the volume upward/downward. Display – shows the current status of the DVD player. -
Page 10: Remote Control
Functional Overview Remote control – switches the system on/ off. – selects a connected external source DISC – selects disc playing SUBTITLE – selects a subtitle language. SYSTEM MENU – enters or exits the system menu. REPEAT – selects variations of continuous playback (For VCD with PBC feature, PBC must be turned off.) DISC DISPLAY... - Page 11 MUTE – disables or enables sound output. VOL +/- – adjusts the volume upward/downward. ¡ GOTO – fast searches in a disc by entering a time, title or chapter (For VCD with PBC feature, PBC must be turned off.) ™ ZOOM –...
-
Page 12: Getting Started
Switch the DVD system on and then select DISC source. (See “Switching the system on/off”). Turn on the TV and set to the correct video-in channel. You should see the blue Philips DVD background screen on the TV. ➜ Usually these channels are between the lowest and highest channels and may be called FRONT, A/V IN, or VIDEO. -
Page 13: Setting Up Progressive Scan Feature
1) Your TV can accept progressive signals, a progressive scan TV is required. 2) You have connected the DVD player to your TV using Y Pb Pr (see “Connecting TV set”) Getting Started Turn on your TV. -
Page 14: To Deactivate Progressive Manually
Getting Started ➜ Progressive scan is now set on. TV screen comes to the system menu. ➜ If distored picture still appears, it indicates that your TV doesn’t support progressive scan. In this case, turn off progressive scan as described in “To deactivate Progressive manually”. -
Page 15: Switching The System On/Off
IMPORTANT! – Before you operate the system, complete the connection procedures. – When the system is switched to Standby mode, it is still consuming power.To disconnect the system from the power supply completely, remove the AC power plug from the wall socket. Switching the system on/off ●... -
Page 16: Disc Operations
3 in order to play on this DVD system. You cannot play discs that are labeled for other regions. Note: – If you are having trouble playing a certain disc, remove the disc and try a different one. Improper formatted disc will not play on this DVD Player. -
Page 17: Playing Discs
Press SOURCE on the system once or more to select DVD mode ( or DISC on the remote control). ➜ You should see the blue Philips DVD background screen on the TV. Push OPEN/CLOSE on the top of the system to open the disc tray. -
Page 18: Fast Forwarding/Reversing
Disc Operations Fast forwarding/reversing For DVD/VCD/CD/MP3: During playback, press á/à repeatedly to select fast search speed in forward (FF) or reverse (FR) playback. ➜ The disc plays at a high speed with no sound. To resume to normal playback, pressÉ Å. Or, press á/à... -
Page 19: Programming Favourite Tracks
Programming favourite tracks For VCDs/CDs You can select and program up to 99 desired tracks for playback in the desired sequence. If you like, store any track/chapter/title more than once. During playback, press 9 twice to fully stop the playback. Press PROG on the remote control (or PRGOGRAM on the system) to activate programming mode. -
Page 20: Zoom
Disc Operations ZOOM For DVDs/VCDs/JPEG Zooming allows you to enlarge the video/ JPEG image during playback. ● Press ZOOM repeatedly to zoom in on the playback video image. ➜ For JPEP picture disc, press ZOOM to display “ZOOM ON”, then press ¡/ ™ to select different enlarging rates. -
Page 21: Playing Mp3/Wma/Jpeg Disc
Playing MP3/WMA/JPEG picture disc IMPORTANT! – Make sure that the system is properly connected to your TV (see Connecting a TV ), and your TV is turned on and set to video-in channel (Setting up the TV). – For DRM-protected WMA files, use windows Media Player 10 (or later) for CD burning/conversion. -
Page 22: Dvd Menu Operations
DVD Menu Operations Using the menu bar You can continue some operations directly via the multiple menu bars on the TV screen without interrupting the disc playback. But when you enter (SETUP MENU), the playback will pause. SUBTITLE REPEAT SYSTEM MENU AUDIO In disc mode, press SYSTEM MENU. -
Page 23: Using The Setup Menu (User Preference Settings)
DVD Menu Operations TV Display (default: Normal/PS) IMPORTANT! – This menu is accessible only in the stop postion. Set the aspect ratio of the DVD Player according to the TV you have connected. SHUFFLE ➜ Normal/PS (panscan): If you have a normal... -
Page 24: Night Mode
DVD Menu Operations Night Mode NIGHT MODE TEST TONE NIGHT MODE SET TO OFF Select this when you want to enjoy the surround sound with its full dynamic range. Select this to level out the volume. High volume output will be softened and low volume output will be brought upward to an audio level. -
Page 25: Restricting Playback By Setting Parental Level
Restricting playback by setting parental level Some DVDs may have a parental level assigned to the complete disc or to certain scenes on the disc. This feature lets you set a playback limitation level. The rating levels are from 1 to 8 and are country specific. -
Page 26: Specifications
Specifications SYSTEM Power supply ..110-127V 60Hz /220-240V 50Hz Rated working power consumption (1/8 rated output power) ... ≤ 40W AUX input sensitivity ... ≤ 500mV Output power ... 2 x 20W RMS (L/R speakers) Frequency response ... 20Hz-20kHz (± 3dB) Video output ... -
Page 27: Troubleshooting
Do not open the system as there is a risk of electric shock. If a fault occurs, first check the points listed below before taking the system for repair. If you are unable to remedy a problem by following these hints, consult your dealer or Philips for help. - Page 28 The aspect ratio of the screen cannot be changed even though you have set the TV shape. No sound or distorted sound. The micro DVD player does not start playback. The DVD micro system does not respond when the buttons are pressed.
- Page 29 The remote control does not function. Low hum or buzz sound. Low bass response. Unable to select Progressive Scan ✔ Select the correct source (DISC or AUX for example) before pressing the function button. ✔ Point the remote control at the remote sensor of the unit.
-
Page 30: Glossary
Glossary Analog: Sound that has not been turned into numbers. Analog sound varies, while digital sound has specific numerical values. These jacks send audio through two channels, the left and right. Aspect ratio: The ratio of vertical and horizontal sizes of a displayed image. The horizontal vs.
Need help?
Do you have a question about the MCD129 and is the answer not in the manual?
Questions and answers