Mitsubishi Electric MXZ-4C36NAHZ Technical & Service Manual
Split-type, heat pump air conditioners
Hide thumbs
Also See for MXZ-4C36NAHZ:
- Service manual (148 pages) ,
- Technical & service manual (7 pages) ,
- Installation manual (52 pages)
Table of Contents
Advertisement
TECHNICAL & SERVICE MANUAL
[Model Name]
<Outdoor unit>
MXZ-4C36NAHZ
MXZ-5C42NAHZ
MXZ-8C48NAHZ
MXZ-8C48NA
MXZ-8C60NA
<Branch box>
PAC-MKA50BC
PAC-MKA30BC
PAC-MKA51BC
PAC-MKA31BC
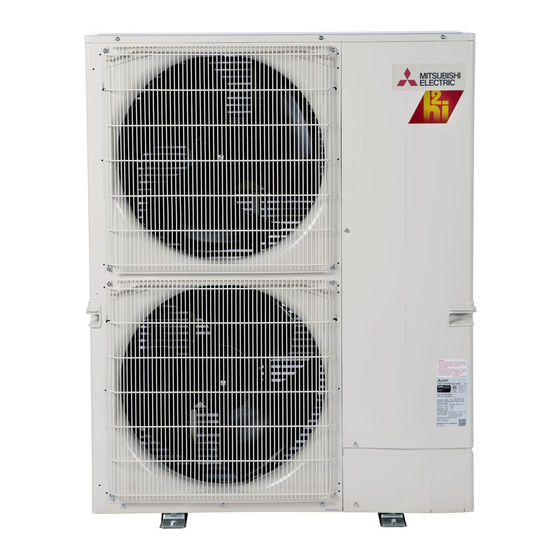
OUTDOOR UNIT: MXZ-4C36NAHZ
BRANCH BOX: PAC-MKA51BC
[Service Ref.]
MXZ-4C36NAHZ
MXZ-4C36NAHZ-U1
MXZ-5C42NAHZ
MXZ-5C42NAHZ-U1
MXZ-8C48NAHZ
MXZ-8C48NAHZ-U1
MXZ-8C48NA
MXZ-8C48NA-U1
MXZ-8C60NA-U1
PAC-MKA50BC
PAC-MKA30BC
PAC-MKA51BC
PAC-MKA31BC
CONTENTS
TECHNICAL CHANGES ......................................... 2
10. DISASSEMBLY PROCEDURE ...................... 142
1. SAFETY PRECAUTION .................................... 3
2. OVERVIEW OF UNITS ...................................... 6
3. SPECIFICATIONS ............................................ 10
4. DATA ................................................................ 14
5. OUTLINES AND DIMENSIONS ...................... 36
6. WIRING DIAGRAM ......................................... 40
8. TROUBLESHOOTING .................................... 52
PARTS CATALOG (OCB573)
HFC
utilized
R410A
Februray 2018
No. OCH573
REVISED EDITION-E
:
Notes:
Advertisement
Chapters
Table of Contents

Related Manuals for Mitsubishi Electric MXZ-4C36NAHZ


Summary of Contents for Mitsubishi Electric MXZ-4C36NAHZ
-
Page 1: Table Of Contents
5. OUTLINES AND DIMENSIONS ...... 36 6. WIRING DIAGRAM ......... 40 7. NECESSARY CONDITIONS FOR SYSTEM CONSTRUCTION ..47 8. TROUBLESHOOTING ........52 9. PRECAUTIONS AGAINST REFRIGERANT LEAKAGE ..141 OUTDOOR UNIT: MXZ-4C36NAHZ 10. DISASSEMBLY PROCEDURE ...... 142 PARTS CATALOG (OCB573) BRANCH BOX: PAC-MKA51BC... -
Page 2: Technical Changes
TECHNICAL CHANGES Service ref. have been changed as follows. MXZ-4C36NAHZ MXZ-4C36NAHZ-U1 MXZ-5C42NAHZ MXZ-5C42NAHZ-U1 MXZ-8C48NAHZ MXZ-8C48NAHZ-U1 MXZ-8C48NA MXZ-8C48NA-U1 OCH573E... -
Page 3: Safety Precaution
SAFETY PRECAUTION 1-1. ALWAYS OBSERVE FOR SAFETY Before obtaining access to terminal, all supply circuit must be disconnected. 1-2. CAUTIONS RELATED TO NEW REFRIGERANT Cautions for units utilizing refrigerant R410A Use a vacuum pump with a reverse flow check Use new refrigerant pipes. valve. - Page 4 [1] Cautions for service (1) Perform service after recovering the refrigerant left in unit completely. (2) Do not release refrigerant in the air. (3) After completing service, charge the cycle with specified amount of refrigerant. (4) If moisture or foreign matter might have entered the refrigerant piping during service, ensure to remove them. [2] Additional refrigerant charge When charging directly from cylinder Unit...
- Page 5 1-3. Cautions for refrigerant piping work Diagram below: Piping diameter and thickness Thickness : in [mm] Nominal Outside dimensions (in) diameter (mm) R410A 6.35 1/32 [0.8] 1/32 [0.8] 9.52 1/32 [0.8] 1/32 [0.8] 12.70 1/32 [0.8] 1/32 [0.8] 15.88 5/128 [1.0] 5/128 [1.0] —...
-
Page 6: Overview Of Units
OVERVIEW OF UNITS 2-1. CONSTRUCTION OF SYSTEM Capacity Models other than MXZ-8C60NA MXZ-8C60NA OCH573E... - Page 7 2-2. SYSTEM OUTLINE 2-2-1. System example Indoor unit (Ceiling concealed type) Indoor unit (Wall mounted type) Outdoor unit Branch box 2-2-2. Method for identifying Number of connectable indoor units (MAX.) Development No. : A, B, ···,etc. H Z - U1 M X Z - Sub-number Control and refrigerant...
- Page 8 2-3. TYPICAL COMBINATION EXAMPLE Branch box is located INSIDE of condominium Branch box (Inside) Installing branch box indoors Branch box (5-branches type) Master Dining Bedroom (1) Bedroom (2) Living bedroom Outdoor unit SEZ-18 MSZ-12 MSZ-12 MSZ-09 MSZ-09 Example: SEZ-18 = 18 MSZ-12 = 12 Total rated capacity...
- Page 9 2-4. SIMPLIFIED PIPING SYSTEM Piping connection size The piping connection size differs according to the type and capacity of indoor units. {3/8 inch Liquid Match the piping connection size of branch box with indoor unit. [9.52 mm] If the piping connection size of branch box does not match the piping connection size of {5/8 inch {3/4 inch* indoor unit, use optional different-diameter (deformed) joints to the branch box side.
-
Page 10: Specifications
SPECIFICATIONS kcal/h = kW o 860 3-1. OUTDOOR UNIT: Conversion formula: BTU/h = kW o 3412 MXZ-4C36/5C42/8C48NAHZ(-U1), MXZ-8C48NA(-U1), MXZ-8C60NA-U1 /min o 35.31 Service Ref. MXZ-4C36NAHZ(-U1) MXZ-5C42NAHZ(-U1) OCH573E... - Page 11 kcal/h = kW o 860 Conversion formula: BTU/h = kW o 3412 /min o 35.31 Service Ref. MXZ-8C48NAHZ(-U1) MXZ-8C48NA(-U1) OCH573E...
- Page 12 kcal/h = kW o 860 BTU/h = kW o 3412 Conversion formula: /min o 35.31 Service Ref. MXZ-8C60NA-U1 OCH573E...
- Page 13 3-2. BRANCH BOX: PAC-MKA50BC PAC-MKA51BC PAC-MKA30BC PAC-MKA31BC PAC-MKA50BC PAC-MKA30BC Model name PAC-MKA51BC PAC-MKA31BC Connectable number of indoor units Maximum 5 Maximum 3 Power supply Single phase, 208/230 V, 60 Hz Input 0.003 Running current 0.05 External finish Galvanized sheets inch (mm) 17-23/32 (450) Width Dimensions...
-
Page 14: Data
DATA 4-1. SELECTION OF COOLING/HEATING UNITS How to determine the capacity when less than or equal 100% indoor model size units are connected in total: The purpose of this flow chart is to select the indoor and outdoor units. For other purposes, this flow chart is intended only for reference. Determine the load (L) and the Indoor/Outdoor Temperature Temporarily select the Indoor/Outdoor Units... - Page 15 How to determine the capacity when greater than 100% indoor model size units are connected in total: for reference. Determine the load (L) and the Indoor/Outdoor Temperature Temporarily select the indoor/outdoor units Reselect the indoor units Reselect the indoor units Reselect the outdoor units Reselect the outdoor units Indoor Unit...
- Page 16 <Cooling> Design Condition Outdoor Design Dry Bulb Temperature 98.6ºF (37.0ºC) Total Cooling Load 29.6 kBTU/h Room1 Indoor Design Dry Bulb Temperature 80.6ºF (27.0ºC) Indoor Design Wet Bulb Temperature 68.0ºF (20.0ºC) Cooling Load 13.6 kBTU/h Room2 Indoor Design Dry Bulb Temperature 75.2ºF (24.0ºC) Indoor Design Wet Bulb Temperature 66.2ºF (19.0ºC)
- Page 17 <Heating> Design Condition Outdoor Design Wet Bulb Temperature 35.6ºF (2.0ºC) Total Heating Load 34.4 kBTU/h Room1 Indoor Design Dry Bulb Temperature 69.8ºF (21.0ºC) Heating Load 16.3 kBTU/h Room2 Indoor Design Dry Bulb Temperature 73.4ºF (23.0ºC) Heating Load 18.1 kBTU/h <Other> Indoor/Outdoor Equivalent Piping Length 230 ft Capacity of indoor unit 2.
- Page 18 3. Power input of outdoor unit Outdoor unit : MXZ-4C36 Indoor unit 1 : MSZ-FH15 Indoor unit 2 : MSZ-FH18 <Cooling> (1) Rated power input of outdoor unit 2.57 kW (2) Calculation of the average indoor temperature power input coefficient Coefficient of the outdoor unit for indoor unit 1 (Outdoor temp.
- Page 19 <Heating> (1) Rated power input of outdoor unit 3.34 kW (2) Calculation of the average indoor temperature power input coefficient Coefficient of the outdoor unit for indoor unit 1 (Outdoor temp. 26.6°F [ 3°C] W.B., Indoor temp. 68.0°F [20°C] D.B.) 1.34 (Refer to “4-2.
-
Page 20: Ground
4-2. CORRECTION BY TEMPERATURE Figure 7 Indoor unit temperature correction <Cooling> 60.8 62.6 64.4 66.2 69.8 71.6 73.4 75.2 [°FW.B.] [°CW.B.] Indoor Temperature Figure 8 Outdoor unit temperature correction 67.0°F (19.4°C) W.B. [°F W.B.] [°C W.B.] Outdoor Temperature 68.0°F (20.0°C) W.B. 68.0°F (20.0°C) W.B. -
Page 21: Ground
<Heating> Figure 9 Indoor unit temperature correction 60.8 62.6 64.4 66.2 69.8 71.6 73.4 75.2 78.8 80.6 [°F W.B.] [°C W.B.] Indoor Temperature Figure 10 Outdoor unit temperature correction 70.0°F (21.1°C) D.B. [°F W.B.] [°C W.B.] Outdoor Temperature 70.0°F (21.1°C) D.B. 60.8°F (16.0°C) D.B. -
Page 22: Ground
<Heating> (NAHZ) Figure 11 Indoor unit temperature correction 60.8 62.6 64.4 66.2 69.8 71.6 73.4 75.2 78.8 80.6 [°F W.B.] [°C W.B.] Indoor Temperature Figure 12 Outdoor unit temperature correction 70.0°F (21.1°C) D.B. [°F W.B.] [°C W.B.] Outdoor Temperature 78.8°F (26.0°C) W.B. 69.8°F (21.0°C) W.B. -
Page 23: Ground
4-3. STANDARD OPERATION DATA (REFERENCE DATA) Operation Indoor Ambient DB/WB temperature Outdoor No. of connected units Unit Indoor unit No. of units in operation Model — Operating Main pipe conditions Piping Branch pipe Total pipe length Fan speed — lb oz Amount of refrigerant (kg) Electric current... -
Page 24: Ground
4-4. STANDARD CAPACITY DIAGRAM 4-4-1. MXZ-4C36NAHZ <cooling> Total capacity of indoor units (kBTU/h) Total capacity of indoor units (kBTU/h) 208, 230 V Total capacity of indoor units (kBTU/h) OCH573E... -
Page 25: Ground
4-4-2. MXZ-4C36NAHZ <heating> Total capacity of indoor units (kBTU/h) Total capacity of indoor units (kBTU/h) 208, 230 V Total capacity of indoor units (kBTU/h) OCH573E... -
Page 26: Ground
4-4-3. MXZ-5C42NAHZ <cooling> Total capacity of indoor units (kBTU/h) Total capacity of indoor units (kBTU/h) 208, 230 V Total capacity of indoor units (kBTU/h) OCH573E... -
Page 27: Ground
4-4-4. MXZ-5C42NAHZ <heating> Total capacity of indoor units (kBTU/h) 15.0 22.5 30.0 37.5 45.0 52.5 60.0 Total capacity of indoor units (kBTU/h) 208, 230 V 60.0 15.0 22.5 30.0 37.5 45.0 52.5 Total capacity of indoor units (kBTU/h) OCH573E... -
Page 28: Ground
4-4-5. MXZ-8C48NA MXZ-8C48NAHZ <cooling> Total capacity of indoor units (kBTU/h) Total capacity of indoor units (kBTU/h) 208, 230 V Total capacity of indoor units (kBTU/h) OCH573E... -
Page 29: Ground
4-4-6. MXZ-8C48NA MXZ-8C48NAHZ <heating> Total capacity of indoor units (kBTU/h) Total capacity of indoor units (kBTU/h) 208, 230 V Total capacity of indoor units (kBTU/h) OCH573E... -
Page 30: Ground
4-4-7. MXZ-8C60NA <cooling> 10.0 20.0 30.0 40.0 50.0 60.0 70.0 80.0 90.0 Total capacity of indoor units(kBTU/h) 10.0 20.0 30.0 40.0 50.0 60.0 70.0 80.0 90.0 Total capacity of indoor units(kBTU/h) 208, 230 V 10.0 20.0 30.0 40.0 50.0 60.0 70.0 80.0 90.0... -
Page 31: Ground
4-4-8. MXZ-8C60NA <heating> 10.0 20.0 30.0 40.0 50.0 60.0 70.0 80.0 90.0 Total capacity of indoor units(kBTU/h) 10.0 20.0 30.0 40.0 50.0 60.0 70.0 80.0 90.0 Total capacity of indoor units(kBTU/h) 208 V, 230 V 208, 230 V 10.0 20.0 30.0 40.0 50.0... -
Page 32: Ground
4-5. CORRECTING CAPACITY FOR CHANGES IN THE LENGTH OF REFRIGERANT PIPING (1) Capacity Correction Curve Figure 13 MXZ-4C36NAHZ <Cooling> Total capacity of indoor unit 1.00 18 [kBTU/h] 0.95 27 [kBTU/h] 0.90 36 [kBTU/h] 0.85 0.80 46.8 [kBTU/h] 0.75 0.70 Piping equivalent length (ft) Figure 14 MXZ-5C42NAHZ <Cooling>... -
Page 33: Ground
Figure 15 MXZ-8C48NA <Cooling> Total capacity of indoor unit 1.00 24 [kBTU/h] 0.95 0.90 36 [kBTU/h] 0.85 48 [kBTU/h] 0.80 62.4 [kBTU/h] 0.75 0.70 Piping equivalent length (ft) Figure 16 MXZ-8C60NA <Cooling> Total capacity of indoor unit 1.00 30 [kBTU/h] 0.95 0.90 45 [kBTU/h]... -
Page 34: Ground
Figure 17 MXZ-4C36NAHZ/5C42NAHZ/8C48NA <Heating> Total capacity of indoor unit 1.00 0.95 0.90 0.85 0.80 0.75 0.70 Piping equivalent length (ft) Figure 18 MXZ-8C60NA <Heating> Total capacity of indoor unit 1.00 0.95 0.90 0.85 0.80 0.75 0.70 Piping equivalent length (ft) (2) Method for Obtaining the Equivalent Piping Length 4-5-1. - Page 35 4-6. NOISE CRITERION CURVES MXZ-4C36NAHZ MODE SPL(dB) LINE MXZ-5C42NAHZ SPL(dB) MODE LINE COOLING COOLING MXZ-4C36NAHZ-U1 MXZ-5C42NAHZ-U1 HEATING HEATING NC-70 NC-70 NC-60 NC-60 NC-50 NC-50 NC-40 NC-40 NC-30 NC-30 APPROXIMATE APPROXIMATE THRESHOLD OF THRESHOLD OF HEARING FOR NC-20 HEARING FOR CONTINUOUS...
-
Page 36: Outlines And Dimensions
OUTLINES AND DIMENSIONS 5-1. OUTDOOR UNIT MXZ-4C36NAHZ MXZ-5C42NAHZ MXZ-8C48NAHZ MXZ-8C48NA Unit: mm <inch> OCH573E... -
Page 37: Ground
MXZ-4C36NAHZ-U1 MXZ-5C42NAHZ-U1 MXZ-8C48NAHZ-U1 MXZ-8C48NA-U1 Unit: mm <inch> OCH573E... -
Page 38: Ground
MXZ-8C60NA-U1 Unit: mm <inch> OCH573E... -
Page 39: Ground
5-2. BRANCH BOX Unit: mm <inch> PAC-MKA50BC PAC-MKA51BC When installing the conduit. Set the attachment to the inner side of each panel. 58 〈2-9/32〉 SUSPENSION BOLT PITCH 320〈12-19/32〉 〈25/32〉 〈1-3/32〉 SUSPENSION BOLT : W3/8(M10) REFRIGERANT PIPE FLARED CONNECTION Unit: inch TO OUTDOOR UNIT LIQUID PIPE 1/4F... -
Page 40: Wiring Diagram
WIRING DIAGRAM 6-1. OUTDOOR UNIT MXZ-4C36NAHZ MXZ-5C42NAHZ MXZ-8C48NAHZ SYMBOL NAME SYMBOL NAME SYMBOL NAME Terminal Block 〈Power Supply〉 Thermistor〈Suction Pipe〉 Switch〈Function Selection〉 TB1B Terminal Block 〈Branch Box〉 Thermistor〈Ambient〉 Switch〈Model Selection〉 Terminal Block Switch〈Function Selection〉 Thermistor〈Heat Sink〉 〈Branch box/Outdoor Transmission Line〉... -
Page 41: Ground
MXZ-8C48NA SYMBOL NAME SYMBOL NAME SYMBOL NAME Terminal Block 〈Power Supply〉 Switch〈Function Selection〉 Thermistor〈Ambient〉 TB1B Terminal Block 〈Branch Box〉 Thermistor〈Heat Sink〉 Switch〈Model Selection〉 Terminal Block LEV-A,LEV-B Electronic Expansion Valve Switch〈Function Selection〉 〈Branch box/Outdoor Transmission Line〉 Reactor SWU1 Switch〈Unit Address Selection, 1st digit〉 P.B. -
Page 42: Ground
MXZ-4C36NAHZ-U1 MXZ-5C42NAHZ-U1 MXZ-8C48NAHZ-U1 OCH573E... -
Page 43: Ground
MXZ-8C48NA-U1 OCH573E... -
Page 44: Ground
MXZ-8C60NA-U1 OCH573E... -
Page 45: Ground
6-2. BRANCH BOX PAC-MKA50BC PAC-MKA30BC OCH573E... -
Page 46: Ground
PAC-MKA51BC PAC-MKA31BC OCH573E... -
Page 47: Necessary Conditions For System Construction
NECESSARY CONDITIONS FOR SYSTEM CONSTRUCTION 7-1. TRANSMISSION SYSTEM SETUP OCH573E... -
Page 48: Ground
7-2. REFRIGERANT SYSTEM DIAGRAM MXZ-4C36NAHZ MXZ-5C42NAHZ MXZ-8C48NAHZ MXZ-4C36NAHZ-U1 MXZ-5C42NAHZ-U1 MXZ-8C48NAHZ-U1 Thermistor(TH-A–E) Thermistor(TH7) <Gas pipe temperature> Service port <Ambient> Service port 4-Way Valve (21S4) Strainer Room temperature Ball valve High pressure thermistor Oil separator switch(63H) Solenoid valve(SV1) (TH1 or RT11) <Bypass>... -
Page 49: Ground
MXZ-8C60NA-U1 Thermistor(TH-A–E) Thermistor(TH7) <Gas pipe temperature> Service port <Ambient> Service port 4-Way Valve (21S4) Strainer Room temperature Ball valve High pressure thermistor Oil separator switch(63H) Solenoid valve(SV1) (TH1 or RT11) <Bypass> Strainer Capillary Distributor tube1 Service port Strainer Thermistor(TH3) High <Outdoor Liquid pipe>... -
Page 50: Ground
7-3. TYPICAL CONTROL SYSTEM IMPORTANT: TB3A TB5/TB15 Branch Box A-IC If a current leakage breaker is used, it should be compatible with higher MA-RC (01) (51) harmonics as this unit is equipped with an inverter. The use of an inadequate TB3B TB5/TB15 breaker can cause the incorrect operation of inverter. - Page 51 ( 5) Group setting (6) Restricted functions OCH573E...
-
Page 52: Troubleshooting
TROUBLESHOOTING 8-1. TROUBLESHOOTING <Check code displayed by self-diagnosis and actions to be taken for service (summary)> Unit conditions at service Check code Actions to be taken for service (summary) Judge what is wrong and take a corrective action according Displayed to “8-3 SELF-DIAGNOSIS ACTION BY FLOWCHART”. - Page 53 8-2. CHECK POINTS FOR TEST RUN 8-2-1. Procedures before test run " " OCH573E...
- Page 54 8-2-2. Test run for wired remote controller <PAR-31MAA> MENU RETURN SELECT ON/OFF Function buttons Select "Service" from the Main menu, and press the button. Test run Input maintenance info. Function setting Check Self check Select "Test run" with the button, and press the button.
- Page 55 8-2-3. Test run About the restart protective mechanism OCH573E...
-
Page 56: Heating
In case of the test run from outdoor unit, all indoor units operate. Therefore, you cannot detect any erroneous con- nection of refrigerant pipes and the connecting wires. If it aims at detection of any erroneous connection, be sure to carry out the test run from remote controller with reference to "(1) Using remote controller." SW3-1 Cooling operation SW3-2... - Page 57 8-2-4. Countermeasures for Error During Test Run Detected Unit Remote Indoor Outdoor Controller NOTES: 1. When the outdoor unit detects No ACK error/No response error, an object indoor unit is treated as a stop, and not assumed to be abnormal. 2.
- Page 58 8-3. SELF-DIAGNOSIS ACTION BY FLOWCHART Check code Abnormal points and detection methods Causes and checkpoints Diagnosis Remedy OCH573E...
- Page 59 Check code Abnormal points and detection methods Causes and checkpoints Diagnosis Remedy OCH573E...
- Page 60 Check code Diagnosis Remedy OCH573E...
- Page 61 Check code Abnormal points and detection methods Causes and checkpoints Diagnosis Remedy OCH573E...
- Page 62 Check code Diagnosis Remedy OCH573E...
- Page 63 Check code Diagnosis Remedy OCH573E...
- Page 64 Check code Diagnosis Remedy OCH573E...
- Page 65 Check code Abnormal points and detection methods Causes and checkpoints Diagnosis Remedy " " " " " OCH573E...
- Page 66 Check code Diagnosis Remedy OCH573E...
- Page 67 Check code Abnormal points and detection methods Causes and checkpoints Diagnosis Remedy OCH573E...
- Page 68 Check code Diagnosis Remedy OCH573E...
- Page 69 Check code Abnormal points and detection methods Causes and checkpoints Diagnosis Remedy OCH573E...
- Page 70 Check code Abnormal points and detection methods Causes and checkpoints Diagnosis Remedy OCH573E...
- Page 71 Check code Abnormal points and detection methods Causes and checkpoints Diagnosis Remedy OCH573E...
- Page 72 Check code Diagnosis Remedy OCH573E...
- Page 73 Check code Abnormal points and detection methods Causes and checkpoints Diagnosis Remedy Turn the power OFF to check for looseness, disconnection or converse phases of the compressor wiring OCH573E...
- Page 74 Check code Diagnosis Remedy OCH573E...
- Page 75 Check code Abnormal points and detection methods Causes and checkpoints Diagnosis Remedy SW1 Setting Display on LED1,2 1 2 3 4 5 6 7 8 1 2 3 4 5 6 7 8 OCH573E...
- Page 76 Check code Diagnosis Remedy SW1 Setting Display on LED1,2 Unit 0–999.9 1 2 3 4 5 6 7 8 OCH573E...
- Page 77 Check code Abnormal points and detection methods Causes and checkpoints Diagnosis Remedy OCH573E...
- Page 78 Check code Abnormal points and detection methods Causes and checkpoints Diagnosis Remedy OCH573E...
- Page 79 Check code Abnormal points and detection methods Causes and checkpoints Diagnosis Remedy OCH573E...
- Page 80 Check code Diagnosis Remedy OCH573E...
- Page 81 Check code Abnormal points and detection methods Causes and checkpoints Diagnosis Remedy SW1 Setting Display on LED1,2 Unit °F 99.9–999.9 1 2 3 4 5 6 7 8 OCH573E...
- Page 82 Check code Abnormal points and detection methods Causes and checkpoints Diagnosis Remedy OCH573E...
- Page 83 Check code Abnormal points and detection methods Causes and checkpoints Diagnosis Remedy OCH573E...
- Page 84 Check code Abnormal points and detection methods Causes and checkpoints Diagnosis Remedy SW1 Setting Display on LED1,2 Unit 99.9–999.9 °F 1 2 3 4 5 6 7 8 OCH573E...
- Page 85 Check code Abnormal points and detection methods Causes and checkpoints Diagnosis Remedy OCH573E...
- Page 86 Check code Abnormal points and detection methods Causes and checkpoints Diagnosis Remedy OCH573E...
- Page 87 Check code Abnormal points and detection methods Causes and checkpoints Diagnosis Remedy SW1 Setting Display on LED1,2 Unit 99.9–999.9 PSIG [ kgf/cm² ] 1 2 3 4 5 6 7 8 OCH573E...
- Page 88 Check code Abnormal points and detection methods Causes and checkpoints Diagnosis Remedy OCH573E...
- Page 89 Check code Abnormal points and detection methods Causes and checkpoints Diagnosis Remedy OCH573E...
- Page 90 Check code Abnormal points and detection methods Causes and checkpoints Diagnosis Remedy OCH573E...
- Page 91 Check code Abnormal points and detection methods Causes and checkpoints Diagnosis Remedy OCH573E...
- Page 92 Check code Abnormal points and detection methods Causes and checkpoints Diagnosis Remedy OCH573E...
- Page 93 Check code Abnormal points and detection methods Causes and checkpoints OCH573E...
- Page 94 Check code Abnormal points and detection methods Causes and checkpoints OCH573E...
- Page 95 Check code Diagnosis Remedy OCH573E...
- Page 96 Check code Diagnosis Remedy OCH573E...
- Page 97 Check code Abnormal points and detection methods Causes and checkpoints · Diagnosis Remedy OCH573E...
- Page 98 Check code Abnormal points and detection methods Causes and checkpoints Diagnosis Remedy OCH573E...
- Page 99 Check code Diagnosis Remedy Is the wiring connected properly, meeting the condition? OCH573E...
- Page 100 Check code Abnormal points and detection methods Causes and checkpoints Diagnosis Remedy OCH573E...
- Page 101 Check code Diagnosis Remedy Is the wiring connected properly, meeting the condition? OCH573E...
- Page 102 Check code Abnormal points and detection methods Causes and checkpoints Diagnosis Remedy OCH573E...
- Page 103 Check code Abnormal points and detection methods Causes and checkpoints · Diagnosis Remedy OCH573E...
- Page 104 Check code Abnormal points and detection methods Causes and checkpoints Diagnosis Remedy OCH573E...
- Page 105 Check code Abnormal points and detection methods Causes and checkpoints Diagnosis Remedy <Outdoor unit> <Branch box> OCH573E...
- Page 106 Check code Abnormal points and detection methods Causes and checkpoints Diagnosis Remedy OCH573E...
- Page 107 8-4. TROUBLESHOOTING BY INFERIOR PHENOMENA Factor Phenomena Countermeasure OCH573E...
-
Page 108: Heating
8-5. OUTDOOR UNIT INPUT/OUTPUT CONNECTOR State (CN51) A Distant control board E Lamp power supply B Relay circuit F Procure locally C External output adapter (PAC-SA88HA-E) G Max. 10 m CN51 D Outdoor unit control board : Error display lamp : Compressor operation lamp X, Y: Relay (Coil standard of 0.9W or less for 12 V DC) X, Y: Relay (1mA DC) - Page 109 8-6. HOW TO CHECK THE PARTS OUTDOOR UNIT: MXZ-4C36NAHZ MXZ-5C42NAHZ MXZ-8C48NAHZ MXZ-8C48NA MXZ-4C36NAHZ-U1 MXZ-5C42NAHZ-U1 MXZ-8C48NAHZ-U1 MXZ-8C48NA-U1 MXZ-8C60NA-U1 Parts name Check points Thermistor (TH3) Disconnect the connector then measure the resistance with a tester. (At the ambient temperature 50 to 80 F [10 to 30 :]) <Outdoor liquid pipe>...
- Page 110 Check method of DC fan motor (fan motor/outdoor multi controller circuit board) Notes 1. High voltage is applied to the connecter (CNF1, 2) for the fan motor. Pay attention to the service. 2. Do not pull out the connector (CNF1, 2) for the motor with the power supply on. board and fan motor.) (It causes trouble of the outdoor multi controller circuit Self check...
- Page 111 Check method of multi controller circuit board Multi controller circuit board check Fuse check Check the fuse on multi controller circuit board Disconnect the FAN motor connector and Replace multi controller circuit board (MULTI. B.) Did the fuse (F500) blow? measure the resistance of connector pins.
- Page 112 Check method of power circuit board Power circuit board check Note: To check the voltage of the parts on this board with a tester is difficult due to its location. Test points are limited. Is the voltage of main incoming power Check the breaker and power supply.
- Page 113 Check method of M-NET power circuit board M-NET power circuit board check * To check the voltage of the parts on this board with a tester is difficult due to its location. Test points are limited. Check the voltage between M1 and M2 on the transmission terminal block TB3.
- Page 114 8-7. HOW TO CHECK THE COMPONENTS <Thermistor characteristic Graph> Low temperature thermistors " 4 14 32 50 68 86 104122 °F 20 10 0 10 20 30 40 50 Temperature Medium temperature thermistor " " " " " " 167 212 230 257 ºF 100 110 125 : High temperature thermistor "...
- Page 115 <HIGH PRESSURE SENSOR> Comparing the High Pressure Sensor Measurement and Gauge Pressure By configuring the digital display setting switch (SW1) as shown in the figure below, the pressure as measured by the high pressure sensor appears on the LED1, 2 on the control board. The figure at left shows that the switches 1 through 4 are set to ON and 5 through 8 are set to OFF.
- Page 116 <LOW PRESSURE SENSOR> Comparing the Low Pressure Sensor Measurement and Gauge Pressure By configuring the digital display setting switch (SW1) as shown in the figure below, the pressure as measured by the low pressure sensor appears on the LED1 on the control board. The figure at left shows that the switches 1 through 4 are set to ON and 5 through 8 are set to OFF.
- Page 117 BRANCH BOX: PAC-MKA50BC PAC-MKA51BC PAC-MKA30BC PAC-MKA31BC Parts name Check points Disconnect the connector then measure the resistance with a tester. Thermistor (TH-A–E) (At the ambient temperature 50 to 86°F [10 to 30:]) <Gas pipe> Normal Abnormal 4.3 to 9.6k" Open or short Disconnect the connector then measure the resistance with a tester.
- Page 118 (1) Operation summary of the linear expansion valve branch box controller board 12V DC Drive circuit Blue Orange Yellow White Connector LEV-A LEV-B LEV-C LEV-D LEV-E <Output pulse signal and the valve operation> Output Output (Phase) (2) Linear expansion valve operation Open Close Open...
- Page 119 (3) How to attach and detach the coil of linear expansion valve Main body Coil Lead wire Stopper <How to detach the coil> <How to attach the coil> Be sure to attach the stopper to pipe B. OCH573E...
-
Page 120: Cooling
Troubleshooting Check point Corrective measure Problem Locked expansion Replace the linear If the linear expansion valve becomes locked and the motor is still operating, valve expansion valve. the motor will emit a clicking noise and will not function. This clicking noise indicates an abnormality. - Page 121 8-8. TEST POINT DIAGRAM Outdoor multi controller circuit board MXZ-4C36NAHZ MXZ-5C42NAHZ MXZ-8C48NAHZ MXZ-8C48NA MXZ-4C36NAHZ-U1 MXZ-5C42NAHZ-U1 MXZ-8C48NAHZ-U1 MXZ-8C48NA-U1 MXZ-8C60NA-U1 <CAUTION> TEST POINT 1 is high voltage. CN51 CN102 CN40,CN41 CNS2 SWU2, SWU1 CNS1 CNLVB CNLVA CN52 CN3N CN3D CNAC TH2 Thermistor...
- Page 122 Brief Check of POWER MODULE Outdoor power circuit board MXZ-4C36NAHZ MXZ-5C42NAHZ MXZ-8C48NAHZ MXZ-8C48NA MXZ-4C36NAHZ-U1 MXZ-5C42NAHZ-U1 MXZ-8C48NAHZ-U1 MXZ-8C48NA-U1 MXZ-8C60NA-U1 CN52C CNDC E2, E3 Power module U/V/W DCL1, DCL2 EI, E4 CNAC2 CNAC1 NI, LI OCH573E...
- Page 123 M-NET power circuit board MXZ-4C36NAHZ MXZ-5C42NAHZ MXZ-8C48NAHZ MXZ-8C48NA MXZ-4C36NAHZ-U1 MXZ-5C42NAHZ-U1 MXZ-8C48NAHZ-U1 MXZ-8C48NA-U1 MXZ-8C60NA-U1 OCH573E...
- Page 124 Branch box controller board PAC-MKA50BC PAC-MKA51BC PAC-MKA30BC PAC-MKA31BC TH-A to E LEV-A to E TH-D and E LEV-D and E CN3M LED1,LED2 SW12 SW11 F2,F3,F4 TB3A to E OCH573E...
- Page 125 8-9. INTERNAL SWITCH FUNCTION TABLE (1) Function of switches MXZ-4C36NAHZ(-U1) MXZ-5C42NAHZ(-U1) MXZ-8C48NAHZ(-U1) MXZ-8C48NA(-U1) MXZ-8C60NA-U1 OCH573E...
- Page 126 OCH573E...
- Page 127 OCH573E...
- Page 128 PAC-MKA50BC PAC-MKA51BC PAC-MKA30BC PAC-MKA31BC OCH573E...
- Page 129 8-10. OUTDOOR UNIT FUNCTIONS OCH573E...
- Page 130 OCH573E...
- Page 131 OCH573E...
- Page 132 OCH573E...
- Page 133 OCH573E...
- Page 134 OCH573E...
- Page 135 OCH573E...
- Page 136 OCH573E...
- Page 137 8-11. BRANCH BOX UNIT OPERATION MONITOR FUNCTION [When option part ‘A-Control Service Tool (PAC-SK52ST)’ is connected to branch box controller board (CNM)] <Table1> SW5 setting SW5 setting Detail Common 2 3 4 5 6 Indoor-A 2 3 4 5 6 Indoor-B 2 3 4 5 6 Indoor-C...
- Page 138 2 3 4 5 6 2 3 4 5 6 2 3 4 5 6 2 3 4 5 6 2 3 4 5 6 2 3 4 5 6 OCH573E...
- Page 139 2 3 4 5 6 2 3 4 5 6 2 3 4 5 6 2 3 4 5 6 2 3 4 5 6 2 3 4 5 6 2 3 4 5 6 OCH573E...
- Page 140 8-12. SELECTING FUNCTIONS USING THE REMOTE CONTROLLER : Initial setting Function Settings Mode No. Setting No. Remarks (when sent from the factory) Power failure automatic recovery The setting can Average data from each indoor unit be made to Indoor temperature each indoor Data from the indoor unit with remote controller detecting...
-
Page 141: Precautions Against Refrigerant Leakage
PRECAUTIONS AGAINST REFRIGERANT LEAKAGE 9-1. PRECAUTIONS AGAINST REFRIGERANT LEAKAGE 9-1-1. Introduction Outdoor unit Direction of refrigerant flow Branch box Indoor unit All refrigerant of this system will leak out to this room if there is leakage at this indoor unit. 9-1-2. -
Page 142: Disassembly Procedure
DISASSEMBLY PROCEDURE 10-1. OUTDOOR UNIT MXZ-4C36NAHZ(-U1) MXZ-5C42NAHZ(-U1) MXZ-8C48NAHZ(-U1) OPERATING PROCEDURE PHOTOS/FIGURES Removing the service panel and top panel Photo 1 2. Removing the fan motor (MF1, MF2) Photo 2 Photo 3 Note: Tighten the propeller fan with a torque of 5.7 ± 0.3 N·m. - Page 143 OPERATING PROCEDURE PHOTOS/FIGURES Photo 5 4. Removing the thermistor <Suction pipe> (TH6) Photo 6 Note: When replacing thermistor <Suction pipe> (TH6), replace it together with thermistor <Ambient> (TH7) since they are combined together. Refer to procedure No.5 below to remove thermis- tor <Ambient>...
- Page 144 OPERATING PROCEDURE PHOTOS/FIGURES 6. Removing the thermistor <Outdoor liquid pipe> (TH3) and Photo 9 Photo 9 thermistor <Compressor> (TH4), thermistor <HIC pipe> (TH2) 7. Removing the 4-way valve coil (21S4) Photo 10 8. Removing the 4-way valve Notes: 1. Recover refrigerant without spreading it in the air. 2.
- Page 145 OPERATING PROCEDURE PHOTOS/FIGURES 9. Removing bypass valve coil (SV1, SV2) and bypass valve Photo 11 Refer to the notes below. 10. Removing the high pressure switch (63H) and high pres- sure sensor (63HS) Refer to the notes below. 11. Removing the low pressure sensor (63LS) Photo 12 Refer to the notes below.
- Page 146 OPERATING PROCEDURE PHOTOS/FIGURES 13. Removing the compressor (MC) Photo 13 Figure 2 Note: Recover refrigerant without spreading it in the air. 14. Removing the accumulator Photo 14 Note: Recover refrigerant without spreading it in the air. Photo 15 OCH573E...
- Page 147 OPERATING PROCEDURE PHOTOS/FIGURES Figure 3 15. Removing the reactor (DCL) 16. Removing the base heater Photo 16 Notes: Photo 17 1. Tighten the propeller fan with a torque of 5.7 ± 0.3 N·m [4.2 ± 0.2 ft = lbs] 2. Rotate the propeller fan and make sure that the base heater and the lead wires do not interfere with the movement of the propeller fan.
- Page 148 MXZ-8C48NA MXZ-8C48NA-U1 OPERATING PROCEDURE PHOTOS/FIGURES 1. Removing the service panel and top panel Figure 1 2. Removing the fan motor (MF1, MF2) Photo 1 Photo 2 Note: Tighten the propeller fan with a torque of 5.7 ± 0.3 N·m [4.2 ± 0.2 ft = lbs] 3.
- Page 149 OPERATING PROCEDURE PHOTOS/FIGURES Photo 4 4. Removing the thermistor <Suction pipe> (TH6) Photo 5 Note: When replacing thermistor <Suction pipe> (TH6), replace it together with thermistor <Ambient> (TH7) since they are combined together. Refer to procedure No.5 below to remove thermis- tor <Ambient>...
- Page 150 OPERATING PROCEDURE PHOTOS/FIGURES Photo 8 6. Removing the thermistor <Outdoor liquid pipe> (TH3) and thermistor <Compressor> (TH4), thermistor <HIC pipe> (TH2) 7. Removing the 4-way valve coil (21S4) Photo 9 8. Removing the 4-way valve Note: 1. Recover refrigerant without spreading it in the air. 2.
- Page 151 OPERATING PROCEDURE PHOTOS/FIGURES Photo 10 9. Removing bypass valve coil (SV1) and bypass valve Refer to the notes below. 10. Removing the high pressure switch (63H) and high pres- sure sensor (63HS) Photo 11 Refer to the notes below. 11. Removing the low pressure sensor (63LS) Refer to the notes below.
- Page 152 OPERATING PROCEDURE PHOTOS/FIGURES 13. Removing the compressor (MC) Photo 13 Figure 3 Note: Recover refrigerant without spreading it in the air. 14. Removing the accumulator Photo 14 Note: Recover refrigerant without spreading it in the air. Photo 15 OCH573E...
- Page 153 OPERATING PROCEDURE PHOTOS/FIGURES Figure 4 15. Removing the reactor (DCL) OCH573E...
- Page 154 MXZ-8C60NA-U1 OPERATING PROCEDURE PHOTOS/FIGURES 1. Removing the service panel and top panel Photo 1 2. Removing the fan motor (MF1, MF2) Photo 2 Photo 3 Note: Tighten the propeller fan with a torque of 5.7 ± 0.3 N·m [4.2 ± 0.2 ft = lbs] 3.
- Page 155 OPERATING PROCEDURE PHOTOS/FIGURES Photo 5 4. Removing the thermistor <Suction pipe> (TH6) Photo 6 Note: When replacing thermistor <Suction pipe> (TH6), replace it together with thermistor <Ambient> (TH7) since they are combined together. Refer to procedure No.5 below to remove thermis- tor <Ambient>...
- Page 156 OPERATING PROCEDURE PHOTOS/FIGURES Photo 9-1 6. Removing the thermistors Thermistor <HIC> (TH2) and thermistor <Compressor> (TH4) Thermistor <Outdoor pipe> (TH3) Photo 9-2 Photo 10 7. Removing the 4-way valve coil (21S4) [Removing the 4-way valve coil] 8. Removing the 4-way valve 1.
- Page 157 OPERATING PROCEDURE PHOTOS/FIGURES Photo 11 9. Removing bypass valve coil (SV1) and bypass valve Refer to the notes below. 10. Removing the high pressure switch (63H) and high pres- sure sensor (63HS) Refer to the notes below. 11. Removing the low pressure sensor (63LS) Photo 12 Refer to the notes below.
- Page 158 OPERATING PROCEDURE PHOTOS/FIGURES Figure 2 13. Removing the reactor (DCL) 14. Removing the compressor (MC) Photo 13 Note: Recover refrigerant without spreading it in the air. Figure 3 Photo 14 OCH573E...
- Page 159 OPERATING PROCEDURE PHOTOS/FIGURES Photo 15 15. Removing the accumulator Note: Recover refrigerant without spreading it in the air. Photo 16 OCH573E...
- Page 160 10-2. BRANCH BOX: PAC-MKA50BC PAC-MKA51BC PAC-MKA30BC PAC-MKA31BC PHOTO: PAC-MKA50/51BC OPERATING PROCEDURE PHOTOS/FIGURES 1. Removing the controller cover and under panel Photo 1 2. Removing the thermistor (TH-A–E*) Photo 2-1 Photo 2-3 Photo 2-2 OCH573E...
- Page 161 OPERATING PROCEDURE PHOTOS/FIGURES 3. Removing the LEV coil (LEV-A–E*) Photo 3 4. Removing the controller board Photo 4 OCH573E...
- Page 162 OPERATING PROCEDURE PHOTOS/FIGURES 5. Removing the LEV assy Photo 5-1 <Removing the header assy> <Disassembling the pipe box> Photo 5-2 <Pipe box cap only for PAC-MKA30/31BC> Photo 5-4 Photo 5-4 Photo 5-3 Photo 5-5 Photo 5-5 OCH573E...
- Page 163 OCH573E...
Need help?
Do you have a question about the MXZ-4C36NAHZ and is the answer not in the manual?
Questions and answers