Philips HD9220/40 Service Manual
Hide thumbs
Also See for HD9220/40:
- Quick start manual (2 pages) ,
- User manual (32 pages) ,
- Service manual (10 pages)
Table of Contents
Advertisement
Quick Links
Philips Consumer Lifestyle
Service Manual
PRODUCT INFORMATION
Safety info
- This product meets the requirements regarding
interference suppression on radio and TV.
- After the product has been repaired, it should function
properly and has to meet the safety requirements as
officially laid down at this moment.
- SAP coding
: HD9220/40
HD9220/42
HD9220/44
OPTIONAL (accessories)
- Baking dish 4222 459 52761
IMPORTANT:
When you replace the pan (basketholder) or basket, i rst check production week on the bottom of the appliance
to i nd out which part(s) you need to order:
HD9220/4x Pan
1111
4222 459 54141 and
1111 1136
4222 459 54141
1136
4222 459 54141
Published by Philips Consumer Lifestyle
11/10
Basket
4222 459 54121
Due to compatibility issues, make sure you order both components
or
4222 459 51791
Components are compatible no need to be ordered both at once
or
4222 459 54121
Components are compatible no need to be ordered both at once
Printed in the Netherlands
TECHNICAL INFORMATION
- Voltage
- Frequency
- Power consumption
- Product dimensions (W x H x D) : 287 x 315 x 384 mm
- Cord length
- Materials : Outer skin
: Pan
: Basket
: Basket mesh
: Coating
- Capacity
- Weight
- Coloursetting
- Temperature
- Fuse cut-off temp. Motor
TCO
© Copyright reserved
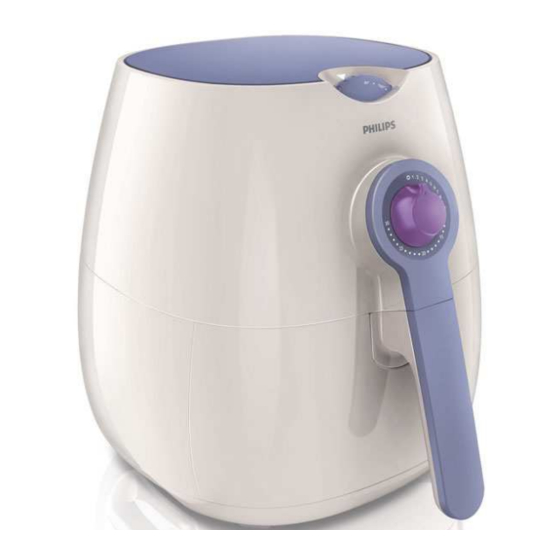
Air Fryer
HD9220/40
HD9220/42
HD9220/44
: 220 - 240 V
: 50 - 60 Hz
: 1425 W
: 1 meter
: Plastic (PP)
: Aluminized steel
: Aluminized steel
: Stainless steel
: PTFE coating
: 2.2 liter
(till max indicator)
: 7.0 kg
: White, Lavender
: 80 till 200 °C
: 145 °C
: 190 °C
Subject to modification
Advertisement
Table of Contents

Related Manuals for Philips HD9220/40


Summary of Contents for Philips HD9220/40
- Page 1 Components are compatible no need to be ordered both at once 1136 4222 459 54141 4222 459 54121 Components are compatible no need to be ordered both at once Published by Philips Consumer Lifestyle Printed in the Netherlands © Copyright reserved Subject to modification 11/10...
-
Page 2: Troubleshooting
TROUBLE SHOOTING HD9220/40 /42 /44 Replace Part/ (depending of Test Possible deviation Analyses System the analyses outcome) Timer Check if the green light is lit, The green light is not lit Check the timer-switch and the Timer/Fuse and if you can hear the timer... -
Page 3: Repair Instructions
REPAIR INSTRUCTIONS HD9220/40 /42 /44 General remark; When you need to disconnect a wire from the crimp housing, please cut the wire half way (See in the picture below) and always connect the wires with a new 2 wire crimp housing 4222 459 51851. To crimp the housing use the Lobster AK25 No2 or Muromoto Tekko MR30A Nr 2 with Air pressure = 6 kg/cm². - Page 4 DISASSEMBLY- AND RE-ASSEMBLY ADVICE HD9220/40 /42 /44 A. Top cover removal 1. Open the cover from the top cover by using a l athead 3. Use a l athead screw driver to open the “timer top cover” screw driver to open the 6 click connections.
- Page 5 DISASSEMBLY- AND RE-ASSEMBLY ADVICE HD9220/40 /42 /44 B. Cover housing removal D. Double heat shield removal 1. Follow previous step A 1. Follow previous step A, B and C 2. Open the motor fan assy from the base by unscrewing the 2.
- Page 6 DISASSEMBLY- AND RE-ASSEMBLY ADVICE HD9220/40 /42 /44 F. Thermostat removal G. Motor assy removal 1. Follow previous step A 1. Follow previous step A, B, C, D By step C do not cut the wires. 2. Remove the 3 screws from the thermostat assy.
-
Page 7: Parts List
PARTS LIST HD9220/40 /42 /44 Service code Description 4222 459 51861 Cover Lavender 4222 459 51811 Timer knob Purple 4222 459 51821 Timer cover Lavender 4222 459 51901 Food separator wk1111 wk1136 4222 459 51791 Basket * Lavender 4222 459 54121 all other prod. -
Page 8: Exploded View
EXPLODED VIEW HD9220/40 /42 /44... - Page 9 EXPLODED VIEW HD9220/40 /42 /44...
- Page 10 : 80 till 200 °C - Fuse cut-off temp. Motor : 145 °C : 190 °C - SAP coding : HD9220/40 OPTIONAL (accessories) - No specific issues Published by Philips Consumer Lifestyle Printed in the Netherlands © Copyright reserved Subject to modification 11/04...
- Page 11 TROUBLE SHOOTING HD9220/40 Replace Part/System Test Possible deviation Analyses (depending of the analyses outcome) Timer Check if the green light is lit, The green light is not lit Check the timer-switch and the Timer/Fuse and if you can hear the timer...
- Page 12 REPAIR INSTRUCTIONS HD9220/40 General remark; When you need to disconnect a wire from the crimp housing, please cut the wire half way (See in the picture below) and always connect the wires with a new 2 wire crimp housing 4222 459 51851. To crimp the housing use the Lobster AK25 No2 or Muromoto Tekko MR30A Nr 2 with Air pressure = 6 kg/cm².
- Page 13 DISASSEMBLY- AND RE-ASSEMBLY ADVICE HD9220/40 A. Top cover removal 1. Open the cover from the top cover by using a fl athead 3. Use a fl athead screw driver to open the “timer top cover” screw driver to open the 6 click connections.
- Page 14 DISASSEMBLY- AND RE-ASSEMBLY ADVICE HD9220/40 B. Cover housing removal D. Double heat shield removal 1. Follow previous step A 1. Follow previous step A, B and C 2. Open the motor fan assy from the base by unscrewing the 2. Remove the double heat shield out of the motor fan assy 6 screws C.
- Page 15 DISASSEMBLY- AND RE-ASSEMBLY ADVICE HD9220/40 F. Thermostat removal G. Motor assy removal 1. Follow previous step A 1. Follow previous step A, B, C, D By step C do not cut the wires. 2. Remove the 3 screws from the thermostat assy.
- Page 16 PARTS LIST HD9220/40 Service code Description 4222 459 51861 Cover Lavender 4222 459 51811 Timer knob Purple 4222 459 51821 Timer cover Lavender 4222 459 51901 Food separator 4222 459 51791 Basket Lavender 4222 459 51801 Basket holder (pan) Lavender/White...
- Page 17 EXPLODED VIEW HD9220/40...
- Page 18 EXPLODED VIEW HD9220/40...
-
Page 19: Technical Information
Air Fryer HD9220/40 HD9220/42 HD9220/43 HD9220/44 Version: A PRODUCT INFORMATION TECHNICAL INFORMATION - This product meets requirements regarding - Product dimensions (W x H x D) : 287 x 315 x 384 mm interference suppression on radio and TV. - Cord length : 0.8 meter... -
Page 20: Technical Informations
TECHNICAL INFORMATIONS HD9220/40 HD9220/42 HD9220/43 HD9220/44... - Page 21 HD9220/40 TROUBLE SHOOTING HD9220/42 HD9220/43 HD9220/44...
- Page 22 HD9220/40 REPAIR INSTRUCTIONS HD9220/42 HD9220/43 HD9220/44...
- Page 23 HD9220/40 DISSASEMBLY & RE-ASSEMBLY ADVICE HD9220/42 HD9220/43 HD9220/44...
- Page 24 HD9220/40 DISSASEMBLY & RE-ASSEMBLY ADVICE HD9220/42 HD9220/43 HD9220/44...
-
Page 25: Parts Lists
HD9220/40 PARTSLISTS HD9220/42 HD9220/43 HD9220/44 Basket 4203 036 04821 Basket 4203 036 04851 Basket holder Pan v3 (Container), 1 foot 4203 036 06521 4203 036 05671 4203 036 05681 4203 036 05331 4203 036 05341 4222 459 56141 4203 036 05271... - Page 26 EXPLODED VIEW HD9220/40 HD9220/42 HD9220/43 HD9220/44 Double layer accessory HD9904/00 QC basket Baking accessory Removable lid Removable mesh...
- Page 27 EXPLODED VIEW HD9220/40 HD9220/42 HD9220/43 HD9220/44...
Need help?
Do you have a question about the HD9220/40 and is the answer not in the manual?
Questions and answers