
Related Manuals for Honeywell NOTIFIER NFC-50/100


Summary of Contents for Honeywell NOTIFIER NFC-50/100
- Page 1 Notifier FirstCommand NFC-50/100 & NFC-50/100E Instruction Manual Document LS10001-001NF-E Rev: H 1/8/2018 ECN: 18-117...
- Page 2 Fire Alarm & Emergency Communication System Limitations While a life safety system may lower insurance rates, it is not a substitute for life and property insurance! An automatic fire alarm system—typically made up of smoke Heat detectors do not sense particles of combustion and alarm detectors, heat detectors, manual pull stations, audible warning only when heat on their sensors increases at a predetermined rate devices, and a fire alarm control panel (FACP) with remote notifica-...
- Page 3 HARSH™, NIS™, and NOTI•FIRE•NET™ are all trademarks; and Acclimate® Plus™, eVance®, FlashScan®, FAAST Fire Alarm Aspiration Sensing Technology®, Honeywell®, Intelligent FAAST®, NOTIFIER®, ONYX®, ONYXWorks®, SWIFT®, VeriFire®, and VIEW® are all registered trademarks of Honeywell International Inc. Microsoft® and Windows® are registered trademarks of the Microsoft Corporation. Chrome™ and Google™ are trademarks of Google Inc. Firefox® is a registered trademark of The Mozilla Foundation.
- Page 4 • Your suggestion for how to correct/improve documentation Send email messages to: FireSystems.TechPubs@honeywell.com Please note this email address is for documentation feedback only. If you have any technical issues, please contact Technical Services. Notifier FirstCommand Series Manual — P/N LS10001-001NF-E:H 1/8/2018...
-
Page 5: Table Of Contents
Table of Contents Section 1: Product Description ............................12 1.1: Product Features ......................................12 1.2: Input/Output Circuit Specifications.................................13 1.2.1: NFC-50/100 Main Control Board.................................13 1.2.2: Display Board .......................................16 1.2.3: NFC-CE6 Circuit Expander Module ..............................16 1.3: Controls and Indicators....................................17 1.3.1: Push-Button Controls....................................17 1.3.2: LED Indicators (visible with door closed)............................17 1.3.3: LED Indicators (visible with door and dress panel open) ........................18 1.4: Components ........................................18 1.5: Optional Equipment......................................20... - Page 6 Table of Contents 3.2.2: General/NAC Options ..................................53 General Options ......................................53 NAC Options ......................................54 Console Control ......................................54 3.2.3: Address Assignment .....................................55 Remote Microphone / Operator Console Address Assignments ......................55 Speaker Circuit Address Assignment ..............................55 3.2.4: Message Buttons....................................56 Message Buttons .....................................56 CMD Input Style.....................................57 3.2.5: Date / Time ......................................57 3.2.6: Send to Panel ......................................57 3.3: Main Menu - Utilities ......................................57...
- Page 7 Table of Contents 5.2: System Requiring Up to 100 Watts of Audio Power ............................77 5.3: System Requiring Greater Than 100 Watts of Audio Power ...........................77 Section 6: Power Supply Calculations .......................... 78 6.1: Overview..........................................78 6.2: Calculating the AC Branch Circuit ..................................78 6.3: Calculating the System Current Draw ................................78 6.3.1: Overview.......................................78 6.3.2: How to use Table 6.2 to calculate system current draws........................78...
- Page 8 This control panel has been designed to comply with standards set forth by the following regulatory agencies: • Underwriters Laboratories/Underwriters Laboratories Canada • National Fire Protection Association Before proceeding, the installer should be familiar with the following documents. NFPA Standards This Fire Alarm Control Panel complies with the following NFPA Standards: NFPA 72 National Fire Alarm Code Note: Audible signal appliances used in public mode applications, are required to have minimum sound levels of 75 dBA at 10 feet...
- Page 9 visual only NFC-BDA-25/70V NFC-CE6 optional amplifier circuit expander internal options NAC Circuit Speaker Circuits TB19 TB20 & TB21 NFC-FFT firefighter telephone NFC-LOC NFC-RPU NFC-RM local operator console remote page unit remote remote microphone consoles TB24 TB12 external battery distributed audio TB22 charger - J7 NFC-50/100DA...
- Page 10 Notifier FirstCommand Series Manual — P/N LS10001-001NF-E:H 1/8/2018...
- Page 11 Basic System Connections - Display Board (Section 1.2.2) JP2 - External Data Bus termination JP5 - isolation/ground when powered by source other than main control board SW1- Dipswitch for BUS addressing J2- Connection to Must be set to main control board address 2.
-
Page 12: Section 1: Product Description
Section 1: Product Description The Notifier FirstCommand NFC-50/100 is a single channel, 50 watt, 25 V , emergency voice evacuation panel that may be used for fire applications, mass notification applications, or both. The NFC-50/100 comes standard with one speaker circuit. The panel provides the ability to record fourteen field programmable messages (up to 60 seconds each) with an integral microphone or from an external audio source. -
Page 13: Input/Output Circuit Specifications
Input/Output Circuit Specifications Product Description • System Status LEDs (refer to “Controls and Indicators” on page 17) • Integral Dress Panel • Optional TR-CE-B semi-flush trim ring • Any combination of up to eight (8) of: – Optional NFC-RM Remote Microphone (includes cabinet). –... - Page 14 Product Description Input/Output Circuit Specifications Speaker Circuits Primary Speaker Circuit - TB20, Terminals 1(+) & 2(-) Style Y (Class B), 4(+) & 5(-) Style Z (Class A), 3 Shield (Standby and Alarm Polarity Shown) on main control board Secondary Speaker Circuit (with optional amplifier only) - TB21, Terminals 1(+) & 2(-) Style Y (Class B), 4(+) & 5(-) Style Z (Class A), 3 Shield (Standby and Alarm Polarity Shown) on main control board Power-limited (Class 2) circuitry Operation: Circuit can be wired Style Y (Class B) or Style Z (Class A)
- Page 15 Input/Output Circuit Specifications Product Description External Audio Riser TB22, Terminals 1 (OUT+), 2 (OUT-), 4 (IN+), 5 (IN-), & 3 (SHLD) Style Y (Class B) or Style Z (Class A) audio connections to external operator interface components Power-limited (Class 2) circuitry, supervised Audio signal level: 3.85 V , maximum Frequency range: 800 - 2,800 Hz...
-
Page 16: 2: Display Board
Product Description Input/Output Circuit Specifications TB20 TB20 Primary 50W 10W max. = 0.66 Speaker Circuit amps from supply 10W max. = 0.66 Primary 50W amps from supply Speaker Circuit Standby TB24 2.0 amps max. TB24 (includes External Operator 0.8 amp max. background Interface Power External Operator... -
Page 17: Controls And Indicators
Controls and Indicators Product Description 1.3 Controls and Indicators green green FIRE SYSTEM SYSTEM yellow ACTIVE CALL yellow CONTROL CONTROL SPEAKER SPEAKER ZONE 1 ZONE 13 SPEAKER SPEAKER ZONE 2 ZONE 14 SPEAKER SPEAKER OK TO PAGE ZONE 3 ZONE 15 MICROPHONE SPEAKER SPEAKER... -
Page 18: 3: Led Indicators (Visible With Door And Dress Panel Open)
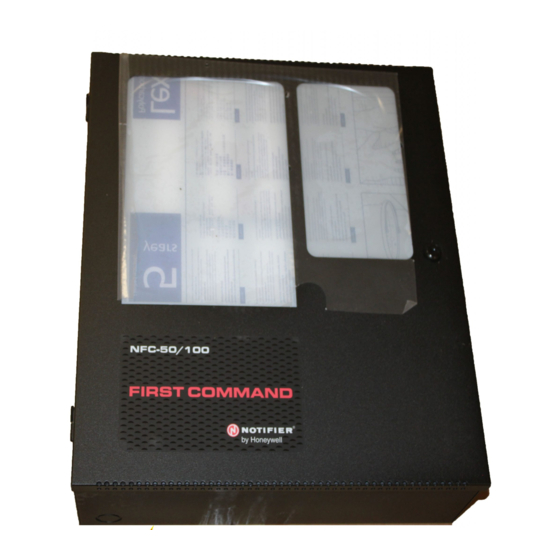
Product Description Components • Speaker Zone 1-24 Fault (yellow) • OK to Page (green) • Microphone Trouble (yellow) • Message 1-8 Active (red) • Message 1-8 Fault (yellow) • Remote Amplifier 1-8 Fault (yellow) • LOC/RPU/RM 1-8 Fault (yellow) • LOC/RPU/RM 1-8 Active (green) •... - Page 19 Components Product Description Cabinet The cabinet is black with an attractive grey front overlay. A clear window allows viewing of the display board, status LEDs and location of microphone. The backbox measures 16.65" x 19.0" x 5.2" D (42.29cm x 48.26cm x 13.23cm) and provides space for two 12AH or two 18AH batteries.
-
Page 20: Optional Equipment
Product Description Optional Equipment 1.5 Optional Equipment NFC-BDA-25/70V Audio Amplifier Modules An optional second audio amplifier can be plugged into connectors J10 & J11 located in the upper right of the main control board in the NFC-50/100. This amplifier also provides 50 watts of power at 25 V or 70 V , depending on the model, and can therefore be used to expand system power to 100 watts (providing dual 50 watt speaker circuits) or it can be used as a backup amplifier. -
Page 21: Ul 464 Low Frequency Sounders
UL 464 Low Frequency Sounders Product Description talk switch. ALL CALL broadcast of a stored message can be done by pressing a message button. The message buttons operate in the same fashion as the message buttons on the NFC-50/100 main console. Not for use in UL2572 Mass Notification or Canadian applica- tions. -
Page 22: Section 2: Installation
Section 2: Installation 2.1 Mounting Options The cabinet may be semi-flush or surface mounted. The cabinet mounts using three key slots at the top of the backbox and two additional 0.250" diameter holes located at the bottom. Carefully unpack the system and check for shipping damage. Mount the cabinet in a clean, dry, vibration-free area where extreme tem- peratures are not encountered. -
Page 23: Removing The Chassis Assembly
Backbox Installation Installation Removing the Chassis Assembly If present, remove the two (2) screws which fasten the lower chassis tabs to the backbox. These are for shipping purposes only and do not need to be reinstalled. Loosen the two nuts which secure the top of the chassis with an 11/32” socket. Carefully lift up and remove the chassis assembly from the backbox and store in a safe, clean place. - Page 24 Installation Backbox Installation An optional Trim Ring (P/N TR-CE-B) is available for semi-flush mount installations. Semi-Flush Hinge Slot for Mounting Dress Panel Do not recess box more than 3.875” into wall to Do not use these knock-outs! Mounting slots for optional Trim Ring Semi-flush...
-
Page 25: Operating Power
Operating Power Installation Depth Depth = Door Backbox Door Backbox Left Side Right Side Bottom Figure 2.5 NFC-50/100 Backbox Dimensions 2.3 Operating Power WARNING: RISK OF EQUIPMENT DAMAGE AND PERSONAL INJURY SEVERAL DIFFERENT SOURCES OF POWER CAN BE CONNECTED TO THIS PANEL. DISCONNECT ALL SOURCES OF POWER BEFORE SERVICING. - Page 26 Installation Operating Power cable to TB15. Refer to Figure 2.6 for the location of the stud. Apply AC power to the panel only after the system is completely installed and visually checked. Note that AC power must be applied to the panel before installing the battery interconnect cable (refer to the fol- lowing section).
-
Page 27: 2: Secondary Power Source (Batteries)
Auxiliary DC Power Output Connections Installation 2.3.2 Secondary Power Source (Batteries) Interconnect Cable The batteries must be sealed lead acid type. Before connecting the batteries to the FACP, make certain that the interconnect cable between the batteries is not connected. Do not con- nect the interconnect cable until the system is completely installed. -
Page 28: Input/Initiating Circuits
Installation Input/Initiating Circuits 2.5 Input/Initiating Circuits 2.5.1 CMD Inputs The NFC-50/100 has eight Command Input circuits, which are used to activate the panel amplifiers which, in turn, transmit an audio sig- nal over the system speakers. All field wiring for the circuits is power-limited (Class 2) and supervised for opens and ground faults. Note that zero impedance to ground will cause a ground fault. -
Page 29: 2: External Audio Input
Input/Initiating Circuits Installation When configured with a compatible, addressable FACP, the NFC-50/100 may be triggered either by the FACP main NAC output or from addressable control modules. Figure 2.1 illustrates CMD1 triggered by an addressable control module. The addressable control module may trigger the NFC-50/100 via reverse polarity (shown) or relay contact. -
Page 30: 4: Night Ring
Installation Output Circuits The NAC Follower input is power-limited (Class 2) (refer to Section 2.12, “UL Power-limited Wiring Requirements”, on page 42) and supervised by the host FACP. Supervision requires that a 4.7 KΩ EOL resistor be connected to the last device in the NAC Follower chain. -
Page 31: Trouble Relay - Tb2
Output Circuits Installation Trouble Relay - TB2 The main control board provides a Form-C Trouble relay for independent, general system fault monitoring. This relay is ‘fail safe’, meaning that it is normally energized. Should system power shut off, this relay will de-energize, transferring its contacts. Shown in energized, non trouble condition Figure 2.13 Trouble Relay... -
Page 32: 3: Notification Appliance Circuit
Installation Output Circuits 2.6.3 Notification Appliance Circuit The NFC-50/100 provides a Style Y (Class B) or Style Z (Class A) NAC (Notification Appliance Circuit). Use UL-listed 24 VDC visual notification appliances only. Circuit is supervised and power-limited (Class 2). Refer to the Notifier Device Compatibility Document for a listing of compatible notification appliances. -
Page 33: 4: Speaker Volume Control
Output Circuits Installation 2.6.4 Speaker Volume Control Speaker Volume Control requires use of the Cooper Wheelock SP-SVC module. The Supervised Volume Control (SP-SVC) allows man- ual volume setting for telephone paging and background music for a specific speaker or speaker zone. The selected adjustment will not affect the volume setting of emergency prerecorded messages or live microphone usage. -
Page 34: 5: Facp Data Bus
Installation Output Circuits 2.6.5 FACP Data Bus NFW-100X The FACP communicates with the NFC-50/100 over the ANN-BUS annunciator bus. Wiring must be connected between the primary ANN-Bus terminal TB9 or the secondary ANN-BUS terminal TB10 on the FACP and Terminal TB13 on the NFC-50/100 panel. to other ANN devices TB9 or TB10... -
Page 35: Nfs2-640 And Nfs-320
Output Circuits Installation NFS2-640 and NFS-320 The NFS2-640 and NFS-320 FACPs communicate with the NFC-50/100 over the ACS annunciator link. Wiring must be connected between Terminal TB11 on the FACP and Terminal TB13 on the NFC-50/100 panel. to other ACS devices located down stream TB13... -
Page 36: Nfc-Loc Local Operator Console
Installation NFC-LOC Local Operator Console 2.7 NFC-LOC Local Operator Console CAUTION: EXTERNAL WIRING CONNECTIONS THE NFC-LOC IS A SEPARATE DEVICE, NOT PART OF THE NFC-50/100 ASSEMBLY! Wiring for the Local Operator Console is accomplished between TB24, TB12, and TB22 on the NFC-50/100 main control board to TB3, TB4, and TB5 on the LOC. - Page 37 NFC-LOC Local Operator Console Installation external operator interface power - 24VDC TB24 ECC-MCB-PCA external data bus Rev. TB12 external audio riser TB15 TB22 RTZM NFC-50/100 main control board NFC-LOC (shown jumpered display board on pins 2 and 3) Figure 2.24 Local Operator Console Wiring (Class A/Style Z) Notifier FirstCommand Series Manual —...
-
Page 38: Nfc-Rpu Remote
Installation NFC-RPU Remote Page Unit 2.8 NFC-RPU Remote Page Unit Connections are made from TB24, TB12, and TB22 on the NFC-50/100 main control board to TB1, TB3, and TB2 on the RPU. If the NFC-RPU is the last device on the audio and data bus chain, signal terminations are required. For the external data bus, a removable jumper must be on pins 1 and 2 of JS4. - Page 39 NFC-RPU Remote Page Unit Installation external operator interface power - 24VDC TB24 external data bus TB12 main control board external audio riser TB22 RPU board (shown jumpered on pins 2 and 3) Figure 2.26 Remote Page Unit Wiring (Class A/Style Z) Notifier FirstCommand Series Manual —...
-
Page 40: Nfc-Rm Remote Microphone
Installation NFC-RM Remote Microphone 2.9 NFC-RM Remote Microphone Connections are made from TB24, TB12, and TB22 on the NFC-50/100 main control board to TB3, TB2, and TB1 on the RM. If the NFC-RM is the last device on the audio and data bus chain, signal terminations are required. For the external data bus, a removable jumper must be on pins 1 and 2 of JS4. -
Page 41: Shielding For External Device Wiring
Shielding for External Device Wiring Installation 2.11 Shielding for External Device Wiring The external data bus and external audio riser circuits must be wired using twisted pair cable. Shielded cable is optional but is recom- mended for sites with electric machinery, electric motors, etc. to minimize the effects of electrical interference. Do not run either cable adjacent to or in the same conduit as 120 VAC service, noisy electrical circuits that are powering mechanical bells or horns, speaker cir- cuits, motor control circuits or SCR power circuits. -
Page 42: Ul Power-Limited Wiring Requirements
Installation UL Power-limited Wiring Requirements 2.12 UL Power-limited Wiring Requirements Power-limited and nonpower-limited circuit wiring must remain separated in the cabinet. All power-limited circuit wiring must remain at least 0.25" away from any nonpower-limited circuit wiring. Furthermore, all power-limited and nonpower-limited circuit wiring must enter and exit the cabinet through different knockouts and/or conduits. -
Page 43: Installation Of Option Modules
Installation of Option Modules Installation 2.13 Installation of Option Modules CAUTION: DISCONNECT POWER BEFORE INSTALLING ANY MODULES OR CABLES, MAKE CERTAIN ALL POWER (AC AND DC) HAS BEEN REMOVED AND BE SURE TO OBSERVE PROPER GROUNDING AND HANDLING PROCEDURES. 2.13.1 NFC-CE6 Circuit Expander Module The NFC-CE6 Circuit Expander Module provides connections for up to six Style Z (Class A) or Style Y (Class B) speaker circuits. - Page 44 Installation Installation of Option Modules ECC-MCB-PCA Rev. Connect J2 to J11 Connect J1 to J10 NFC-50/100 main control board Power Control LED1 - Power NFC-BDA-25/70V SW5 - 75W (Not populated on 70V boards) - NOT USED SW6 - 50W SW7 - 35W - NOT USED SW4 - Fail Test Switch LED3 - Enabled LED2 - Limit...
-
Page 45: Power And Control Cables
Installation of Option Modules Installation Power and Control Cables Control cable Power cable p/n 75690 p/n 75689 Align where there is no pin. Align tab with notch in Align cable connectors board connector. over spaces and pins. Figure 2.35 Control and Power Cables Configuration Enable Switches, SW6 &... - Page 46 Installation Installation of Option Modules zone button Speaker Circuit Connections Primary with Circuit Expander • 50W TB20 on main control board Primary • Four Class B or Class A Outputs • NFC-CE6 adds 3 speaker circuits circuit TB1 on NFC-CE6 •...
-
Page 47: Transformer (Nfc-Xrm-70V)
Installation of Option Modules Installation zone button Speaker Circuit Connections Primary with Expander and Backup • 50W for primary, 50W for backup TB20 on main control board Primary • Four Class B or Class A Outputs • NFC-CE6 adds 3 primary speaker circuit circuits TB1 on NFC-CE6... -
Page 48: Addressing External Data Bus Devices
Installation Addressing External Data Bus Devices When installing the NFC-XRM-70V, be sure to: carefully remove the factory-installed jumper plug from connector J12 on the main control board. set SW5 on the NFC-50/100 main control board to 70V operation. 2.14 Addressing External Data Bus Devices The table below defines an address map for the external data bus devices which include the NFC-LOC, NFC-RPU, NFC-RM, NFC-50DA, and NFC-125DA. - Page 49 Addressing External Data Bus Devices Installation The table below shows the dipswitch settings for all possible addresses. Note that some devices have a 5-position dipswitch while others have a 6-position dipswitch. The sixth switch on these dipswitches are not used. Dipswitches are shown as they are oriented in the cabi- net.
- Page 50 Installation Addressing External Data Bus Devices Dipswitch Setting on Dipswitch Setting on Dipswitch Setting on Bus Address Device NFC-50DA(SW1) NFC-125DA (SW1) NFC-50/100DA (SW3) External Amp #7 External Amp #8 Notifier FirstCommand Series Manual — P/N LS10001-001NF-E:H 1/8/2018...
-
Page 51: Section 3: Programming
Section 3: Programming NOTICE TO USERS, INSTALLERS, AUTHORITIES HAVING JURISDICTION AND OTHER INVOLVED PARTIES This product incorporates field-programmable software. In order for the product to comply with the requirements in the Standard for Control Units and Accessories for Fire Alarm Systems, UL 864, and in the standard for Communication and Control Units for Mass Notification Systems, UL 2572, certain programming features or options must be limited to specific values or not used at all as indicated below: Program feature or Permitted in... -
Page 52: Main Menu - User Programming
Programming Main Menu - User Programming 3.2 Main Menu - User Programming This screen shows the main menu for the NFC user programming options. Changes to programming require a valid password for system login. Note that a password is NOT required to change the date/time, view the informational screens, or view the panel history. Figure 3.1 Main Menu 3.2.1 Password Options Changes to NFC programming require a valid password login. -
Page 53: 2: General/Nac Options
Main Menu - User Programming Programming 3.2.2 General/NAC Options General Options Figure 3.3 General Options Select whether the NFC will function for Fire Evacuation, Mass Notification, or a Combination of both. Unit Operation When Combo or Mass Notification is selected for Unit Operation, select whether Mass Notification events or Fire Evac- Event Priority uation events will take priority in the system. -
Page 54: Nac Options
Programming Main Menu - User Programming NAC Options Figure 3.4 NAC Options The NAC circuit can be programmed to activate for specific applications. Select Mass Notification to turn on the NAC cir- NAC Type cuit only for a mass notification event, Fire Evacuation to turn on the NAC circuit only for a fire evacuation event, Both to turn on the NAC circuit for both mass notification and fire evacuation events, or Follow Input to have the NAC follow the input from an external source (connections to TB18). -
Page 55: 3: Address Assignment
Main Menu - User Programming Programming 3.2.3 Address Assignment Remote Microphone / Operator Console Address Assignments Figure 3.6 RM/Console Address Assignments Any combination of up to eight (8) remote consoles (NFC-LOC, NFC-RPU, and NFC-RM) can be used in the system. Odd numbered addresses are not selectable. -
Page 56: 4: Message Buttons
Programming Main Menu - User Programming If the NFC-CE6 has been installed on P1 of the main circuit board, select CE6 - Primary Operator Console - Circuit Expander Installed from the drop down box. The NFC-50/100 comes with one (1) integrated speaker circuit. Adding the CE6 gives the system three (3) more speaker circuits for a total option of four (4) from the drop-down box. -
Page 57: Cmd Input Style
Main Menu - Utilities Programming CMD Input Style Figure 3.9 Tone Duration / CMD Input Types CMD Input Style CMD1 and CMD2 Command Input circuits can be independently programmed to be triggered by a Contact Closure or by the Reverse Polarity of a Notification Appliance Circuit. When the system is programmed for Mass Notification, CMD1 and CMD2 will be programmed for Reverse Polarity only. -
Page 58: 1: Message Recording
Programming Main Menu - Utilities 3.3.1 Message Recording The NFC allows up to 14 recorded messages. These custom messages can be recorded using the local microphone, external audio input, or via USB port using a third party audio editing program. Clicking the Enable Recording will put the system in message record mode. Refer to Section 3.5. -
Page 59: Main Menu - Informational
Main Menu - Informational Programming 3.4 Main Menu - Informational From the main screen, programmed information for the 24 possible speaker circuits can be viewed without accidentally making changes. Viewing this information does not require login to the system. Figure 3.11 Main Menu 3.4.1 Informational Speaker Circuit Buttons Figure 3.12 Speaker Circuit Button Assignments... -
Page 60: Version Information
Programming Main Menu - Informational Version Information Figure 3.13 Version Information The Version Information screen lists the devices programmed to the NFC system by address. All software and hardware revision infor- mation can be viewed here. This screen is updated every time a device is added or changed. History Information Figure 3.14 History Information The History Information screen shows the system’s event history. -
Page 61: Recording Custom Messages
Recording Custom Messages Programming 3.5 Recording Custom Messages The system has 14 recordable message slots. Messages can be recorded from the microphone, external audio input, or uploaded via USB using the Voice Loader (VL) software. Each message can be up to one minute in duration. 3.5.1 Message Record Mode Enable Recording Mode in the system’s message recording programming section. -
Page 62: Recording With External Audio - Example
Programming Recording Custom Messages Enter programming mode at the main control board. Enable Recording Mode in the system’s message recording programming section. Refer to Section 3.5.1 on page 61. NOTE: The display board will light green LEDs for message slots that are occupied. If a message is already stored in that message slot, it must first be erased prior to recording a new message. -
Page 63: Recording With Microphone - Example
Recording Custom Messages Programming Recording with Microphone - Example To record into message slot 5 via the microphone: Enter the Local Recording mode via the online programming utility. Select the Message Record Mode option. The display board will light green zone 1-14 LEDs for all message slots that are occupied. If a message already exists in message slot 5, it must first be erased. -
Page 64: Writing A Message To The Panel
Programming Programmed Activation by FACP Connect the PC to the panel using a standard Male A to Male B USB cable. Run the VL software. Assure that the USB icon in the VL application window is green. If the icon is black then the VL software has not established communication with the panel. -
Page 65: 1: Firewarden-100X And Firewarden-100-2
Programmed Activation by FACP Programming Any fault in the audio system is sent to the FACP via the FACP Data Bus and is indicated as an annunciator fault on the FACP display. Individual Audio Individual Control of Simultaneous Zone Control All Messages FACP Activation of All... -
Page 66: Facp Message Assignment - Speaker Specific
Programming Programmed Activation by FACP • For non-General Alarm applications where input devices and/or messages are mapped to specific zones, Message 1 must be removed from Zone 00 programming. FACP Message Assignment - Speaker Specific The NFC-50/100 has the capability of generating up to fourteen different messages. Any one of the fourteen messages can be pro- grammed to each of the speaker circuit zones Z32 through Z56. -
Page 67: Facp Programming Menus
Programmed Activation by FACP Programming Example 3: If two devices are being programmed and the first addressable input device is programmed to Zone 7 and Zone 35, and a second addressable input device is programmed to Zone 5 and Zone 35, activation of the first addressable input device (address 12 in the example below) will cause Message 2 to be generated over speaker circuit 3. -
Page 68: 2: Nfs2-640 And Nfs-320
Programming Programmed Activation by FACP Press the down arrow key until the following screen is displayed. ZONE MESSAGE 1=Z30 NO MESSAGE 2=Z31 NO MESSAGE 3=Z32 NO MESSAGE The default setting is No Message for each speaker circuit. As shown in the screen above, Z32 is the zone dedicated for all speaker cir- cuits (all call). - Page 69 Programmed Activation by FACP Programming VeriFire Tools Programming Map ACS Address 1 to M. Assign desired panel points (SLC devices, zones, logic zone, releasing zones, etc) to ACS Points in User Map FireVoice Speaker Panel ACS Point Circuit/Message Assignment 1 - 9 (Do Not Use) NFC Message 0 No Message (Message Off) NFC Message 1...
-
Page 70: Section 4: Operating Instructions
Section 4: Operating Instructions 4.1 Main Control Panel Keypad Labels The NFC-50/100 is shipped with slide-in labels installed in the keypad as illustrated in the following figure. Blank labels are provided to allow the user to customize the zone and message description. Remove the center piece to access the label slots. Using a small, flat screwdriver, press and release the small plastic latch located on the left side of the center piece. -
Page 71: Led Indicators
LED Indicators Operating Instructions System Control This button is used to manually gain control of the audio system in preparation for an ALL CALL, message activation, or general page. The main console will have system priority based upon user programming. If the main console has higher priority than other system con- soles (NFC-LOC, NFC-RPU, NFC-RM) then the green LED will turn on steady to confirm control. -
Page 72: Operation
Operating Instructions Operation Remote Amplifiers 1-8 Fault A yellow LED per remote amplifier (distributed audio) that turns on steady when an amplifier has a fault. Specific, additional fault indi- cation is annunciated via the fault LEDs with the “wrench” graphic next to them on the keypad. LOC/RPU/RM 1-8 Fault A yellow LED per remote console that turns on steady when a remote console has a fault. -
Page 73: 3: Fire Alarm Response, System Configured For Fire Only
Operation Operating Instructions 4.4.3 Fire Alarm Response, System Configured for Fire Only Upon detection of an alarm condition (any of CMD1 to CMD8 inputs active or automatic activation from the FACP Data Bus) the sys- tem will: • Turn the appropriate speaker zone LED(s) on steady •... -
Page 74: 8: Alarm/Alert Restoral, System Configured For Mass Notification Only
Operating Instructions Operation • Turn the “System in Use” LED on steady • Activate the “MNS active” relay (if the system is programmed for mass notification) • Activate the NAC output (if programmed to do so for mass notification) • Play and repeat a leading tone (if programmed) •... -
Page 75: 12: Alarm/Alert Restoral, System Configured For Combo Fire/Mass Notification With Mass Notification Priority
Operation Operating Instructions 4.4.12 Alarm/Alert Restoral, System Configured for Combo Fire/Mass Notification with Mass Notification Priority If the restoral is for a fire alarm only under this configuration then the system will respond as in Section 4.4.4 above. If the restoral is for a mass notification alarm/alert only under this configuration then the system will respond as in Section 4.4.8 above. If the restoral is for a fire alarm that was over ridden by a currently active mass notification alarm/event then the system will: •... -
Page 76: 15: External Audio Input Operation
Operating Instructions Operation • For the data bus to peripheral consoles, the data bus fault LED turns off • For the onboard NAC, the NAC fault LED turns off • For the audio riser, the audio riser fault LED turns off •... -
Page 77: Section 5: Getting Started
Section 5: Getting Started This section describes the basic guidelines for setting up the various NFC-50/100 systems, assuming that the speaker and FACP cabling has been installed. 5.1 System Requiring up to 50 Watts of Audio Power Install backbox and chassis assembly as described in Section 2, “Installation”, on page 22. Connect laptop or PC to Ethernet port (J2) and launch the web-based programming utility. -
Page 78: Section 6: Power Supply Calculations
Section 6: Power Supply Calculations 6.1 Overview This section contains instructions and tables for calculating power supply currents in alarm and standby conditions. This is a four-step process, consisting of the following: Calculating the total amount of AC branch circuit current required to operate the system Calculating the power supply load current for non-fire and fire alarm conditions and calculating the secondary (battery) load Calculating the size of batteries required to support the system if an AC power loss occurs Selecting the proper batteries for your system... - Page 79 Calculating the System Current Draw Power Supply Calculations Table 6.2 contains two columns for calculating current draws. For each column, calculate the current and enter the total (in amps) in the bottom row. When finished, copy the totals from Calculation Column 1 and Calculation Column 2 to Table 6.3 on page 80. Calculation Column 1 Calculation Column 2 Secondary (Battery) Power Source...
-
Page 80: Calculating The Battery Size
Power Supply Calculations Calculating the Battery Size 6.4 Calculating the Battery Size Use Table 6.3 to calculate the total Standby and Alarm load in ampere hours (AH). This total load determines the battery size (in AH), required to support the NFC-50/100 under the loss of AC power. Complete Table 6.3 as follows: Enter the totals from Table 6.2 on page 79 Calculation Columns 1 and 2 where shown. -
Page 81: Appendix A: Digital Voice Messages
Appendix A: Digital Voice Messages The FirstCommand digital message generator provides up to 14 messages each with up to 60 seconds of record time. The NFC-50/100 is provided with factory recorded messages which can be changed in the field. The prerecorded messages (female voice) are: Fire Evacuation Messages: •... -
Page 82: Appendix B: Wiring Requirements
Appendix B: Wiring Requirements Connecting external system accessories to the NFC-50/100 main circuits must be carefully considered to ensure proper operation. It is important to use the correct type of wire, wire gauge and wire run length per each circuit. Refer to the following table to specify wire requirements and limitations. -
Page 83: Appendix C: Canadian Applications
Appendix C: Canadian Applications When using the NFC in Canadian Applications, note the following: • The NFC-50/100 is for fire evacuation use only. • The NFC-50DA, NFC-125DA, and NFC-50/100DA amplifiers are not permitted for use in Canada. • The NFC-RPU and NFC-RM are not permitted for use in Canada. •... - Page 84 Notes Notifier FirstCommand Series Manual — P/N LS10001-001NF-E:H 1/8/2018...
-
Page 85: Slide-In Labels - Upper Portion
Slide-in Labels - Upper Portion Carefully cut along the outside of each label. Identify keypad buttons as desired and slide the labels in. Refer to Section 4.1 on page 70 for instal- lation instructions. Figure 1.1 Slide-in Labels - Top Row of Keypad... -
Page 87: Slide-In Labels - Lower Section
Slide-in Labels - Lower Section Figure 1.2 Slide-in Labels - Bottom Row of Keypad... -
Page 89: Index
Index Numerics battery size System Trouble Relay 13 calculation 80 Control 24 hour resound 53 button see also Push-button 17 520 Hz devices 21 assignment 56 custom messages 12 buttons microphone 62 message 56 AC branch circuit calculation 78 Data Bus Fault LED 72 AC Loss Delay 53 Cabinet 19 default IP address 53... - Page 90 Index see also Notification Appliance Circuit 12 see also AC power 25 Style Y 12 Product Description 12 Labels Style Z 12 Product Features 12 replacing 70 NAC Active LED 72 Programmed Activation by FACP 64 LED 20 NAC Circuit 32 programming 28 AC Power 72 NAC Fault LED 72...
- Page 91 Index Style Z 20 surface mount 22 System Control 71 System Control LED 71 system current draw calculation 78 System in Use LED 71 system status 72 System Trouble LED 72 time-out feature microphone 12 tone 12 duration 56 generator 12 Transformer 70.7 volt Conversion 47 trim ring 24...
- Page 92 Notes...
-
Page 93: Nfc-50/100 And Nfc-Loc Operating Instructions
NFC-50/100 and NFC-LOC OPERATING INSTRUCTIONS YSTEM IN Green LED text that turns on steady when the main con- Section 1 Operating Information sole, an LOC, an RPU, or an RM has control of the audio system. ORMAL TANDBY PERATION 1-24. Green LED per speaker circuit button that turns PEAKER ONES... - Page 95 Manufacturer Warranties and Limitation of Liability Manufacturer Warranties. Subject to the limitations set forth herein, Manufacturer warrants that the Products manufactured by it in its Northford, Connecticut facility and sold by it to its authorized Distributors shall be free, under normal use and service, from defects in material and workmanship for a period of thirty six months (36) months from the date of manufacture (effective Jan.
- Page 96 NOTIFIER 12 Clintonville Road Northford, CT 06472-1610 USA 203-484-7161 www.notifier.com...
Need help?
Do you have a question about the NOTIFIER NFC-50/100 and is the answer not in the manual?
Questions and answers