Table of Contents
Advertisement
Available languages
Available languages
Quick Links
Advertisement
Table of Contents

Related Manuals for Philips Multigroom 5000 Series


Summary of Contents for Philips Multigroom 5000 Series
- Page 1 MG5720 MG5730 MG5735 MG5740...
- Page 3 MG5730 MG5735 MG5740 12MM 16MM 3-7MM MG5730 MG5735 MG5740 MG5740...
- Page 4 empty page before TOC...
-
Page 5: Table Of Contents
English 6 Bahasa Indonesia 20 Bahasa Melayu 35 Português do Brasil 50 Tiếng Việt 65 ภาษาไทย 78 简体中文 繁體中文 105 한국어 117 ﺍﻟﻌﺮﺑﻴﺔ ﻓﺎرﺳﯽ... -
Page 6: English
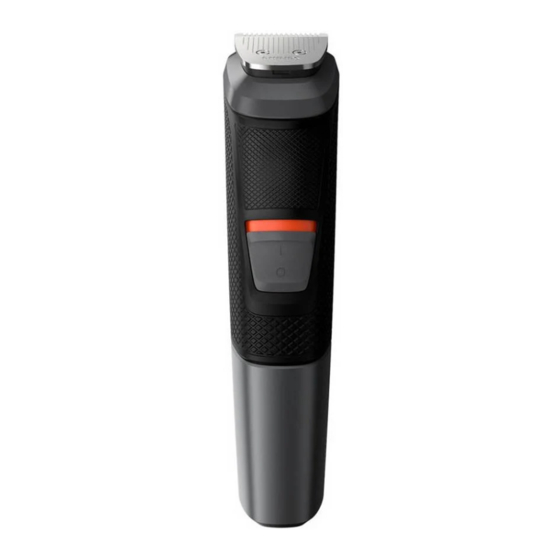
English Introduction Congratulations on your purchase and welcome to Philips! To fully benefit from the support that Philips offers, register your product at www.philips.com/welcome. General description (Fig. 1) Full-size hair trimmer 2 On/off slide 3 Socket for small plug 4 Precision trimmer... - Page 7 English Danger - Keep the supply unit dry. Warning - To charge the battery, only use the detachable supply unit (A00390) provided with the appliance. - The supply unit contains a transformer. Do not cut off the supply unit to replace it with another plug, as this causes a hazardous situation.
- Page 8 Electromagnetic fields (EMF) This Philips appliance complies with all applicable standards and regulations regarding exposure to electromagnetic fields. General - This appliance can be safely cleaned under the tap.
- Page 9 English Charging Charging with the supply unit When the appliance has charged for 16 hours, it has a cordless operating time of up to 80 minutes. 1 Make sure the appliance is switched off. 2 Insert the small plug into the appliance and put the supply unit in the wall socket.
- Page 10 English Detaching the precision shaver and nose trimmer 1 Place your finger on the arrow at the back of the attachment and push it off the handle in the direction of the arrow. Attaching and detaching combs 1 To attach any type of guard onto a cutting element, slide the front part of the guard onto the teeth of the cutting element.
- Page 11 English (0.5mm) or to create clean lines around your beard, neck and sideburns. 1 To trim hair close to the skin, place the flat side of the cutting element against your skin and make strokes against the direction of hair growth.
- Page 12 English 3 To trim the most effective way, move the comb against the direction of hair growth. Make sure the surface of the comb always stays in contact with the skin. Attachments for use on body - Use the green body combs to trim body hair. - When you trim for the first time, use the 5mm/3/16in.
- Page 13 English 1 Attach a body comb to the full-size hair trimmer. 2 To trim in the most effective way, stretch the skin with your free hand and move the comb against the direction of hair growth. Make sure the surface of the comb always stays in contact with the skin.
- Page 14 English Hair comb 15/32in. 12mm Hair comb 21/32in. 16mm 1 Attach a comb to the full size hair trimmer. 2 Move the trimmer slowly over the crown from different directions to achieve an even result. Make sure the surface of the comb always stays in contact with the skin.
- Page 15 English Trimming nose hair 1 Gently move the tip in and out of nose while turning it around to remove unwanted hairs. Trimming ear hair 1 Slowly move the tip round the ear to remove hairs that stick out beyond the rim of the ear. 2 Gently move the tip in and out of the outer ear channel to remove unwanted hairs.
- Page 16 English After every use: cleaning under the tap 1 Turn off the appliance and disconnect from the wall socket. 2 Remove any comb or cutting element from the appliance. 3 Rinse the hair chamber under a warm tap. 4 Clean the cutting element and comb under a warm tap.
- Page 17 English 1 Rinse the nose trimmer head with hot water. 2 Turn on the appliance and rinse the nose trimmer head once more to remove any remaining hairs. Then turn off the appliance again. For a thorough clean, immerse the nose trimmer head in a bowl with warm water for a few minutes and then turn on the appliance to remove stubborn hair/debris.
- Page 18 English Ordering accessories To buy accessories or spare parts, visit www.shop.philips.com/service or go to your Philips dealer. You can also contact the Philips Consumer Care Center in your country (see the international warranty leaflet for contact details). Recycling - This symbol means that this product shall not be disposed of with normal household waste (2012/19/EU).
- Page 19 3 Remove the rechargeable battery. Warranty and support If you need information or support, please visit www.philips.com/support or read the international warranty leaflet. Warranty restrictions Cutting units are not covered by the terms of the international warranty because they are subject to wear.
-
Page 20: Bahasa Indonesia
Bahasa Indonesia Pendahuluan Selamat atas pembelian Anda dan selamat datang di Philips! Untuk memanfaatkan sepenuhnya dukungan yang ditawarkan Philips, daftarkan produk Anda di www.philips.com/welcome. Keterangan umum (Gbr. 1) Pemangkas rambut berukuran penuh 2 Tombol geser on/off 3 Soket untuk steker kecil... - Page 21 Bahasa Indonesia Aksesori yang disertakan dapat berbeda-beda, tergantung pada produk. Bahaya - Usahakan unit catu daya tetap kering. Peringatan - Untuk mengisi daya baterai, hanya gunakan unit catu daya yang dapat dilepas (A00390) yang disertakan dengan alat ini. - Unit catu daya terdiri atas transformator. Jangan memotong unit catu daya dan menggantinya dengan steker lain, karena hal ini menimbulkan situasi berbahaya.
- Page 22 Medan elektromagnet (EMF) Alat Philips ini mematuhi semua standar dan peraturan yang berlaku terkait paparan terhadap medan elektromagnet. Umum - Alat ini dapat dibersihkan dengan aman menggunakan air keran.
- Page 23 Bahasa Indonesia - Unit catu daya mengubah tegangan 100-240 volt ke tegangan rendah yang aman kurang dari 24 volt. Pengisian daya Mengisi baterai dengan unit catu daya Bila diisi daya selama 16 jam, alat memiliki waktu operasi tanpa kabel hingga 80 menit. 1 Pastikan alat telah dimatikan.
- Page 24 Bahasa Indonesia Melepas alat cukur presisi dan pemangkas bulu hidung 1 Tempatkan jari Anda pada tanda panah di bagian belakang sambungan dan dorong dari gagangnya searah dengan tanda panah. Memasang dan melepas sisir 1 Untuk memasang segala jenis pelindung ke elemen pemotong, geser bagian depan pelindung ke gerigi elemen pemotong.
- Page 25 Bahasa Indonesia dengan kulit (hingga sepanjang 1/32 inci (0,5 mm) atau untuk membuat garis bersih di sekitar jenggot, leher, dan cambang. 1 Untuk memangkas rambut yang dekat dengan kulit, letakkan sisi datar elemen pemotong pada kulit dan gerakkan ke arah yang berlawanan dengan arah tumbuh rambut.
- Page 26 Bahasa Indonesia 2 Sisir yang dapat disesuaikan: Dorong pemilih panjang ke kiri atau ke kanan untuk memilih pengaturan panjang rambut yang diinginkan. = mm 3 Untuk memangkas dengan cara paling efektif, gerakkan sisir berlawanan arah tumbuh rambut. Pastikan permukaan sisir selalu bersentuhan dengan kulit.
- Page 27 Bahasa Indonesia Sisir pemangkas bulu badan Pasang sisir pemangkas bulu badan ke pemangkas berukuran penuh untuk memangkas rambut di bawah garis leher. Alat dilengkapi dengan 2 sisir pemangkas bulu badan. Pengaturan panjang rambut ditunjukkan pada sisir. Pengaturan merujuk pada panjang rambut yang tersisa setelah dipangkas.
- Page 28 Bahasa Indonesia 2 Miringkan alat sedemikian rupa, sehingga hanya satu tepi pisau pemotong yang menyentuh ujung rambut saat Anda membentuk kontur garis di sekeliling telinga. 3 Untuk membuat kontur pada tengkuk leher atau cambang, putar alat dan lakukan gerakan ke bawah. 4 Gerakkan alat secara perlahan dan mulus dengan mengikuti garis rambut aslinya.
- Page 29 Bahasa Indonesia Sambungan presisi untuk digunakan pada wajah Pemangkas presisi Gunakan pemangkas presisi untuk membuat garis halus dan kontur di sekitar wajah Anda, dekat dengan kulit (hingga sepanjang 1/32 inci / 0,5 mm). 1 Tahan kepala pemangkas presisi secara tegak lurus dengan kulit lalu gerakkan kepala pemangkas ke atas atau ke bawah sambil menekan lembut.
- Page 30 Bahasa Indonesia Alat cukur presisi Gunakan alat cukur presisi setelah memangkas, untuk mencukur rambut di pipi, dagu, dan sepanjang jenggot dengan akurat. Pastikan untuk memangkas terlebih dahulu jenggot Anda, dengan pemangkas berukuran penuh tanpa sisir untuk mendapatkan hasil terbaik. Catatan: Gunakan alat cukur presisi untuk mencukur rambut yang tersisa dan membuat detail gaya jenggot.
- Page 31 Bahasa Indonesia 4 Bersihkan elemen pemotong dan sisir di bawah keran air hangat. 5 Dengan hati-hati kibaskan sisa air dan biarkan semua bagian sampai benar-benar kering. Pembersihan menyeluruh 1 Matikan alat dan cabut steker dari stopkontak listrik. 2 Lap gagang alat dengan kain kering. 3 Lepaskan sisir atau elemen pemotong dari alat.
- Page 32 - Simpan alat dalam kantung yang disediakan. Catatan: Pastikan alat kering sebelum disimpan di dalam kantung. Memesan aksesori Untuk membeli aksesori atau suku cadang, buka www.shop.philips.com/service atau kunjungi dealer Philips terdekat. Anda juga dapat menghubungi Pusat Layanan Konsumen Philips di...
- Page 33 Kami sangat menganjurkan agar Anda membawa produk ke lokasi pengumpulan resmi atau ke pusat servis Philips untuk melepas baterai isi ulang oleh teknisi profesional. - Patuhi peraturan di negara Anda untuk pengumpulan terpisah untuk produk listrik dan elektronik serta baterai isi-ulang.
- Page 34 Anda melihat papan sirkuit cetakan (PCB) dan baterai isi-ulang. 3 Lepas baterai isi-ulang. Garansi dan dukungan Jika Anda membutuhkan informasi atau dukungan, silakan kunjungi www.philips.com/support atau bacalah pamflet garansi internasional. Batasan garansi Unit pemotong tidak termasuk dalam ketentuan jaminan internasional karena mudah aus.
-
Page 35: Bahasa Melayu
Bahasa Melayu Pengenalan Tahniah atas pembelian anda dan selamat menggunakan Philips! Untuk memanfaatkan sepenuhnya sokongan yang ditawarkan oleh Philips, daftar produk anda di www.philips.com/welcome. Gambaran umum (Raj. 1) Pemotong rambut saiz penuh 2 Gelangsar hidup/mati 3 Soket untuk plag kecil... - Page 36 Bahasa Melayu Aksesori yang dibekalkan mungkin berbeza-beza untuk berlainan produk. Bahaya - Pastikan unit bekalan sentiasa kering. Amaran - Untuk mengecas bateri, hanya gunakan unit bekalan boleh ditanggalkan (A00390) yang disediakan dengan perkakas. - Unit bekalan mengandungi pengubah. Jangan putuskan unit bekalan untuk menggantikannya dengan palam lain, kerana ini menyebabkan situasi berbahaya.
- Page 37 - Jangan sekali-kali gunakan udara termampat, pad penyental, agen pembersih yang melelas atau cecair yang agresif seperti alkohol atau aseton untuk membersihkan perkakas. Medan elektromagnet (EMF) Perkakas Philips ini mematuhi semua piawaian dan peraturan yang berkaitan dengan pendedahan kepada medan elektromagnet.
- Page 38 Bahasa Melayu - Alat ini boleh dibersihkan dengan selamat di bawah paip air. - Unit bekalan sesuai untuk voltan sesalur kuasa antara 100 hingga 240 volt. - Unit bekalan mengubah 100-240 volt kepada voltan rendah dan selamat tidak melebihi 24 volt.
- Page 39 Bahasa Melayu 2 To attach a cutting element, insert the lug of the cutting element into the guiding slot at the front and push the back of the cutting element onto the appliance ('click'). Detaching the precision shaver and nose trimmer 1 Place your finger on the arrow at the back of the attachment and push it off the handle in the...
- Page 40 Bahasa Melayu Switching the appliance on and off - Untuk menghidupkan perkakas, tolak gelangsar hidup/mati ke atas. - Untuk mematikan perkakas, tolak gelangsar hidup/mati ke bawah. Attachments for use on beard Full-size hair trimmer Use the full-size hair trimmer without a comb to trim hair close to the skin (to a length of 1/32in (0.5mm) or to create clean lines around your beard, neck and sideburns.
- Page 41 Bahasa Melayu Adjustable beard 1/8in.- 9/32in. 3mm-7mm comb 1 Attach the comb to the full-size hair trimmer. 2 Adjustable comb: Push the length selector to the left or right to select the desired hair length setting. = mm 3 To trim the most effective way, move the comb against the direction of hair growth.
- Page 42 Bahasa Melayu Body combs Attach a body comb to the full-size hair trimmer to trim hairs below the neckline. The appliance comes with 2 body combs. The hair length settings are indicated on the combs. The settings correspond to the remaining hair length after trimming. Comb inch Body comb (green)
- Page 43 Bahasa Melayu 3 To contour the nape of the neck or sideburns, turn the appliance and make downward strokes. 4 Move the appliance slowly and smoothly following the natural hairline. Sikat rambut Pasang sikat rambut pada pemotong rambut saiz penuh untuk memotong rambut secara sekata pada kepala anda.
- Page 44 Bahasa Melayu Precision attachments for use on face Precision trimmer Use the precision trimmer to create fine lines and contours around your facial style, close to the skin (to a length of 1/32in./0.5mm). 1 Hold the precision trimming head perpendicular to the skin and move the trimming head upwards or downwards with gentle pressure.
- Page 45 Bahasa Melayu Note: Use the precision shaver to remove remaining hairs and detailing your beard style. It is not suitable for a full face shave. 1 Gently press the precision shaver onto the skin and shave along contoured edges to remove any unwanted hairs.
- Page 46 Bahasa Melayu 3 Remove any comb or cutting element from the appliance. 4 Remove any hairs that have accumulated in the hair chamber with the cleaning brush supplied. 5 Remove any hairs that have accumulated in the cutting elements and/or combs with the cleaning brush supplied.
- Page 47 Memesan aksesori Untuk membeli aksesori atau alat ganti, lawati www.shop.philips.com/service atau pergi ke penjual Philips anda. Anda juga boleh menghubungi Pusat Penjagaan Pengguna Philips di negara anda (lihat risalah jaminan seluruh dunia untuk maklumat perhubungan). Kitar semula...
- Page 48 Kami menasihatkan anda untuk membawa produk anda ke pusat pungutan rasmi atau pusat khidmat Philips supaya bateri boleh cas semula itu dikeluarkan oleh seorang profesional. - Ikuti peraturan negara anda bagi pemungutan produk elektrik dan elektronik serta bateri kitar semula secara berasingan.
- Page 49 Bahasa Melayu Jaminan dan sokongan Jika anda memerlukan maklumat atau sokongan, sila lawati www.philips.com/support atau baca risalah jaminan antarabangsa. Sekatan jaminan Unit pemotong tidak diliputi oleh terma jaminan antarabangsa kerana ia terdedah kepada kelusuhan. ...
-
Page 50: Português Do Brasil
Português do Brasil Introdução Parabéns pela sua compra e seja bem-vindo à Philips! Para aproveitar todos os benefícios oferecidos pelo suporte da Philips, registre seu produto na página www.philips.com/welcome. Descrição geral (Fig. 1) Aparador de pelos com o tamanho perfeito... - Page 51 Português do Brasil Perigo - Mantenha a fonte de alimentação seca. Aviso - Para carregar a bateria, use apenas a fonte de alimentação removível (A00390) fornecida com o aparelho. - A fonte de alimentação contém um transformador. Não desligue a fonte de alimentação para trocá-la por outro conector, pois isso causará...
- Page 52 - Nunca use ar comprimido, palhas de aço, agentes de limpeza abrasivos ou líquidos agressivos como gasolina ou acetona para limpar o aparelho. Campos eletromagnéticos Este aparelho Philips está em conformidade com todos os padrões e regulamentos aplicáveis relacionados à exposição a campos eletromagnéticos. Informações gerais - Este aparelho pode ser lavado com segurança...
- Page 53 Português do Brasil Carregamento Carregamento com a fonte de alimentação Quando é carregado por 16 horas, o aparelho tem um tempo de operação sem fio de até 80 minutos. 1 Verifique se o aparelho está desligado. 2 Insira o pequeno conector no aparelho e coloque a fonte de alimentação na tomada elétrica.
- Page 54 Português do Brasil Como desencaixar o barbeador de precisão e o aparador de nariz 1 Coloque o dedo sobre a seta na parte de trás do acessório e empurre-o para fora do cabo na direção da seta. Como encaixar e desencaixar os pentes 1 Para encaixar qualquer tipo de proteção em uma lâmina de corte, deslize a parte frontal do protetor nos dentes da lâmina de corte.
- Page 55 Português do Brasil 0,5 mm ou 1/32 pol.) ou para criar linhas limpas ao redor da barba, pescoço e costeletas. 1 Para cortar os pelos rentes à pele, coloque o lado reto da lâmina de corte em contato com a pele e faça movimentos na direção de crescimento do cabelo.
- Page 56 Português do Brasil 2 Pente ajustável: Empurre o seletor de altura para a direita ou esquerda para selecionar o ajuste da altura do pelo desejado. = mm 3 Para aparar de maneira mais eficiente, passe o pente na direção oposta ao crescimento dos pelos.
- Page 57 Português do Brasil linha do pescoço. O aparelho vem com dois pentes de corpo. Os ajustes no comprimento do pelo são indicados nos pentes. Os ajustes correspondem ao comprimento dos pelos restantes após o uso. Pente polegada Pente de corpo 1/8 pol.
- Page 58 Português do Brasil 3 Para contornar a nuca ou as costeletas, gire o aparelho e faça movimentos para baixo. 4 Movimente o aparelho de forma lenta e suave, seguindo a linha natural do cabelo. Pentes de pelo Encaixe o pente de pelo ao aparador de pelos com o tamanho perfeito para aparar o pelo da cabeça por igual.
- Page 59 Português do Brasil Acessórios de precisão para uso no rosto Aparador de precisão Use o aparador de precisão para criar linhas finas e contornos ao redor do seu estilo facial, rentes à pele (no comprimento de 0,5 mm ou 1/32 pol.). 1 Mantenha a cabeça aparadora de precisão na posição perpendicular à...
- Page 60 Português do Brasil Certifique-se de aparar previamente a barba primeiro com o aparador de pelos com o tamanho perfeito sem o pente, para obter o melhor resultado. Nota: Use o barbeador de precisão para remover os pelos restantes e detalhar o estilo da barba. Não é...
- Page 61 Português do Brasil Limpeza total 1 Desligue o aparelho e desconecte-o da tomada. 2 Limpe o cabo do aparelho com um pano seco. 3 Remova todas as laminas de corte ou pentes do aparelho. 4 Remova pelos acumulados na câmara coletora com a escova de limpeza fornecida.
- Page 62 Para comprar acessórios ou peças de substituição, acesse www.shop.philips.com/service ou dirija-se até um revendedor Philips. Você também pode entrar em contato com a Central de Atendimento ao Cliente Philips do seu país (consulte o folheto de garantia mundial para ver as informações de contato).
- Page 63 Recomenda-se levar o produto até um ponto de coleta oficial ou a uma assistência técnica autorizada Philips para que um profissional remova a bateria recarregável. - Siga a regulamentação do seu país para a coleta seletiva de produtos elétricos e...
- Page 64 3 Remova a bateria recarregável. Garantia e suporte Caso você precise obter informações ou suporte, visite o site www.philips.com/support ou leia o folheto de garantia internacional. Restrições da garantia As unidades de corte não estão cobertas pelos termos da garantia internacional, pois elas estão...
-
Page 65: Tiếng Việt
Giớ i thiệ u Chúc mừng bạn đã mua hà n g và chào mừng bạn đến với Philips! Để có được lợi ích đầy đủ từ sự hỗ trợ do Philips cung cấp, hãy đăng ký sản phẩm tại www.philips.com/welcome. - Page 66 Tiếng Việt Nguy hiểm Giữ bộ nguồn khô ráo. Cả n h bá o Để sạc pin, chỉ sử dụng bộ nguồn có thể tháo rời (A00390) đi kèm với thiết bị. Bộ nguồn chứa một biến áp. Không tháo bỏ bộ nguồn nà...
- Page 67 ăn mòn hoặc những chất lỏng mạnh như xăng hay axeton để lau chùi thiết bị. Điện từ trường (EMF) Thiết bị Philips này tuân thủ tất cả các tiêu chuẩn và quy định hiện hành liên quan đến mức phơi nhiễm điện từ trường.
- Page 68 Tiếng Việt 1 Đảm bảo thiết bị đã được tắt. 2 Cắm phích cắm nhỏ vào thiết bị và cắm bộ nguồn vào ổ cắm điện trên tường. 3 Sau khi sạc, hãy rút bộ nguồn ra khỏi ổ điện và rút phích cắm nhỏ...
- Page 69 Tiếng Việt Lắp và tháo lược 1 Để lắp bất kỳ bộ phận bảo vệ loại nào vào bộ phận cắt, trượt phần phía trước của bộ phận bảo vệ vào răng của bộ phận cắt. Sau đó dùng ngón tay hoặc lòng bàn tay ấn phần giữa của bộ...
- Page 70 Tiếng Việt 2 Để tỉa tạo đường nét, hãy giữ bộ phận cắt vuông góc với da và di chuyển thiết bị hướng lên hoặc hướng xuống trong khi ấn nhẹ. Lược tỉa râu Gắn lược tỉa râu vào đầu tỉa đầy đủ kích thước để cắt tỉa đồng đều râu và...
- Page 71 Tiếng Việt Khi cắt tỉa ở vùng da nhạy cảm, hãy nhớ luôn dùng lược. Vì toàn bộ lông không mọc theo cùng một hướng, có thể bạn cần thử cắt tỉa theo nhiều hướng khác nhau (ví dụ: lên trên, xuống dưới hoặc đi ngang). Thực hành để...
- Page 72 Tiếng Việt Phụ kiện dùng cho tóc Đầu tỉa kích thước đầy đủ Sử dụng máy tỉa loại kích thước đầy đủ mà không dùng lược để cắt tóc trên đầu rất sát với da (1/32in (0,5 mm) hoặc tỉa xung quanh cổ và vùng quanh tai. 1 Tỉa đường viền chân tóc quanh tai, dùng lược chải đầu tóc chờm qua tai.
- Page 73 Tiếng Việt Phụ kiện cắt tỉa chính xác dùng cho khuôn mặt Máy tỉa lông Dùng đầu tỉa chính xác để tạo các đường viền và đường cắt nhỏ ở sát da quanh khuôn mặt (lên đến độ dài 1/32in./0,5 mm) 1 Giữ...
- Page 74 Tiếng Việt trước bằng máy cắt tỉa râu đầy đủ kích thước mà không dùng lược để có kết quả tốt nhất. Lưu ý: Dùng máy cạo chính xác để loại bỏ phần râu tóc còn lại và tạo kiểu chi tiết cho bộ râu. Thiết bị không phù...
- Page 75 Tiếng Việt 5 Loại bỏ tóc bám trên bộ phận cắt râu tóc và/hoặc lược bằng bàn chải làm sạch đi kèm. 6 Rửa sạch bộ phận cắt râu tóc dưới vòi nước ấm. 7 Rửa sạch lược dưới vòi nước ấm. 8 Cẩn thận lắc sạch nước còn thừa và...
- Page 76 đại lý Philips của bạn. Bạn cũng có thể liên hệ với Trung tâm Chăm sóc Người tiêu dùng của Philips ở nước bạn (xem tờ quảng cáo bảo hành toàn cầu để biết thêm chi tiết liên hệ).
- Page 77 3 Thá o pin sạc ra. Bảo hành và hỗ trợ Nếu bạn cần thông tin hoặc hỗ trợ, vui lòng truy cập vào www.philips.com/support hoặc đọc tờ bảo hành quốc tế. Các giới hạn về bảo hành Bộ phận cắt không thuộc phạm vi các điều khoản bảo hành quốc tế...
-
Page 78: ภาษาไทย
ขอแสดงความยิ น ดี ก ั บ ผลิ ต ภั ณ ฑ์ ใ หม่ แ ละต้ อ นรั บ เข้ า สู ่ โ ลกของฟิ ล ิ ป ส์ ! เพื ่ อ ให้ ค ุ ณ ได้ ร ั บ ประโยชน์ อ ย่ า งเต็ ม ที ่ จ ากบริ ก ารที ่ Philips มอบให้... - Page 79 ภาษาไทย ข้ อ มู ล ความปลอดภั ย ที ่ ส ำคั ญ โปรดอ่ า นข้ อ มู ล ที ่ ส ำคั ญ อย่ า งละเอี ย ดก่ อ นใช้ ง านเครื ่ อ งรวมทั ้ ง อุ ป กร- ณ์...
- Page 80 สนามแม่ เ หล็ ก ไฟฟ้ า (EMF) อุ ป กรณ์ Philips เครื ่ อ งนี ้ ส อดคล้ อ งกั บ มาตรฐานและกฎข้ อ บั ง คั บ ที ่ เ กี ่ ย วข้ อ งทั ้ ง หมดเกี ่ -...
- Page 81 ภาษาไทย ทั ่ ว ไป สามารถล้ า งตั ว เครื ่ อ งนี ้ ไ ด้ อ ย่ า งปลอดภั ย ใต้ ก ๊ อ กน้ ำ ชุ ด อุ ป กรณ์ น ี ้ เ หมาะสำหรั บ ใช้ ก ั บ แรงดั น ไฟฟ้ า ตั ้ ง แต่ 100 ถึ ง 240 โวลต์...
- Page 82 ภาษาไทย 2 หากต้ อ งการใส่ ช ุ ด มี ด ให้ เ สี ย บสลั ก ของชุ ด ใบมี ด เข้ า ไปในร่ อ งนำทางด้ า นหน้ า แล้ ว ดั น ชุ ด ใบมี ด เข้ า ไปที ่ ต ั ว เครื ่ อ ง (เสี ย งดั ง 'คลิ ก ') การถอดเครื...
- Page 83 ภาษาไทย การปิ ด และเปิ ด เครื ่ อ ง เลื ่ อ นสวิ ต ช์ เ ปิ ด /ปิ ด ขึ ้ น ด้ า นบนเพื ่ อ เปิ ด เครื ่ อ ง เลื ่ อ นสวิ ต ช์ เ ปิ ด /ปิ ด ลงเพื ่ อ ปิ ด เครื ่ อ ง อุ...
- Page 84 ภาษาไทย หวี ส ำหรั บ เคราแบบปรั บ ได้ 1/8 นิ ้ ว - 9/32 นิ ้ ว 3 มม. - 7 มม. 1 ประกอบหวี เ ข้ า กั บ เครื ่ อ งกั น ขน 2 หวี แ บบปรั บ ได้ : ดั น ปุ ่ ม ปรั บ เลื อ กความยาวไปทางซ้ า ยหรื อ ขวา เพื...
- Page 85 ภาษาไทย หวี ส ำหรั บ ร่ า งกาย ประกอบหวี ส ำหรั บ ร่ า งกายเข้ า กั บ เครื ่ อ งกั น ขนเพื ่ อ เล็ ม ขนที ่ ต ่ ำ กว่ า แ- นวลำคอ ตั ว เครื ่ อ งมาพร้ อ มกั บ หวี ส ำหรั บ ร่ า งกาย 2 เล่ ม การตั...
- Page 86 ภาษาไทย หวี ต ั ด ผม ประกอบหวี ต ั ด ผมเข้ า กั บ เครื ่ อ งกั น ขนเพื ่ อ เล็ ม ผมให้ เ ท่ า ๆ กั น ตั ว เครื ่ อ งมาพร้ อ มกั บ หวี ต ั ด ผม 3 เล่ ม การตั...
- Page 87 ภาษาไทย 1 จั บ หั ว ของที ่ เ ล็ ม ขนเฉพาะจุ ด ให้ ต ั ้ ง ฉากกั บ ผิ ว แล้ ว ขยั บ หั ว เล็ ม ขึ ้ น หรื อ ลงโดยกดเบาๆ ที ่ เ ล็ ม ขนจมู ก ใช้...
- Page 88 ภาษาไทย หมายเหตุ : ใช้ เ ครื ่ อ งโกนเฉพาะจุ ด เพื ่ อ โกนขนส่ ว นที ่ เ หลื อ และตกแต่ ง เคราตามท- รงต้ อ งการ ไม่ เ หมาะกั บ การโกนทั ้ ง หน้ า 1 ค่ อ ยๆ กดเครื ่ อ งโกนเฉพาะจุ ด ลงบนผิ ว หนั ง เบาๆ และโกนตามแนวขอบเพื...
- Page 89 ภาษาไทย 3 ถอดหวี แ ละ/หรื อ อุ ป กรณ์ ต ั ด ออกจากตั ว เครื ่ อ ง 4 กำจั ด ขนที ่ ส ะสมอยู ่ ใ นที ่ เ ก็ บ เศษขนด้ ว ยแปรงทำความสะอาดที ่ ใ - ห้ ม า 5 กำจั...
- Page 90 หรื อ ติ ด ต่ อ ตั ว แทนจำหน่ า ย Philips และคุ ณ ยั ง สามารถติ ด ต่ อ ศู น ย์ บ ริ ก ารลู ก ค้ า Philips ในประเทศของคุ ณ ได้ อ ี ก ด้ ว ย...
- Page 91 เราขอแนะนำให้ ค ุ ณ นำผลิ ต ภั ณ ฑ์ ข องคุ ณ ไปยั ง ศู น ย์ ร วบรวมอย่ - างเป็ น ทางการ หรื อ ศู น ย์ บ ริ ก ารของ Philips เพื ่ อ ทำการถอดแบตเตอรี ่ แ บบชาร์ จ ไฟใหม่ ไ ด้ อ อกโดยผู ้ ท ี ่ ม ี ค วา- มชำนาญ...
- Page 92 หากคุ ณ ต้ อ งการข้ อ มู ล หรื อ การสนั บ สนุ น โปรดเข้ า ชมเว็ บ ไซต์ www.philips.com/support หรื อ อ่ า นข้ อ มู ล จากเอกสารแผ่ น พั บ ที ่ แ ยกเฉพาะเกี ่ ย วกั บ การรั บ ประ- กั...
-
Page 93: 简体中文
简体中文 简介 感谢您的惠顾,欢迎光临飞利浦! 为了让您能充分享 受飞利浦提供的支持,请在 www.philips.com/welcome 上注册您的产品。 基本说明(图 1) 1 标准尺寸须发修剪器 2 开/关滑块 3 小插头插口 4 精修修剪器 5 精修剃须刀(仅限于 MG5740、MG5735、 MG5730) 6 鼻毛修剪器 7 定长梳齿 3/8 英寸 (9 毫米) 8 定长梳齿 15/32 英寸 (12 毫米) 9 定长梳齿 21/32 英寸 16 毫米... - Page 94 简体中文 危险 保持电源部件干燥。 警告符号注释: 禁止在打开的水龙头下进行清洗。 警告 要给电池充电,请仅使用产品随附的可拆卸电源部 件 (A00390)。 电源部件中包含一个变压器。 请勿自行更换电源部 件的插头,否则将导致严重后果。 本产品也可以由 8 岁或以上年龄的儿童以及肢体不 健全、感觉或精神上有障碍或缺乏相关经验和知识 的人士使用,但前提是有人对他们使用本产品进行 监督或指导,以确保他们安全使用,并且让他们明 白相关的危害。 切勿让儿童玩弄本产品。 不要让儿 童在无人监督的情况下对本产品进行清洁和保养。 手持部分与电源软线分开后,才能在水中清洗手持 部分。 使用前,请务必检查产品。 请勿使用损坏的产品, 否则可能对人体造成伤害。 请务必用原装型号更换 损坏的部件。 切勿拆开本产品更换充电电池。 警告 切勿将充电座浸入水中,也不要在自来水龙头下冲 洗。 切勿将产品浸入水中。 请勿在洗澡或淋浴时使用本 产品。 切勿使用温度高于 60°C 的热水冲洗本产品。 只能将本产品用于用户手册中所示的原定用途。 出于卫生的目的,本产品只能供一个人使用。...
- Page 95 简体中文 切勿使用压缩气体、钢丝绒、研磨性清洁剂或腐蚀 性液体(例如汽油或丙酮)来清洁产品。 电磁场 (EMF) 本 Philips 产品符合所有有关暴露于电磁场的适用标准 和法规。 概述 该产品可放心在水龙头下清洗。 符号注释:适合用在打开的水龙头下进行清洗。 符号注释:适合用在打开的水龙头下进行清洗。 电源部件适合在 100 - 240 伏的电源电压下工作。 该电源部件可将 100-240 伏的电压转换为 24 伏以 下的安全低电压。 充电 使用电源部件充电 本产品充电 16 小时后,可不接电源工作长达 80 分 钟。 1 确保产品电源已关闭。 2 将充电插头插入产品,然后将电源部件插入电源插 座。 3 充电之后,从电源插座上拔下电源部件,并从产品 上拔下充电插头。...
- Page 96 简体中文 拆卸和安装刀头部件 1 要拆卸刀头部件,请顺着刀头部件的啮合部位向上 推,将其从手柄上取下。 2 要安装刀头部件,请将刀头部件的凸缘插入前端的 导向槽内,然后将刀头部件的后部推入产品中(听 到“咔哒”一声)。 拆卸精修剃须刀和鼻毛修剪器 1 将手指置于附件背面的箭头处,按箭头方向将其从 手柄中推出。 安装和拆卸梳齿 1 要将任意类型的网罩安装到修剪部件上,请将网罩 的前部滑到修剪部件的梳齿上。 然后用手指或手掌 在网罩的中心向下按(可听到“咔哒”一声)。 2 要从刀头部件上拆卸任意类型的梳齿,请小心地将 梳齿的后部从产品上拔下,然后将其从刀头部件上 滑出。 注意: 第一次进行修剪时,应从最大的修剪长度设 置开始使用梳齿,以熟悉产品的使用。...
- Page 97 简体中文 打开或关闭产品 要启动本产品,请向上推动开/关滑钮。 要关闭本产品,请向下推动开/关滑钮。 用于剃须的附件 标准尺寸须发修剪器 使用不带梳齿的标准尺寸须发修剪器,以非常紧贴皮肤 的距离(0.5 毫米或 1/32 英寸)修剪须发或在胡须、 颈部和鬓角周围打造明晰的线条。 1 如需贴近皮肤修剪须发,请将刀头部件平坦的一侧 贴近皮肤放置,然后逆着须发生长的方向来回移 动。 2 如需修剪轮廓,请手执修剪器,使刀头部件与皮肤 呈垂直角度,并上下移动刀头部件,同时轻轻按压 。 胡须修剪梳齿 将胡须修剪梳齿安装到标准尺寸须发修剪器上,以均匀 地修剪胡须和须髭。 本产品随附 5 款胡须修剪梳齿。 梳齿上显示有须发长度设置。 设定值对应修剪后须发 剩余的长度。 梳齿 英寸 毫米 胡茬修剪梳齿 3/64 英寸 1 毫米 胡茬修剪梳齿 5/64 英寸 2 毫米...
- Page 98 简体中文 2 可调节梳齿: 向左或向右推动长度选择器,以选择 所需的须发长度设置。 = mm 3 为了实现最佳的修剪效果,请逆着毛发生长的方向 移动梳齿。 请确保梳齿表面始终与皮肤相接触。 用于身体的附件 使用绿色体毛修剪梳齿修剪体毛。 第一次进行修剪时,应使用 5 毫米(3/16 英寸)的 体毛修剪梳齿,以熟悉产品的使用。 请确保毛发清洁干燥,因为湿的毛发容易贴在身体 上。当修剪敏感部位的毛发时,请务必使用体毛修 剪梳齿。 由于并非所有的毛发均按相同的方向生长,因此您 可能需要尝试不同的修剪位置(即向上、向下或交 叉)。 不断实践才能获得最佳效果。 始终轻柔平稳地移动,确保梳齿表面始终与皮肤相 接触。 如果产品中积聚了过多的毛发,请在使用前先将毛 发吹掉,以获得最佳的修剪效果。 体毛修剪梳齿 将体毛修剪梳齿安装到标准尺寸须发修剪器上,以修剪 领口以下任意部位的体毛。 本产品随附 2 款体毛修剪 梳齿。 梳齿上显示有须发长度设置。 设定值对应修剪 后须发剩余的长度。 梳齿 英寸...
- Page 99 简体中文 1 将体毛修剪梳齿安装到标准尺寸须发修剪器上。 2 为实现最佳的修剪效果,请用另一只手绷紧皮肤并 逆着毛发生长的方向移动梳齿。 请确保梳齿表面始 终与皮肤相接触。 用于头部的附件 标准尺寸须发修剪器 使用不带梳齿的标准尺寸须发修剪器,以非常贴近皮肤 的距离(0.5 毫米或 1/32 英寸)修剪头部须发,或在 领口和耳朵附近区域修剪出轮廓。 1 如需修整耳朵周围的发际线轮廓,请梳理耳朵上方 的发梢。 2 在修整耳朵周围的轮廓时,倾斜本产品,仅让修剪 刀头的一边接触发梢。 3 要修饰颈背或鬓角的轮廓,请转动产品并向下修剪 。 4 沿着发际线的自然生长线条缓慢、平稳地移动产 品。 定长梳齿 将定长梳齿安装到标准尺寸须发修剪器上,以均匀地修 剪头发。 本产品随附 3 款定长梳齿。 梳齿上显示有须 发长度设置。 设定值对应修剪后须发剩余的长度。 梳齿 英寸 毫米 定长梳齿...
- Page 100 简体中文 2 缓慢从各个方向沿头顶再向下移动修剪器,以修剪 出均长的发型。 请确保梳齿表面始终与皮肤相接 触。 始终逆着毛发生长的方向移动修剪器。 轻轻按 压。 在整个头部重复修剪动作,以确保剪到所有需要 修剪的头发。 用于面部的精修附件 精修修剪器 使用精修修剪器,在您的面部周围以非常贴近皮肤的距 离(0.5 毫米或 1/32 英寸)修剪出细致的线条和轮 廓。 1 手执修剪器,使精修修剪刀头与皮肤呈垂直角度, 并上下移动修剪刀头,同时轻轻按压。 鼻毛修剪器 使用鼻毛修剪器,修饰鼻毛和耳毛。 请确保鼻腔清洁无异物。 请确保外耳道清洁,没有 耳垢。 修剪头插入鼻腔的深度不得超过 5 毫米(3/16 英 寸)。 务必在每次使用后清洁附件。 修剪鼻毛 1 将修剪头轻轻插入和移出鼻孔,同时转动修剪头, 以去除多余的毛发。...
- Page 101 简体中文 修剪耳毛 1 在耳部周围缓缓移动修剪头,以去除突出耳缘的毛 发。 2 将修剪头轻轻插入和移出外耳道,以去除多余的毛 发。 精修剃须刀 在修剪后使用精修剃须刀精确剃除脸颊、下巴和胡子周 围多余的毛发。 请务必先使用不带梳齿的标准尺寸须 发修剪器预先修剪您的胡须,以获得最佳的效果。 注意: 使用精修剃须刀去除剩余的毛发,精心打造胡 须造型。 它不适用于全脸剃须。 1 将精修剃须刀轻按到皮肤上,沿着轮廓边缘剃除所 有多余的毛发。 清洁 切勿使用钢丝绒、研磨性清洗剂或腐蚀性液体(例如汽 油和丙酮)来清洁本产品。 切勿用毛巾或纸巾擦干修剪器齿,否则可能会损坏修剪 器齿。 每次使用后: 在水龙头下清洁 1 关闭产品并与电源插座断开连接。 2 从产品上拆下所有梳齿或修剪部件。 3 在温水龙头下冲洗胡茬储藏室。 4 在温水龙头下冲洗修剪部件和梳齿。 5 小心地甩掉多余水分并彻底晾干所有部件。...
- Page 102 简体中文 彻底清洁 1 关闭产品并断开电源插座连接。 2 使用干布擦拭产品手柄。 3 从产品上拆下所有梳齿或修剪部件。 4 使用附带的清洁刷清除胡茬储藏室中积聚的毛发。 5 使用附带的清洁刷清除修剪部件和/或梳齿中积聚的 毛发。 6 在温水龙头下冲洗修剪部件。 7 在温水龙头下冲洗梳齿。 8 小心地甩掉多余水分并彻底晾干所有部件。 清洁鼻毛修剪器 在使用后以及在鼻毛修剪器刀头积聚大量毛发或灰尘 时,请立即清洁鼻毛修剪器。 1 用热水冲洗鼻毛修剪器刀头。 2 打开产品,再次冲洗鼻毛修剪器刀头,以去除所有 残留的毛发。 然后再次关闭本产品。 为了进行彻底的清洁,可将鼻毛修剪器刀头置于碗中, 用温水浸泡几分钟,然后打开产品去除残留的毛发/碎 屑。 3 小心地甩掉多余水分并彻底晾干所有部件。 清洁精修剃须刀 1 握住精修剃须刀凹槽部分的两侧,将顶部部件从底 部部件上拔出。 2 吹掉和/或甩掉积聚在精修剃须刀内部的毛发。 请勿使用清洁刷清除剃须刀网的须发。...
- Page 103 简体中文 3 在温水龙头下冲洗精修剃须刀的刀头。 4 小心地甩掉多余水分并彻底晾干所有部件。 5 将精修剃须刀的刀头重新安装到底部部件上。 存放 将产品存放在随附的软袋中。 注意: 将本产品存放到软袋之前,应确保其干燥。 订购配件 要购买附件或备件,请访问 www.shop.philips.com/service 或联系您的飞利浦经销 商。 您还可以联系所在国家/地区的飞利浦客户服务中 心(请参阅全球保修卡了解详细联系信息)。 回收 弃置本产品时,请不要将其与一般生活垃圾放在一 起,应将其交给政府指定的回收中心。 这样做将有 利于环保。 此产品包含内置充电电池;请勿将充电电池与一般 生活垃圾一起弃置。 强烈建议您将自己的产品送到 官方收集点或飞利浦服务中心,让专业人士移除充 电电池。 遵循您的国家/地区有关分类回收电子电气产品和充 电电池的规定。 正确弃置产品有助于避免对环境和 人类健康造成不良后果。 拆下充电电池 仅在丢弃本产品时方可取出充电电池。 卸下电池 之前,请确保本产品与电源断开连接并且电池电 量已耗尽。 当您使用工具打开本产品时以及在您弃置充电电 池时,请采取必要的安全保护措施。...
- Page 104 简体中文 1 检查产品的前面和后面是否有螺丝。 如果有,请将 其拆下。 2 用螺丝刀卸下产品的前面板和/或后面板。 必要时还 需要拆下更多的螺丝和/或部件,直到您看见装有充 电电池的印刷电路板为止。 3 拆下充电电池。 保修和支持 如需信息或支持,请访问 www.philips.com/support 或 阅读国际保修卡。 保修条款 修剪部件不在国际保修条款的涵盖范围之内,因为修剪 部件属于易磨损物品。 ...
-
Page 105: 繁體中文
繁體中文 簡介 感謝您購買本產品。歡迎來到飛利浦的世界! 為充分 享受飛利浦為您提供的好處,請至下列位址註冊產 品:www.philips.com/welcome。 一般說明 (圖 1) 1 大型修容刀 2 滑動開關 3 小插頭插座 4 精準修整刀 5 精密修毛器 (限 MG5740、MG5735、MG5730) 6 鼻毛修容刀 7 髮梳 3/8 吋 (9 公釐) 8 髮梳 15/32 吋 (12 公釐) 9 髮梳 21/32 吋 (16 公釐) 10 鬍渣梳具... - Page 106 繁體中文 危險 電源供應裝置請保持乾燥。 此符號表示: 禁止於自來水下清潔。 警示 如需為電池充電,僅可使用裝置隨附的可拆式電源 供應裝置 (型號:A00390)。 電源供應裝置內含一個變壓器。 請勿切斷電源供應 裝置而以其他的插頭取代,否則會造成危險。 本產品可供 8 歲以上兒童、身體官能或心智能力退 化者,或是經驗與使用知識缺乏者使用,但需有人 從旁監督或指示如何安全使用本產品,且使用者需 了解使用本產品的潛在危險。 請勿讓小孩把玩本產 品。 若無人監督,請勿讓兒童進行清潔和使用者維 護。 在水龍頭下沖洗本產品之前,請先拔掉產品電源插 頭。 使用前請務必檢查本產品。 若產品受損請勿使用, 以免受傷。 零件如有受損,請務必以原型號更換 之。 請勿拆開本產品更換充電式電池。 警告 請勿將充電座浸入水中或置於水龍頭下沖洗。 切勿將本產品浸泡於水中。 請勿在泡澡或淋浴時使 用本產品。 切勿使用超過 60°C 的熱水沖洗產品。 本產品儘限用於本使用手冊所述之相關用途。 為保衛生起見,請勿多人共用本產品。 警告符...
- Page 107 繁體中文 絕對不可使用壓縮空氣、鋼絲絨、磨蝕性的清潔劑 或侵蝕性的液體 (例如汽油或丙酮) 清潔本產品。 電磁波 (EMF) 本Philips產品符合所有電磁場暴露的相關適用標準和法 規。 一般 本產品可在水龍頭下安全地清洗。 本電源供應裝置適用於 100 到 240 伏特的插座電 壓。 電源供應裝置可以將 100-240 伏特的電壓轉換為低 於 24 伏特的安全低電壓。 充電 使用電源供應裝置充電 本產品充電 16 小時後,可不插電使用長達 80 分鐘。 1 確定關閉本產品的電源。 2 將小插頭插入產品中,並將電源供應裝置插入牆壁 插座中。 3 充電完畢請將電源供應裝置拔離牆壁插座,並將小 插頭從產品上拔除。 使用本產品 注意: 本產品只能以無線方式使用。...
- Page 108 繁體中文 拆下與安裝修剪組件 1 若要拆下修剪組件,請逆著修剪組件的刀齒方向往 上推,使其脫離握柄。 2 若要安裝修剪組件,請將修剪組件的突耳插入正面 的導引槽,並將修剪組件的背面推回產品 (會聽見 「喀噠」一聲)。 拆下精密修毛器和鼻毛修容刀 1 將手指放在配件背面的箭頭處,並依箭頭的方向推 動以脫離握柄。 安裝與拆下梳具 1 若要將任何種類的刀網安裝到修剪組件上,請將刀 網前端滑動到修剪組件的刀齒上。 然後用手指或手 掌將刀網中心往下壓 (會聽見「喀噠」一聲)。 2 若要從修剪組件拆下任何種類的梳具,請小心拉開 產品上的梳具後面部分,然後滑動梳具,從修剪組 件上取下。 注意: 首次進行修剪時,請先從使用最大修剪長度 設定的梳具開始,以熟練本產品的使用。...
- Page 109 繁體中文 開啟及關閉本產品 若要開啟本產品電源,請將開關往上推。 若要關閉本產品電源,請將開關往下推。 用於鬍鬚的配件 大型修容刀 使用不裝梳具的大型修容刀修剪貼近皮膚的毛髮 (至 1/32 吋 (0.5 公釐),或打造鬍鬚、頸部和鬢角周圍的俐 落線條。 1 若要修剪貼近皮膚的毛髮,請將修剪組件的平面靠 在皮膚上,並逆著毛髮的生長方向推移。 2 若要貼面修整,請將修剪組件與皮膚呈垂直,然後 稍微下壓並向上或向下移動。 鬍鬢梳 將鬍鬢梳安裝到大型修容刀上,均勻地修剪鬍鬚和短 髭。 本產品隨附 5 把鬍鬢梳。 毛髮長度設定標示於梳 具上。 設定對應至修剪後的毛髮長度。 梳具 英吋 公釐 鬍渣梳 3/64 吋 1 公釐 鬍渣梳 5/64 吋 2 公釐 可調整的鬍鬢梳...
- Page 110 繁體中文 2 可調整梳具: 將長度選擇器向左或向右推,以選擇 想要的髮長設定。 = mm 3 若要以最有效率的方式修剪,請逆著毛髮生長的方 向推移梳具。 請確認梳具表面與皮膚完全地接觸。 用於身體的配件 使用綠色的身體梳具修剪身體毛髮。 首次進行修剪時,請使用 5 公釐/3/16 吋的身體梳 具,以熟練本產品的使用。 請確保頭髮清潔與乾燥,因為濕潤的毛髮較容易黏 在身體上。 修剪敏感部位毛髮時,請務必使用身體梳具。 由於並非所有毛髮的生長方向均相同,因此您可能 會想要嘗試不同的修剪位置 (即朝上、朝下或交 叉)。 熟能生巧。 請務必平滑推移產品,輕輕移動,並儘量讓梳具的 表面永遠與皮膚保持接觸。 當過量的毛髮黏附在產品上時,使用前以吹氣的方 式清除毛髮,以獲得最佳的修剪效果。 身體梳具 將身體梳具安裝到大型修容刀上,修剪脖子以下的毛 髮。 本產品隨附 2 把身體梳具。 毛髮長度設定標示於 梳具上。 設定對應至修剪後的毛髮長度。 梳具 英吋...
- Page 111 繁體中文 1 將身體梳具安裝到大型修容刀上。 2 若要以最有效率的方式修剪,請用您的另外一隻手 來繃緊皮膚,並逆著毛髮生長的方向推移梳具。 請 確認梳具表面與皮膚完全地接觸。 用於頭部的配件 大型修容刀 使用未裝上梳具的大型修容刀來修剪貼近皮膚 (1/32 吋 (0.5 公釐) 的頭髮,或者修整頸線以及耳朵附近的區 域。 1 若要修剪耳朵附近的髮線,請先梳理耳朵上方的髮 尾。 2 在貼面修剪耳朵附近的區域時,請斜握產品,讓刀 片僅有一側碰觸到髮尾。 3 修整頸背或鬢角時,請翻轉產品並向下推移。 4 順著自然的髮線,慢慢地、平穩地推移產品。 髮梳 將髮梳裝到大型修容刀上,均勻地修剪頭髮。 本產品 隨附 3 把髮梳。 髮長設定標示於梳具上。 設定對應至 修剪後的髮長。 梳具 英吋 公釐 髮梳 3/8 吋...
- Page 112 繁體中文 2 從不同的方向在頭頂慢慢推移修容刀,以達到平整 的修剪效果。 請確認梳具表面與皮膚完全地接觸。 修容刀一律朝毛髮生長的相反方向移動。 輕輕 壓住。 以重疊的方式推剪整個頭部,確保修剪到所有應 修剪的頭髮。 用於臉部的精準配件 精準修整刀 使用精準修整刀修出細線條,並貼近皮膚照著臉型修剪 出造型 (至 1/32 吋/0.5 公釐的長度)。 1 將精準修整刀頭與皮膚呈垂直,然後稍微下壓並向 上或向下移動修整刀頭。 鼻毛修容刀 請使用鼻毛修容刀修剪鼻毛和耳毛。 確定鼻腔通道保持清潔。 確定外耳道清潔而且沒有 耳屎。 請勿將刀尖插入超過 3/16 吋/5 公釐。 每次使用後,務必清潔配件。 修剪鼻毛 1 在鼻子內外輕輕移動刀尖,並且翻轉,以清除多餘 的毛髮。 修剪耳毛 1 在耳朵周圍緩慢移動刀尖,以清除超出耳朵邊緣的 雜毛。 2 在外耳道輕輕內外移動刀尖,以清除多餘的毛髮。 精密修毛器...
- Page 113 繁體中文 注意: 請使用精密修毛器來清除剩餘毛髮,及修整鬍 鬚造型。 不適合用於全臉刮鬍。 1 輕輕將精密修毛器壓在皮膚上,然後沿著剛刮出的 鬍線,清除多餘的毛髮。 清潔 絕對不可使用鋼絲絨、磨蝕性的清潔劑或侵蝕性的液體 (例如汽油或丙酮) 清潔本產品。 切勿使用毛巾或紙巾擦乾鬢角刀的刀齒,否則可能會對 鬢角刀的刀齒造成損壞。 每次使用後: 在水龍頭下清洗 1 將產品關機並從電源插座拔除插頭。 2 取下產品上的任何梳具或修剪組件。 3 在水龍頭下以溫水清洗鬍渣室。 4 在水龍頭下以溫水清洗修剪組件和梳具。 5 仔細甩乾多餘的水份之後,讓所有零件完全風乾。 徹底清潔 1 將產品關機並從電源插座拔除插頭。 2 用乾布擦拭產品握把。 3 取下產品上的任何梳具或修剪組件。 4 使用隨附的清潔刷去除黏附在鬍渣室中的毛髮。 5 使用隨附的清潔刷去除黏附在修剪組件及/或梳具中 的毛髮。 6 在水龍頭下以溫水清潔修剪組件。 7 在水龍頭下以溫水清潔梳具。...
- Page 114 繁體中文 8 仔細甩乾多餘的水份之後,讓所有零件完全風乾。 清潔鼻毛修容刀 使用完畢後以及有大量毛髮或污垢黏附在鼻毛修容刀頭 上時,立即清潔鼻毛修容刀。 1 使用熱水清洗鼻毛修容刀頭。 2 開啟產品電源,再一次清洗鼻毛修容刀頭,以清除 任何殘留的毛髮。 然後再次將產品關機。 為了徹底清潔,將鼻毛修容刀頭浸入一盆溫水中數分 鐘,然後開啟產品電源,以清除頑強的毛髮/殘留物。 3 仔細甩乾多餘的水份之後,讓所有零件完全風乾。 清潔精密修毛器 1 握住精密修毛器的兩側溝槽,然後將頂部從底部拉 出。 2 以吹氣及/或輕敲的方式清除黏附在精密修毛器內的 毛髮。 請勿使用清潔刷來清除刀網中的毛髮。 3 在水龍頭下以溫水清潔精密修毛器的頂部。 4 仔細甩乾多餘的水份之後,讓所有零件完全風乾。 5 將精密修毛器的頂部重新安裝到底部上。 收納 將本產品存放在隨附的收納袋中。 注意: 請先確定本產品已完全乾燥,再收回收納袋 中。...
- Page 115 繁體中文 訂購配件 若要購買配件或備用零件,請造訪 www.shop.philips.com/service,或洽詢您的飛利浦經 銷商。 您也可以聯絡您所在國家/地區的飛利浦客戶服 務中心 (詳細聯絡資料請參閱全球保證書)。 回收 本產品使用壽命結束時請勿與一般家庭廢棄物一併 丟棄。請將該產品放置於政府指定的回收站, 此舉 能為環保盡一份心力。 本產品包含內建充電式電池,不得與一般家用廢棄 物一併丟棄。 強烈建議您將產品攜至政府指定的回 收站或 Philips 服務中心,由專業人員取出充電式電 池。 請按照您所在國家/地區的規定,分類與回收電子電 器產品及充電式電池。正確處理廢棄產品有助於避 免對環境和人類健康帶來負面影響。 取出充電式電池 棄置本產品前,才能取出充電式電池。 取出電池 前,請確認已從牆上插座拔出產品插頭,且電池 電力已完全耗盡。 使用工具打開產品或棄置充電式電池時,請採取 任何必要的安全預防措施。 1 檢查產品背面或正面是否有任何螺絲, 如有的話請 拆下。 2 使用螺絲起子拆除產品的背面和/或正面護板。 必要 時,也可拆下其他螺絲和/或零件,直到清楚看見印 刷電路板與充電式電池為止。 3 取出充電式電池。...
- Page 116 繁體中文 保固限制 由於刀組具有磨損性,因此不在全球保固範圍內。...
-
Page 117: 한국어
한국어 소개 필립스 제품을 구입해 주셔서 감사합니다! 필립스가 드리는 지원 혜택을 최대한 누리시려면 www.philips.com/welcome에서 제품을 등록하십시오. 구성품 명칭(그림 1) 1 풀 사이즈 트리머 2 전원 스위치 3 소형 플러그용 콘센트 4 프리시젼 트리머 5 프리시젼 면도기(MG5740, MG5735, MG5730 모델만 해당) 6 코털... - Page 118 한국어 주의 - 전원 공급 장치를 건조한 상태로 보관하십시오. 경고 - 배터리를 충전하려면 제품과 함께 제공된 분리형 전원 공급 장치(A00390)만 사용해야 합니다. - 전원 공급 장치에는 변압기가 내장되어 있습니다. 위험할 수 있으므로, 다른 플러그로 교체하기 위해 전원 공급 장치를 잘라내지 마십시오. - 8세...
- Page 119 - 제품을 세척할 때 압축 공기, 수세미, 연마성 세제나 휘발유, 아세톤과 같은 강력 세제를 사용하지 마십시오. EMF(전자기장) 이 Philips 제품은 EMF(전자기장) 노출과 관련된 모든 기준 및 규정을 준수합니다. 일반 - 이 제품은 안전하게 물 세척이 가능합니다. - 전원 공급 장치는 100 ~ 240V 범위의 전원에...
- Page 120 한국어 2 소형 플러그를 제품에 꽂은 다음 전원 공급 장치를 벽면 콘센트에 꽂으십시오. 3 충전 후에는 벽면 콘센트에서 전원 공급 장치를 뽑고, 소형 플러그를 제품에서 분리하십시오. 제품 사용 참고: 이 제품은 무선으로만 작동됩니다. 참고: 매 사용 후 제품의 전원을 끄고 제품을 세척하십시오.
- Page 121 한국어 빗 탈부착 1 커팅 부품에 보호대를 부착하려면 커팅 부품의 날 위에 보호대의 앞 부분을 밀어 넣습니다. 그런 다음 보호대 가운데를 손가락이나 손바닥을 이용하여 아래로 누릅니다('딸깍'소리가 남). 2 커팅 부품에서 빗을 분리하려면 제품에서 빗의 뒷부분을 조심스럽게 당긴 다음 커팅 부품에서 빗을...
- Page 122 한국어 2 윤곽을 정리하려면 커팅 부품을 피부에 수직으로 두고 살짝 누른 상태로 위 또는 아래로 커팅 부품을 움직이십시오. 수염 빗 턱수염과 콧수염을 고르게 다듬을 때에는 수염 빗을 풀 사이즈 트리머에 부착하십시오. 제품에는 5개의 수염 빗이 포함되어 있습니다. 수염 길이 설정은 빗에 표시됩니다.
- Page 123 한국어 - 민감한 부위를 다듬을 때는 항상 바디용 빗을 사용하십시오. - 모든 체모가 같은 방향으로 자라지는 않으므로 체모가 자라는 방향에 따라 여러 방향(위, 아래 또는 대각선)으로 움직여 보십시오. 연습을 통해 최적의 트리밍 결과를 얻을 수 있습니다. - 항상 제품을 부드럽고 자연스럽게 움직이되, 빗의 표면과...
- Page 124 한국어 1 귀 주변의 모발선 윤곽을 잡으려면 귀 위로 모발 끝을 빗어 줍니다. 2 귀 주변의 윤곽을 잡을 때에는 커팅 날의 한 모서리만 모발 끝에 닿도록 제품을 기울이십시오. 3 목덜미나 구레나룻의 윤곽을 잡으려면 제품을 돌려 아래 방향으로 움직이십시오. 4 모발이 난 자리를 따라 제품을 천천히 부드럽게 움직이십시오.
- Page 125 한국어 1 프리시젼 트리머 헤드를 피부에 수직으로 두고 가볍게 누른 상태로 위 또는 아래로 트리머 헤드를 움직이십시오. 코털 트리머 코털 트리머를 사용하여 코털 및 귀털을 다듬습니다. - 콧속 상태가 깨끗한지 확인하십시오. 바깥쪽 귀를 확인하여 청결한 상태인지 확인하십시오. - 트리머 끝을 콧구멍 속으로 3/16in(5mm) 이상 깊게...
- Page 126 한국어 1 프리시젼 면도기를 피부에 살짝 누르고 수염 가장자리를 따라 면도하여 원하지 않는 털을 제거하십시오. 세척 제품을 세척할 때 수세미, 연마성 세제나 가솔린 또는 아세톤과 같은 강력 세제를 사용하지 마십시오. 절대로 수건이나 휴지로 트리머 날의 물기를 닦아내지 마십시오. 트리머 날이 손상될 수 있습니다. 매...
- Page 127 한국어 7 빗을 따뜻한 수돗물로 세척하십시오. 8 물기가 남아 있지 않도록 조심스럽게 흔들어 털고 모든 부분이 완전히 건조될 때까지 두십시오. 코털 트리머 세척 사용 후 또는 코털 트리머 헤드에 털이 많이 쌓이거나, 더러울 경우에는 즉시 코털 트리머를 세척하십시오. 1 코털 트리머 헤드를 뜨거운 물로 헹구십시오. 2 제품의...
- Page 128 - 제품을 제공된 파우치에 넣어 보관하십시오. 참고: 파우치에 보관하기 전에 제품을 충분히 말리십시오. 액세서리 주문 액세서리 또는 예비 부품을 구입하려면 www.shop.philips.com/service를 방문하거나 필립스 대리점에 문의하십시오. 또한 해당 국가의 필립스 고객 상담실에 문의하셔도 됩니다(연락처 정보는 국제 보증서 참조). 재활용 - 수명이 다 된 제품은 일반 가정용 쓰레기와 함께...
- Page 129 충전식 배터리가 장착된 인쇄 회로 기판이 보일 때까지 추가 나사 및/또는 부품을 분리하십시오. 3 충전식 배터리를 분리하십시오. 품질 보증 및 지원 보다 자세한 정보나 지원이 필요한 경우에는 필립스 웹사이트(www.philips.com/support)를 방문하거나 국제 보증 리플릿을 참조하십시오. 보증 제한 커팅 유닛은 소모품이므로 보증에 해당되지 않습니다. ...
- Page 130 ﺍﻟﻌﺮﺑﻴﺔ ﻣﻘﺪﻣﺔ ﻭﻣﺮﺣﺒﹱﺎ ﺑﻚ ﺇﻟﻴﻬﺎ! ﻟﺘﺴﺘﻔﻴﺪ ﺑﺸﻜﻞ ﻛﺎﻣﻞPhilips ﺗﻬﺎﻧﻴﻨﺎ ﻋﻠﻰ ﺷﺮﺍﺋﻚ ﻣﻦ ، ﺳﺠﹽﻞ ﻣﻨﺘﺠﻚ ﻋﻠﻰPhilips ﻣﻦ ﺍﻟﺪﻋﻢ ﺍﻟﺬﻱ ﺗﻘﺪﻣﻪ .www.philips.com/welcome (1 ﻭﺻﻒ ﻋﺎﻡ )ﺍﻟﺸﻜﻞ ﻣﺎﻛﻴﻨﺔ ﺗﺸﺬﻳﺐ ﺍﻟﺸﻌﺮ ﺍﻟﻜﺎﻣﻞ ﺷﺮﻳﺤﺔ ﺍﻟﺘﺸﻐﻴﻞ/ﺇﻳﻘﺎﻑ ﺍﻟﺘﺸﻐﻴﻞ ﻣﻘﺒﺲ ﻟﻤﺄﺧﺬ ﺻﻐﻴﺮ ﻭﺣﺪﺓ ﺍﻟﺘﺸﺬﻳﺐ ﺍﻟﺪﻗﻴﻖ ( ﻓﻘﻂMG5740, MG5735, MG5730) ﻣﺎﻛﻴﻨﺔ ﺍﻟﺤﻼﻗﺔ ﺍﻟﺪﻗﻴﻘﺔ...
- Page 131 ﺍﻟﻌﺮﺑﻴﺔ ﺧﻄﺮ .ﺣﺎﻓﻆ ﻋﻠﻰ ﺇﺑﻘﺎء ﻭﺣﺪﺓ ﺍﻟﺘﺰﻭﻳﺪ ﺑﺎﻟﻄﺎﻗﺔ ﺟﺎﻓﺔ ﺗﺤﺬﻳﺮ ﻟﺸﺤﻦ ﺍﻟﺒﻄﺎﺭﻳﺔ، ﻻ ﺗﺴﺘﺨﺪﻡ ﺇﻻ ﻭﺣﺪﺓ ﺍﻟﺘﺰﻭﻳﺪ ﺑﺎﻟﻄﺎﻗﺔ ﺍﻟﻘﺎﺑﻠﺔ ﻟﻠﻔﺼﻞ .( ﺍﻟﻤﻠﺤﻘﺔ ﻣﻊ ﺍﻟﺠﻬﺎﺯA00390) ﺗﺤﺘﻮﻱ ﻭﺣﺪﺓ ﺍﻟﺘﺰﻭﻳﺪ ﺑﺎﻟﻄﺎﻗﺔ ﻋﻠﻰ ﻣﺤﻮﻝ. ﻻ ﺗﻘﻄﻊ ﻭﺣﺪﺓ ﺍﻟﺘﺰﻭﻳﺪ .ﺑﺎﻟﻄﺎﻗﺔ ﻻﺳﺘﺒﺪﺍﻟﻬﺎ ﺑﻘﺎﺑﺲ ﺁﺧﺮ ﺣﻴﺚ ﻳﺘﺴﺒﺐ ﺫﻟﻚ ﻓﻲ ﺣﺎﻟﺔ ﺧﻄﻴﺮﺓ ﻳﻤﻜﻦ...
- Page 132 ﺍﻟﻤﻨﻈﻔﺔ ﺍﻟﻜﺎﺷﻄﺔ ﺃﻭ ﺍﻟﺴﻮﺍﺋﻞ ﺍﻟﺸﺪﻳﺪﺓ ﻣﺜﻞ ﺍﻟﺒﺘﺮﻭﻝ ﺃﻭ ﺍﻷﺳﻴﺘﻮﻥ .ﻟﺘﻨﻈﻴﻒ ﺍﻟﺠﻬﺎﺯ (EMF) ﺍﻟﻤﺠﺎﻻﺕ ﺍﻟﻜﻬﺮﻭﻣﻐﻨﺎﻃﻴﺴﻴﺔ ﻳﺘﻮﺍﻓﻖ ﻣﻊ ﺟﻤﻴﻊ ﺍﻟﻤﻌﺎﻳﻴﺮ ﻭﺍﻟﻠﻮﺍﺋﺢPhilips ﻫﺬﺍ ﺍﻟﺠﻬﺎﺯ ﺍﻟﺬﻱ ﺗﻘﺪﻣﻪ .ﺍﻟﻤﻌﻤﻮﻝ ﺑﻬﺎ ﻓﻴﻤﺎ ﻳﺘﻌﻠﻖ ﺑﺎﻟﺘﻌﺮﺽ ﻟﻠﻤﺠﺎﻻﺕ ﺍﻟﻜﻬﺮﻭﻣﻐﻨﺎﻃﻴﺴﻴﺔ ﺃﻣﻮر ﻋﺎﻣﺔ .ﻳﻤﻜﻦ ﺗﻨﻈﻴﻒ ﻫﺬﻩ ﺍﻵﻟﺔ ﺑﺄﻣﺎﻥ ﺃﺳﻔﻞ ﺍﻟﺼﻨﺒﻮﺭ...
- Page 133 ﺍﻟﻌﺮﺑﻴﺔ ﺍﺳﺘﺨﺪﺍﻡ ﺍﻟﺠﻬﺎﺯ .ﻣﻼﺣﻈﺔ: ﻻ ﻳﻤﻜﻦ ﺍﺳﺘﺨﺪﺍﻡ ﻫﺬﺍ ﺍﻟﺠﻬﺎﺯ ﺇﻻ ﺑﺪﻭﻥ ﺳﻠﻚ .ﻣﻼﺣﻈﺔ: ﻗﻢ ﺑﺈﻳﻘﺎﻑ ﺗﺸﻐﻴﻞ ﺍﻟﺠﻬﺎﺯ ﻭﺗﻨﻈﻴﻔﻪ ﺑﻌﺪ ﻛﻞ ﺍﺳﺘﺨﺪﺍﻡ ﻓﺼﻞ ﻋﻨﺎﺻﺮ ﺍﻟﻘﺺ ﻭﺗﺮﻛﻴﺒﻬﺎ ﻟﻔﺼﻞ ﻋﻨﺼﺮ ﺍﻟﻘﺺ، ﺍﺩﻓﻊ ﻋﻨﺼﺮ ﺍﻟﻘﺺ ﺻﻌﻮ ﺩ ﹰﺍ ﻋﻜﺲ ﺍﺗﺠﺎﻩ ﺍﻷﺳﻨﺎﻥ ﺛﻢ .ﻗﻢ ﺑﺈﺧﺮﺍﺟﻪ ﻣﻦ ﺍﻟﻴﺪ ﻟﺘﺮﻛﻴﺐ...
- Page 134 ﺍﻟﻌﺮﺑﻴﺔ ﻟﻔﺼﻞ ﺃﻱ ﻧﻮﻉ ﻣﻦ ﺃﻧﻮﺍﻉ ﺍﻷﻣﺸﺎﻁ ﻣﻦ ﻋﻨﺼﺮ ﺍﻟﻘﺺ، ﺍﺳﺤﺐ ﺍﻟﺠﺰء .ﺍﻟﺨﻠﻔﻲ ﻣﻦ ﺍﻟﺠﻬﺎﺯ ﺑﻌﻨﺎﻳﺔ ﺛﻢ ﺣ ﺮ ﹼﻛﻪ ﻗﺒﺎﻟﺔ ﻋﻨﺼﺮ ﺍﻟﻘﺺ ﻣﻼﺣﻈﺔ: ﻋﻨﺪ ﺍﻟﺘﺸﺬﻳﺐ ﻟﻠﻤﺮﺓ ﺍﻷﻭﻟﻰ، ﺍﺑﺪﺃ ﺑﺎﺳﺘﺨﺪﺍﻡ ﺍﻟﻤﺸﻂ ﺫﻭ ﺍﻟﺤﺪ .ﺍﻷﻗﺼﻰ ﻟﻄﻮﻝ ﺍﻟﺘﺸﺬﻳﺐ ﺣﺘﻰ ﺗﻌﺘﺎﺩ ﻋﻠﻰ ﺍﺳﺘﺨﺪﺍﻡ ﺍﻟﺠﻬﺎﺯ ﺗﺸﻐﻴﻞ...
- Page 135 ﺍﻟﻌﺮﺑﻴﺔ 1 ﻣﻢ .46/3 ﺑﻮﺻﺔ ﻣﺸﻂ ﺍﻟﻠﺤﻴﺔ ﺍﻟﺨﻔﻴﻔﺔ 2 ﻣﻢ .46/5 ﺑﻮﺻﺔ ﻣﺸﻂ ﺍﻟﻠﺤﻴﺔ ﺍﻟﺨﻔﻴﻔﺔ 3 ﻣﻢ-7 ﻣﻢ .8/1 ﺑﻮﺻﺔ.- 23/9 ﺑﻮﺻﺔ ﻣﺸﻂ ﻟﺤﻴﺔ ﻗﺎﺑﻞ ﻟﻠﺘﻌﺪﻳﻞ .ﺍﺭﻓﻖ ﺍﻟﻤﺸﻂ ﺇﻟﻰ ﻭﺣﺪﺓ ﺗﺸﺬﻳﺐ ﺍﻟﺸﻌﺮ ﺑﺎﻟﺤﺠﻢ ﺍﻟﻜﺎﻣﻞ ﻣﺸﻂ ﻗﺎﺑﻞ ﻟﻠﺘﻌﺪﻳﻞ: ﺍﺩﻓﻊ ﻣﺤﺪﺩ ﺍﻟﻄﻮﻝ ﺇﻟﻰ ﺍﻟﻴﻤﻴﻦ ﺃﻭ ﺍﻟﻴﺴﺎﺭ ﻟﺘﺤﺪﻳﺪ .ﺇﻋﺪﺍﺩ...
- Page 136 ﺍﻟﻌﺮﺑﻴﺔ ﺃﻣﺸﺎﻁ ﺍﻟﺠﺴﻢ ﺍﺭﻓﻖ ﻣﺸﻂ ﺍﻟﺠﺴﻢ ﺇﻟﻰ ﻭﺣﺪﺓ ﺗﺸﺬﻳﺐ ﺍﻟﺸﻌﺮ ﺑﺎﻟﺤﺠﻢ ﺍﻟﻜﺎﻣﻞ ﻟﺘﺸﺬﻳﺐ ﺍﻟﺸﻌﺮ ﺍﻟﻤﻮﺟﻮﺩ ﺗﺤﺖ ﺧﻂ ﺍﻟﻌﻨﻖ. ﻳﺄﺗﻲ ﺍﻟﺠﻬﺎﺯ ﻣﺰﻭ ﺩ ﹰﺍ ﺑﻤﺸﻄﻴﻦ ﻟﻠﺠﺴﻢ. ﻳﺸﺎﺭ ﺇﻟﻰ ﺇﻋﺪﺍﺩﺍﺕ ﻃﻮﻝ ﺍﻟﺸﻌﺮ ﻋﻠﻰ ﺍﻷﻣﺸﺎﻁ. ﺗﺘﻮﺍﻓﻖ ﺍﻹﻋﺪﺍﺩﺍﺕ ﻣﻊ ﻃﻮﻝ ﺍﻟﺸﻌﺮ .ﺍﻟﻤﺘﺒﻘﻲ ﺑﻌﺪ ﺍﻟﺘﺸﺬﻳﺐ ﻣﻢ...
- Page 137 ﺍﻟﻌﺮﺑﻴﺔ ﻣﺬﻛﻮﺭﺓ ﻋﻠﻲ ﺍﻟﻤﺸﻂ. ﺗﺘﻮﺍﻓﻖ ﺇﻋﺪﺍﺩﺍﺕ ﺍﻟﻀﺒﻂ ﻣﻊ ﺃﻃﻮﺍﻝ ﺍﻟﺸﻌﺮ ﺍﻟﻤﺘﺒﻘﻲ ﺑﻌﺪ .ﺍﻟﺘﺸﺬﻳﺐ ﻣﻢ ﺑﻮﺻﺔ ﻣﺸﻂ 9 ﻣﻢ .8/3 ﺑﻮﺻﺔ ﻣﺸﻂ ﺍﻟﺸﻌﺮ 21 ﻣﻢ .23/51 ﺑﻮﺻﺔ ﻣﺸﻂ ﺍﻟﺸﻌﺮ 61 ﻣﻢ .23/12 ﺑﻮﺻﺔ ﻣﺸﻂ ﺍﻟﺸﻌﺮ .ﻗﻢ ﺑﺘﺮﻛﻴﺐ ﻣﺸﻂ ﺑﻤﺎﻛﻴﻨﺔ ﺗﺸﺬﻳﺐ ﺍﻟﺸﻌﺮ ﺍﻟﻜﺎﻣﻞ ﻗﻢ...
- Page 138 ﺍﻟﻌﺮﺑﻴﺔ ﺗﺸﺬﻳﺐ ﺷﻌﺮ ﺍﻷﻧﻒ ﺣﺮﻙ ﺍﻟﻄﺮﻑ ﺑﺮﻓﻖ ﺩﺍﺧﻞ ﺍﻷﻧﻒ ﻭﺧﺎﺭﺟﻬﺎ ﻣﻊ ﺗﺪﻭﻳﺮ ﺍﻟﺠﻬﺎﺯ ﻹﺯﺍﻟﺔ ﺍﻟﺸﻌﺮ .ﻏﻴﺮ ﺍﻟﻤﺮﻏﻮﺏ ﻓﻴﻪ ﺗﺸﺬﻳﺐ ﺷﻌﺮ ﺍﻷﺫﻥ .ﺣﺮﻙ ﻃﺮﻑ ﺍﻷﺫﻥ ﺑﺒﻂء ﻹﺯﺍﻟﺔ ﺍﻟﺸﻌﺮ ﺍﻟﻤﻠﺘﺼﻖ ﺧﺎﺭﺝ ﺣﺎﻓﺔ ﺍﻷﺫﻥ ﺣﺮﻙ ﺍﻟﻄﺮﻑ ﺑﻠﻄﻒ ﺩﺍﺧﻞ ﻭﺧﺎﺭﺝ ﻗﻨﺎﺓ ﺍﻷﺫﻥ ﺍﻟﺨﺎﺭﺟﻴﺔ ﻹﺯﺍﻟﺔ ﺍﻟﺸﻌﺮ ﻏﻴﺮ .ﺍﻟﻤﺮﻏﻮﺏ...
- Page 139 ﺍﻟﻌﺮﺑﻴﺔ .ﻗﻢ ﺑﺈﺯﺍﻟﺔ ﺃﻱ ﻣﺸﻂ ﺃﻭ ﻭﺣﺪﺓ ﻣﻦ ﻭﺣﺪﺍﺕ ﺍﻟﻘﺺ ﻣﻦ ﺍﻟﺠﻬﺎﺯ .ﺍﺷﻄﻒ ﺗﺠﻮﻳﻒ ﺍﻟﺸﻌﺮ ﺗﺤﺖ ﺻﻨﺒﻮﺭ ﻣﺎء ﺩﺍﻓﺊ .ﻧﻈﻒ ﻋﻨﺼﺮ ﺍﻟﻘﺺ ﻭﺍﻟﻤﺸﻂ ﺗﺤﺖ ﺻﻨﺒﻮﺭ ﻣﺎء ﺩﺍﻓﺊ ﺍﻧﻔﺾ ﺍﻟﻤﻴﺎﻩ ﺍﻟﺰﺍﺋﺪﺓ ﺑﻌﻨﺎﻳﺔ ﺛﻢ ﺍﺗﺮﻙ ﺟﻤﻴﻊ ﺍﻷﺟﺰﺍء ﻓﻲ ﺍﻟﻬﻮﺍء ﺣﺘﻰ .ﺗﺠﻒ ﺗﻤﺎﻣﹱﺎ ﺍﻟﺘﻨﻈﻴﻒ...
- Page 140 .ﻣﻼﺣﻈﺔ: ﺍﺣﺮﺹ ﻋﻠﻰ ﺗﺠﻔﻴﻒ ﺍﻟﺠﻬﺎﺯ ﻗﺒﻞ ﺗﺨﺰﻳﻨﻪ ﻓﻲ ﺍﻟﺤﻘﻴﺒﺔ ﻃﻠﺐ ﺍﻟﻤﻠﺤﻘﺎﺕ ﻟﺸﺮﺍء ﻣﻠﺤﻘﺎﺕ ﺃﻭ ﻗﻄﻊ ﻏﻴﺎﺭ، ﻳﺮﺟﻰ ﺍﻟﺘﻔﻀﻞ ﺑﺰﻳﺎﺭﺓ ﺃﻭ ﺍﻟﺬﻫﺎﺏ ﺇﻟﻰ ﻭﻛﻴﻞ ﺷﺮﻛﺔwww.shop.philips.com/service Philips . ﻳﻤﻜﻦ ﻛﺬﻟﻚ ﺍﻻﺗﺼﺎﻝ ﺑﻤﺮﻛﺰ ﺧﺪﻣﺔ ﺍﻟﻌﻤﻼء ﻓﻲ ﺷﺮﻛﺔPhilips ﻓﻲ ﺩﻭﻟﺘﻚ )ﻳﺮﺟﻰ ﺍﻟﺮﺟﻮﻉ ﺇﻟﻰ ﻧﺸﺮﺓ ﺍﻟﻀﻤﺎﻥ ﺣﻮﻝ ﺍﻟﻌﺎﻟﻢ ﻟﻠﺘﻌﺮﻑ ﻋﻠﻰ .(ﺗﻔﺎﺻﻴﻞ ﺍﻻﺗﺼﺎﻝ...
- Page 141 ﻟﻮﺣﺔ ﺍﻟﺪﻭﺍﺋﺮ ﺍﻟﻜﻬﺮﺑﻴﺔ ﺍﻟﻤﻄﺒﻮﻋﺔ ﺍﻟﻤﺰﻭﺩﺓ ﺑﺎﻟﺒﻄﺎﺭﻳﺔ ﺍﻟﻘﺎﺑﻠﺔ ﻹﻋﺎﺩﺓ .ﺍﻟﺸﺤﻦ .ﻗﻢ ﺑﺈﺯﺍﻟﺔ ﺍﻟﺒﻄﺎﺭﻳﺔ ﺍﻟﻘﺎﺑﻠﺔ ﻹﻋﺎﺩﺓ ﺍﻟﺸﺤﻦ ﺍﻟﻀﻤﺎﻥ ﻭﺍﻟﺪﻋﻢ ﺇﺫﺍ ﻛﻨﺖ ﺑﺤﺎﺟﺔ ﺇﻟﻰ ﻣﻌﻠﻮﻣﺎﺕ ﺃﻭ ﺩﻋﻢ، ﻳﹹﺮﺟﻲ ﺯﻳﺎﺭﺓ .ﺃﻭ ﻗﺮﺍءﺓ ﻛﺘﻴﺐ ﺍﻟﻀﻤﺎﻥ ﺍﻟﻌﺎﻟﻤﻲwww.philips.com/support ﻗﻴﻮﺩ ﺍﻟﻀﻤﺎﻥ .ﻻ ﺗﻐﻄﻲ ﺷﺮﻭﻁ ﺍﻟﻀﻤﺎﻥ ﺍﻟﺪﻭﻟﻲ ﻭﺣﺪﺍﺕ ﺍﻟﻘﺺ ﻷﻧﻬﺎ ﻣﻌﺮﺿﺔ ﻟﻠﺘﺂﻛﻞ...
- Page 142 ﺍﻟﻌﺮﺑﻴﺔ ...
- Page 143 ﻓﺎرﺳﯽ ﻣﻘﺪﻣﻪ ﺑﻪ ﺷﻤﺎ ﺑﺮﺍی ﺧﺮﯾﺪ ﺍﯾﻦ ﻣﺤﺼﻮﻝ ﺗﺒﺮﯾﮏ ﻣﯽ ﮔﻮﯾﯿﻢ ﻭ ﺑﻪ ﺩﻧﯿﺎی ﻣﺤﺼﻮﻻﺕ ﺧﻮﺵ ﺁﻣﺪﯾﺪ! ﺑﺮﺍی ﺍﺳﺘﻔﺎﺩﻩ ﺑﻬﯿﻨﻪ ﺍﺯ ﺧﺪﻣﺎﺕ ﭘﺲ ﺍﺯ ﻓﺮﻭﺵPhilips www.philips.com/welcome ، ﺩﺳﺘﮕﺎﻩ ﺧﻮﺩ ﺭﺍ ﺩﺭ ﺳﺎﯾﺖPhilips .ﺛﺒﺖ ﻧﺎﻡ ﮐﻨﯿﺪ (۱ ﺗﻮﺿﯿﺤﺎﺕ ﮐﻠﯽ )ﺷﮑﻞ...
- Page 144 ﻓﺎرﺳﯽ ﺍﻁﻼﻋﺎﺕ ﺍﻣﻨﯿﺘﯽ ﻣﻬﻢ ﺍﯾﻦ ﺍﻁﻼﻋﺎﺕ ﻣﻬﻢ ﺭﺍ ﺑﻪ ﺩﻗﺖ ﻗﺒﻞ ﺍﺯ ﺍﺳﺘﻔﺎﺩﻩ ﺍﺯ ﺩﺳﺘﮕﺎﻩ ﻭ ﻭﺳﺎﯾﻞ ﺟﺎﻧﺒﯽ ﺑﺨﻮﺍﻧﯿﺪ ﻭ ﺁﻥ ﺭﺍ ﺑﺮﺍی ﺍﺳﺘﻔﺎﺩﻩ ﻫﺎی ﺑﻌﺪی ﻧﺰﺩ ﺧﻮﺩﺗﺎﻥ ﻧﮕﻬﺪﺍﺭﯾﺪ. ﻭﺳﺎﯾﻞ ﺟﺎﻧﺒﯽ ﺍﺭﺍﺋﻪ ﺷﺪﻩ ﻣﻤﮑﻦ ﺍﺳﺖ ﺩﺭ ﻣﺤﺼﻮﻻﺕ ﻣﺨﺘﻠﻒ ﺑﺎ ﯾﮑﺪﯾﮕﺮ ﻣﺘﻔﺎﻭﺕ .ﺑﺎﺷﻨﺪ...
- Page 145 ﻣﺎﯾﻌﺎﺕ ﺳﺎﯾﻨﺪﻩ ﻣﺎﻧﻨﺪ ﺑﻨﺰﯾﻦ ﯾﺎ ﺍﺳﺘﻮﻥ ﺑﺮﺍی ﺗﻤﯿﺰ ﮐﺮﺩﻥ ﺍﯾﻦ ﺩﺳﺘﮕﺎﻩ .ﺍﺳﺘﻔﺎﺩﻩ ﻧﮑﻨﯿﺪ (EMF) ﻣﯿﺪﺍﻥ ﻫﺎﯼ ﺍﻟﮑﺘﺮﻭﻣﻐﻨﺎﻃﯿﺴﯽ ﺍﺯ ﻫﻤﻪ ﺍﺳﺘﺎﻧﺪﺍﺭﺩﻫﺎی ﻗﺎﺑﻞ ﺍﺟﺮﺍ ﻭ ﻗﻮﺍﻧﯿﻦ ﻣﺮﺑﻮﻁ ﺑﻪPhilips ﺍﯾﻦ ﺩﺳﺘﮕﺎﻩ .ﻗﺮﺍﺭﮔﯿﺮی ﺩﺭ ﻣﻌﺮﺽ ﻣﯿﺪﺍﻥ ﻫﺎی ﻣﻐﻨﺎﻃﯿﺴﯽ ﺗﺒﻌﯿﺖ ﻣﯽ ﮐﻨﺪ ﻣﺸﺨﺼﺎﺕ ﮐﻠﯽ...
- Page 146 ﻓﺎرﺳﯽ .ﻓﯿﺶ ﮐﻮﭼﮏ ﺭﺍ ﺑﻪ ﺩﺳﺘﮕﺎﻩ ﻭﺻﻞ ﮐﻨﯿﺪ ﻭ ﺩﻭﺷﺎﺧﻪ ﺭﺍ ﺑﻪ ﭘﺮﯾﺰ ﺑﺰﻧﯿﺪ ﺑﻌﺪ ﺍﺯ ﺷﺎﺭﮊ ﮐﺮﺩﻥ، ﺍﺗﺼﺎﻝ ﻣﻨﺒﻊ ﺑﺮﻕ ﺭﺍ ﺍﺯ ﭘﺮﯾﺰ ﺟﺪﺍ ﮐﻨﯿﺪ ﻭ ﺩﻭﺷﺎﺧﻪ .ﮐﻮﭼﮏ ﺭﺍ ﻧﯿﺰ ﺍﺯ ﺩﺳﺘﮕﺎﻩ ﺟﺪﺍ ﮐﻨﯿﺪ ﺍﺳﺘﻔﺎﺩﻩ ﺍﺯ ﺩﺳﺘﮕﺎﻩ .ﺗﻮﺟﻪ: ﺍﯾﻦ ﺩﺳﺘﮕﺎﻩ ﻓﻘﻂ ﺑﺪﻭﻥ ﺳﯿﻢ ﻗﺎﺑﻞ ﺍﺳﺘﻔﺎﺩﻩ ﺍﺳﺖ .ﺗﻮﺟﻪ: ﭘﺲ...
- Page 147 ﻓﺎرﺳﯽ ﻭﺻﻞ ﮐﺮﺩﻥ ﻭ ﺟﺪﺍ ﮐﺮﺩﻥ ﺷﺎﻧﻪﻫﺎ ﺑﺮﺍی ﻭﺻﻞ ﮐﺮﺩﻥ ﻫﺮ ﻧﻮﻉ ﻣﺤﺎﻓﻆ ﺑﻪ ﻭﺍﺣﺪ ﺳﺮ ﻣﺨﺼﻮﺹ ﺍﺹﻼﺡ، ﺁﻥ .ﺭﺍ ﺍﺯ ﻗﺴﻤﺖ ﺟﻠﻮ ﺑﺮ ﺭﻭی ﺩﻧﺪﺍﻧ ﻪ ﻫﺎی ﺳﺮ ﻣﺨﺼﻮﺹ ﺍﺹﻼﺡ ﺳﻮﺍﺭ ﮐﻨﯿﺪ ﺳﭙﺲ ﻗﺴﻤﺖ ﻣﯿﺎﻧﯽ ﻣﺤﺎﻓﻆ ﺭﺍ ﺑﺎ ﺍﻧﮕﺸﺘﺎﻥ ﯾﺎ ﮐﻒ ﺩﺳﺖ ﺧﻮﺩ ﺑﻪ ﭘﺎﯾﯿﻦ .(ﻓﺸﺎﺭ...
- Page 148 ﻓﺎرﺳﯽ ﺑﺮﺍی ﺍﻧﺪﺍﺧﺘﻦ ﺧﻂ، ﺳﺮ ﻣﺨﺼﻮﺹ ﺍﺹﻼﺡ ﺭﺍ ﺑﻪ ﺻﻮﺭﺕ ﻋﻤﻮﺩی ﺭﻭی .ﭘﻮﺳﺖ ﺑﮕﺬﺍﺭﯾﺪ ﻭ ﺑﺎ ﻓﺸﺎﺭ ﻡﻼﯾﻢ ﺑﻪ ﺑﺎﻻ ﯾﺎ ﭘﺎﯾﯿﻦ ﺑﮑﺸﯿﺪ ﺷﺎﻧﻪﻫﺎﯼ ﻣﺨﺼﻮص رﯾﺶ ﺑﺮﺍی ﭘﯿﺮﺍﯾﺶ ﯾﮑﻨﻮﺍﺧﺖ ﻣﻮﻫﺎی ﺭﯾﺶ ﻭ ﺳﺒﯿﻞ، ﯾﮏ ﺷﺎﻧﻪ ﻣﺨﺼﻮﺹ ﻣﻮ ﺑﻪ ﺳﺮ ﻧﻤﺮﻩ ﺻﻔﺮ ﭘﯿﺮﺍﯾﺶ ﻣﻮ ﻭﺻﻞ ﮐﻨﯿﺪ. ﺑﻪ ﻫﻤﺮﺍﻩ ﺍﯾﻦ ﺩﺳﺘﮕﺎﻩ 5 ﺷﺎﻧﻪ ﺍﺭﺍﺋﻪ ،ﻣ...
- Page 149 ﻓﺎرﺳﯽ ﺍﻃﻤﯿﻨﺎﻥ ﺣﺎﺻﻞ ﻧﻤﺎﯾﯿﺪ ﻣﻮﻫﺎی ﻣﻮﺭﺩﻧﻈﺮ ﺗﻤﯿﺰ ﻭ ﺧﺸﮏ ﻫﺴﺘﻨﺪ ﺯﯾﺮﺍ .ﻣﻮﻫﺎی ﺧﯿﺲ ﺑﻪ ﺑﺪﻥ ﻣﯽﭼﺴﺒﻨﺪ ﻫﻨﮕﺎﻡ ﺍﺹﻼﺡ ﻗﺴﻤﺖﻫﺎی ﺣﺴﺎﺱ، ﻫﻤﯿﺸﻪ ﺍﺯ ﺷﺎﻧﻪ ﻣﺨﺼﻮﺹ .ﺍﺹﻼﺡ ﺑﺪﻥ ﺍﺳﺘﻔﺎﺩﻩ ﮐﻨﯿﺪ ﺍﺯ ﺁﻧﺠﺎ ﮐﻪ ﺟﻬﺖ ﺭﺷﺪ ﻣﻮﻫﺎی ﻣﺨﺘﻠﻒ ﯾﮑﺴﺎﻥ ﻧﯿﺴﺖ، ﻻﺯﻡ ﺍﺳﺖ ﭘﯿﺮﺍﯾﺶ ﺭﺍ ﺩﺭ ﺟﻬ ﺖ ﻫﺎی ﻣﺨﺘﻠﻒ ﺍﻧﺠﺎﻡ ﺩﻫﯿﺪ )ﺑﻪ ﻃﺮﻑ ﺑﺎﻻ، ﭘﺎﯾﯿﻦ ﯾﺎ ﺍﺯ ﯾﮏ...
- Page 150 ﻓﺎرﺳﯽ ﺳﺮﻫﺎﯼ ﻣﺨﺼﻮص ﭘﯿﺮﺍﯾﺶ ﺳﺮ ﺳﺮ ﻣﺨﺼﻮص ﭘﯿﺮﺍﯾﺶ ﻧﻤﺮﻩ ﺻﻔﺮ ﺑﺮﺍی ﮐﻮﺗﺎﻩ ﮐﺮﺩﻥ ﻣﻮﻫﺎی ﺳﺮ ﺗﺎ ﮐﻤﺘﺮﯾﻦ ﺍﻧﺪﺍﺯﻩ ﻣﻤﮑﻦ )ﺍﻧﺪﺍﺯﻩ 23/1 ﺍﯾﻨﭻ ﯾﺎ 5.0 ﻣﯿﻠﯽﻣﺘﺮ( ﯾﺎ ﺧﻂ ﺍﻧﺪﺍﺧﺘﻦ ﻣﻮﻫﺎی ﮔﺮﺩﻥ ﻭ ﺧﻂ ﺭﯾﺶ ﺍﺯ ﺳﺮ ﻧﻤﺮﻩ ﺻﻔﺮ .ﭘﯿﺮﺍﯾﺶ ﻣﻮ ﺍﺳﺘﻔﺎﺩﻩ ﮐﻨﯿﺪ ﺑﺮﺍی...
- Page 151 ﻓﺎرﺳﯽ ﻫﻤﯿﺸﻪ ﺳﺮ ﻣﺨﺼﻮﺹ ﭘﯿﺮﺍﯾﺶ ﺭﺍ ﺥﻼﻑ ﺟﻬﺖ ﺭﺷﺪ ﻣﻮﻫﺎ ﺣﺮﮐﺖ .ﺩﻫﯿﺪ. ﺑﻪ ﺁﺭﺍﻣﯽ ﻓﺸﺎﺭ ﺩﻫﯿﺪ ﭼﻨﺪﯾﻦ ﺑﺎﺭ ﺿﻤﻦ ﻟﻤﺲ ﮐﺎﻣﻞ ﺗﯿﻐﻪ ﺑﺎ ﺳﻄﺢ ﻣﻮﻫﺎ، ﺩﺳﺘﮕﺎﻩ ﺭﺍ ﺑﺮ ﺭﻭی ﺗﻤﺎﻣﯽ ﻣﻮﻫﺎ ﺑﮑﺸﯿﺪ ﺗﺎ ﻣﻄﻤﺌﻦ ﺷﻮﯾﺪ ﻫﻤﻪ ﻣﻮﻫﺎی ﻣﻮﺭﺩﻧﻈﺮ .ﭘﯿﺮﺍﯾﺶ ﻣﯽﺷﻮﻧﺪ ﺳﺮﻫﺎﯼ...
- Page 152 ﻓﺎرﺳﯽ ﺍصﻼﺡ ﮐﺮﺩﻥ ﻣﻮﻫﺎﯼ ﮔﻮﺵ ﺍﻧﺘﻬﺎی ﺳﺮی ﻣﺨﺼﻮﺹ ﺭﺍ ﺑﻪ ﺁﺭﺍﻣﯽ ﺭﻭی ﻗﺴﻤﺖﻫﺎی ﻣﺨﺘﻠﻒ ﮔﻮﺵ .ﺣﺮﮐﺖ ﺩﻫﯿﺪ ﺗﺎ ﻣﻮﻫﺎﯾﯽ ﮐﻪ ﺍﺯ ﻻﻟﻪ ﮔﻮﺵ ﺑﯿﺮﻭﻥ ﺯﺩﻩﺍﻧﺪ ﺍﺹﻼﺡ ﺷﻮﻧﺪ ﺍﻧﺘﻬﺎی ﺳﺮی ﻣﺨﺼﻮﺹ ﺭﺍ ﺑﻪ ﺁﺭﺍﻣﯽ ﺩﺭ ﻣﺤﻔﻈﻪ ﺧﺎﺭﺟﯽ ﮔﻮﺵ ﻓﺮﻭ ﺑﺮﺩﻩ .ﻭ ﺑﯿﺮﻭﻥ ﺑﯿﺎﻭﺭﯾﺪ ﺗﺎ ﻣﻮﻫﺎی ﺯﺍﺋﺪ ﺑﻪ ﻃﻮﺭ ﮐﺎﻣﻞ ﺍﺹﻼﺡ ﺷﻮﻧﺪ ﺳﺮ...
- Page 153 ﻓﺎرﺳﯽ .ﺳﺮ ﻣﺨﺼﻮﺹ ﺍﺹﻼﺡ ﺭﺍ ﺑﻪ ﻫﻤﺮﺍﻩ ﺷﺎﻧﻪ ﺯﯾﺮ ﺷﯿﺮ ﺁﺏﮔﺮﻡ ﺑﺸﻮﯾﯿﺪ ﺩﺳﺘﮕﺎﻩ ﺭﺍ ﺑﺎ ﺍﺣﺘﯿﺎﻁ ﺗﮑﺎﻥ ﺩﻫﯿﺪ ﺗﺎ ﺁﺏ ﺑﺎﻗﯿﻤﺎﻧﺪﻩ ﺧﺎﺭﺝ ﺷﻮﺩ ﻭ ﺍﺟﺎﺯﻩ .ﺩﻫﯿﺪ ﺗﻤﺎﻣﯽ ﻗﺴﻤ ﺖ ﻫﺎ ﺧﺸﮏ ﺷﻮﻧﺪ ﺗﻤﯿﺰ ﮐﺮﺩﻥ ﮐﺎﻣﻞ .ﺩﺳﺘﮕﺎﻩ ﺭﺍ ﺧﺎﻣﻮﺵ ﮐﺮﺩﻩ ﻭ ﺍﺯ ﺑﺮﻕ ﺑﮑﺸﯿﺪ .ﺩﺳﺘﻪ...
- Page 154 ﺑﺮﺍی ﺧﺮﯾﺪ ﻟﻮﺍﺯﻡ ﺟﺎﻧﺒﯽ ﻭ ﻗﻄﻌﺎﺕ ﯾﺪﮐﯽ، ﺍﺯ ﺩﯾﺪﻥ ﮐﻨﯿﺪ ﯾﺎ ﺑﻪ ﻓﺮﻭﺷﻨﺪﻩwww.shop.philips.com/service ﻣﺮﺍﺟﻌﻪ ﮐﻨﯿﺪ. ﻫﻤﭽﻨﯿﻦ ﻣﯽ ﺗﻮﺍﻧﯿﺪ ﺑﺎ ﻣﺮﮐﺰ ﺧﺪﻣﺎﺕ ﻣﺸﺘﺮیPhilips ﺩﺭ ﮐﺸﻮﺭ ﺧﻮﺩ ﺗﻤﺎﺱ ﺑﮕﯿﺮﯾﺪ )ﺑﺮﺍی ﺍﻁﻼﻉ ﺍﺯ ﺟﺰﺋﯿﺎﺕ ﺗﻤﺎﺱ، ﺑﻪPhilips .(ﺑﺮﮔﻪ ﺿﻤﺎﻧﺖ ﺳﺮﺍﺳﺮ ﺟﻬﺎﻥ ﻣﺮﺍﺟﻌﻪ ﮐﻨﯿﺪ...
- Page 155 ﺍﯾﻦ ﻣﺤﺼﻮﻝ ﺩﺍﺭﺍی ﺑﺎﺗﺮی ﻗﺎﺑﻞ ﺷﺎﺭﮊ ﺍﺳﺖ ﮐﻪ ﻧﺒﺎﯾﺪ ﺁﻥ ﺭﺍ ﻣﺎﻧﻨﺪ ﺯﺑﺎﻟﻪ ﻫﺎی ﻣﻌﻤﻮﻟﯽ ﺧﺎﻧﮕﯽ ﺩﻭﺭ ﺑﯿﻨﺪﺍﺯﯾﺪ. ﻗﻮﯾ ﺎ ً ﺗﻮﺻﯿﻪ ﻣﯽ ﮐﻨﯿﻢ ﮐﻪ ﻣﺤﺼﻮﻝ ﺑﺮﺩﻩ ﺗﺎPhilips ﺧﻮﺩ ﺭﺍ ﺑﻪ ﻣﺮﮐﺰ ﺭﺳﻤﯽ ﺟﻤﻊ ﺁﻭﺭی ﯾﺎ ﻣﺮﮐﺰ ﺧﺪﻣﺎﺕ .ﺑﺎﺗﺮی ﻗﺎﺑﻞ ﺷﺎﺭﮊ ﺭﺍ ﺑﺼﻮﺭﺕ ﺣﺮﻓﻪ ﺍی ﺟﺪﺍ ﺳﺎﺯﯾﺪ...
- Page 156 ﻓﺎرﺳﯽ ﻣﺤﺪﻭﺩﯾﺖﻫﺎﯼ ﺿﻤﺎﻧﺖ ﺑﺨﺶ ﻫﺎی ﺗﯿﻐﻪ ﺩﺍﺭ ﺑﺮﺍی ﺑﺮﺵ، ﺗﺤﺖ ﭘﻮﺷﺶ ﺿﻤﺎﻧﺖ ﻧﺎﻣﻪ ﺑﯿﻦ ﺍﻟﻤﻠﻠﯽ .ﻧﯿﺴﺘﻨﺪ ﺯﯾﺮﺍ ﻣﻤﮑﻦ ﺍﺳﺖ ﺧﺮﺍﺏ ﺷﻮﻧﺪ ...
- Page 159 Empty page before back cover...
- Page 160 © 2017 Koninklijke Philips N.V. >75% recycled paper All rights reserved >75% papier recyclé 8888.989.2532.1 (20/10/2017)
Need help?
Do you have a question about the Multigroom 5000 Series and is the answer not in the manual?
Questions and answers