Table of Contents
Advertisement
Advertisement
Table of Contents

Related Manuals for AEG FAVORIT 52860


Summary of Contents for AEG FAVORIT 52860
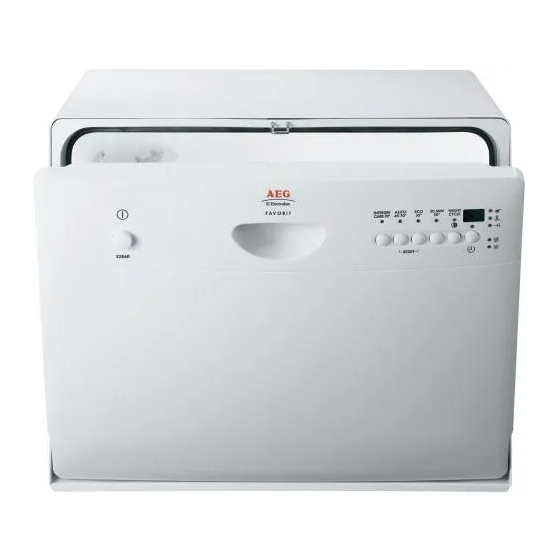
- Page 1 FAVORIT 52860 User manual Dishwasher...
-
Page 2: Table Of Contents
Contents Thank you for choosing one of our high-quality products. To ensure optimal and regular performance of your appliance please read this instruction manual carefully. It will enable you to navigate all processes perfectly and most efficiently. To refer to this manual any time you need to, we recommend you to keep it in a safe place. -
Page 3: Operating Instructions
Safety information Operating instructions Safety information For your safety and correct operation of the appliance, read this manual carefully before installation and use. Always keep these instructions with the appliance even if you move or sell it. Users must fully know the operation and safety features of the appliance. Correct use •... -
Page 4: Installation
Product description Installation • Make sure that the appliance is not damaged because of transport. Do not connect a damaged appliance. If necessary, contact the supplier. • Remove all packaging before first use. • A qualified and competent person must do the electrical installation. •... -
Page 5: Control Panel
Control panel Spray arm Microfilter Detergent dispenser Rinse aid dispenser Flat filter Salt container The rating label is on the back of appliance. Control panel On/off button Programme selection buttons Night cycle button /(NIGHT CYCLE) Delay start button Indicator lights Digital display Function buttons Indicator lights... -
Page 6: Delay Start Button
Control panel Indicator lights The indicator light comes on when the drying phase operates. The indicator light comes on when the washing programme is completed. The indicator light comes on when it is necessary to fill the salt container. Refer to the chapter 'Use of dishwasher salt'. -
Page 7: Use Of The Appliance
Use of the appliance – To set a washing programme. – To set the water softener level. If a programme indicator light is on, cancel the programme to go back to the setting mode. Refer to the chapter "Setting and starting a washing programme". Use of the appliance Refer to the following instructions for each step of procedure: 1. -
Page 8: Use Of Dishwasher Salt
Use of dishwasher salt 1. Switch on the appliance. 2. Make sure that the appliance is in setting mode. 3. Press and hold function buttons B and C until the indicator lights of function buttons A, B and C start to flash. 4. -
Page 9: Use Of Rinse Aid
Use of rinse aid When you set the water softener to level 1, the salt indicator light does not stay on. Use of rinse aid CAUTION! Only use branded rinse aid for dishwashers. Do not fill the rinse aid dispenser with other products (e.g. dishwasher cleaning agent, liquid detergent). -
Page 10: Loading Cutlery And Dishes
Loading cutlery and dishes Loading cutlery and dishes Helpful hints and tips CAUTION! Only use the appliance for household utensils that are applicable for dishwashers. Do not use the appliance to clean objects that can absorb water (sponges, household cloths, etc.). -
Page 11: Use Of Detergent
Use of detergent Use the cutlery basket for: • forks and spoons with the handles down. • knives with the handles up. The cutlery basket has a cutlery grid that you can remove. Do not let the cutlery bond together. Make sure that the spray arm can move freely before you close the door. -
Page 12: Do These Steps When The Drying Results Are Not Satisfactory
Washing programmes 1. Make sure that the detergent tablets are applicable for your water hardness. Refer to the instructions from the manufacturer. 2. Set the lowest levels of water hardness and rinse aid dosage. It is not necessary to fill the salt container and the rinse aid dispenser. Do these steps when the drying results are not satisfactory: 1. -
Page 13: Select And Start A Washing Programme
Select and start a washing programme Degree of Programme Type of load Programme description soil Prewash Main wash up to 55°C NIGHT CYCLE Normal Crockery 1 intermediate rinse soil and cutlery Final rinse Drying 1) During the 'Auto' washing programme the level of soiling on the dishes is determined by how cloudy the water is. -
Page 14: Cancelling A Washing Programme
Select and start a washing programme When the washing programme operates, you cannot change the programme. Cancel the washing programme. WARNING! Only interrupt or cancel a washing programme if necessary. CAUTION! Open the door carefully. Hot steam can come free. Cancelling a washing programme 1. -
Page 15: End Of The Washing Programme
Care and cleaning End of the washing programme Switch off the appliance in these conditions: • The appliance stops automatically. • The display shows 0. • The end of programme indicator comes on. 1. Press the on/off button. 2. Open the door. 3. -
Page 16: External Cleaning
What to do if… If necessary, do these steps to disassemble : 1. Turn the nut anticlockwise. 2. Remove the spray arm. 3. Clean the holes fully. External cleaning Clean the external surfaces of the appliance and control panel with a damp soft cloth. Only use neutral detergents. - Page 17 What to do if… Fault code and malfunction Possible cause and solution • the drain pump operates contin- • Close the water tap and contact your local Service Force uously Centre. • all indicators lights on the con- trol panel go off The anti-flood device operates The programme does not start •...
-
Page 18: Technical Data
Technical data The cleaning results are not satisfactory Dry water drop signs on • Increase rinse aid dosage. glasses and dishes • The detergent can be the cause. Technical data Dimensions Width 54,5 cm Height 44,7 cm Depth 48,0-49,0 cm Electrical connection - Voltage Data on the electrical connection are on the rating plate on the - Overall power - Fuse... -
Page 19: Adjusting The Level Of The Appliance
Water connection Make sure that the dimensions of the recess agree with the given dimensions. Make sure that there are openings in the furniture for the inlet hose, the water drain hose and the mains cable. Adjusting the level of the appliance Make sure that the appliance is level to close and seal the door correctly. -
Page 20: Drain Hose
Water connection WARNING! Make sure that the retaining nut and all other connections are tight before you move the dishwasher into position. WARNING! Always use a new water inlet hose. Do not use connection hoses from an old appliance. Drain hose The appliance has water safety system to prevent water damage. -
Page 21: Electrical Connection
Electrical connection Electrical connection WARNING! The manufacturer is not responsible if you do not follow these safety precautions. Ground the appliance according to safety precautions. Make sure that the rated voltage and type of power on the rating plate agree with the voltage and the power of the local power supply. - Page 24 www.electrolux.com...
Need help?
Do you have a question about the FAVORIT 52860 and is the answer not in the manual?
Questions and answers