JVC KD-AR800 Service Manual
Cd receiver
Hide thumbs
Also See for KD-AR800:
- Instructions manual (66 pages) ,
- Instructions manual (135 pages) ,
- Instructions manual (50 pages)
Table of Contents
Advertisement
Quick Links
QQ
3 7 63 1515 0
SERVICE MANUAL
1
2004
MA052
KD-AR800, KD-G800
TE
L 13942296513
1
PRECAUTION. . . . . . . . . . . . . . . . . . . . . . . . . . . . . . . . . . . . . . . . . . . . . . . . . . . . . . . . . . . . . . . . . . . . . . . . . 1-3
2
SPECIFIC SERVICE INSTRUCTIONS . . . . . . . . . . . . . . . . . . . . . . . . . . . . . . . . . . . . . . . . . . . . . . . . . . . . . . 1-5
3
DISASSEMBLY . . . . . . . . . . . . . . . . . . . . . . . . . . . . . . . . . . . . . . . . . . . . . . . . . . . . . . . . . . . . . . . . . . . . . . . 1-6
4
ADJUSTMENT . . . . . . . . . . . . . . . . . . . . . . . . . . . . . . . . . . . . . . . . . . . . . . . . . . . . . . . . . . . . . . . . . . . . . . . 1-27
5
TROUBLE SHOOTING . . . . . . . . . . . . . . . . . . . . . . . . . . . . . . . . . . . . . . . . . . . . . . . . . . . . . . . . . . . . . . . . . 1-28
www
.
CD RECEIVER
ATT
SOUND
U
R
SOURCE
F
D
VOL
VOL
Line input terminal
ARSENAL rogo
TABLE OF CONTENTS
x
ao
u163
y
i
COPYRIGHT © 2004 VICTOR COMPANY OF JAPAN, LIMITED
http://www.xiaoyu163.com
2 9
8
KD-AR800
Q Q
3
6 7
1 3
1 5
KD-G800
KD-AR800
KD-G800
co
.
9 4
2 8
Area suffix
J -------------- Northern America
0 5
8
2 9
9 4
2 8
m
9 9
9 9
No.MA052
2004/1
Advertisement
Table of Contents

Related Manuals for JVC KD-AR800


Summary of Contents for JVC KD-AR800
-
Page 1: Table Of Contents
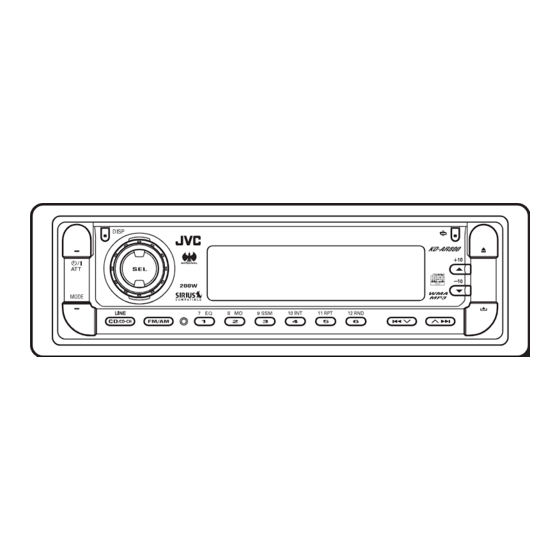
3 7 63 1515 0 SERVICE MANUAL CD RECEIVER MA052 2004 KD-AR800, KD-G800 Area suffix J -------------- Northern America KD-AR800 SOUND SOURCE L 13942296513 KD-G800 KD-AR800 KD-G800 Line input terminal ARSENAL rogo TABLE OF CONTENTS PRECAUTION............... . . 1-3 SPECIFIC SERVICE INSTRUCTIONS . -
Page 2: Http://Www.xiaoyu163.Com
4.0 V/20 kΩ load (full scale) KD-G700 2.5 V/20 kΩ load (full scale) Output Impedance 1 kΩ Subwoofer-Out Level/Impedance KD-AR800/KD-G800 2.0 V/20 kΩ load (full scale) TUNER SECTION Frequency Range 87.5 MHz to 107.9 MHz 530 kHz to 1 710 kHz L 13942296513 11.3 dBf (1.0 µV/75 Ω) -
Page 3: Precaution
http://www.xiaoyu163.com 3 7 63 1515 0 SECTION 1 PRECAUTION Safety Precautions Burrs formed during molding may be left over on some parts of the chassis. Therefore, pay attention to such burrs in the case of preforming repair of this system. Please use enough caution not to see the beam directly or touch it in case of an adjustment or operation check. - Page 4 http://www.xiaoyu163.com 3 7 63 1515 0 Preventing static electricity Electrostatic discharge (ESD), which occurs when static electricity stored in the body, fabric, etc. is discharged, can destroy the laser diode in the traverse unit (optical pickup). Take care to prevent this when performing repairs. 1.2.1 Grounding to prevent damage by static electricity Static electricity in the work area can destroy the optical pickup (laser diode) in devices such as CD players.
-
Page 5: Specific Service Instructions
http://www.xiaoyu163.com 3 7 63 1515 0 SECTION 2 SPECIFIC SERVICE INSTRUCTIONS This service manual does not describe SPECIFIC SERVICE INSTRUCTIONS. L 13942296513 u163 (No.MA052)1-5 http://www.xiaoyu163.com... -
Page 6: Disassembly
http://www.xiaoyu163.com 3 7 63 1515 0 SECTION 3 DISASSEMBLY Main body 3.1.1 Removing the front panel assembly (See Fig.1) (1) Push the detach button in the lower right part of the front Front panel assembly panel assembly. (2) Remove the front panel assembly. Detach button Fig.1 3.1.2 Removing the heat sink... - Page 7 http://www.xiaoyu163.com 3 7 63 1515 0 3.1.3 Removing the top chassis assembly (See Figs.3 to 6) • Prior to performing the following procedures, remove the heat Bottom chassis assembly sink. Reference: Remove the front panel assembly as required. (1) From the bottom side of the main body, remove the two screws C attaching the top chassis assembly to the bottom chassis assembly.
- Page 8 http://www.xiaoyu163.com 3 7 63 1515 0 3.1.4 Removing the front chassis (See Figs.7 and 8) • Prior to performing the following procedure, remove the front Top chassis assembly panel assembly, heat sink and top chassis assembly. (1) From the both sides of the top chassis assembly, remove the two screws E attaching the front chassis.
- Page 9 http://www.xiaoyu163.com 3 7 63 1515 0 3.1.7 Removing the main board (See Figs.11 and 12) • Prior to performing the following procedures, remove the front Rear bracket panel assembly, heat sink and top chassis assembly. (1) From the rear side of the bottom chassis assembly, remove the two screws H attaching the rear bracket to the bottom chassis assembly.
- Page 10 Wire Main board panel assembly, heat sink, top chassis assembly and main board. Wire (KD-AR800) Wire holder (1) From the rear side of the main board, remove the wires from the rear bracket in the direction of the arrow. (2) Remove the two screws K and three screws L attaching the Rear bracket rear bracket to the main board.
- Page 11 http://www.xiaoyu163.com 3 7 63 1515 0 3.1.10 Removing the front board (See Figs.15 to 17) • Prior to performing the following procedures, remove the front Rear cover assembly panel assembly. (1) From the rear side of the front panel assembly, remove the four screws P attaching the rear cover assembly to the front panel assembly.
- Page 12 http://www.xiaoyu163.com 3 7 63 1515 0 CD Mechanism section 3.2.1 Removing the top cover (See Figs.1 and 2) (1) Remove the four screws A on the both side of the body. (2) Lift the front side of the top cover and move the top cover backward to release the two joints a.
- Page 13 http://www.xiaoyu163.com 3 7 63 1515 0 3.2.2 Removing the connector board Wires (See Figs.3 to 5) CAUTION: Before disconnecting the flexible wire from the pickup, solder the short-circuit point on the pickup. No observance of this in- struction may cause damage of the pickup. (1) Remove the screw B fixing the connector board.
- Page 14 http://www.xiaoyu163.com 3 7 63 1515 0 3.2.3 Removing the DET switch (See Figs.6 and 7) (1) Extend the two tabs c of the feed sw. holder and pull out the switch. (2) Unsolder the DET switch wire if necessary. switch Connector board Pickup...
- Page 15 http://www.xiaoyu163.com 3 7 63 1515 0 3.2.4 Removing the chassis unit (See Figs.8 and 9) • Prior to performing the following procedure, remove the top Chassis unit cover and connector board. Suspension spring (L) Suspension spring (R) (1) Remove the two suspension springs (L) and (R) attaching the chassis unit to the frame.
- Page 16 http://www.xiaoyu163.com 3 7 63 1515 0 3.2.5 Removing the clamper assembly (See Figs.10 and 11) • Prior to performing the following procedure, remove the top cover. (1) Remove the clamper arm spring. Clamper arm spring (2) Move the clamper assembly in the direction of the arrow to release the two joints d.
- Page 17 http://www.xiaoyu163.com 3 7 63 1515 0 3.2.6 Removing the loading / feed motor assembly (See Figs.12 and 13) • Prior to performing the following procedure, remove the top cover, connector board and chassis unit. (1) Remove the screw C and move the loading / feed motor as- sembly in the direction of the arrow to remove it from the chassis rivet assembly.
- Page 18 http://www.xiaoyu163.com 3 7 63 1515 0 3.2.7 Removing the pickup unit Pickup unit (See Figs.14 to 18) • Prior to performing the following procedure, remove the top cover, connector board and chassis unit. (1) Remove the screw D and pull out the pu. shaft holder from Part e the pu.
- Page 19 http://www.xiaoyu163.com 3 7 63 1515 0 3.2.9 Removing the trigger arm Joint k (See Figs.19 and 20) • Prior to performing the following procedure, remove the top cover, connector board and clamper unit. (1) Turn the trigger arm in the direction of the arrow to release Trigger arm the joint k and pull out upward.
- Page 20 http://www.xiaoyu163.com 3 7 63 1515 0 3.2.11 Removing the mode sw. / select lock arm Link plate Joint t (See Figs.22 and 23) Mode sw. • Prior to performing the following procedure, remove the top plate assembly. Select lock arm (1) Bring up the mode sw.
- Page 21 http://www.xiaoyu163.com 3 7 63 1515 0 3.2.12 Reassembling the mode sw. / select lock arm Select lock arm spring (See Figs.24 to 26) Hook w REFERENCE: Reverse the above removing procedure. Joint v (1) Reattach the select lock arm spring to the top plate and set Joint v the shorter end of the select lock arm spring to the hook w on the top plate.
- Page 22 http://www.xiaoyu163.com 3 7 63 1515 0 3.2.13 Removing the select arm R / link plate Link plate Joint c' Joint r (See Figs.27 and 28) Select arm R Joint b' • Prior to performing the following procedure, remove the top plate assembly.
- Page 23 http://www.xiaoyu163.com 3 7 63 1515 0 3.2.15 Removing the loading roller assembly (See Figs.31 to 33) Loading roller assembly • Prior to performing the following procedure, remove the Roller guide clamper assembly and top plate assembly. spring (1) Push inward the loading roller assembly on the gear side and detach it upward from the slot of the joint g' of the lock arm rivet assembly.
- Page 24 http://www.xiaoyu163.com 3 7 63 1515 0 3.2.16 Removing the loading gear 5, 6 and 7 Loading gear bracket (See Figs.35 and 36) • Prior to performing the following procedure, remove the top Loading gear 6 cover, chassis unit, pickup unit and top plate assembly. (1) Remove the screw K attaching the loading gear bracket.
- Page 25 http://www.xiaoyu163.com 3 7 63 1515 0 3.2.17 Removing the gears Joint p' (See Figs.37 to 40) • Prior to performing the following procedure, remove the top Change plate cover, chassis unit, top plate assembly and pickup unit. rivet assembly • Pull out the loading gear 3. (See Fig.35.) (1) Pull out the feed gear.
- Page 26 http://www.xiaoyu163.com 3 7 63 1515 0 3.2.18 Removing the turn table / spindle motor Turn table (See Figs.41 and 42) • Prior to performing the following procedure, remove the top cover, connector board, chassis unit and clamper assembly. (1) Remove the two screws L attaching the spindle motor as- sembly through the slot of the turn table on top of the body.
-
Page 27: Adjustment
Exclusive dummy load should be used for AM,and FM. For FM (7) Tracking offset meter dummy load,there is a loss of 6dB between SSG output and (8) Test Disc JVC :CTS-1000 antenna input.The loss of 6dB need not be considered since (9) Extension cable for check direct reading of figures are applied in this working standard. -
Page 28: Trouble Shooting
http://www.xiaoyu163.com 3 7 63 1515 0 SECTION 5 TROUBLE SHOOTING Feed section Is 5v or 0V at IC621 Is the wiring for IC621 Is 5V present at IC681 Check CD8V. pin 40? pin 40 correct? pin 6? Check the vicinity of IC621. - Page 29 http://www.xiaoyu163.com 3 7 63 1515 0 Signal processing section Compare the L-ch and Is the sound output from No sound from either R-ch to locate the both channels (L, R)? channel. defective point. Normal Is 9V present at IC161 Is 9V present at IC901 Check IC901 and its pin 26? pin 13?
- Page 30 http://www.xiaoyu163.com 3 7 63 1515 0 Maintenance of laser pickup Replacement of laser pickup (1) Cleaning the pick up lens Before you replace the pick up, please try to clean the lens Turn of the power switch and, disconnect the with a alcohol soaked cotton swab.
- Page 31 http://www.xiaoyu163.com 3 7 63 1515 0 16 PIN CORD DIAGRAM OR/WH Green Black BL/WH Violet Gray Blue WH/BK White Yellow GN/BK Orange VI/BK GY/BK OR/WH MEMORY L 13942296513 GY/BK BL/WH REMOTE VI/BK WH/BK GN/BK Rear Right Auto Antenna Front Right ACC Line Illuminations Control Front Left...
- Page 32 http://www.xiaoyu163.com 3 7 63 1515 0 L 13942296513 u163 VICTOR COMPANY OF JAPAN, LIMITED AV & MULTIMEDIA COMPANY MOBILE ENTERTAINMENT CATEGORY 10-1,1chome,Ohwatari-machi,Maebashi-city,371-8543,Japan (No.MA052) Printed in Japan http://www.xiaoyu163.com...
-
Page 33: Schematic Diagrams
3 7 63 1515 0 SCHEMATIC DIAGRAMS CD RECEIVER KD-AR800,KD-G800 CD-ROM No.SML200401 Area suffix J -------------- Northern America KD-AR800 SOUND L 13942296513 SOURCE KD-G800 KD-AR800 KD-G800 Line input terminal ARSENAL rogo Contents Block diagram Standard schematic diagrams u163 Printed circuit boards 2-9 to 12 No.MA052SCH... -
Page 34: Safety Precaution
http://www.xiaoyu163.com 3 7 63 1515 0 Safety precaution Burrs formed during molding may be left over on some parts of the chassis. Therefore, pay attention to such burrs in the case of preforming repair of this system. Please use enough caution not to see the beam directly or touch it in case of an adjustment or operation check. - Page 35 http://www.xiaoyu163.com 3 7 63 1515 0 < M E M O > L 13942296513 u163 http://www.xiaoyu163.com...
-
Page 36: Block Diagram
http://www.xiaoyu163.com 3 7 63 1515 0 Block diagram IC573 X571 CLOCK GEN. VA,VB VOUTL CD.L-CH VE,VF VOUTR IC572 CD.R-CH MD,LD IC571 IC601 VREF RWSEL,IOP CD LPF 24bit DAC CD RF RFGC REST DACML REST RF,FE,TE DACMC SWITCH RFRP DACMD SEL,TEB RFDC LRCK LOAD/FEED+... - Page 37 CD RESET LIN.R SUB OUT WOOFER B.DET,P.DET CDMUTE,CDREQ BUSSI/SO IC701 BUSCLK VOLDA VOLCK LPF1 LPF2 IC271 ONLY USED SWITCH BUSSI/SO FOR KD-AR800 BUSCLK L 13942296513 LINE IN E2PROMDI E2PROMDO IC703 E2PROMCK EPROM BUSSO IC702 RESET BUSSI/O RESET CHANGER BUSSCK SI/SO...
- Page 38 http://www.xiaoyu163.com Standard schematic diagrams 3 7 63 1515 0 Main amplifier section QAU0312-001 C160 QAM0556-001 0.0047 1/50 1/50 0.1/50 1/50 1.5k R197 C163 TU.R 1.5k C173 TU.L 1/50 C162 1/50 2SD601A/QR/-X R172 5600p 5600p C161 R174 1/50 C174 2.2k 2.2k 1/50 D1 D2 R171...
- Page 39 http://www.xiaoyu163.com 3 7 63 1515 0 RB160M-30-X D243 R248 R244 C243 0.047 R243 180k C241 R245 1/50 IC301 LA47515 R242 R241 C242 22/16 C183 C311 C170 C160 R311 0.47 R362 R361 0.0047 0.0047 R198 C362 C370 0.0015 R312 C312 IC361 NJM2160AV-X 0.47 R197...
- Page 40 http://www.xiaoyu163.com CD servo control section 3 7 63 1515 0 R613 C611 C577 R614 R612 R611 R610 C610 Q573 2SB624/4/-X R601 R602 R603 330k R604 330k C605 R608 Q574 UN2211-X C603 100/6.3 C612 0.01 0.0068 2SB1132/QR/-W C613 0.01 Q601 C604 R616 0.01 C614...
- Page 41 http://www.xiaoyu163.com 3 7 63 1515 0 R585 C585 C587 C589 R581 R583 CD.L 120p 4.7/35 R589 4.7/35 C577 R572 C586 C588 C590 R582 R584 2.2M CD.R L571 120p 4.7/35 4.7/35 Q571 R586 UN2111-X Q572 CDON UN2211-X IC652 TC94A34FG-002 C667 0.01 C666 100p RFGC...
- Page 42 http://www.xiaoyu163.com 3 7 63 1515 0 LCD & Key control section LCD1 QLD0296-001 L 13942296513 JS601 QSW0793-001 R604 R603 R602 R601 R661 1.8k 1.2k R666 S605 S603 S602 S601 SD602 R667 C608 Q644 0.01 UN2211-X NSW0218-001X Q645 UN2211-X R611 R610 R609 R608 R607...
- Page 43 http://www.xiaoyu163.com 3 7 63 1515 0 CN601 NNZ0098-001X LCDDA R676 3.3k R677 LCDCE 3.3k LCDCL R678 3.3k KEY1 L 13942296513 KEY2 To CN702 ENC2 S601 KEY0 (SHEET 1) TEMP ACC5V ENC2 ENC1 R685 ENC1 RESET R666 R668 R669 COM8 D691 COM7 TH685 1SS355-X...
- Page 44 http://www.xiaoyu163.com 3 7 63 1515 0 Printed circuit boards Main board Forward side D852 R851 C852 J321 R353 Q331 R901 CN901 R323 L901 CN161 CN251 D901 R333 C160 J801 R197 C306 C170 C167 C166 C172 R196 C168 R166 C161 R332 C261 C968 R343...
- Page 45 http://www.xiaoyu163.com 3 7 63 1515 0 Main board Reverse side L901 C325 C324 C323 C326 C271 D971 CN901 D972 R972 C322 C320 J801 R971 C321 C971 CN161 J321 D901 R901 C306 C183 C261 C172 R198 C161 R272 R311 C171 R261 R313 C162 R280...
- Page 46 http://www.xiaoyu163.com 3 7 63 1515 0 Front board Forward side S603 S617 D608 Q644 Q645 SD602 SD601 LCD1 D641 D601 D620 D618 D642 R632 S605 D643 S602 D617 R612 S601 R611 D607 D616 D621 D602 D622 D611 D613 R607 R605 S616 D623 D610...
- Page 47 http://www.xiaoyu163.com 3 7 63 1515 0 Front board Reverse side R604 R639 D625 D624 R640 R655 D641 Q646 R622 R665 R628 D655 R627 D642 R674 R630 C603 R629 C604 C608 C605 D643 R667 C601 R636 R660 Q643 R635 R656 C680 R657 Q641 CN601...
- Page 48 http://www.xiaoyu163.com 3 7 63 1515 0 L 13942296513 u163 VICTOR COMPANY OF JAPAN, LIMITED AV & MULTIMEDIA COMPANY MOBILE ENTERTAINMENT CATEGORY 10-1,1chome,Ohwatari-machi,Maebashi-city,371-8543,Japan Printed in Japan (No.MA052SCH) http://www.xiaoyu163.com...
-
Page 49: Parts List
3 7 63 1515 0 PARTS LIST [ KD-AR800 / KD-G800 ] * All printed circuit boards and its assemblies are not available as service parts. Area suffix J -------------- Northern America L 13942296513 - Contents - 3- 2 Exploded view of general assembly and parts list (Block No.M1) - Page 50 http://www.xiaoyu163.com 3 7 63 1515 0 Exploded view of general assembly and parts list Block No. L 13942296513 u163 http://www.xiaoyu163.com...
- Page 51 DETACH LEVER GE40216-001A REAR LENS (R) GE30973-001A KICK LEVER GE40218-010A SHEET (x2) GE40192-001A SHAFT VKZ4777-001 MINI SCREW (x4) GE40193-001A SHAFT GE40204-001A JVC BADGE WDL123525 WASHER (x2) GE40218-005A SHEET (x2) WDL215025 WASHER (x2) GE31201-002A LCD CASE GE40194-001A T SPRING GE31036-001A LCD LENS GE40195-002A T.SPRING...
- Page 52 http://www.xiaoyu163.com 3 7 63 1515 0 CD mechanism assembly and parts list Block No. Grease TN-2001-1013 TNG-87 GP-501MK CFD-005Z GP-501A L 13942296513 u163 http://www.xiaoyu163.com...
- Page 53 http://www.xiaoyu163.com 3 7 63 1515 0 CD mechanism Block No. [M][B][M][M] Symbol No. Part No. Part Name Description Local 30320101T FRAME 30320102T TOP COVER 30320115T DANPER F (x2) 30320116T DANPER R 303205505T CHASSIS RIVET 303205503T CHANGE P. RVT A 303205301T CLAMPER ASSY 303205302T...
-
Page 54: Electrical Parts List
http://www.xiaoyu163.com 3 7 63 1515 0 Electrical parts list Main board Symbol No. Part No. Part Name Description Local Block No. [0][1][0][0] D781 1SS355-X SI DIODE Symbol No. Part No. Part Name Description Local D782 1SS355-X SI DIODE D784 UDZS11B-X Z DIODE... - Page 55 http://www.xiaoyu163.com 3 7 63 1515 0 Symbol No. Part No. Part Name Description Local Symbol No. Part No. Part Name Description Local C241 QERF1HM-105Z E CAPACITOR 1uF 50V M C716 NCB31EK-104X C CAPACITOR 0.1uF 25V K C242 QERF1CM-226Z E CAPACITOR 22uF 16V M C717...
- Page 56 http://www.xiaoyu163.com 3 7 63 1515 0 Symbol No. Part No. Part Name Description Local Symbol No. Part No. Part Name Description Local R170 NRSA63J-224X MG RESISTOR 220kΩ 1/16W J R711 NRSA63J-473X MG RESISTOR 47kΩ 1/16W J R171 NRSA63J-102X MG RESISTOR 1kΩ...
-
Page 57: Front Board
http://www.xiaoyu163.com 3 7 63 1515 0 Symbol No. Part No. Part Name Description Local Symbol No. Part No. Part Name Description Local R971 NRS181J-222X MG RESISTOR 2.2kΩ 1/8W J D641 NSPW310BS/BRS/ R972 NRS181J-222X MG RESISTOR 2.2kΩ 1/8W J D642 NSPW310BS/BRS/ R976... - Page 58 http://www.xiaoyu163.com 3 7 63 1515 0 Symbol No. Part No. Part Name Description Local Symbol No. Part No. Part Name Description Local R678 NRSA63J-332X MG RESISTOR 3.3kΩ 1/16W J C513 NCB31HK-103X C CAPACITOR 0.01uF 50V K R679 NRSA63J-151X MG RESISTOR 150Ω...
- Page 59 http://www.xiaoyu163.com 3 7 63 1515 0 Symbol No. Part No. Part Name Description Local Symbol No. Part No. Part Name Description Local C661 NCB31HK-103X C CAPACITOR 0.01uF 50V K R572 NRSA63J-225X MG RESISTOR 2.2MΩ 1/16W J C662 NDC31HJ-101X C CAPACITOR 100pF 50V J R573...
- Page 60 http://www.xiaoyu163.com 3 7 63 1515 0 Symbol No. Part No. Part Name Description Local L501 NQL114K-470X INDUCITOR 47uH K L502 NQL114K-470X INDUCITOR 47uH K L571 NQL114K-470X INDUCITOR 47uH K L572 NQL114K-470X INDUCITOR 47uH K L621 NQL114K-470X INDUCITOR 47uH K L622 NQL114K-470X INDUCITOR...
- Page 61 http://www.xiaoyu163.com 3 7 63 1515 0 <MEMO> L 13942296513 u163 3-13 http://www.xiaoyu163.com...
- Page 62 http://www.xiaoyu163.com 3 7 63 1515 0 Packing materials and accessories parts list Block No. A1, A2, A3, A4, A5, A6, A7, A8, A9, A10, A11 L 13942296513 KIT: A12, A13, A14, A15, A16 u163 3-14 http://www.xiaoyu163.com...
- Page 63 http://www.xiaoyu163.com 3 7 63 1515 0 Packing and Accessories Block No. [M][3][M][M] Symbol No. Part No. Part Name Description Local GET0197-001A INST BOOK ENG SPA FRE GET0197-002A INSTALL MANUAL GET0206-001A IMPORTANT SHEET GET0210-001A DEMO MODE SHEET AR80 BT-51029-1 WARRANTY CARD BT-51018-3 WARRANTY CARD G800J...
Need help?
Do you have a question about the KD-AR800 and is the answer not in the manual?
Questions and answers