
Related Manuals for Saeco HD8757


Summary of Contents for Saeco HD8757
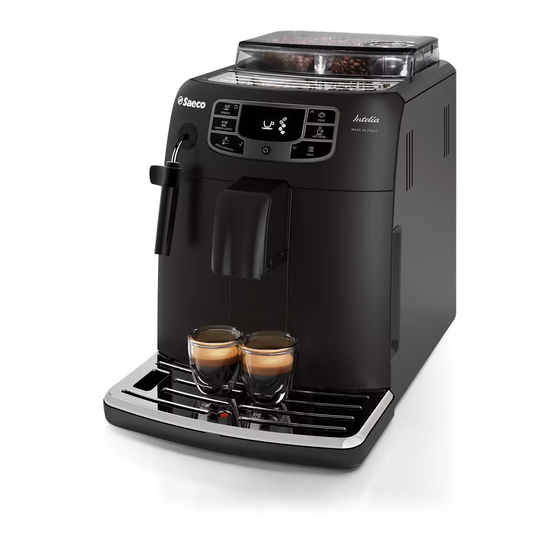
- Page 1 Always here to help you Register your product and get support at www.saeco.com/welcome HD8758/57 HD8758-57_4219_460_3151_1_COVER_BOOKLET_A5_bl.indd 1 14/10/15 10:07...
- Page 3 English 5...
- Page 4 ESPRESSO STEAM ESPRESSO LUNGO HOT WATER MENU...
-
Page 5: Table Of Contents
Warranty and support Ordering maintenance products Disposal Warning icons and error codes Meaning of error codes Troubleshooting Introduction Congratulations on buying this Intelia/Intelia Deluxe full automatic espresso machine! To fully benefit from the support that Saeco offers, please register English... -
Page 6: Important Safeguards
English your product at www.saeco.com/welcome. This quick start guide applies to all Intelia/Intelia Deluxe models with classic milk frother. The machine is suitable for preparing espresso coffee using whole coffee beans. Important safeguards When using electrical appliances, basic safety precautions should always be followed, including the following: 1 Read all instructions. -
Page 7: Instructions For The Power Supply Cord
English Instructions for the power supply cord - A short power-supply cord (or detachable power-supply cord) is to be provided to reduce risks resulting from becoming entangled in or tripping over a longer cord. - Longer detachable power-supply cords or extension cords are available and may used if care is exercised in their use. -
Page 8: Warning
English Warning - Check if the voltage indicated on the machine corresponds to the local voltage before you connect the machine - Connect the machine to a grounded wall outlet. - Do not let the power supply cord hang over the edge of a table or counter, or touch hot surfaces. -
Page 9: Electromagnetic Fields (Emf)
English - The machine is for household use only. It is not intended for use in environments such as canteens, staff kitchen of shops, offices, farms or other work environments. - Always put the machine on a flat and stable surface. - Do not place the machine on hot surfaces, directly next to a hot oven, heater or similar source of heat. -
Page 10: First Installation
English - MENU button = DOWN button: press this button to scroll down through the display menu. MENU First installation 1 Slide the drip tray with drip tray cover into the machine. 2 Remove the water tank. 3 Fill the water tank to the MAX level with fresh water. 4 Fill the coffee bean hopper with coffee beans. -
Page 11: Installing The Water Filter
English Installing the water filter 1 Remove the small white filter from the water tank and store it in a dry place. Note: Please keep the small white filter for future use.You will need it for the descaling process. 2 Remove the filter from its packaging and immerse it in cold water with the opening pointing upwards. -
Page 12: Using The Machine
English 1 Immerse the water hardness test strip (supplied with the machine) in fresh water for 1 second. 2 Remove the water hardness strip and and wait for 1 minute. 3 Check how many squares have changed into the red color and check the water hardness in below table. -
Page 13: Adjusting The Coffee Quantity
English coffee compartment. If you add more pre-ground coffee, the excess coffee will end up in the coffee grounds drawer. 1 Open the lid of the pre-ground coffee compartment. 2 Pour one measuring scoop of pre-ground coffee into the compartment. Caution: Do not put any other substance than pre-ground coffee in the pre-ground coffee compartment, as this may damage the machine. -
Page 14: Descaling
If you want to exit the descaling cycle, press the ESC button. 6 Pour the entire bottle of Saeco descaling solution (250ml) into the water tank. 7 Add water to the descaling solution in the water tank up to the CALC CLEAN indication. -
Page 15: Interruption Of The Descaling Cycle
English 14 Press the OK button to start the rinsing cycle (this takes approximately 4 minutes). - The display shows the following icon to indicate that the rinsing cycle is CALC finished. CLEAN 15 The display shows a tick icon. 16 Rinse the water tank and fill it with fresh water up to the MAX level. -
Page 16: Lubrication
English 3 To remove the brew group, press the lever and pull the brew group out of the machine. 4 Rinse the brew group with fresh water and let it air dry. 5 To place the brew group back, make sure that the lever is in contact with the base of the brewing unit. -
Page 17: Classic Milk Frother Cleaning (Daily)
3 Clean the steam wand with a wet cloth. 4 Reassamble all the classic milk frother parts. Warranty and support If you need information or support, please visit www.saeco.com/support or read the separate worldwide guarantee leaflet. -
Page 18: Ordering Maintenance Products
English To buy spare parts, visit www.shop.philips.com/service or go to your Saeco dealer or authorized service center. You can also contact the Philips/Saeco hotline in your country. Ordering maintenance products - MAVEA (CA6702) - Descaling solution (CA6700) Disposal This product may contain lead and mercury. Disposal of these materials may be regulated due to environmental considerations. -
Page 19: Meaning Of Error Codes
English - Close the service door. - Remove the coffee grounds container and empty it. - There is too much powder in the brew group. Clean the brew group. - If an error code is triggered, check the section 'Meaning of error codes' to see what the code on the display means and what you can do. -
Page 20: Troubleshooting
If the above solutions do not help to remove the error code icon from the display and bring the machine back to normal working order, contact the Philips Saeco hotline. Contact details can be found in the warranty booklet or on www.saeco.com/support. - Page 21 English The machine is still in the You cannot remove the brew group descaling process. when the descaling process is active. First complete the descaling process and then remove the brew group. The brew group cannot The brew group is not in the The brew group was not put in rest be inserted.
- Page 22 The machine is not placed on a Place the machine on a horizontal horizontal surface. surface so that the drip tray full indicator works properly. Note: If you are unable to solve the problem with the information in this table, contact the Philips/Saeco hotline.
- Page 24 4219.460.3151.1 REV00 HD8758-57_4219_460_3151_1_COVER_BOOKLET_A5_bl.indd 2 14/10/15 10:09...
Need help?
Do you have a question about the HD8757 and is the answer not in the manual?
Questions and answers