
Related Manuals for Philips BDM4037F


Summary of Contents for Philips BDM4037F
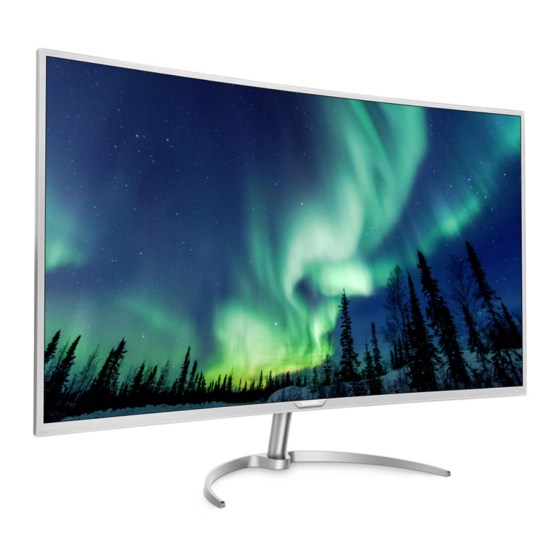
- Page 1 BDM4037F www.philips.com/welcome User manual Customer care and warranty Troubleshooting & FAQs...
-
Page 2: Table Of Contents
4.1 Resolution & Preset Modes ..13 5. Power Management ....14 6. Customer care and warranty .. 15 6.1 Philips’ Flat Panel Displays Pixel Defect Policy ....... 15 6.2 Customer Care & Warranty ..18 7. Troubleshooting & FAQs ..23 7.1 Troubleshooting ...... -
Page 3: Important
This electronic user’s guide is intended • If turning off the Display by for anyone who uses the Philips Display. detaching the power cable or DC Take time to read this user manual power cord, wait for 6 seconds before you use your Display. -
Page 4: Notational Descriptions
1. Important • If foreign substance or water gets in Service your Display, please turn the power • The casing cover should be opened off immediately and disconnect only by qualified service personnel. the power cord. Then, remove the • If there is any need for any foreign substance or water, and document for repair or integration, send it to the maintenance center. -
Page 5: Disposal Of Product And Packing Material
From the planning, design and production stages, Philips emphasizes the important of making products that can easily be recycled. At Philips, end-of-life management primarily entails participation in national take- back initiatives and recycling programs This marking on the product or on... -
Page 6: Setting Up The Display
User’s Manual 保留备用 Display drivers www.philips.com/welcome (1) Gently attach the base to the base Philips and the Philips’ Shield Emblem are registered trademarks of Koninklijke Philips N.V. and are used under license from Koninklijke Philips N.V. * CD column until the latch locks the base. - Page 7 2. Setting up the monitor Connecting to your PC Connect to PC 1. Connect the power cord to the back of the Display firmly. 2. Turn off your computer and unplug its power cable. 3. Connect the Display signal cable to the video connector on the back of your computer.
-
Page 8: Operating The Display
Basic and simple instruction on the 2.2 Operating the Display control keys Description of the control buttons To access the OSD menu on this Philips Display simply use the single toggle Press more than 3 seconds button on the backside of the Display to switch display power bezel. - Page 9 2. Setting up the monitor Resolution notification Main menu Sub menu Input This Display is designed for optimal performance at its native resolution, HDMI 1 HDMI 2 1920 x 1080 @ 60 Hz. When the Display Picture Picture Format Wide Screen, 4:3, 1:1 is powered on at a different resolution, Brightness 0~100...
-
Page 10: Remove The Base Assembly For Vesa Mounting
2. Setting up the monitor 2.3 Remove the Base Assembly for VESA Mounting Before you start disassembling the Display base, please follow the instructions below to avoid any possible damage or injury. 1. Place the Display face down on a smooth surface. -
Page 11: Image Optimization
Whether you're working There are six modes to select: Office, with text applications, displaying images Photo, Movie, Game, Economy and Off. or watching a video, Philips SmartImage delivers great optimized Display performance. ... -
Page 12: Smartcontrast
3. Image Optimization maintaining a dynamic natural When you activate SmartContrast, it will values for the ultimate video display. analyse the content you are displaying in real time to adjust colors and control • Game: Turn on over drive circuit for backlight intensity. -
Page 13: Technical Specifications
4. Technical Specifications 4. Technical Specifications Picture/Display Display Panel Type VA LCD Backlight W-LED system Panel Size 40" (101.6 cm) Aspect Ratio 16:9 SmartContrast (typ.) 20,000,000:1 Response Time (typ.) 20 ms (GtG) SmartResponse (typ.) 5 ms (GtG) Optimum Resolution 1920 x 1080 @ 60Hz Viewing Angle 178°... - Page 14 Cabinet Color White Finish Glossy Note 1. This data is subject to change without notice. Go to www.philips.com/support to download the latest version of leaflet. 2. Smart response time is the optimum value from either GtG or GtG (BW) tests.
-
Page 15: Resolution & Preset Modes
4. Technical Specifications 4.1 Resolution & Preset Modes Maximum Resolution 1920 x 1080 @ 60 Hz (analog input) 1920 x 1080 @ 60 Hz (digital input) Recommended Resolution 1920 x 1080 @ 60 Hz (digital input) H. freq Resolution V. freq (Hz) (kHz) 31.47 720 x 400... -
Page 16: Power Management
5. Power Management 5. Power Management If you have VESA DPM compliance display card or software installed in your PC, the Display can automatically reduce its power consumption when not in use. If an input from a keyboard, mouse or other input device is detected, the Display will 'wake up' automatically. -
Page 17: Customer Care And Warranty
Pixel Defect Policy white pixel. When all are dark, the three colored sub pixels together appear as a Philips strives to deliver the highest single black pixel. Other combinations of quality products. We use some of the lit and dark sub pixels appear as single industry's most advanced manufacturing pixels of other colors. - Page 18 A red or blue bright dot must be the warranty period, a TFT Display panel more than 50 percent brighter than in a Philips flat panel Display must have pixel or sub pixel defects exceeding the neighboring dots while a green tolerances listed in the following tables.
- Page 19 6. Customer care and warranty BRIGHT DOT DEFECTS ACCEPTABLE LEVEL 1 lit subpixel 2 adjacent lit subpixels 3 adjacent lit subpixels (one white pixel) Distance between two bright dot defects* >15mm Total bright dot defects of all types BLACK DOT DEFECTS ACCEPTABLE LEVEL 1 dark subpixel 5 or fewer...
-
Page 20: Customer Care & Warranty
Please contact our Philips Customer Service Representative or local contact center (by Consumer care number) for more details. Philips Customer Care Center number listed below. - Page 21 6. Customer care and warranty Germany +49 01803 386 853 € 0.09 Mon to Fri : 9am - Greece Alman +30 00800 3122 Free of Mon to Fri : 9am - 1223 charge Ireland Celestica +353 01 601 1161 Local call Mon to Fri : 8am - tariff Italy...
- Page 22 Asupport 420 272 188 300 +372 6519900(General) Estonia FUJITSU +372 6519972(workshop) Georgia Esabi +995 322 91 34 71 +36 1 814 8080(General) +36 1814 8565(For AOC&Philips Hungary Profi Service only) Classic Service +7 727 3097515 Kazakhstan I.I.c. +371 67460399 Latvia...
- Page 23 9:00am-6:00pm Macau Pixels Technology Ltd. Macau: Sat. 9:00am-1:00pm Tel: (853)-0800-987 REDINGTON INDIA Tel: 1 800 425 6396 Mon. to Fri. India SMS: PHILIPS to 56677 9:00am-5:30pm +62-21-4080-9086 Mon. to Thu. PT. CORMIC (Customer Hotline) 08:30-12:00; 13:00-17:30 Indonesia SERVISINDO +62-8888-01-9086 Fri.
- Page 24 6. Customer care and warranty Philips Singapore Pte Mon. to Fri. Singapore Ltd (Philips Consumer (65) 6882 3966 9:00am-6:00pm Care Center) Sat. 9:00am-1:00pm Computer Repair Mon. to Fri. South Africa 011 262 3586 Technologies 08:00am-05:00pm Mon. to Fri. 09:00 - Taiwan FETEC.CO...
-
Page 25: Troubleshooting & Faqs
• Disconnect the Display from mains • First, ensure that the power button power source immediately for safety on the front of the Display is in the • Contact with Philips customer OFF position, then press it to the service representative immediately. ON position. -
Page 26: General Faqs
For further assistance, refer to the "after-imaging " or "ghost imaging", Consumer Information Centers list on your screen. "Burn-in", "after- and contact Philips customer service imaging", or "ghost imaging" is a representative. well-known phenomenon in LCD * Functionality different according to panel technology. - Page 27 Display, make sure that there is no disconnect your old Display and pressure or force applied to the reconnect your Philips LCD Display. panel surface side. This may affect • Turn on your Display and then turn your warranty conditions.
- Page 28 PC, workstation or Mac? may result in severe “burn-in” or “after- Ans.: Yes. All Philips LCD Displays are image” or “ghost image” symptoms fully compatible with standard that will not disappear and cannot be PCs, Macs and workstations.
- Page 29 7. Troubleshooting & FAQs Attention Display control locked...
- Page 30 © 2016 Koninklijke Philips N.V. All rights reserved. Philips and the Philips Shield Emblem are registered trademarks of Koninklijke Philips N.V. and are used under license from Koninklijke Philips N.V. Specifications are subject to change without notice. Version: BDM4037FE1T...
Need help?
Do you have a question about the BDM4037F and is the answer not in the manual?
Questions and answers